FTFC´18 WWII Lippisch P13a designed by Dr. Looping Looie

Perfect for piggyback launch: just paint your Sea Duck in WWII colors and youre good to go.

I'm sorry if I sound like i'm trying to ruin the fun, but there might be a little problem with that. First of all, there is a motor mounted on the top (circled red), so you might have some difficulty doing a piggyback launch. Second of all, it might be easy but a bit annoying to replicate some of the features (which I also conveniently circled red ;)), but i'm pretty sure it could be done.

bv.PNG

I think you should go with one of these bad boys, a Siebel FH 204, for an aerial piggyback launch or tow launch, which looks like an easier build to replicate and fun to fly:

Siebel_204.jpg
 

Dr. Looping Looie

Elite member
We dont know anything about the EDF powerpod and I want to wait with building until I know how it looks like because I want to deign the plane around it. So I took the time to think of some designs:

20171024_211714[1].jpg
Late war camo, Luftwaffe Gremlin instead of swastika, yellow underside of nose and wingtips

20171024_221007[1].jpg Focke_Wulf_FW190.jpg
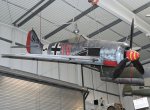
I saw this design with yellow canopy on an FW-190 in a museum and I really like that one.

20171024_211923[1].jpg
Here I tried more winter camo with many yellow parts.

20171024_211949[1].jpg
This one is winter too, but a little different.

20171024_212135[1].jpg 20171024_212147[1].jpg
Baron and Sea Duck designs

20171024_212209[1].jpg porsche-motorsport-image.jpg
And this one is the design of the Porsche 919 Hybrid, which is a race car.

Sorry for bad Quality pictures, I hope you like it.
Tell me which design I should use!
 
Last edited:

FoamyDM

Building Fool-Flying Noob
Moderator
Thumbnail sketches are great to try out a number of alternate color schemes. without taking forever to realize you don't like it. the racing one is sweet. :)
 

Dr. Looping Looie

Elite member
I didn't have started yet because the edf power pod isn't out yet. I dont want to build something and then realize that I'm not able to put the edf in.
So, here's my plan:
1. Wait until the edf pod is out
2. Then build the plane
3. When the edf pod isn't out until december, I'll start building with prop. I think I can make it in one month.
4. The rest of the time, I'll do upgrades and details.

But the project is NOT dead!

I already have all build steps in my head, I'm just waiting for the edf powerpod.
But I realized a problem:
When I'm going with 70mm edf and use the front air intake as a scale reference, the plane would be too big to fit one wing on one sheet of foam. That means I have three options:
1. Make the intake bigger but don't keep scale
2. Make the plane smaller but intake would be smaller than the edf
3. Use a smaller edf but thats probably not compatible with the power pod

Do you know how the sizes of intake, edf and nozzle work together the best?
I would go with option 2 because the edf has its motor in the middle which makes its area smaller than that of a sircle with the same diameter.
 

DamoRC

Elite member
Mentor
I already have all build steps in my head, I'm just waiting for the edf powerpod.
But I realized a problem:
When I'm going with 70mm edf and use the front air intake as a scale reference, the plane would be too big to fit one wing on one sheet of foam. That means I have three options:
1. Make the intake bigger but don't keep scale
2. Make the plane smaller but intake would be smaller than the edf
3. Use a smaller edf but thats probably not compatible with the power pod

Do you know how the sizes of intake, edf and nozzle work together the best?

I admire your patience to wait for the EDF power pod but I would encourage you to go ahead and build the plane around your EDF because you are probably going to need to customize it anyway to make it work in your model.

Some general rules of thumb for the EDF.
(1) The intake area should be >=100% of the fan swept area (FSA = cross sectional area of the fan minus the cross sectional area of the motor). For my 70mm EDFs this works out to be a circular inlet of ~2.5 inches diameter. Note that if you go smaller than this you could be starving the EDF from getting enough air
(2) The nozzle / exhaust should be anywhere in the 80% to 95% FSA (I have used thrust tubes with around 2.2 - 2.3 inches diameter).

Looking at the pic posted earlier in the thread and mocking it up in sketchup with the EDF model I used for the Diamond model, you could squeeze a 70mm EDF into a model that was ~30 inches long with a 26 inch wingspan and the inlet would be 2.5 inches diameter (a little less considering foam thickness). I think this would be a rocket!

Hope this helps - DamoRC

P13 dimensions.jpg
 

Dr. Looping Looie

Elite member
I just started building:

20171120_175219[1].jpg
20171121_164038[1].jpg
20171121_164114[1].jpg

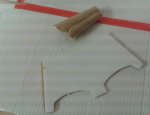
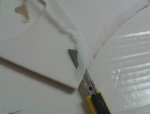
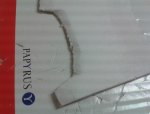
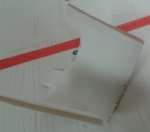
I made the biggest part, the wings, just barely fitting on one sheet. The wings have the double area, bacause I want to peel the paper off to create an airfoil, but this makes the plane have only 55 cm wingspan, this would mean 47mm intake and 50 or 55mm EDF or mighty mini pod. Later I noticed that I could make a few centimeters more wingspan by placing them different on the foam board, but now its that small and I cant do anything when this flies good with MM pod, Im going to build a bigger one.
 

Dr. Looping Looie

Elite member
Todays prpgress:

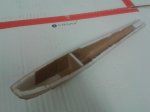
Finished nozzle, rocket booster and landing skid.
Pictures come tomorrow, but this build will have some very advanced building techniques...
 

Dr. Looping Looie

Elite member
Here they come:

20171123_123137.jpg
20171123_123152.jpg
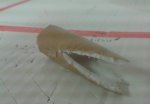
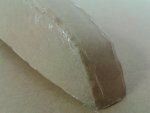
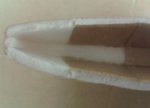
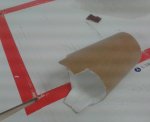
Heres the roket that boosts it too Mach 0.5, so the ramjet can start. I left some paper at the back that I curved to the inside so that it looks nice. I also put my glueguns nozzle in the hole to melt the foam and make the hole bigger.

20171123_123311.jpg
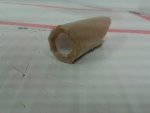
Heres the nozzle. Its not glued because it needs to fit perfect and want to do it just before I join it to the wings.

20171123_123209.jpg 20171123_123223.jpg 20171123_124647.jpg 20171123_124736.jpg 20171123_124759.jpg
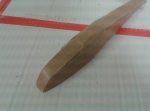
And heres the landing skid. simple shaping but really effective. I used a pice of foam in the middle to give it a nice angle and more strenth. I also glued the part where I peeled the foam off, which makes it very durable. The stability of foam core filled with glue is insane!
 

Dr. Looping Looie

Elite member
Sadly, I didnt document building of the parts, but I think you should see whats going on:
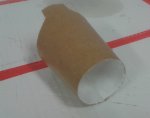
rocket nozzle: cut out the part, remove the foam from the back and side, then remove paper from the top and roll it. Use bevel cuts or sandpaper to get a little foam off so that it fits nice in the end. Then glue it so that the thing we removed the foam from is overlapping and holds everything better. Then we cut the back paper that is without foam in smaller pieces to glue them to the inside. we gan now put our glueguns nozzle inthe hole to make it bigger and finished. Note: the nozzle points to the back, so the back is there the rocket boost comes out.
Unbenannt.png
The landing skid is a simple b-fold there the side plates go beside the bottom plate. First remove foam from the cavitys and paper from the front. Also make your score cuts and drag something threw them to get the right shape. Then glue the piece that holds the angle into the middle. Apply glue to the middle section and the sides of your piece you just added and glue it into place. Then glue the front and rear, but only one at a time. Roll the pieces you removed the paper from until they fit good and smear glue into the foam core to make it really stable. Use the common FT techniques to build a normal planes fusalage, and you have no problem with this. I put a little glue on the edges and went with the glueguns nozzle over it. This is a technique I love to do to round things up and it also gives it a little more stability.

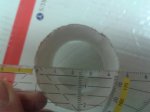
Also, just build the air intake, and at my scale, its about 47mm inner diameter. I removed a lot of foam to make it, but a mighty mini power pod fits in and I think a 50 or55mm EDF is poweful enough tp make it go vertical.
 
Last edited:

Dr. Looping Looie

Elite member
The Nose

20171123_125937.jpg
Cut out the part.
20171123_130117.jpg
Peel the paper off. Also remove the foam from one side.
20171123_130226.jpg
Make a sharp singele bevel on the front edge and sand it down.
20171123_130818.jpg
Also do it on the whole trailing edge.
20171123_130844.jpg
Sand it down as much as possible!
20171123_131344.jpg
Bend the whole part to get a tube.
20171123_132100.jpg
Also, go with your glue gun nozzle over the edge to make it nice.
20171123_132610.jpg
Glue it together.
20171123_132616.jpg
The other side
20171123_132806.jpg
47 mm diameter.
20171123_133046.jpg
This are the pats I cut out
20171123_131840.jpg
And thats the leftover foam from 3 sheets.


I am actually a lot further, finished the top fin and insalled the rudder. Top fin just needs cockpit, hatch, electronics and painting, so that will come! I just dont have the time po put all the pictures from the phone to the PC.

Also I m going to build a Kettenkrad out of my little RC car to pull the trailer.

So stay tuned!
 

Dr. Looping Looie

Elite member
I m now at the point where I have to bild in the control surfaces and because there is not too much space in there, I want to include as much details as possible and I only have 6 ch radio, I want to ask you what details and extra functions I should include:

lippisch-p13-3-seiten2.jpg
1. retractable landing skid: I could use LEGO technic suspension to create an easy and durable mecanism
2. thrust vectoring: could make it incredibly maneuverable and perform impossible maneuvers
3. airbrakes: they extend out of the fin and make it slow down nicely (this one also kas no flaps)
CFS3_Lippisch_P13a_v10.jpg
4. bomb drops: very easy to make but alot of fun


So, what extra function would you like to see? I think a simple delta is a little boring and if you pic a scale one, you should also add scale features.
Please write me what you would like to see and I try to do it!

Power setups:

1.: FT powerpack F tractor style
2.: 50mm FMS EDF with 650gramms of thrust, 40amp ESC and 3s 2200

what I need to do next: adding spars and parts for extra strenth, making battery hatch, adding cockpit, installing electronics, painting and extra details