1/4 Scale Bud Nosen Designed Citabria

Joker 53150

Mmmmmmm, balsa.
Mentor
1/4 Scale Citabria, a Nitro Fuel Bud Nosen Design

I've been a sucker for the Citabria, Super Decathlon, Airbatic, etc planes for a while, and have been eyeing up this Citabria for a while. It's a Bud Nosen designed 1/4 scale Citabria with a 105" wingspan, and was built a decade or more ago by a guy who is now getting out of the hobby due to health reasons. He built it with a 100 size Evolution nitro engine and decent quality components throughout. My initial plan was to sell off the nitro engine and replace it with a 35-ish cc gasser, but the more I thought about it, the more I decided to finally try my hand at nitro.

Here's the starting point, a pretty dirty plane which hasn't seen daylight possibly ever. Since it was never flown and never started it was probably never taken outside. The guy I got it from has a few planes like this...! The covering is mostly good, although there are a few small bits that need addressing, and some of the trim work needs to be stuck back down. The wheel skits are a little wobbly, and I may modify the mounting a bit.

IMG_5082.JPG


After cleaning it's much brighter. I got no mounting hardware with it, so I'll need to do some testing to get the right pieces sorted out.

IMG_5091.JPG


The Evolution 100 is a bit dirty, but has never seen fuel or spark. I ordered a new plug for it, and will replace all the old gas line, fuel tank stopper, etc to make sure it's all good. Per the instructions I also ordered some 15% nitro fuel for it.

IMG_5092.JPG


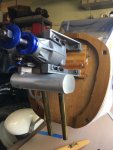
The firewall needs a little more fuel-proofing as well, but is otherwise nice & clean.
IMG_5093.JPG


So with everything ordered, I should take delivery within a week or so. This should be a pretty quick turn-around to have it ready to fly, assuming the engine works as planned.
 
Last edited:

Joker 53150

Mmmmmmm, balsa.
Mentor
The more I add to and update this list of tasks, the more I like having it here where I can use it. The plan (for now?) is to keep coming back to it as a reminder of what I need to do so the Citabria is ready for a maiden.


  • STARTED- Final programming of receiver needed for gasser.
  • - Replace fuel tank lines for gas.
  • - Re-do all wiring for opti-kill switch and dual batteries.
  • DONE- Install RCGF 26cc Gas Engine.
  • DONE - Remove and replace nitro engine.
  • Repair some wing sheeting damage, inboard top side leading edge.
  • DONE- Paint on the cowl is cracked and yellowed with age - fix and repaint white.
  • DONE - Install new receiver battery.
  • DONE - Raise fuel tank and re-do the lines.
  • DONE - Add fuel filter.
  • DONE - The ailerons rub on the wing a bit and will need to be clearanced.
  • DONE - Replace the pull-pull lines and ends for rudder control.
  • DONE - Verify rudder movement is proper, re-hinge as needed.
  • DONE - Patch a few tiny holes in covering.
  • DONE - Repair/replace blue stars as needed and add blue pin striping.
  • DONE - Install fuel tank.
  • DONE - Paint on the wheel pants is yellowed with age - fix pinholes and repaint white.
  • DONE - Build new fuel tank tray.
  • DONE - More fuel-proofing on the firewall is needed.
  • DONE - Re-glue side windows.
  • DONE - Replace fuel lines.
  • DONE - One of the captured nuts for a wing strut is stripped and will need to be replaced.
  • DONE - Source longer wing mounting bolts.
  • DONE - Make wing fit properly on fuselage.
  • DONE - Find answer to aileron servo wire connection question.
  • DONE, SMELLS BETTER ALREADY! - Dryer sheets in the fuselage to mask odors.
  • DONE - The paint on the wing struts is chipped and yellowed with age - repaint white.
  • DONE - Ordered 15% nitro fuel, glow plug igniter, and a few other items necessary for glow.

Plus whatever else I run across!
 
Last edited:

Joker 53150

Mmmmmmm, balsa.
Mentor
It's going to be awesome flying it. Big airplanes are definitely better. IMHO.

I'm really hoping for a great flying plane...! The big ones are a bit of an addiction, and I love the way they handle winds that would keep me grounded with my smaller planes, and how they command the sky as they cruise by. The P-38 I got should really amp that up with the twin engines - even if I go electric with it.
 

Joker 53150

Mmmmmmm, balsa.
Mentor
The work done today was all just for show, and did nothing to make the plane ready for flight. Either way, it's stuff that bothered me about it so it's getting taken care of. To start, I addressed the graphics on the fuselage sides. It's a variation on the "shooting star" theme found on the Citabria, Decathlon, etc. The problem (in my view) was the stars, specifically the size of the stars.

The star near the cowl was too small...

IMG_5108.JPG


...and the upper star towards the back was WAY too small. The bottom one was ok.

IMG_5109.JPG


Since part of my job involves running a small vinyl shop I found some blue vinyl that was close to the original and cut various size stars. The nose got a more prominent star.

IMG_5110.JPG


The lower star is just slightly larger while the top star is much bigger to better fit the size of the red stripe. These aren't ideal size, but I was taking some guesses as to what would look good, and it's certainly an improvement. The wings will need some work done, but that'll be done after I make some pinstripe.

IMG_5111.JPG


Additional work that doesn't really matter was done on the wheel pants. Both were covered with hundreds of pinholes, which certainly MUST be fixed! The guy who built the plane said he painted cars in the past, so this finish is surprising. Although maybe his cars looked like this as well. :) Step one in fixing the finish was cleaning and sanding.

IMG_5114.JPG


Followed by a layer of spot putty. 98% of this will get sanded off after it dries, and I'll then follow with primer and a nice coat of white paint. The previous paint was yellowing from age, so these shoes will spruce the plane up a bit! Hopefully they don't get destroyed flying off a grass field. Depending on how taxi testing goes I may just remove them for flight unless I plan to fly off the paved runway at a secondary field I use.

IMG_5116.JPG
 

Joker 53150

Mmmmmmm, balsa.
Mentor
Sigh, more to do. I didn't pay much attention when I was removing the fuel tank, but looking back at it the builder did an "interesting" job with the gas lines. One fuel line was dedicated to fill the tank, one line had a clunk in the tank which was to provide fuel to the engine, and the third line was the pressure line from the muffler back to the tank.

That should all work to RUN the engine, but it didn't provide any way to remove excess fuel from the tank at the end of the day! The cowl completely covered the lines forward of the firewall, so I couldn't just pull a line to suck the extra gas out. The fill line that comes out the side of the fuselage doesn't have a clunk or any way to pick up extra gas from the tank, so I'll end up having to either change the fuel line configuration, swap in a different tank, or both.

The original tank is a bit on the small side, so I'll probably change to a bigger tank and then re-route the lines as needed to let me empty the tank easily. Oh well, it's easy to do!
 

Joker 53150

Mmmmmmm, balsa.
Mentor
Yesterday I slathered on the spot putty, and after letting it cure for 24 hours I sanded off almost all of it, and you can easily see all the filled pinholes now.

IMG_5121.JPG


After wiping off the sanding dust and creating a nice clean surface I applied a coat of Rustoleum primer. After it dries I'll wet sand it before re-priming as needed, and will then lay down some gloss white paint.

IMG_5122.JPG


Going back to the wings, I wanted to do some more unnecessary trim work. On the right is how I got the wings, with just the red trim. Each wing also had a single small star that was falling off. The fuselage has blue striping on the red, and I liked the look so I recreated that look with new blue pin-striping. To complete the look I added a new larger star. The bits of yellow are tape marking areas that need attention. There are a few small holes that will be patched, fairly easy and quick to do.

IMG_5123.JPG


Last up is a view of the bottom pattern with my new top. The bottom is pretty basic and will probably get a little jazzing up.

IMG_5124.JPG
 

Joker 53150

Mmmmmmm, balsa.
Mentor
I just realized I forgot a major detail that this plane MUST have - a pilot! I'll have to do a little playing around with the 3D printer to pick the appropriate sized figure and get that started soon. My daughter has been volunteered to paint it for me once printed.
 

Joker 53150

Mmmmmmm, balsa.
Mentor
No pics yet, but last night was dedicated to plywood and epoxy. The remains of the previous fuel tank "tray" were removed and a new one was made. I'm still surprised at how flimsy the tray was - it looks like a simple sheet of 3/32" balsa that was CA'd in place! The replacement tray is 1/8" ply installed and coated with epoxy. The gas tank WAS simply glued to the balsa, and now the tank will be cushioned with foam to isolate it more from vibration. While I had the epoxy out, I gave the firewall a coat to make sure there was no exposed wood.

I also went with a slightly larger fuel tank, adding 4 ounces of additional capacity. All new lines were built and are being routed such that I can both fill AND drain the tank as needed without removing the cowl to gain access to the fuel lines. Before final hook-up, a fuel filter will be added as well for a little extra security.

Last, I wet-sanded the wheel pants and gave them a first coat of gloss white paint. The pinholes are a thing of the past, and they're looking MUCH better now. Another coat or two of paint will follow.
 

Joker 53150

Mmmmmmm, balsa.
Mentor
The new fuel tank tray is much thicker than the original, plus the tank is slightly taller so it's a tight fit for the tank once I add 1/4" of padding to dampen vibration. But it works. The new fuel lines were installed as well, although I still need to add the inline filter. Line #1 is the fill/empty line which has it's own clunk line inside the tank. Line #2 has it's own clunk in the tank and that goes directly to the engine to supply fuel. Line #3 is the pressure line that goes from the muffler back to the tank.

I'm using a 6 channel FrSky receiver, and will max it out with this 4 channel plane. Two channels will be used for the ailerons and two for the elevators (each of the two elevators has it's own servo). Testing the servos that came with the plane so far shows good results, and no issues were found.

As it sits right now, it could be fueled up and tested to see if it runs. But I don't have a glow plug igniter yet, so a quick run to the hobby store is probably in order.

I did also get a bottle of "After Run Oil", which you add to the cylinder head and inside the carb after running the engine. It's supposed to help keep things lubricated between use - we'll see how well that works!
 
Last edited:

Joker 53150

Mmmmmmm, balsa.
Mentor
As mentioned earlier, the pull-pull cables for the rudder need to be replaced. The original lines looked good, but right after I got the plane I noticed that one of the cables came out of it's holder, which could have made for an "interesting" flight! The lines looked like some kind of blue nylon, but after removing the pieces I found the blue was just a covering over the actual cable underneath. The reason it came apart is that at the servo the cables were just slid through a tube and glued in place. Over time the glue either got brittle and fell apart or it was never glued properly. At the rudder the cables had a crimp that would keep them from failing.

IMG_5142.JPG


This is the replacement, a DuBro pull-pull system that uses crimps and lock nuts, while giving very good ability to tighten the pieces as needed.

IMG_5143.JPG


Everything is a bit messy as I test the pull-pull system, but it tidied up nicely once the receiver was mounted.

IMG_5145.JPG
 

Joker 53150

Mmmmmmm, balsa.
Mentor
I was hoping to try firing the engine up today, but time ran out. The Citabria is loaded with two other 1/4 scale planes for a trip to the field tomorrow. If all goes well I may fly it, but hope to at least just do a shake down on it.
 

Joker 53150

Mmmmmmm, balsa.
Mentor
This isn't a flight report, unfortunately.

I took the Citabria, along with the fuel, igniter, etc to the field today in hopes of at least making it run. If it ran well I'd think about flying it.

On to the table it went, and the tail was secured since the wing wasn't installed. I verified the original glow plug still worked, and pumped some 15% nitro fuel (per manufacturer's recommendation) into the tank. I didn't have a cone on the prop shaft so I was faced with hand-propping the engine. Following the procedure I saw online a few times I opened the throttle and covered the throat of the carb with my thumb. About two rotations of the prop is all it took to get plenty of fuel to the carb and get my thumb wet. A couple more flips of the prop, followed by hooking up the igniter.

The next step was a surprise to me, as I've never seen anybody hand-start a nitro motor (I live a sheltered life...). The prop was rotated by hand BACKWARDS till it was starting to build some compression, and then I gave it a quick slap BACKWARDS, instead of the normal flipping of the prop in the direction I want it to run. As soon as I slapped it, it immediately fired and ran the correct direction! It only ran a few seconds and died, which I thought was due to settings on the carb. Soon I realized the fuel wasn't staying i the lines, but was instead draining back into the tank. :( I tried it a few times, and the only way I was able to get it to run any length of time was when my dad was holding the tail of the plane up a bit, effectively raising the tank in relation to the engine.

I think there is one of two things happening. Either I've got a leak in the system which is allowing fuel to drain back quickly or the tank is too low. Now I KNOW the tank is too low, it's how the guy built the plane and I was wondering about that early on, but with no nitro experience of my own I was hoping he knew what he was doing. His tank position would be fine for gas, but evidently nitro is very picky about tanks being too low. So I'll check the lines first, but expect I'll be doing some surgery to raise the tank about 1". That job is not going to be much fun. Oh well, it sounded sweet when it was running so the effort will be rewarded!
 

PsyBorg

Wake up! Time to fly!
Did you run a line from the exhaust to the tank to pressurize it? Most of those motors can't suck enough on the fuel line to draw its own fuel. It needs help from the pressure coming off a tap in the exhaust. even my Buggy that is not meant to be upside down is pressurized. If you did run the pressure line did you by chance not cap off the fill line? There is usually a pinch mechanism or a plug for the fill line .
 

Joker 53150

Mmmmmmm, balsa.
Mentor
There is a pressure line, but the more I dig for answers the more I think the issue is that the tank is too low. Tomorrow I'll do a quick test to find out, by simply removing the tank and setting it next to the plane, but at the right elevation in relation to the engine. If that works properly I should have my answer.
 

Joker 53150

Mmmmmmm, balsa.
Mentor
A couple pictures from yesterday's flying. I only took 3 planes to the field, but all were 1/4 scale so my Expedition was PACKED. Its surprising everything actually fit! The smallest of the 3 is the 1/4 scale Pietenpol with an 84" wingspan. This electric plane flew horribly for some reason, and I'm lucky to have gotten it back down in one piece with only a broken prop for damage. It may have been too windy, but I've never had issues like this before with it, so I'll have to go through and check it thoroughly.

Behind the Piet is my 1/4 scale Balsa USA Cub gasser, which flew beautifully. I did end up breaking one of the wires for the landing gear, but it wasn't a main support wire, only the one that keeps the wheels together so it ended up working like suspension gear. The plane still soldiered on until I ran out of gas. The take-offs and landings with this plane really make it look like I know how to fly, they're silky smooth!

IMG_5161.JPG


And of course, the Citabria. No cowl, as it's being painted and won't be installed until after the engine is running properly. The wing struts were also omitted for the picture as they're a pain to install. The newly painted wheel pants really shin in the sun now!

IMG_5171.JPG
 

Joker 53150

Mmmmmmm, balsa.
Mentor
So while my wife was enjoying Mother's Day by sleeping in, I decided to work on the Citabria. I pulled the tank and mounted it temporarily next to the plane about 1-1/2" higher than it was in the plane. With a little fuel added I primed the engine and found it was working! While the fuel did drain back, it was draining very slowly. The gas tank was only about 1/5 filled, so if it were full the draining would (probably) go away. Either way, it still fired much more easily now as it didn't have to pull the fuel all the way from the tank.

With that test successful I went about modifying the nose of the plane. I had to cut out some plywood from a former but was able to get room for the tank. I built a platform 1-1/2" tall for the tank and mounted it to the previous tank platform made a few days ago. The lines were re-installed and the tank is now within about 1/8" of the center line of the engine.

Time to fill it up and see how it works!

.....and there is fuel pouring out of the muffler. :(

A dumb mistake, I hooked up the pressure line and the carb lines backwards. So as I'm filling the tank from the 3rd line (the fill/siphon line) the fuel is going into the tank and the air can't get out, which in turn forced the fuel up the line that was supposed to go to the carb. Duh, an easy fix of just swapping the lines.

So the tank was finally filled, and the lines held fuel as they did during my testing. I got it started, and did some preliminary tuning. It's running much better now, but still not consistent. Sometimes I can slowly advance the throttle to full speed, and other times it'll die half-way there. But that will be worked on another day. For now I'm just very happy with it running somewhat properly! :)
 

Joker 53150

Mmmmmmm, balsa.
Mentor
Some of it is expensive-ish, but believe me that there are incredible deals out there. Swap meets are the best example. That 1/4 scale Cub I pictured was $100 at a swap meet, including servos and 23cc gas Zenoah engine installed. I spent a couple bucks re-building the carb, the landing gear wires and fuel line, but I think that was about it. Total investment was well under $200 which includes gas to drive 4 hours round-trip to the event. This Citabria wasn't nearly as great a deal as the Cub, but it was still cheap enough for me to jump on it.