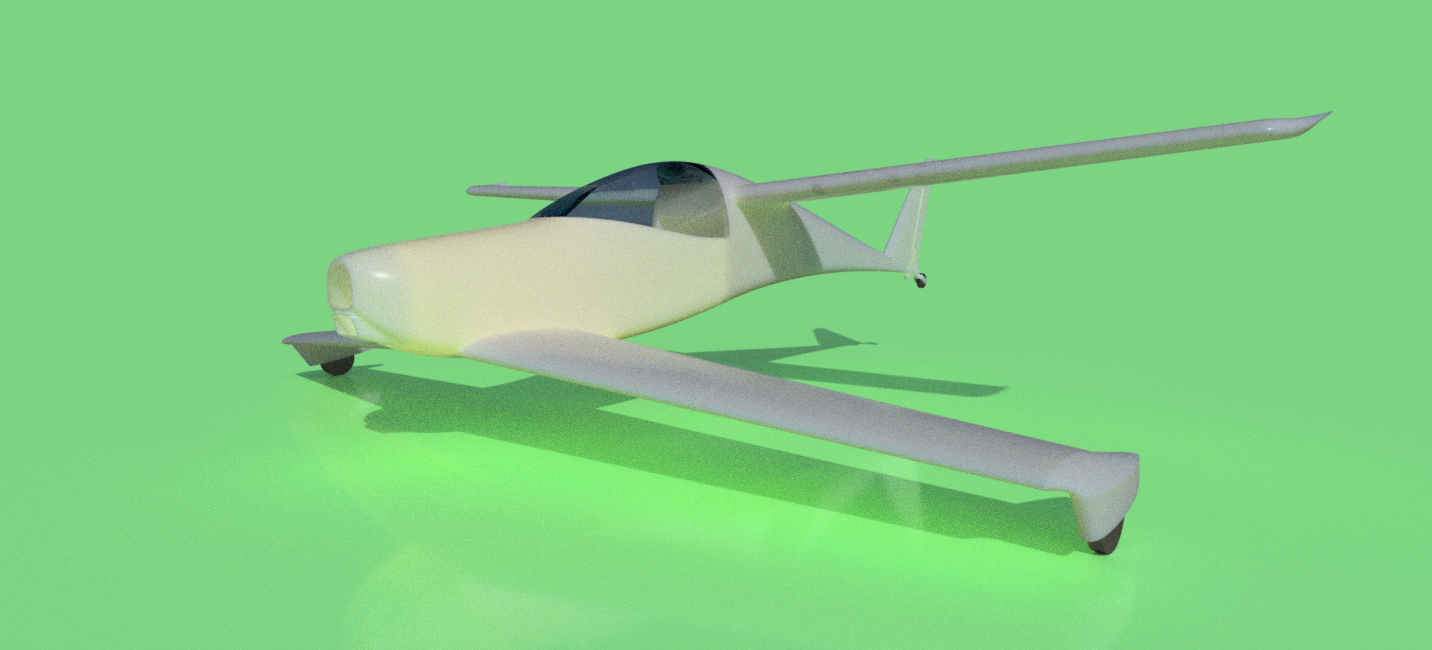
3D printed Rutan Quickie - Fusion 360 tutorial and build along

Back in April when we went into lockdown I started a blog on my website, www.rc3dprint.com/blog walking through how to design a Cessna 337 for 3Dprinting. I have been asked on another thread to do another tutorial. I have a quiet few weeks at the day job so I thought I would oblige!

This time we are going to build a Rutan design. With so many amazing aircraft out there by this design legend it was tough to settle on one. I have chosen to do the Quickie, a lightweight, single-seat (originaly), taildragger with a tandem wing arrangement. The first design was drawn up in 1977 with a 2 seat version to follow later on. The aircraft was a gem, cruising faster than a Cessna 150 with considerably better fuel efficiency, around 100 miles per gallon.
Screenshot 2020-08-29 at 16.13.35.png
The last time I did this I presented screencasts of what I was doing but without commentary - this time, I have included a commentary of what I am doing, the videos are in real time so they are going to be longer but hopefully a bit easier to follow.

Follow this link to the blog post. Or this link to go straight to the screencast on YouTube. Screenshot 2020-09-07 at 09.53.13.png

As with last time, we start by positioning and calibrating the canvases, side, from, and top view. In this episode I have then carried on until we have a general outline of the fuselage and vertical stab. To get the far I have only had to use the sketch, sweep and split functions. Watch the screencast to see how.
Screenshot 2020-09-07 at 09.53.13.png

If you find the tutorials useful, leave a comment and hit subscribe so you don't miss out on further instalments in the series.
 

OliverW

Legendary member
Back in April when we went into lockdown I started a blog on my website, www.rc3dprint.com/blog walking through how to design a Cessna 337 for 3Dprinting. I have been asked on another thread to do another tutorial. I have a quiet few weeks at the day job so I thought I would oblige!

This time we are going to build a Rutan design. With so many amazing aircraft out there by this design legend it was tough to settle on one. I have chosen to do the Quickie, a lightweight, single-seat (originaly), taildragger with a tandem wing arrangement. The first design was drawn up in 1977 with a 2 seat version to follow later on. The aircraft was a gem, cruising faster than a Cessna 150 with considerably better fuel efficiency, around 100 miles per gallon.
View attachment 178610
The last time I did this I presented screencasts of what I was doing but without commentary - this time, I have included a commentary of what I am doing, the videos are in real time so they are going to be longer but hopefully a bit easier to follow.

Follow this link to the blog post. Or this link to go straight to the screencast on YouTube. View attachment 178611

As with last time, we start by positioning and calibrating the canvases, side, from, and top view. In this episode I have then carried on until we have a general outline of the fuselage and vertical stab. To get the far I have only had to use the sketch, sweep and split functions. Watch the screencast to see how.
View attachment 178611
If you find the tutorials useful, leave a comment and hit subscribe so you don't miss out on further instalments in the series.
I love the quickie! I may have to print one
 

Piotrsko

Master member
May want to build the Tri-Q as the full scale has had problems with wing strength/ landing gear.
 

Boberticus

Active member
This is hands down my favorite plane ever built. I wish they were still building kits for the full size, id have a " If I won the lottery" dream...

Could you imagine a fully carbon fiber Quickie, with an adjustable prop, and a supercharged rotax 915is pushing 140 hp?

I too am mildly concerned about the landing gear, the full-size had alignment issues that lead to ground looping. The fix was to align the wheels once they were tension-ed under the full-load of the airplane's weight instead on un-flexed on the workbench(or perfectly aligned in CAD). not sure how this issue will transfer to the RC version, or how to account for any flex without building a full aircraft and readjusting the CAD.

The rear wing had a huge variation of angle of incidence depending on builder, varying something like 7 (+3,-4) degrees across different builds with varying stall and cruise characteristics, not sure if there was ever any consensus for which was considered the best AOI.

very much looking forwards to this, will be printing one when this finishes up.
 
Last edited:
I am going to use carbon spar on the canard which should help with some of the issues described above. The main problem with the tricycle landing gear is just how ugly it is! 😂

I'm not anticipating suffering the same problems as the full size aircraft in that area.

I discuss the wing incidence/decalage in the screencast, I have gone for a value somewhere in the middle of the range.
 

PsyBorg

Wake up! Time to fly!
This is hands down my favorite plane ever built. I wish they were still building kits for the full size, id have a " If I won the lottery" dream...

Could you imagine a fully carbon fiber Quickie, with an adjustable prop, and a supercharged rotax 915is pushing 140 hp?

I too am mildly concerned about the landing gear, the full-size had alignment issues that lead to ground looping. The fix was to align the wheels once they were tension-ed under the full-load of the airplane's weight instead on un-flexed on the workbench(or perfectly aligned in CAD). not sure how this issue will transfer to the RC version, or how to account for any flex without building a full aircraft and readjusting the CAD.

The rear wing had a huge variation of angle of incidence depending on builder, varying something like 7 (+3,-4) degrees across different builds with varying stall and cruise characteristics, not sure if there was ever any consensus for which was considered the best AOI.

very much looking forwards to this, will be printing one when this finishes up.


Design the wheel hubs with an upper and lower "A" arm assembly like a car to keep a neutral camber no matter how much vertical flex during motion.
 
Episode 5, the rudder and tail wheel. I had to cut a bit out of the video which was my first attempt at the tail wheel. It was ugly, totally ruined the sleek look of the aircraft - I would have left it in but the screencast would have been waaaaay too long. I included a photo on the blog though as trail and error is part of the design process.

Click Here to read and watch.

Rutan Quickie v8 rudder.png
 
It's been a month since I last posted on here about the Quickie. Time for an update!

The first attempt at the maiden did go that smoothly. To cut a long story short the flying spot with a hard runway was unavailable to me so I ended up somewhere I needed to hand launch. That turned out to be a doomed scenario. I didn't quite have the CG set correctly, coupled with the fact that the elevator on the canard is powerful and without a take off run to smoothly lift the nose I struggled to launch the model. On the second launch I had a touch too much nose down and not enough time to save it before it hit the ground.

I printed some replacement parts ( the canard and wings were fine due to the carbon supports), and took it out for a second go, this time from a runway. I also re-calculated the CG using some online CG calculators and made a shallow mark on the fuselage so it would be easier to set in the field.

I managed a short successful circuit (if a little twitchy flight) before I got moved off by a security guard (the disused runway I was at is earmarked for housing). It was a shame as I could have used a little longer to dial in the trim.

My plan was to get another flight in and take some video, alas, our government announced yesterday we are to go back into lockdown for a month. With this in mind I have released the Quickie on my website ahead of getting a flight video up, I know this will put some people off but I'll get them a video when I can!

www.rc3dprint.com

I hope it was an interesting project for people to follow along with, the main purpose was to demonstrate some Fusion 360 techniques.

All the best, and happy flying!

IMG_4601.jpg
 

chris398mx

Master member
It's been a month since I last posted on here about the Quickie. Time for an update!

The first attempt at the maiden did go that smoothly. To cut a long story short the flying spot with a hard runway was unavailable to me so I ended up somewhere I needed to hand launch. That turned out to be a doomed scenario. I didn't quite have the CG set correctly, coupled with the fact that the elevator on the canard is powerful and without a take off run to smoothly lift the nose I struggled to launch the model. On the second launch I had a touch too much nose down and not enough time to save it before it hit the ground.

I printed some replacement parts ( the canard and wings were fine due to the carbon supports), and took it out for a second go, this time from a runway. I also re-calculated the CG using some online CG calculators and made a shallow mark on the fuselage so it would be easier to set in the field.

I managed a short successful circuit (if a little twitchy flight) before I got moved off by a security guard (the disused runway I was at is earmarked for housing). It was a shame as I could have used a little longer to dial in the trim.

My plan was to get another flight in and take some video, alas, our government announced yesterday we are to go back into lockdown for a month. With this in mind I have released the Quickie on my website ahead of getting a flight video up, I know this will put some people off but I'll get them a video when I can!

www.rc3dprint.com

I hope it was an interesting project for people to follow along with, the main purpose was to demonstrate some Fusion 360 techniques.

All the best, and happy flying!

View attachment 182272
Sorry about the lockdown. Awesome work! this plane looks great!
 

Martin H

New member
Good Evening,

I stumbled across this thread while doing a bit of research.

I have recently acquired a "new in box", balsa and ply Rich Models ARF version of the Quickie. The manual for it is a... bit sparse... on details.

Where did the CG work out to be?

FWIW, the ARF version I have is designed for a 40 size glow engine and 4 channels. It will be my next project once I finish the electric powered Mid-Star 40 kit.
 

BayDesigns

Active member
Ooh… glad I saw this thread. I’ve been looking for a Quickie that I could modify to resemble TWERP, a Q1 with 2 jet engines on the sides. It only made 3 flights, but I love unconventional aircraft. I’ve got a lot on my plate but this I’ll remember.