Airtronics Olympic II electric sailplane build

GliderFlyer

Elite member
I think I'm ready to glue the motor mount on. The additional fiberglass layer went on fine. You can't really tell in the photo, but the balloon left some ridges on the inside. The motor still has enough clearance though.
IMG_20210213_180226.jpg
 

GliderFlyer

Elite member
Here goes. This was the best way I could think of to clamp the firewall
IMG_20210215_161954.jpg
IMG_20210215_162000.jpg
IMG_20210215_162006.jpg
IMG_20210215_162014.jpg
IMG_20210215_162021.jpg
Hopefully the rubberbands won't stick too much. I used epoxy because I wanted time to work and gap-filling abilities. I glued it with the motor in so that it would be aligned and I know that there will be room for the wires.
 

rockyboy

Skill Collector
Mentor
Excellent clamping method! I think the rubber bands will be easy enough to pull / shave off and well worth the effort. Nicely done!
 

GliderFlyer

Elite member
I just had another thought about the nose. I can continue to build the nose past the motor mount to be able to fit a smaller spinner. If I do that, then I can sand the excess mount flush with the fuselage. The question then is should I go for a smaller spinner?
This is not the spinner I intend to use, but probably something this size.
IMG_20210216_113710.jpg
 

quorneng

Master member
It will not be load bearing so the gap can be filled with soft balsa block and sanded to match the spinner profile.
 

GliderFlyer

Elite member
Wow, I modified my alerts to exclude likes, but for some reason, I have not seen alerts for replies to this thread. I gotta fix that.:unsure:
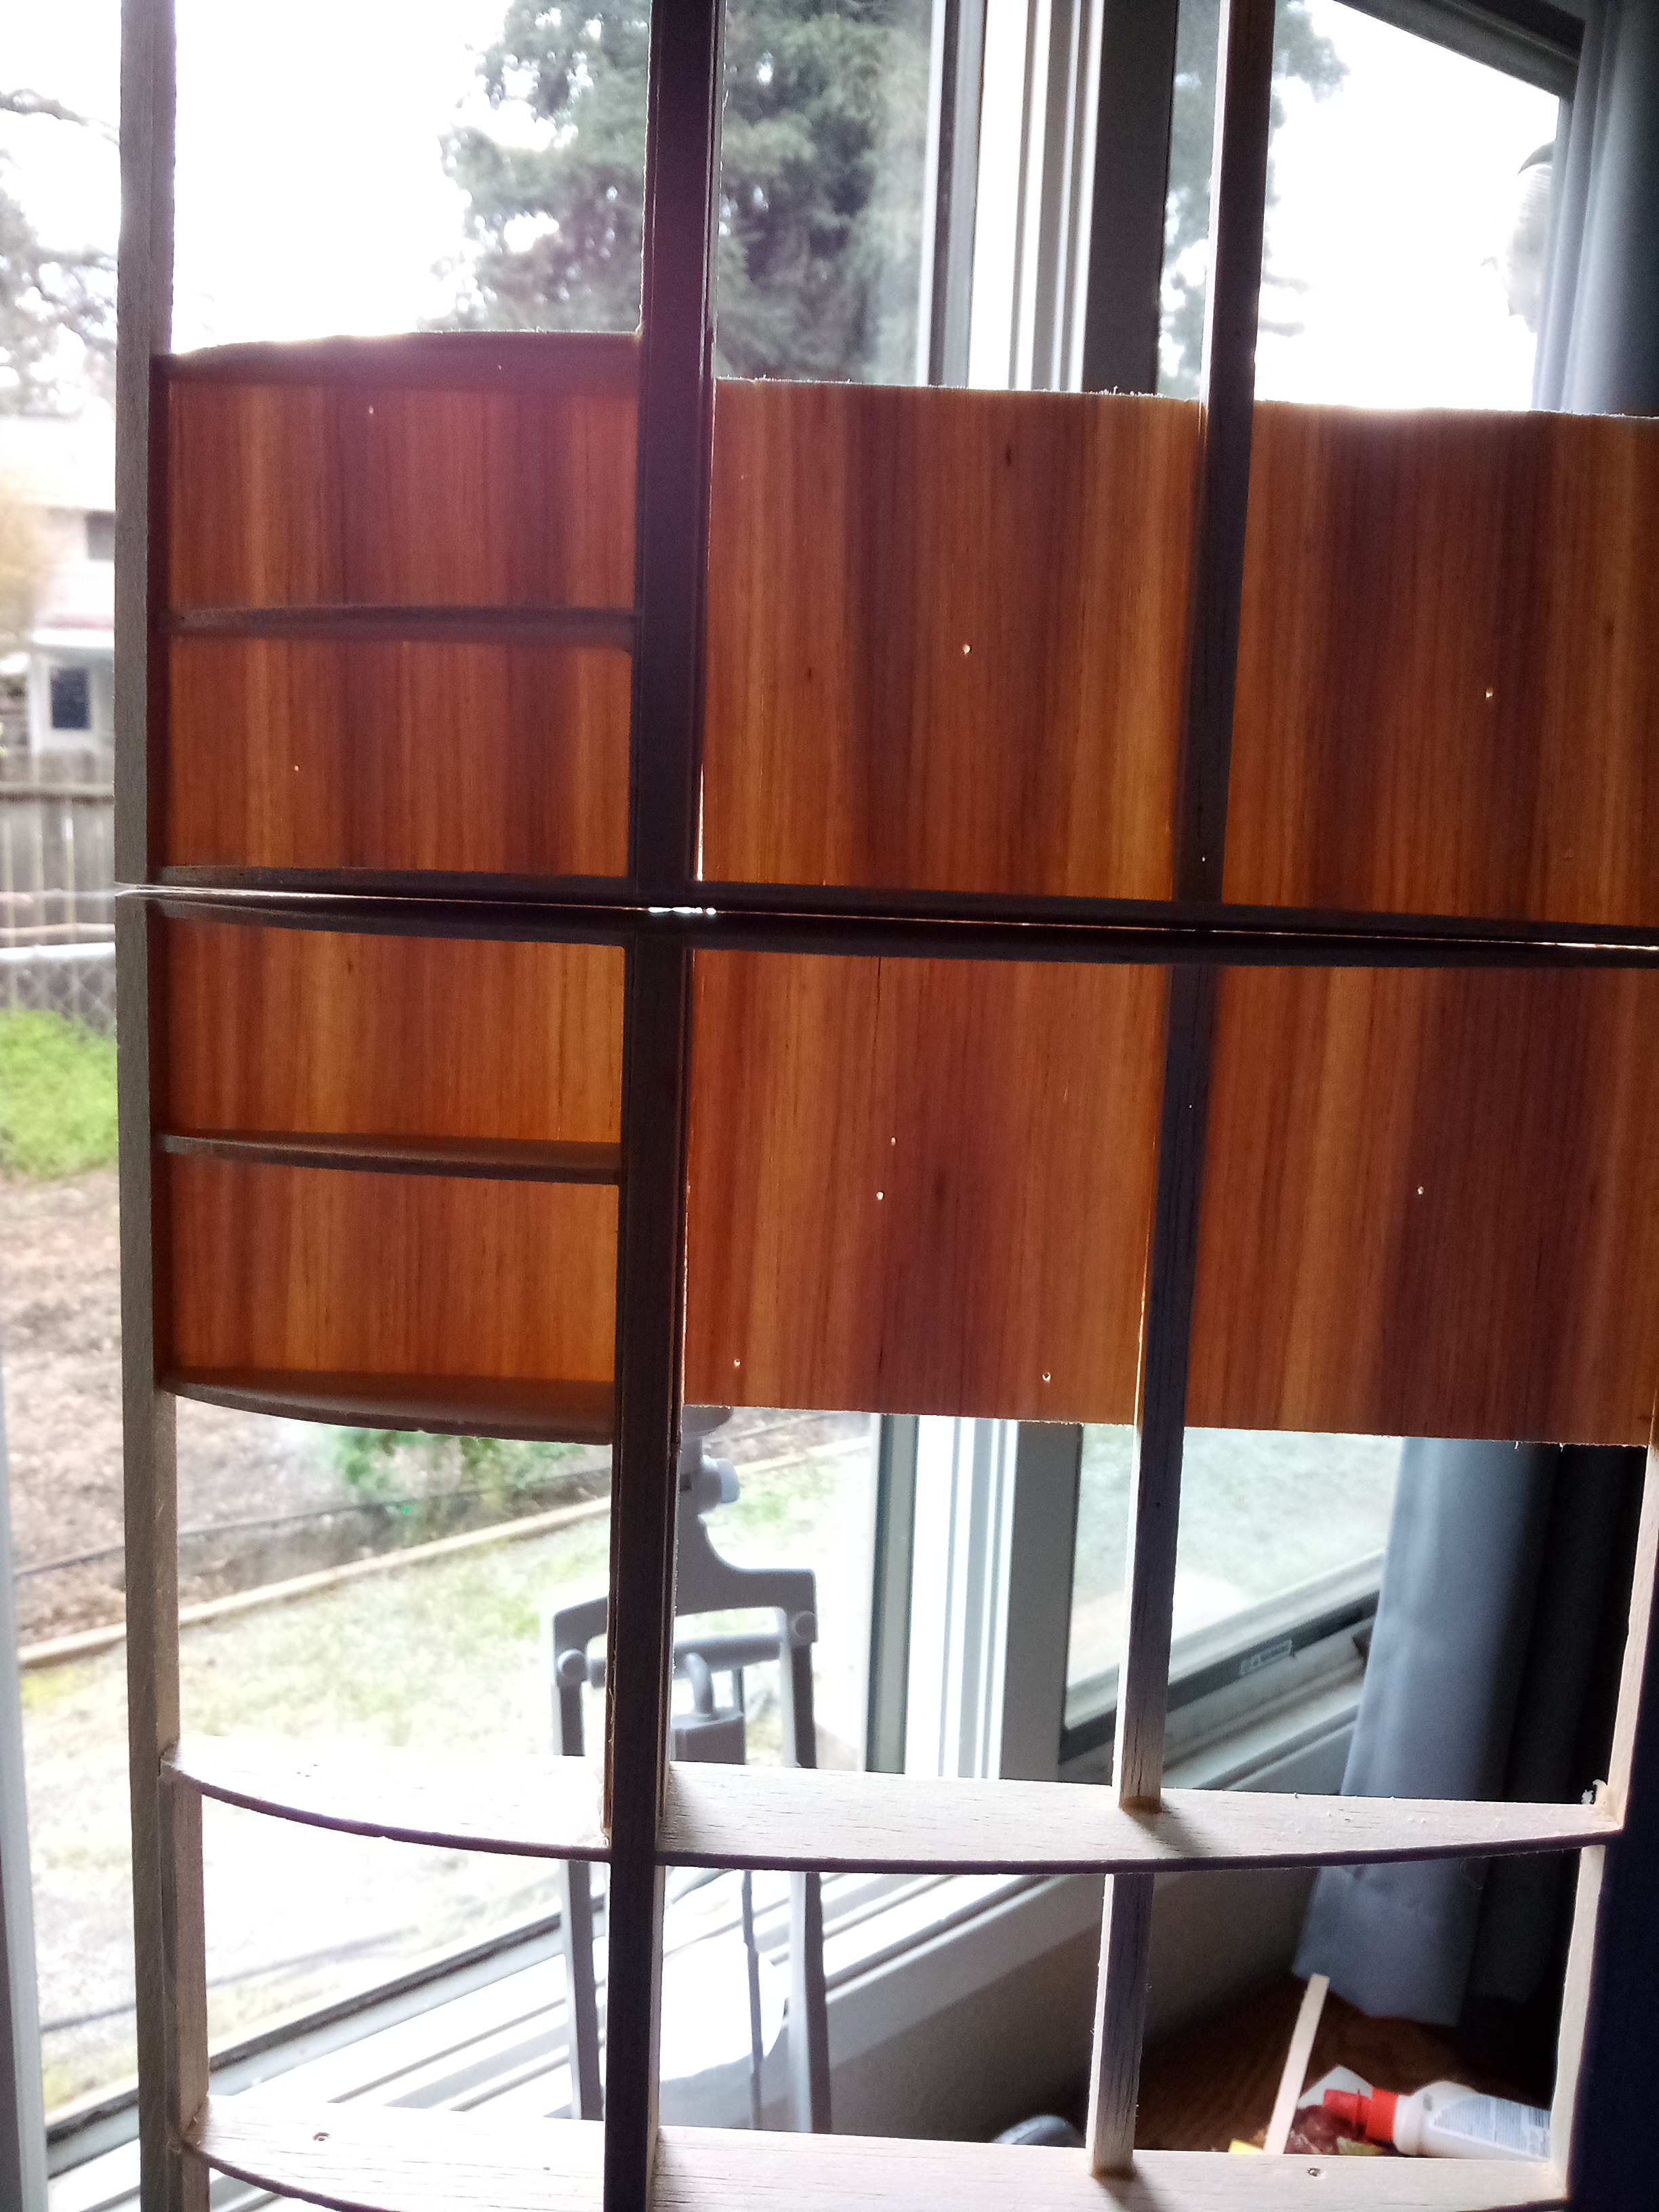
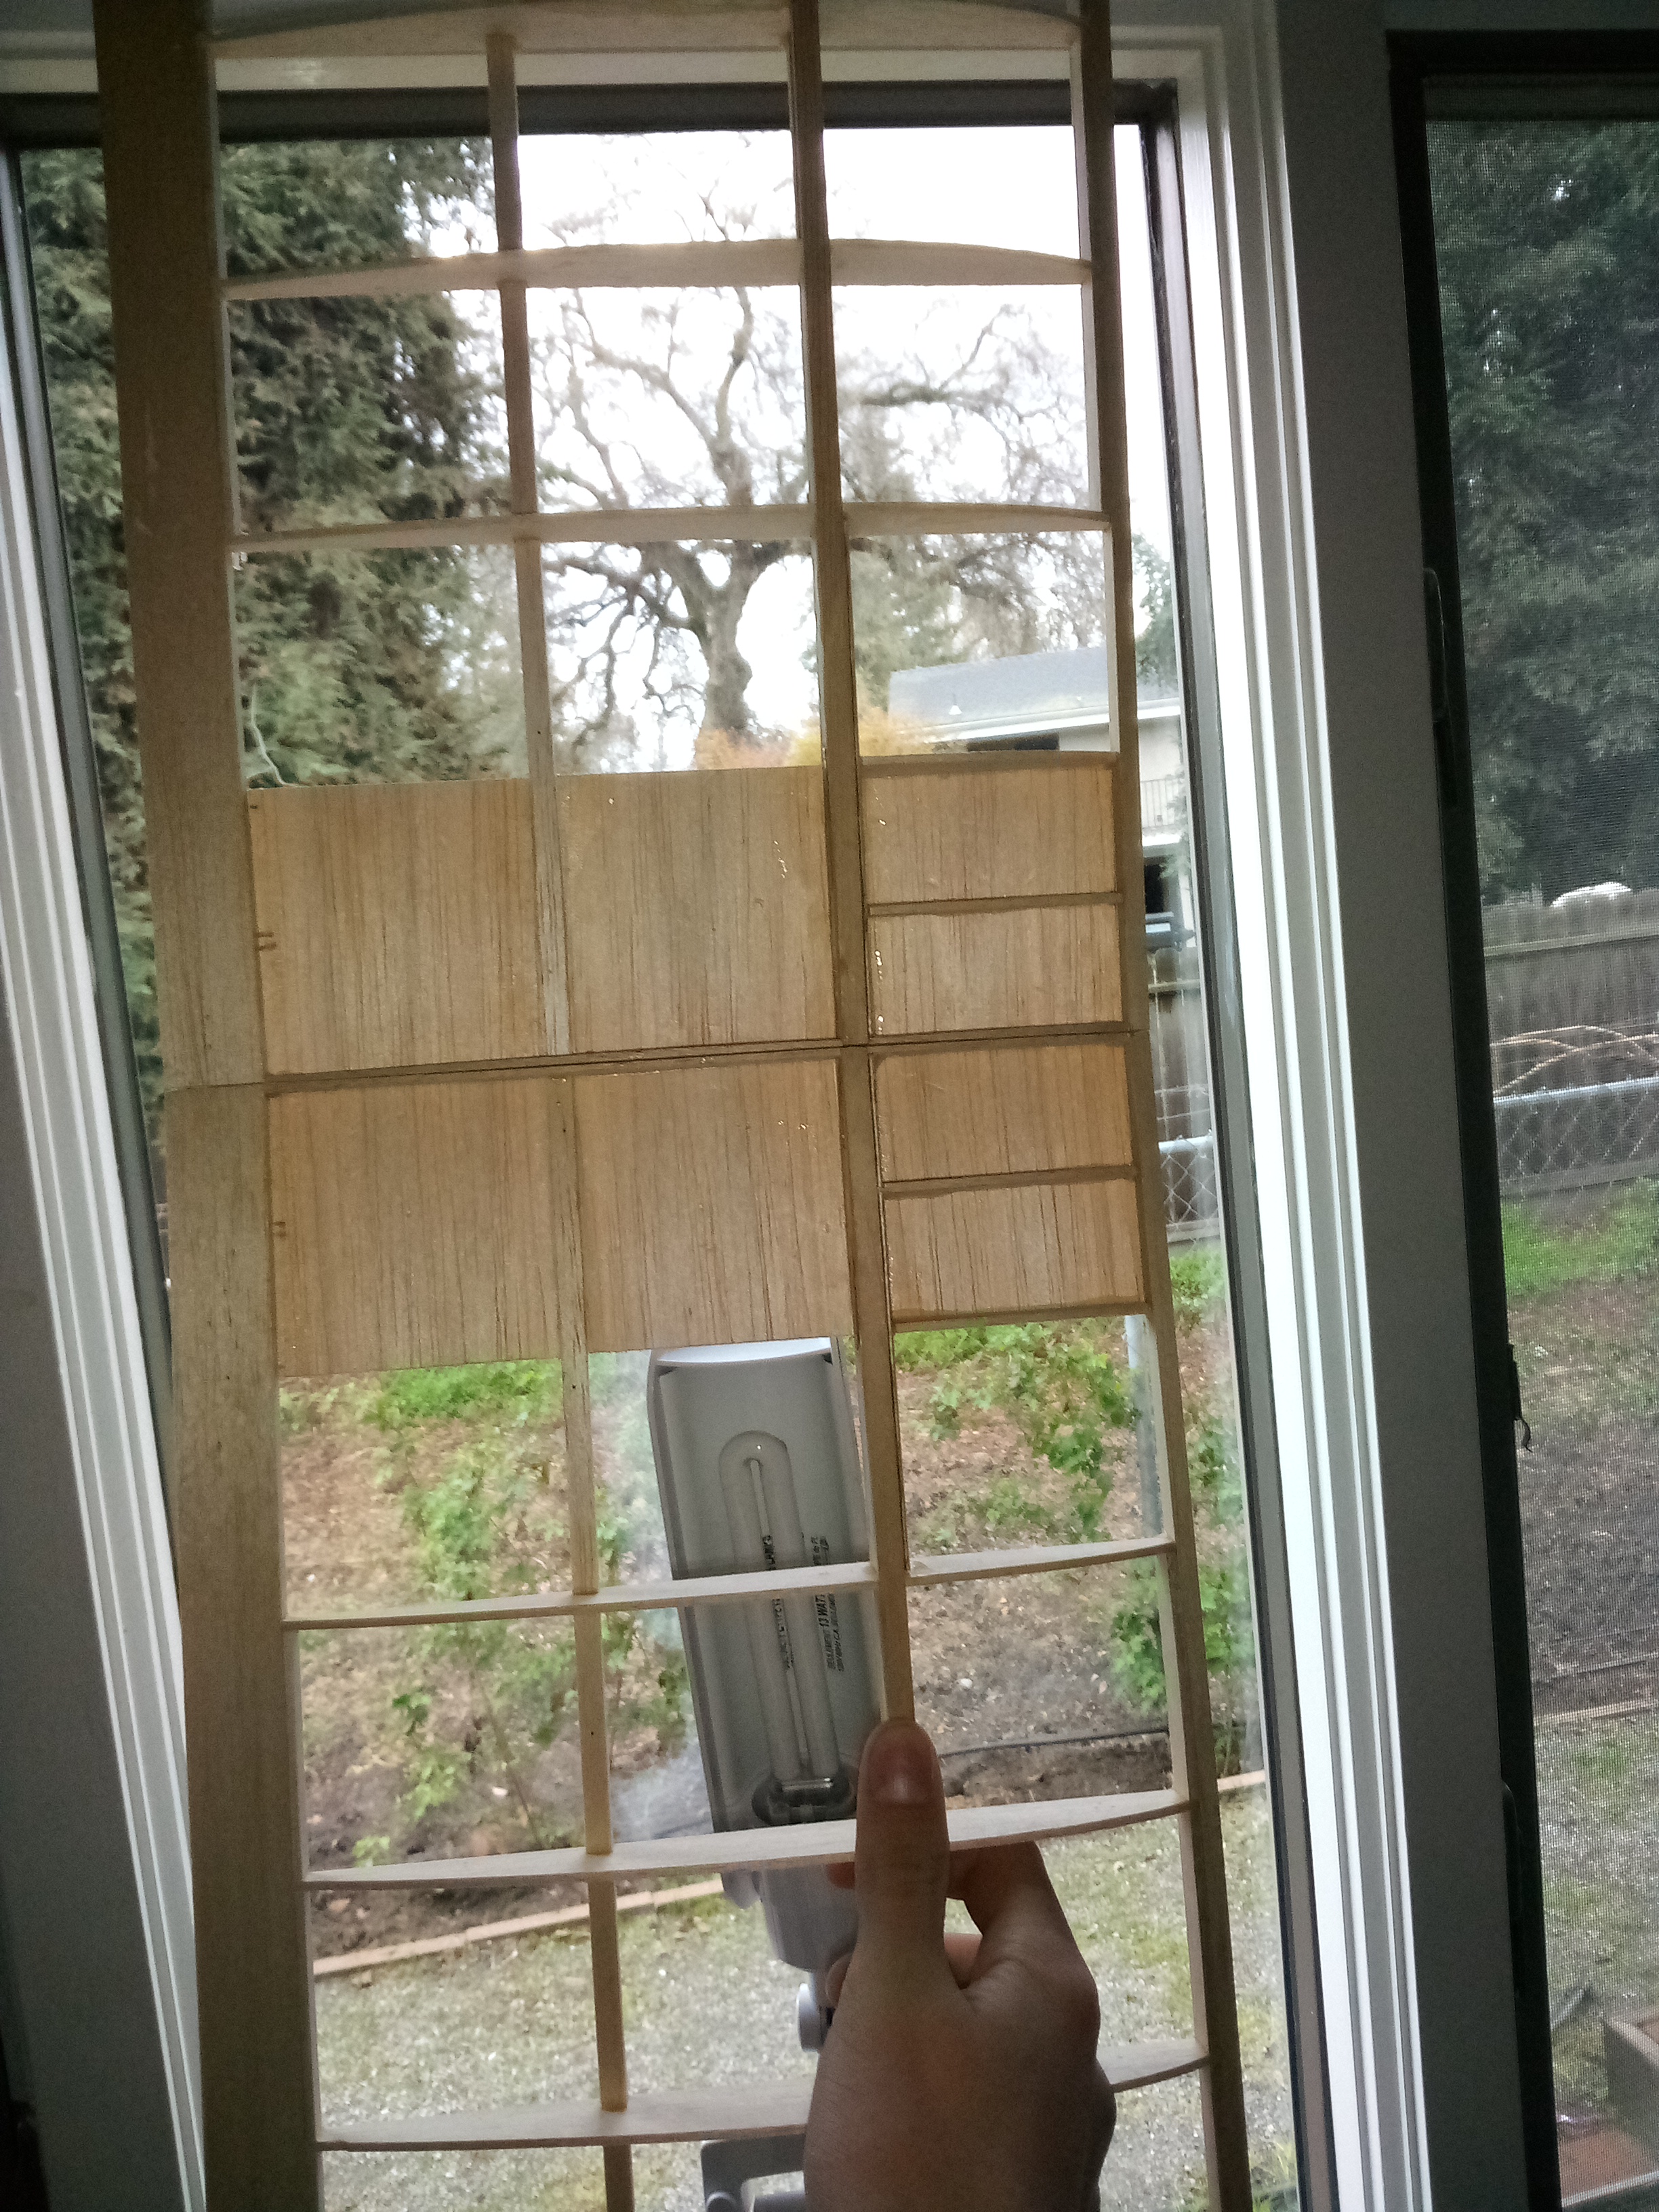
I am choosing to build on the nose to use a smaller spinner. The prop adapter in the photo is put as far in as it can. I will sand the motor mount's circle shape down to fit the fuselage, and build across the gap with a harder wood (not balsa) because I know from experience that hard landings can dent balsa.
I don't want to do any work on the nose until I get the spinner* so I can work with it. In the mean time, I have servos and pushrods to install and a the rear fuselage needs sheeting. After that, the wings:eek:


*This might not be anytime soon because I am currently saving up all funds to purchase a new TX. I'm about 30% there so far.
 

GliderFlyer

Elite member
The wings are next. I need to get the parts for spoiler construction though. I will be building both inboard panels at the same time, to save time and to be consistent. I dry fitted the ribs to the spars.
IMG_20210222_195534[1].jpg

From front to back: A B C
IMG_20210222_195620[1].jpg

that's A grain, B grain, C grain. I thought it would be stronger if I line it up that way, but I don't think it will make a difference if I crash it hard enough.
 

Bricks

Master member
The wings are next. I need to get the parts for spoiler construction though. I will be building both inboard panels at the same time, to save time and to be consistent. I dry fitted the ribs to the spars.
View attachment 193505
From front to back: A B C
View attachment 193506
but I don't think it will make a difference if I crash it hard enough.

Never does ,,,,,,,,:love: I am surprised to see grain running in different directions for ribs
 

GliderFlyer

Elite member
I went to the hobby shop today to pick up some wood for the wing and spoilers. I got every part I needed, except because of balsa shortages, they were out of most 3/32 balsa strip sizes. So I got two 3/32x 1'' balsa strips that I will strip into 1/4 inch and 5/16 inch pieces. It turns out that they were out of 1/4 x 1'' trailing edge stock too, but there was 5/16 x 1 1/4 trailing edge stock in 1/4 x 1'' holder. I didn't realize that until I got home:(
I guess I could cut it to size, or keep it the same. Is there a rule for spoiler size in RES or Nostalgia sailplanes?
 

GliderFlyer

Elite member
I started the wing today. The balsa striping did not go well(I do not have a balsa stripper, so I attempted to make one, but that didn't work well, destroying one of my 3/32x1" strips) so I ended slicing the 3/32x1" balsa in half . There is a quarter inch excess at the top, which will be trimmed later. I put wax paper over the plans. before beginning. Because one of the 3/32x1" strips is not useable for the leading edge, I will probably use some of my own wood, that is thicker than 3/32. I have 1/8 balsa, which should be fine, right?
IMG_20210302_114636.jpg

IMG_20210302_114644.jpg
IMG_20210302_114657.jpg
 

GliderFlyer

Elite member
More progress today:
I glued in the leading edge, using 1/8" balsa for the rib reinforcements.
Glue is drying
IMG_20210303_094647.jpg

Here's what the trailing edge rib reinforcements look like after they are trimmed. It blends in OK.
IMG_20210303_094713.jpg

All the glue on the wing was applied using a paintbrush. It seems to work better than using the glue bottle. I hope that the leading edge rib reinforcements blend in OK because the leading edge is spruce, while the reinforcements are balsa.
 

GliderFlyer

Elite member
I actually got a lot of work done on the wing yesterday, but didn't get around to posting it. I drilled the holes in the root ribs for the jointer, that went well. I also installed the sheeting on the bottom of the wing. This was the only part of the wing that I used thin CA for. Then I glued in the root ribs, which also went well. Then I glued in the top spar. After that, I glued in the front root rib shear, using epoxy. Finally, I glued in the front parts of the W1a ribs, which I forgot to take pictures of. All that is left for the inboard panels is the shear webs, spar spacers, and dihedral tube installation.
Pics:
IMG_20210303_112832.jpg
IMG_20210303_123137.jpg
IMG_20210303_113839.jpg
IMG_20210303_125026.jpg
 

GliderFlyer

Elite member
I have fallen behind on posting. Here is a list of all the things that have happened:
shear webs glued in
Spar spacers glued in
Bottom sheeting cracked (dang thin CA)
Excess spars, leading & trailing edges trimmed at the root,
root rib sanded for a flush fit (lots of sanding)
jointer tubes roughened and cleaned
jointer tubes spot epoxied
jointer tubes glued in with microballoons
rear shear web glued in.
Lots of photos for you all to see:
 

Attachments

  • IMG_20210310_102007.jpg
    IMG_20210310_102007.jpg
    2 MB · Views: 0
  • IMG_20210310_104048.jpg
    IMG_20210310_104048.jpg
    1.9 MB · Views: 0
  • IMG_20210310_104236.jpg
    IMG_20210310_104236.jpg
    2 MB · Views: 0
  • IMG_20210310_121029.jpg
    IMG_20210310_121029.jpg
    2.1 MB · Views: 0
  • IMG_20210310_131330.jpg
    IMG_20210310_131330.jpg
    1.8 MB · Views: 0
  • IMG_20210310_131335.jpg
    IMG_20210310_131335.jpg
    1.8 MB · Views: 0
  • IMG_20210310_131342.jpg
    IMG_20210310_131342.jpg
    1.5 MB · Views: 0
  • IMG_20210310_131529.jpg
    IMG_20210310_131529.jpg
    2.7 MB · Views: 0
  • IMG_20210310_131547.jpg
    IMG_20210310_131547.jpg
    2.2 MB · Views: 0
  • IMG_20210310_131615.jpg
    IMG_20210310_131615.jpg
    2.3 MB · Views: 0
  • IMG_20210310_133218.jpg
    IMG_20210310_133218.jpg
    1.8 MB · Views: 0
  • IMG_20210310_134308.jpg
    IMG_20210310_134308.jpg
    2.2 MB · Views: 0
  • IMG_20210310_135446.jpg
    IMG_20210310_135446.jpg
    1.9 MB · Views: 0
  • IMG_20210310_140200.jpg
    IMG_20210310_140200.jpg
    2.1 MB · Views: 0