AP Mini Argus (FT Power Pack A | swappable)

AircPirateNinsei

airc-pirates.com
Here I present you the little brother of Argus, the Mini Argus (prototype) with only 650 mm (25.59 in) wingspan.

ap_mini_argus_001.jpg

ap_mini_argus_002.jpg


You will only need one sheet Flite Test Water-Resistant Foam Board By Adams (20 x 30 in) and a Flite Test Power Pack A (or compatible electronics) for the build. Since I only have one FT WR Foam Board sheet left, which I still need to finish the Thunderbolt, I had to use Airplac Premier Foamboard, which unfortunately has considerably more weight. The AUW of my Mini Argus with a 2s 950mAh Turnigy nano-tech battery is 265 g (9.35 oz). If you build the Mini Argus with Flite Test Water-Resistant Foam Board By Adams, you will save about 44 g (1.55 oz) and get far below the magic 250 g (8.82 oz) limit. The Mini Argus has a KFm4-airfoil, which is a good choice for aerobatic planes. I'm looking forward to the maiden flight! :cool:
 

BATTLEAXE

Legendary member
I agree with @Merv it is a great looking plane, It does look like it would be a good design for sport aerobatics and It's impressive you can do it all with one sheet of FB. Have you maidened it yet?

Given it has a symmetrical wing it could be good for 3D as well, move the aileron hinge line forward by 1-1.5" and enlarge the control surfaces in the tail and you might be onto something. Gives the builder versatility for the type of flying they choose.

Do you have pdf plans for it?
 

FishHawk

Well-known member
I just finished cutting out the parts. The assembly looks fairly straight forward, but I do have one question. The plans show a skewer and a wire to tie the elevator sides together. How do they fit together with the elevator?
I did make one small mod while cutting out the foam, I increased the rudder size by 25%. The rudder looked like the original size to me, and CL stunt planes typically went with smallest vertical stab that would keep the aircraft tracking straight in the turns. And I can always cut it down if it is to big.
Thanks hope it flies as good as it looks.
 

AircPirateNinsei

airc-pirates.com
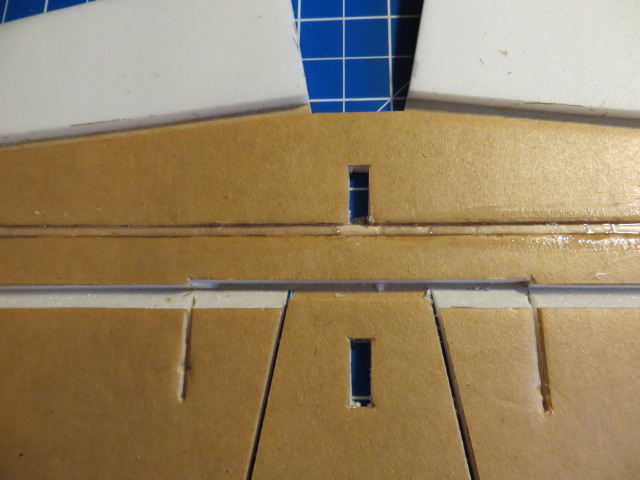
With the BBQ-Skewer (part #5 - H-STAB REINFORCEMENT) you strengthen the horozontal stabilizer. Just glue it in the cavity area. Glue the steel wire (part #4 - ELEVATOR COMBINER) into the two score cuts of the elevators to connect them. That's it. Unfortunately I don't have any pictures of the construction of the Mini Argus. Here are a few pictures (from the larger Argus which has a double layer H-STAB):

IMG_7763.JPG

IMG_7766.JPG

IMG_7768.JPG

Good luck with the maiden flight. I haven't made it yet.
 

FishHawk

Well-known member
With the BBQ-Skewer (part #5 - H-STAB REINFORCEMENT) you strengthen the horozontal stabilizer. Just glue it in the cavity area. Glue the steel wire (part #4 - ELEVATOR COMBINER) into the two score cuts of the elevators to connect them. That's it. Unfortunately I don't have any pictures of the construction of the Mini Argus. Here are a few pictures (from the larger Argus which has a double layer H-STAB):

View attachment 153510
View attachment 153512
View attachment 153513
Good luck with the maiden flight. I haven't made it yet.

Thank you for the clarification. The plans showed the skewer that strengthens the horizontal stabilizer, and what I thought looked like a second skewer running beside the wire that joins the two halves of the elevator. From your pictures I see that it is a cutout allowing the wire joining the elevator to pivot freely.
MiniArgusTail.jpg
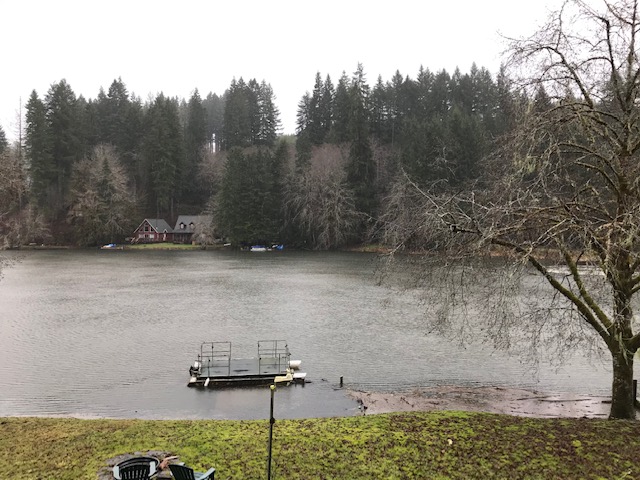
You will probably be able to maiden your Mini-Argus first, I live on the wet side of Oregon. We have had 3 inches (8 cm) of rain since the beginning of the year, and they are forecasting rain and snow for the next 10 days.
Fishhawk_01-06-20.jpg
 

FishHawk

Well-known member
Nice lake lot, hard to tell but is that supposed to be a pier that goes out to the raft?
Our dock, which is normally 9 inches above water, is directly inline with the patio boat and about 3 inches under water. The stuff just to the right, is just debris that the wind has blown against the pilings on the right side of the dock.
 
If I am seeing this right in the photos and plans, this appears to be symmetrical airfoil -- is this correct? If so, this design might be exactly what I have been looking for -- a simple to build, mid-wing symmetrical airfoil, for a PowerPack A (or maybe even an F) to learn acrobatics on. This looks really nice!
 
Just wanted to mention that I noticed a missing black cut line in the plans on the bottom plate of the fuselage. Not really an issue since I know what to do there, but worth mentioning for any future edits.
 

AircPirateNinsei

airc-pirates.com
Here is a video of the Mini Argus in flight with a 2s setup:

Since I built the Mini Argus out of the heavier white foam board, it weighs about 45 g (1.59 oz) more than if I had built it out of Flite Test FoamBoard and these 45 g are noticeable with a 2s setup. I will test a 3s-Setup!
 

ACE62

New member
Beautiful little gem. So after maidening you have confirmed the CG as indicated on the plans, correct?
What foam board did you use?
Thank you.
Greg
 

AircPirateNinsei

airc-pirates.com
@ACE62
Small and handle! After the first flight and compensation of the elevator trim the CG is 30 mm behind the leading edge of the wing. I still have to adjust the build plan. The ailerons have a deflection of 15 mm and the elevator of 13 mm.

I have used the Airplac Premier form board. A 650 x 500 mm board weighs 154 grams (474 grams per square meter). It is very stable but also heavy.
 
I finally got around to cutting the templates, and there are a few notes I have made which I wanted to pass along. Most of this applies to building via templates, without the use of a laser or needle cutter.

1. The gaps for the control surfaces could be reduced to just cut lines. I intend to just use a skewer or control rod to open up the gap, which I think is probably sufficient for most people and will make the plans a little easier.
2. The horizontal stabilizer is a difficult piece to cut for less experienced builders such as myself. I now realize I probably was over thinking that part of the template since all I need to do is just make enough room to put the wire in after cutting the bevel. However, I think it's important to explain what I did and how I interpreted the plans to help improve them. The plans have a long and short section which are marked to remove the foam for support wires and I attempted to cut those sections out when making my templates to be able to trace that marking on the DTFB. Unfortunately, because I didn't think about it I ended up cutting away the middle "U" shaped part which connects to the vertical stabilizer.

Thanks for making and sharing this project with everyone. It's super cool! =)
 
I cutout all the parts last night, and started building it tonight. It comes together pretty quickly.

I still need to put the wire in the h-stab and cut the bevel, and assemble the v-stab/h-stab part, but I took some photos of my progress.

IMG_20200227_214612.jpg

I probably could do a better job on the wing next time if I take out the center cutout and along the two parts using that. As result, my leading edge is probably a bit wider than it should be, but it seems like it should work.
IMG_20200227_205941.jpg IMG_20200227_214626.jpg


The tail is a bit tricky, and you can see some of my sloppy cuts in the pictures which I am hoping won't be an issue.

IMG_20200227_214035.jpg

How well do you think a a V-tail would work? I ask because my tail cuts may cause the tail to break when I try to fit it in. I am thinking if that happens I might still be able to hack in a vtail rather than build a new fuselage. I know that won't work as well for acro/3d training though.
 
Last edited:
I finally put it all together! I need to take some pictures tomorrow, but my all-up weight with DTFB (before minwax & paint) is 228g, with a Tattu 2s 650mAh battery, and along with a FrSky FL-VSS battery sensor and a S6R receiver. I went a little heavy with gluing the wing in place, so I am sure it could be at least 5 grams lighter. This is looking to be the smallest and lightest plane I have built so far, though I haven't built many.

Unfortunately, I probably won't be able to maiden it right away. The weather forecast down here in SoCal is mostly rainy, and looks like it will be for a few days. On the plus side, this gives me plenty of time to paint it before the maiden flight. I've never really liked flying all-one-color planes anyway -- my past experiences have I tend to loose orientation due to lack of contrast, and they end up lawn-darting. Though this thing is light enough, it might not matter too much.

@AircPirateNinsei Did you have any luck with a 3s setup? I tried balancing a 3s 850mAh battery on top of the nose of the plane, and it seemed like it was going to be very nose heavy with that battery. I probably could just add some weight to the tail to balance it out, but I am curious how things turned out for you.