Zetoyoc
Elite member
I have been following a lot of posts and threads and have been invited to join all sorts of builds. A goblin group build, a mustang build a p-38 and even an A-10 build. ALl of which sound really fun, but i told myself i wanted a nice slow high-wing plane like a cub or storch, maybe a bushwacker. so I listened to none of that and started, somewhat accidentally, a p-47.
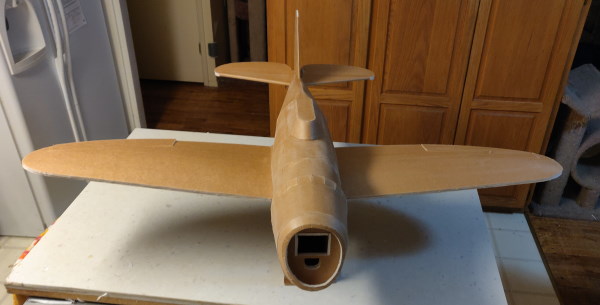
I had most of the plans previously cut out and it only needed 3 more sheets of foam to complete the job. I just happened to have 3 sheets remaining of the ftfb. I guess i had better use it to finish cutting the parts at least before i accidentally use the rest of it on some thing else. I did plan to stop there.
but I received from my parents, er i mean Santa, a gorgeous new large cutting mat. I couldn't stop using it. I cut all the score lines cleared out the channels even did the beveling.

very quickly turned into this

That was yesterday, today, .. ill post about today soon...
-J
I had most of the plans previously cut out and it only needed 3 more sheets of foam to complete the job. I just happened to have 3 sheets remaining of the ftfb. I guess i had better use it to finish cutting the parts at least before i accidentally use the rest of it on some thing else. I did plan to stop there.
but I received from my parents, er i mean Santa, a gorgeous new large cutting mat. I couldn't stop using it. I cut all the score lines cleared out the channels even did the beveling.
very quickly turned into this
That was yesterday, today, .. ill post about today soon...
-J