Autonomous paramotor for aerial filming

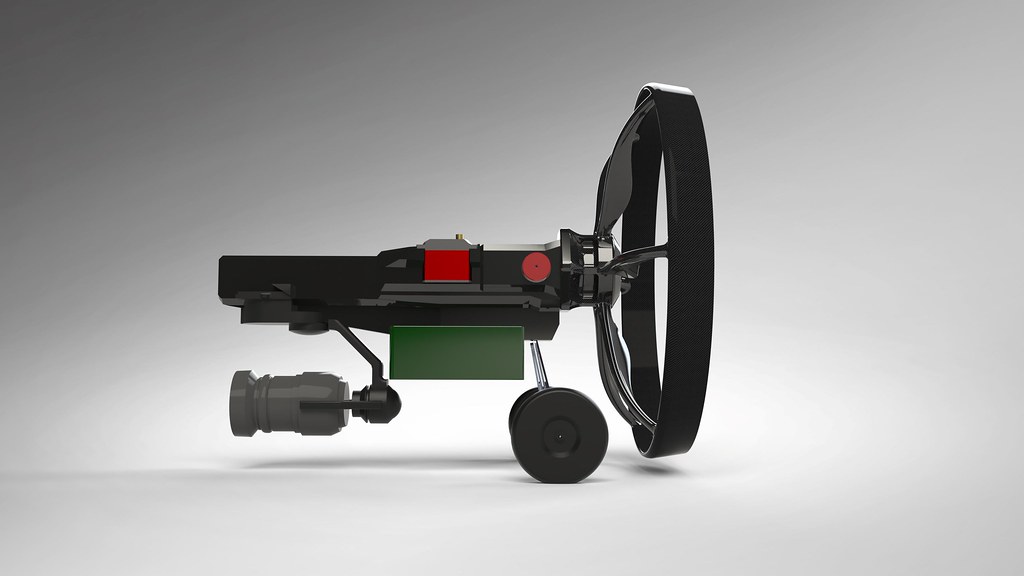
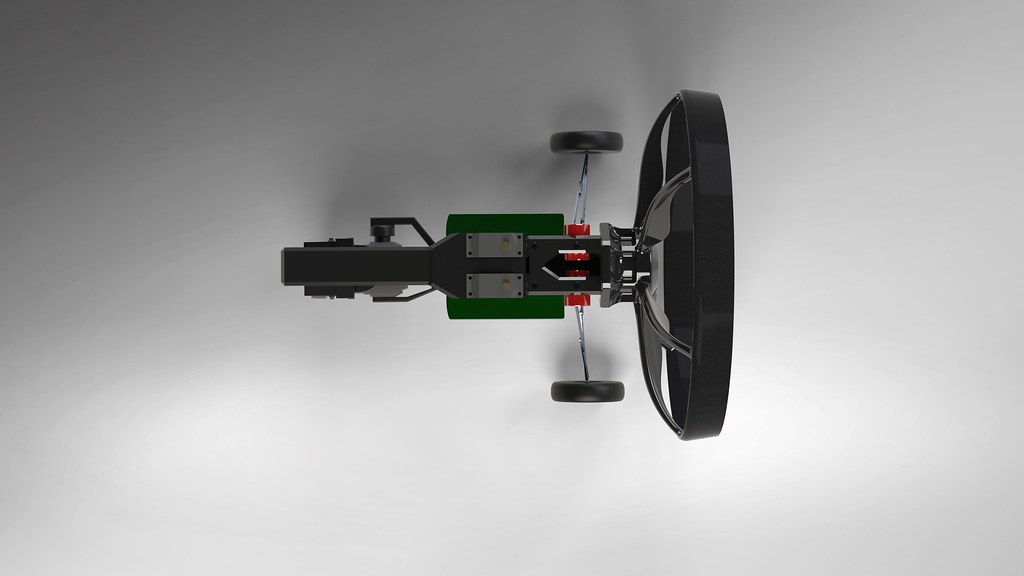
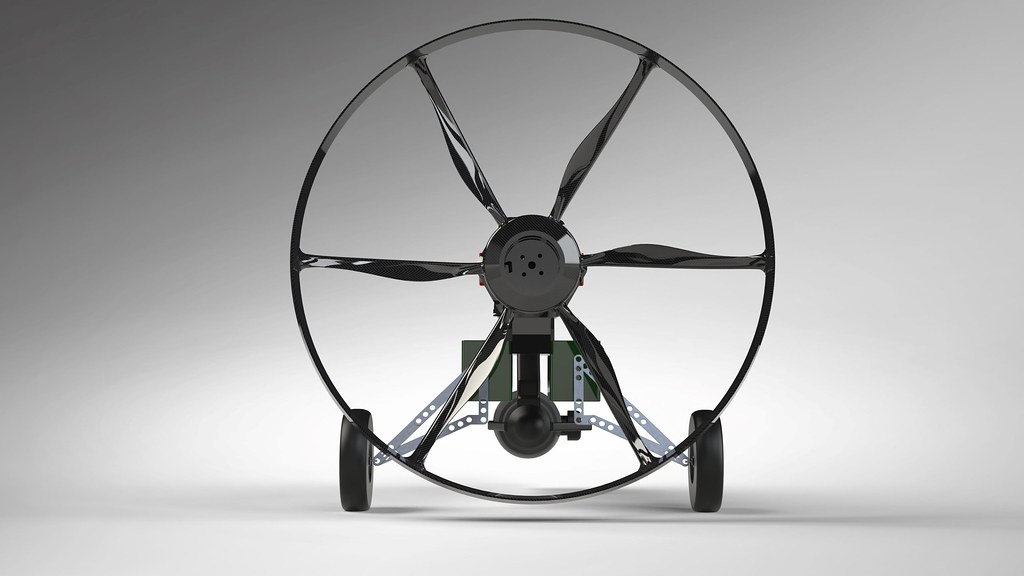
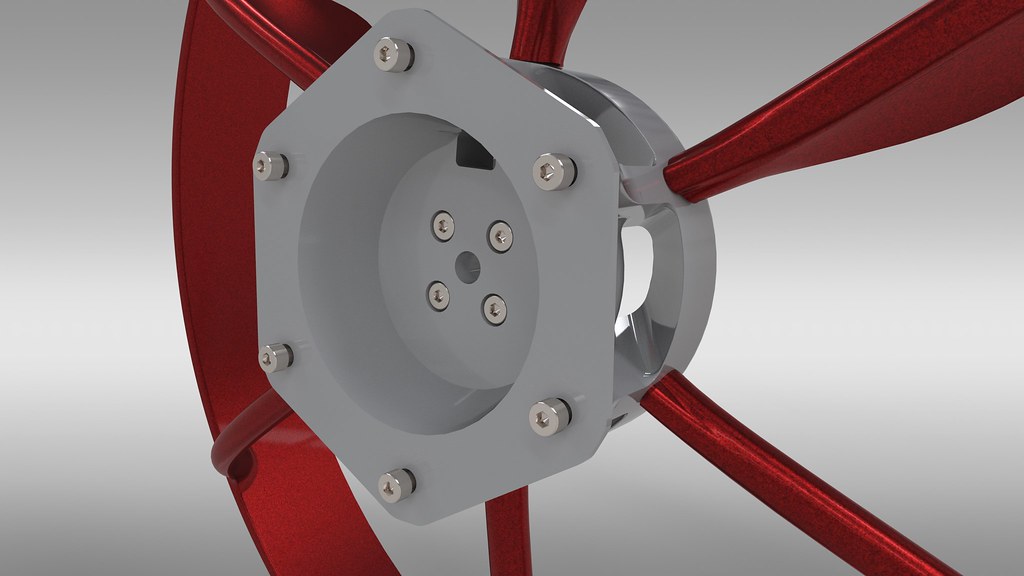
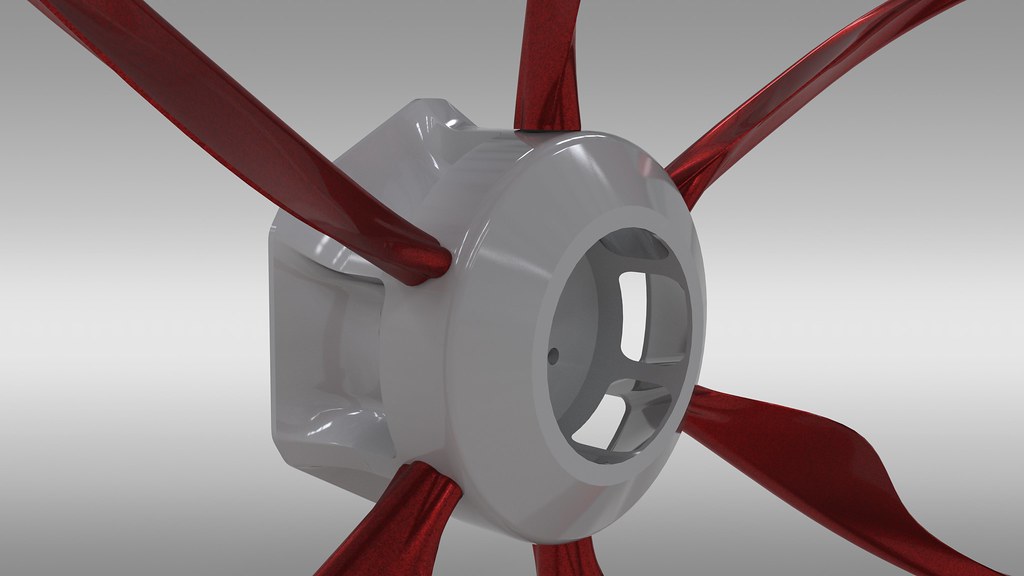
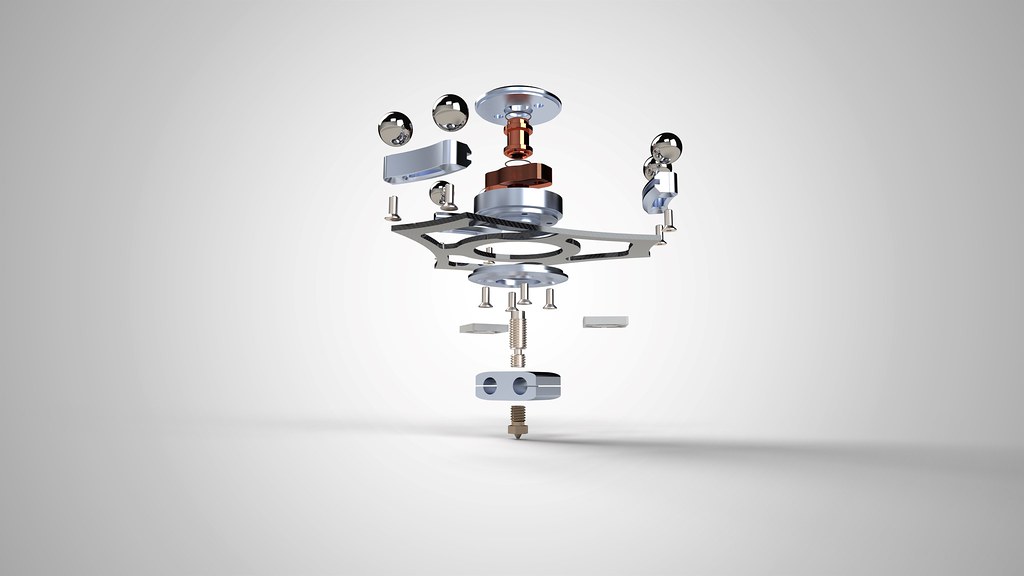
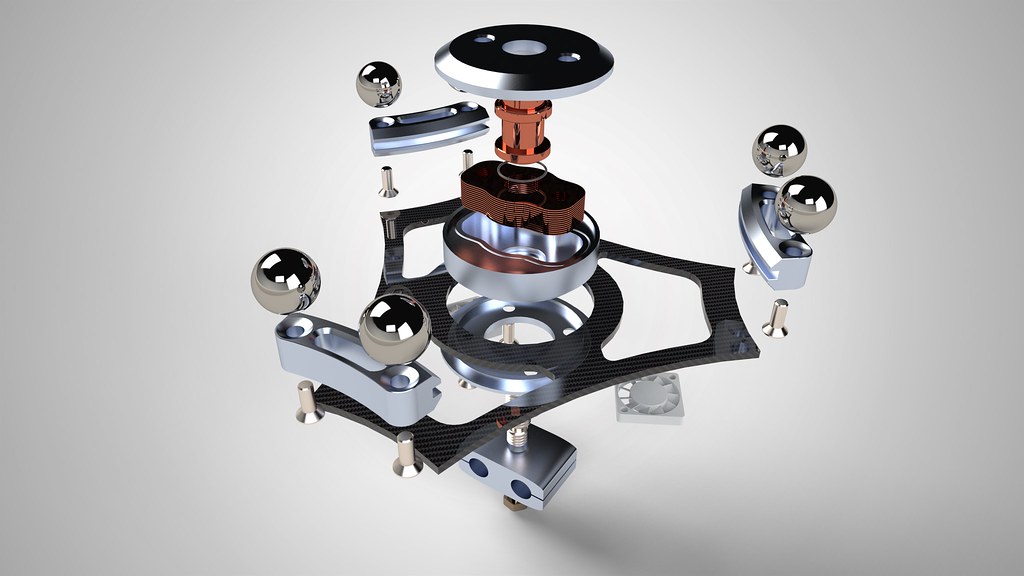
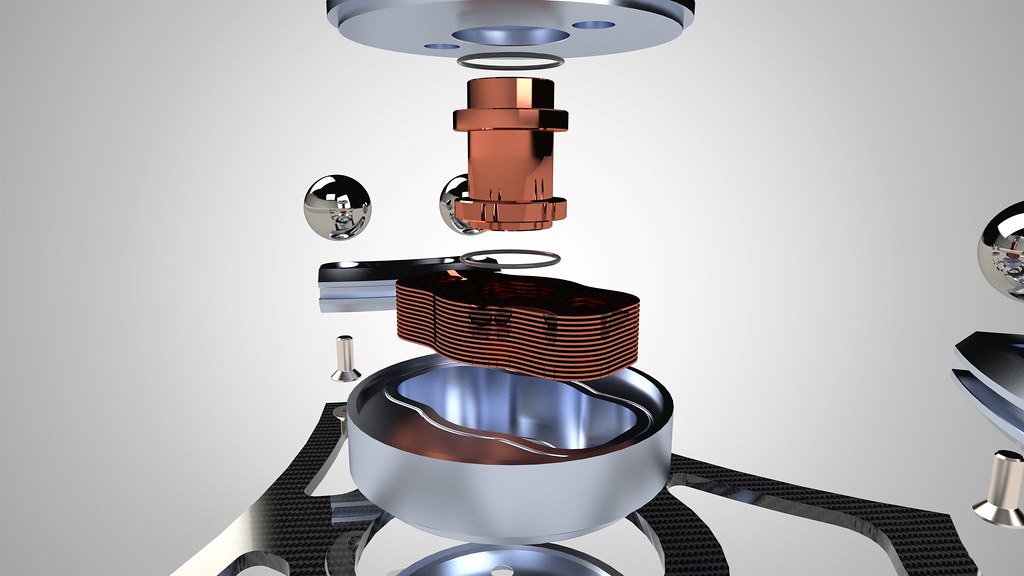
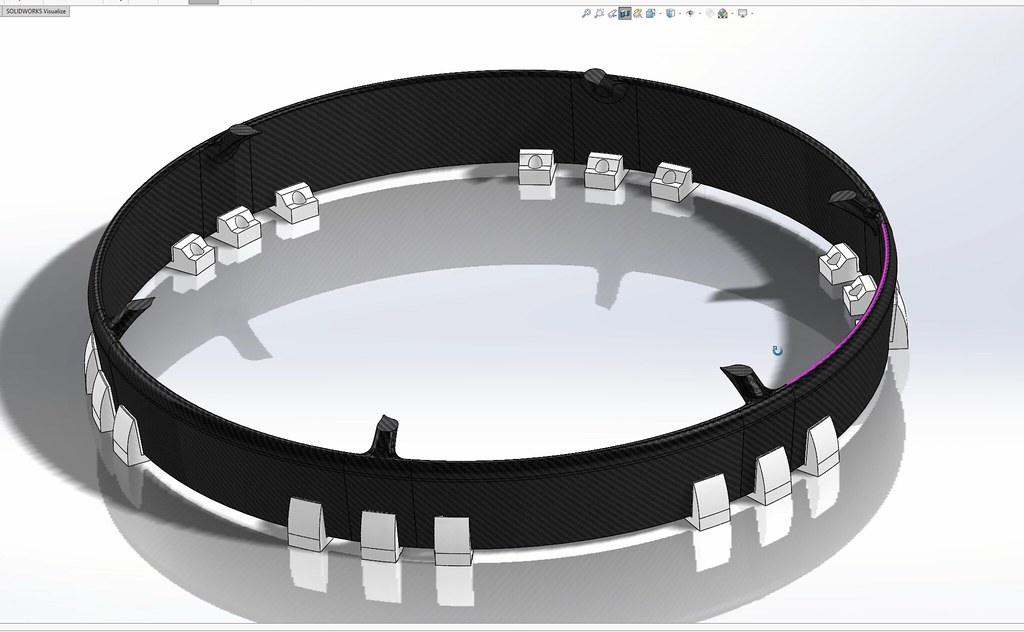
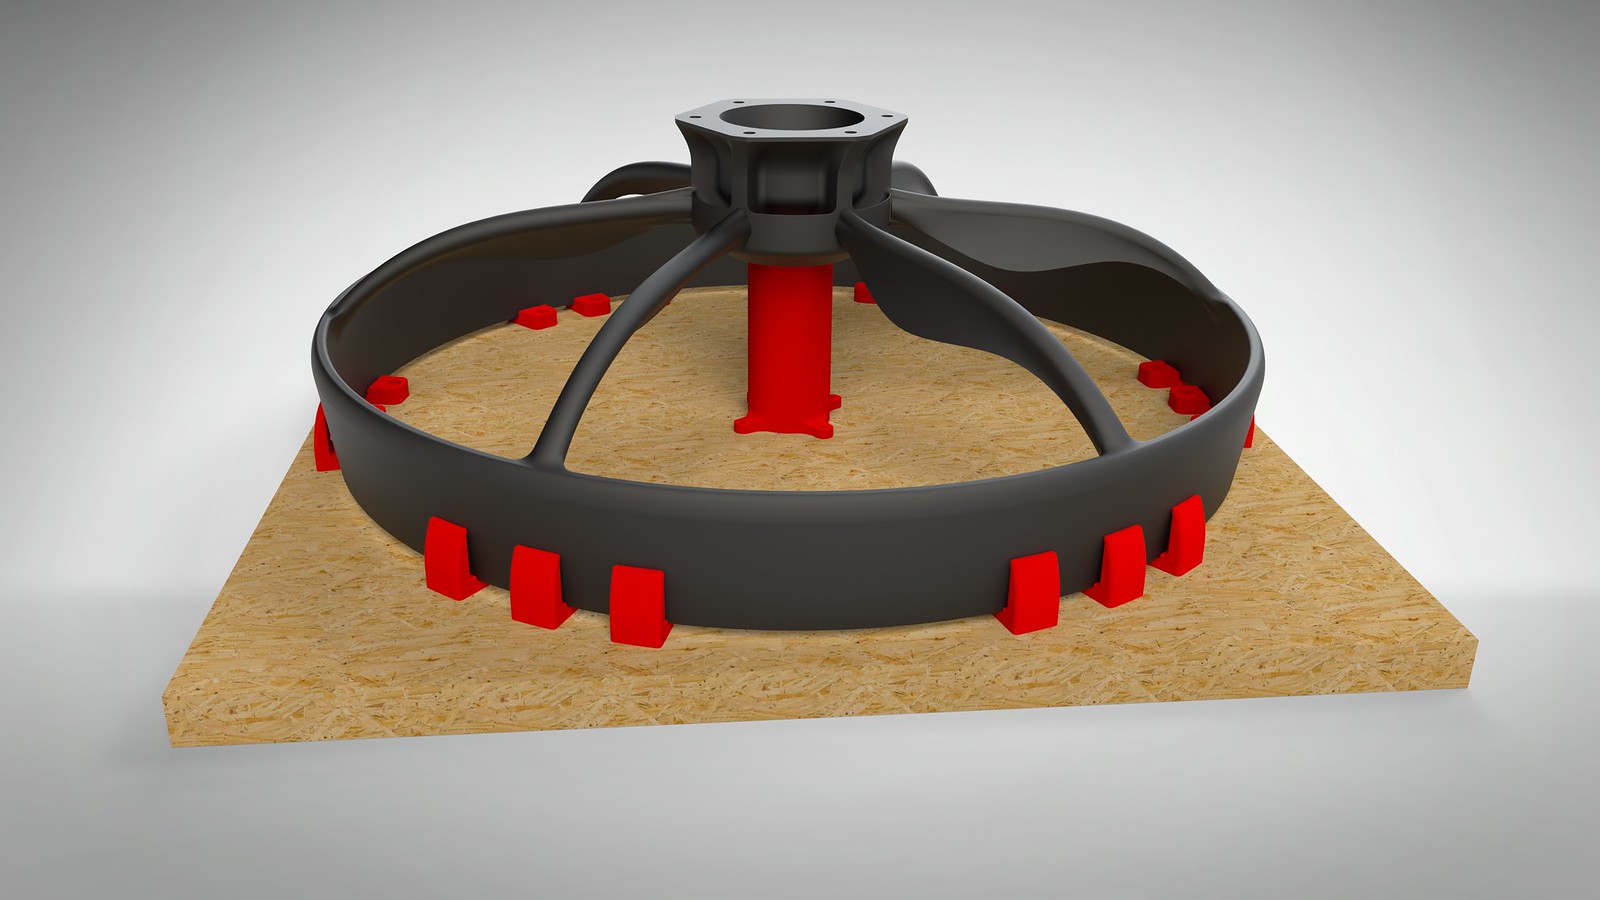
I'm working hard behind the scenes on the design and build of the paramotor but there are definately a couple of things I can share. One of those things is the adapter block that I made just before I left for my ski trip. The idea of this block is that it will make it easier to mount it to the main frame of the paramotor. At first I planned to attach the motormount directly to the mainframe, but later I decided against it because of its complex shape (almost like a snowflake). This adapter converts that to a much more convenient hexagonal shape and bolt pattern. As a bonus it also allows me to improve the airflow to the motor cooling slots.

25285404637_f929906e85_b.jpg

40124785152_c8943343e8_b.jpg


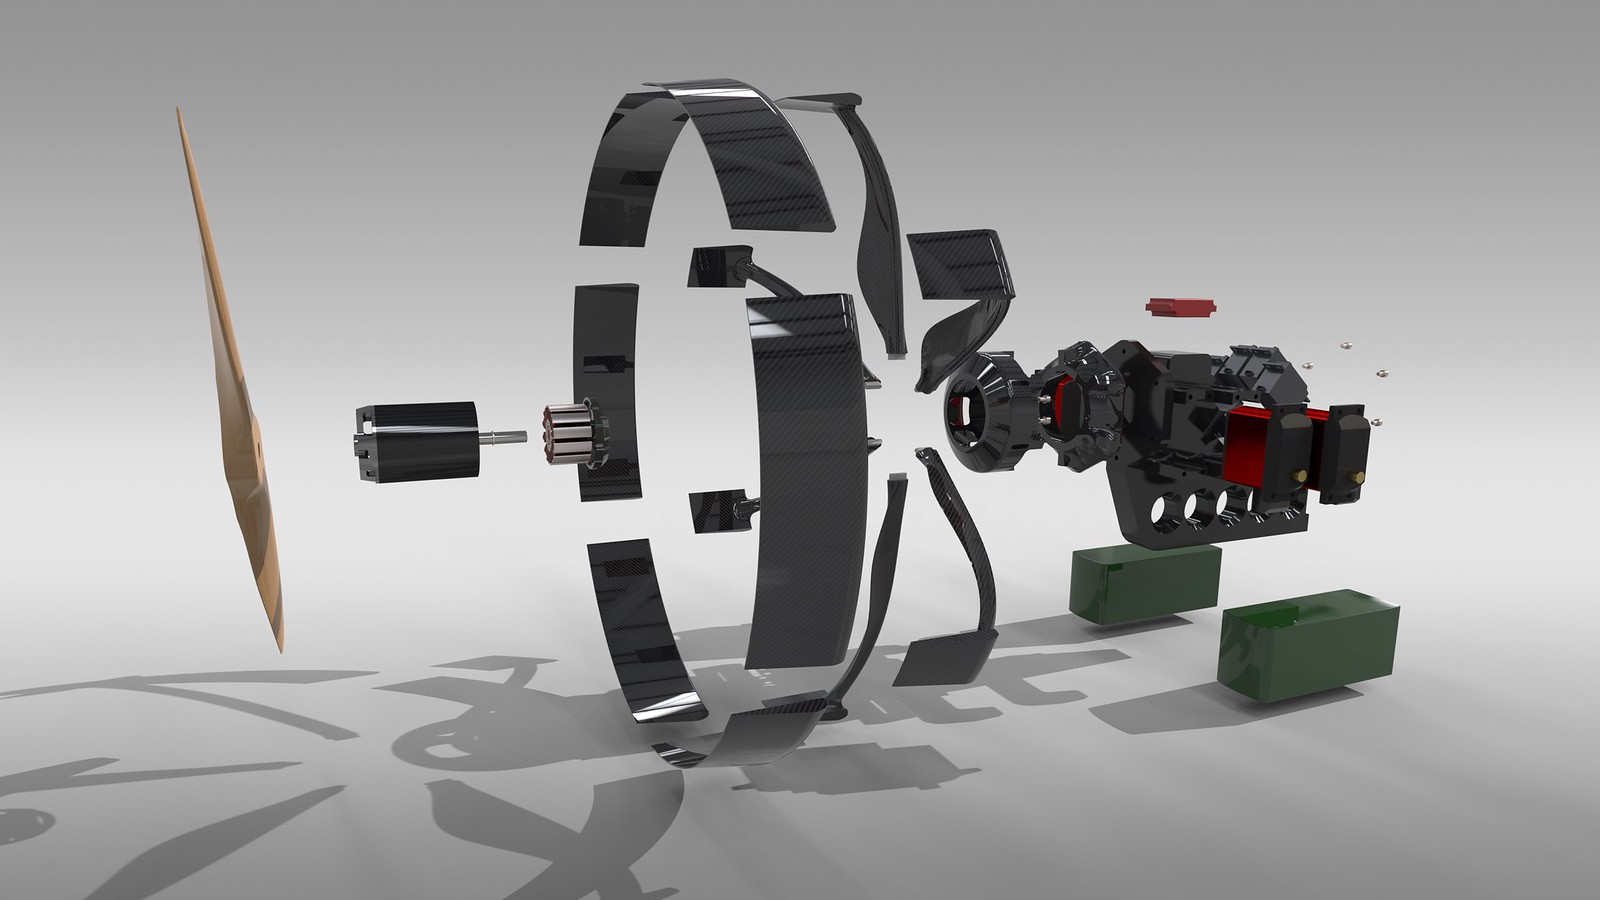
Today I also recieved the final components that I need to get the paramotor to fly (not including the flightcontroller, I will save that for phase 2 when the model flies nicely)

40157287811_1bb4c68575_b.jpg


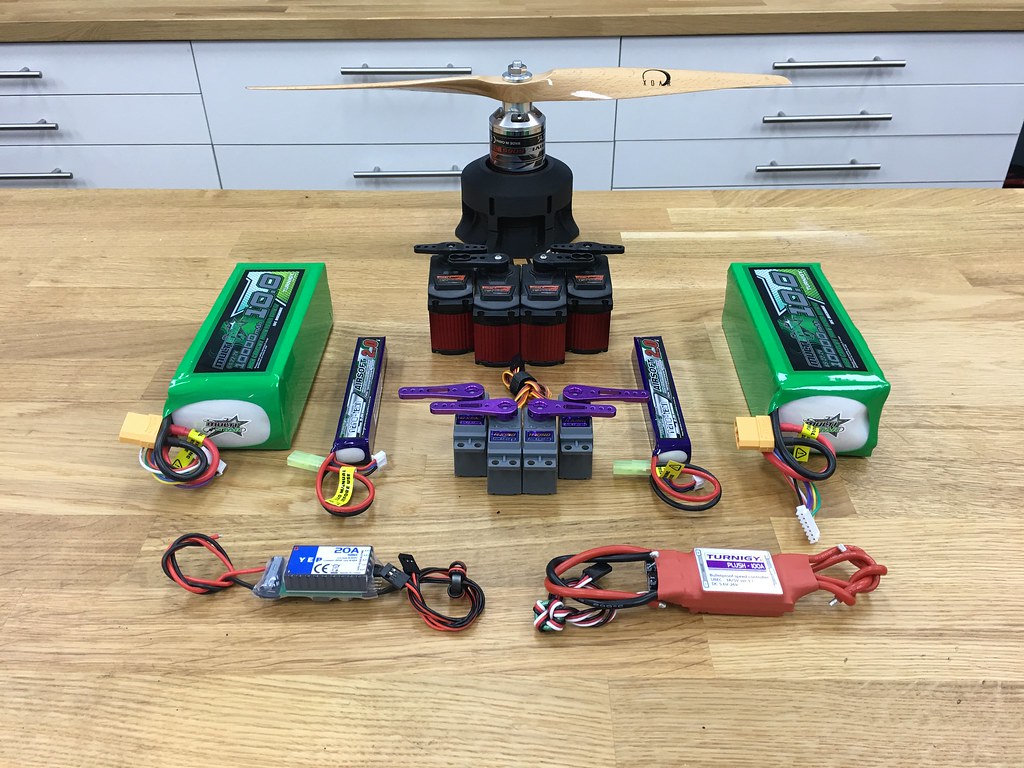
So what do you see here?
2x - 10.000mAh 6S battery (motor)
2x - 2000mAh 2S battery (servo's and other electronics)
4x - HK15138 servo (big-ears and speedbar)
4x - TS-700MG servo (weightshift and brakelines)
1x - 20A SBEC
1x - 100A PLUSH ESC
1x - 5065 320KV aerodrive brushless outrunner

I added the 2S batteries to have the electronics and servo's run seperately from the motor, so even when the main batteries are drained the model will still be controllable.

I haven't finished the new video about the paradrone but I did upload another video that might interest you. It is about my goals and other projects (besides the paradrone, for example a large delta 3D printer that I am currently building) I have planned for 2018.


Tomorrow or the day after I expect to finish the video about the 3D printing. I will share it as soon as it is uploaded!
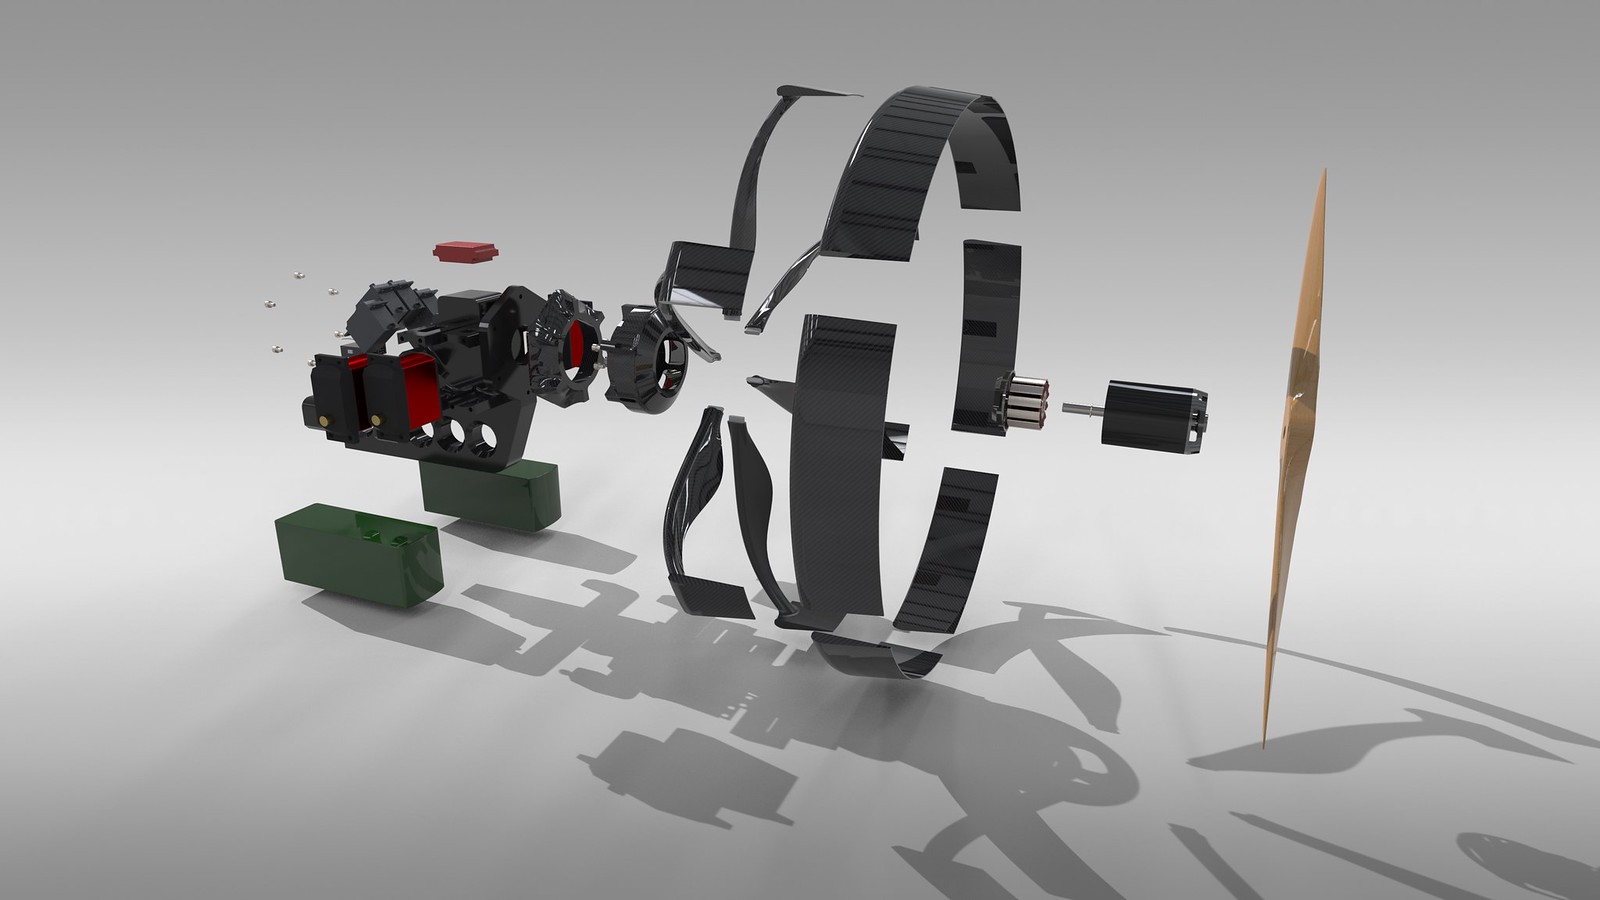
 
The video I promised is finished! It had some extra challenges because this is the first video I've used my new teleprompter. It should improve my presentation a lot but as with everything; it takes practice! In this video I talk about the printing and the challenges I encounted, enjoy!
 
Me neither! Still quite a lot of things to do though. next is to assemble the cage and for that I first have to make a jig that ensures the dimensions are correct (especially taking care of limiting the "out of roundness" of the propcage)
 
A couple weeks have passed but I'm back working on the paradrone! For those that didn't know, I am working on two projects and switch about every week/two weeks between them. So sometimes there will be a delay.

The last few weeks I continued working on the Delta 3D printer, the endeffector to be precise. I am really happy with the design and really look forward to making it! It's a really cool watercooled one. For those that are interested, here is a link to the build video and a couple of renders of the assembly.


And the renders:

This endeffector is the "printhead" of my delta 3D printer. This picture shows it assembled with the arms attached.
40360098281_9f00cbb34d_b.jpg


Exploded view of the endeffector with all the components.
39463227335_be9742ec4d_b.jpg


Same, other angle
38550253790_10fecf558f_b.jpg


Detail shot of the watercooling components
38550252810_c597fa0e89_b.jpg


So what progress is made on the paradrone? well I made a building/assembly template for the propeller cage. It excists out of a lot of parts and it is really important that it is as round as possible. The propeller is really close to the inside of the cage and there is a significant chance that the propeller will touch the inside of the ring when I do not assemble it correctly.

I made small holders for the parts that are shaped the same as the ring itself. These will be screwed onto a wooden plate and hold all the parts.


40581060131_897b1ffa56_b.jpg


I'm printing these holders as I am writing this. I have to make 18 of these pieces, that will take about 6 hours of printing.
 

JamesWhom

Project Air on YouTube
Hey Stefan!

Absolutely wonderful project. I'm so impressed from the sheer technical competence you have with designing all of this CAD stuff - I'm hopeless at that. :) I've spend a good half an hour going through this thread and watching your videos. They're great. As the editor of the articles on flitetest.com (the main site for Flite Test), I'm pleased to let you know that we'll be featuring this project this Friday (9th March) as our weekly 'Community Spotlight'. This is a new thing we've started doing as a way to highlight standout builds from our community. There have only been two others so far.

Anyway, just thought I'd let you know so you can watch out for that appearing soon. :)

Many thanks!
- James
 
Hey James, Thank you for the kind words!

It is a fun project with a couple of challenges. Especially when I get to the actual laminating part of the build. I'm sure there will be a couple of obstacles to overcome before it's finished but that is also what makes it interesting.

It is really kind that you want to feature the build in an article on the main site, I'm certainly looking forward to reading it!
 
Last edited:
Really nice article! To celebrate I'm going to upload another video about the project (in a couple of hours)!

I have a really nice picture for the thumbnail of the article, to bad I forgot about it and didn't share it. One of these:
26840688108_8504e6771a_h.jpg


40669555812_7bdf6fde59_h.jpg
 
It has been a bit quiet here but no worries, I had some stuff to do and am ready to continue this build! I plan to glue and laminate the ring this week, and finalize the main frame design. As always: I will keep you guys updated and when needed share a video.
 
Tomorrow I plan to laminate the propeller cage. In order to limit the possible suprises I decided to make a test piece today that
includes all the steps of the laminating process (as far as can be done up to the application of the epoxy resin).

This test piece is a 50degrees part of the cage/ring itself. After I glued the two halves together and sanded the part in preparation
for the laminating I applied a base coat on the part. This basecoat improves the bond between the PLA part and the lamination.

After a 2hour wait (waiting for the point where the basecoat is tacky but does not leave residue on the gloves) the next step is the
application of the carbon fiber spread tow ribbons (25mm wide) one on the ID and one on the OD. In the final product these will
loop the propellercage as one piece.

Outside Diameter
41437293834_36da47d673_h.jpg


Inside Diameter
40350964700_cdc069d5f4_h.jpg


The next step is the application of the carbon fiber cloth. In this case a 3K plain weave for easier application on rounded parts.
42158049681_817c77733c_h.jpg


It sticks nicely on the somewhat tacky basecoat
28285635218_74c44626fe_h.jpg


After I finished the application around the wing profile it's ready for resin.
42158049531_0432aad867_h.jpg


Tomorrow we will see the result. For now I am positive, it looks good and the process went well!
28285635708_bd3d589a18_h.jpg


Oh before I forget, I made all the printed parts a second (and some a third) time. The reason is that I wanted to change some things in the
design for easier assembly and above that: the print quality of the new printer that I build a couple of weeks ago is significantly better so it
was worth the time and filament.

40210395230_0f80350b0c_h.jpg
 

rockyboy

Skill Collector
Mentor
Looking great! I don't know how I missed this project for so long, but I'm sure hooked now! Love the detailed pictures and step by step walk through :D
 
Thanks for the compliment! This test learned me that this fabric (carbon) is too thick (200g/m2) so I just bought a lighter one (90g/m2) that should be here in 1 or 2 days. Well worth the wait!

Apart from that: the process it self worked out nicely so I will perform the same steps on the final build (the actual parts)
 

jhitesma

Some guy in the desert
Mentor
Did you try turning the fabric 45 degrees? I've been talking to a friend about composite aircraft construction a lot lately as he just took the EAA's course on it and wants me to take the course as well...one of the tricks he picked up is that with a lot of weaves turning the fabric 45 degrees will help it confirm much better than when the weave is parallel to the surfaces like it appears to be in your photo.
 
Thank you for your reply! Looking at the results I decided to change a few things. Mainly the type of carbon fiber. This is 200grams/m2 3K, I ordered 80grams/m2 1k carbon fiber today as a replacement. It should work better because the one I tested with is way to thick/heavy.

About the 45 degrees, I did not consider it but thank you for the suggestion! I saw it a few days ago in a video by easycomposites but forgot about it. For the shapes themselves I have a cool trick that I will tell more about in the video I have planned on this subject but in short: In Solidworks I flattend the 3D surfaces to a flat surface and printed it on my 3D printer (a bit oversized in specific places). Its easy to make and really convenient for cutting the cloth to size.

Oh besides that, I also ordered a box of nitrile gloves. (to replace the vinyl gloves I used in the pictures above)
 
Last edited:
I've been busy with the rest of the frame (mainly the layout) and the placement and shape of the retracts. I haven't yet had the time to fully design the retracts but I do have a picture of the simplified mechanics that I used to get the dimensions (distance between hinges and between hinges and reference surfaces)

Side view, including simplified models of the gimbal, batteries, frame extension and retracts
41586149434_403ef77738_b.jpg


Top view
28435087788_24cea98382_b.jpg


Rear view
41586149754_069e3d6da3_b.jpg


A couple of days ago I explained that during the testing I noticed that the carbon fiber that I allready had is not suitable for this build and that I ordered new fabric as a replacement. It arrived and here it is, besides the one from the first test for comparison
28412285768_08044bcac6_b.jpg


And besides the other fabrics I allready had at home
28412285718_30698e55cf_b.jpg