Bavarian RC – Heinkel 219 night fighter design and build

Bavarian_RC

Elite member
Bavarian RC Heinkel-219
Designed By:
Bavarian RC
Plans By: Bavarian RC
Version 1.1 (2020-03-31)​

The Heinkel He-219 Uhu ("Eagle-Owl") was a night fighter that served with the German Luftwaffe in the later stages of World War II. A relatively sophisticated design, the He 219 possessed a variety of innovations, including advanced VHF-band intercept radar. It was also the first operational military aircraft to be equipped with ejection seats and the first operational German World War II-era aircraft with tricycle landing gear.
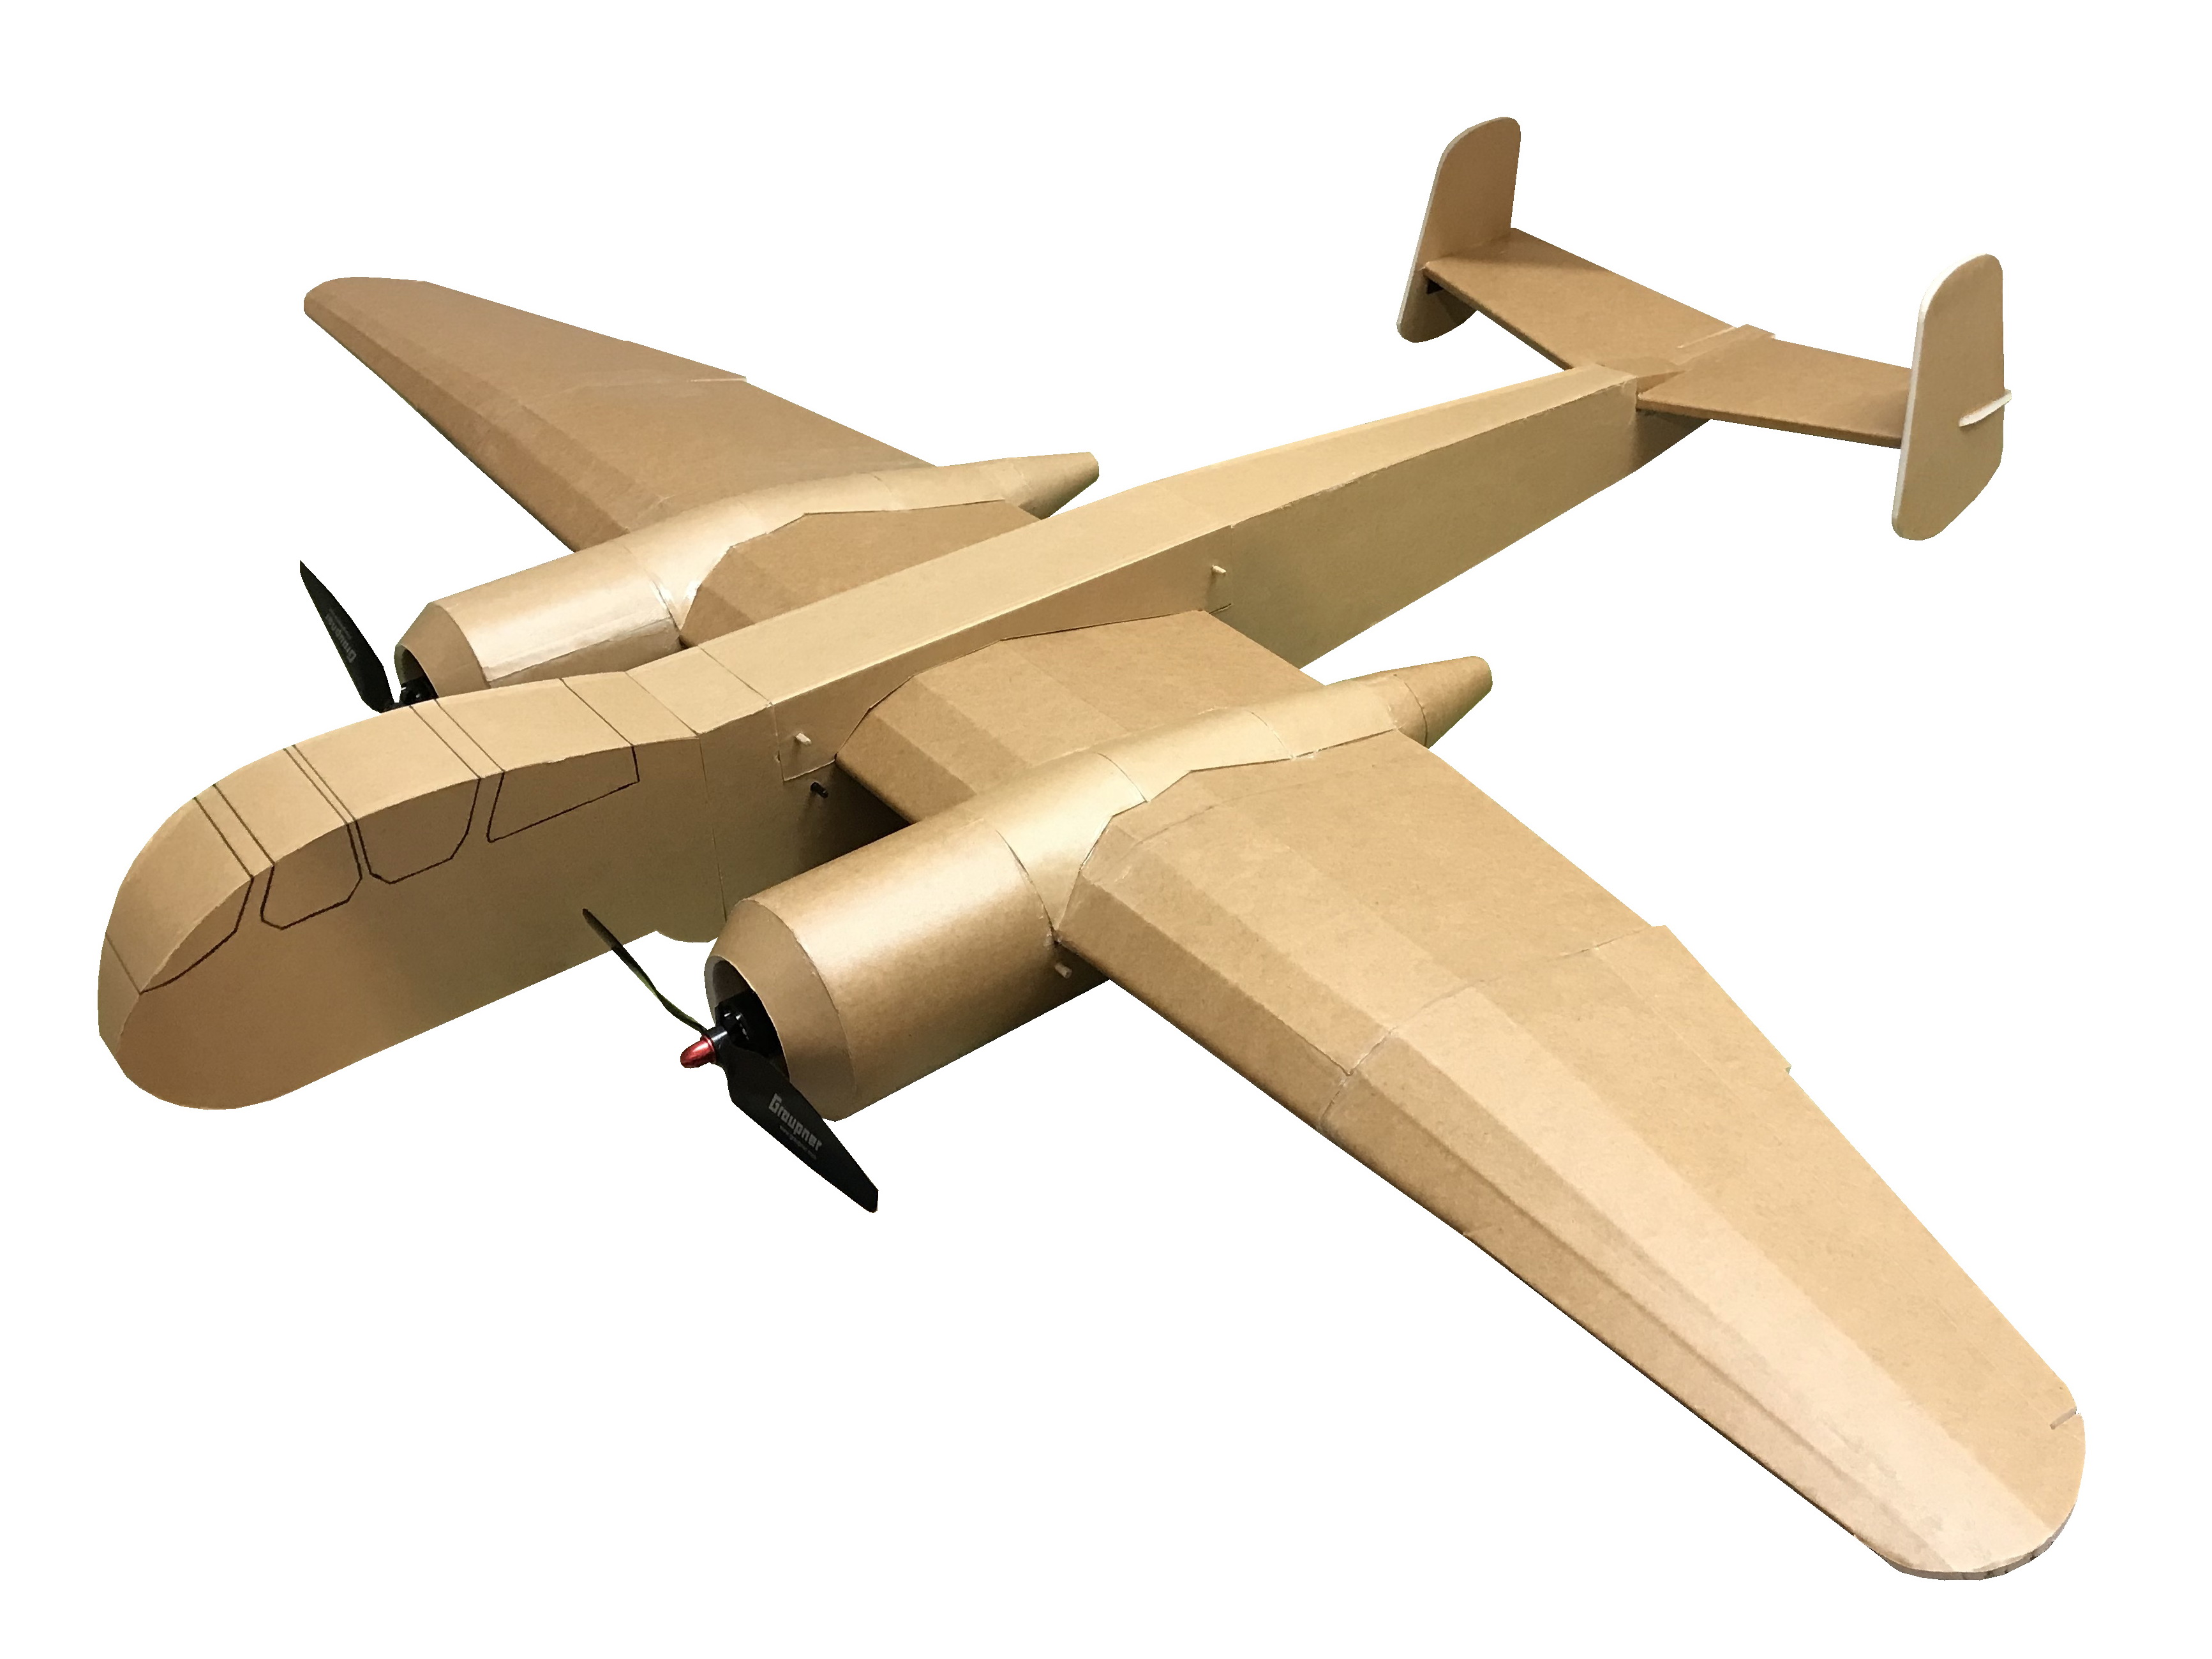
IMG_1272__.jpg


Description:

Power Pack Compatibility:
2x Power Pack B

Specs:

Length: 972 mm (38.3 in)
CG: 53 mm (2.1 in)
Wingspan: 1190 mm (46.9 in)
Wing Area: 18.35 dm2 (284.4 in2)
Dry Weight: 770 g (27.2 oz.)
All Up Weight: 983 g (34.7 oz.)
Wing Loading: 53.6 g/dm2 (17.6 oz/ft2)

Build:
The build follows basic FT techniques. The main challenge is the build of the nacelles, which is using molding techniques similar to the Master Series builds. The proper adjustment of the horizontal stabilizer on the fuselage is crucial for the flight performance. Take your time on this step. I wouldn’t recommend it as first build, but maybe as a 3rd or 4th.

Speed:
The top speed during level flight is around 80 km/h (50 mph). It slows down nicely for landing and is easy to control even at low speed.

Handling:
The roll rate is not very high but the plane is quite sensitive in the pitch axis. Flying inverted is working quite well. All in all it is an easy flyer.

Stalls:
It is really hard to get this plane into stall. When it stalls it just sags away slightly.

Aerobatics:
By its nature it isn’t an aerobatic plane. You can do Rolls, Loops, Inverted, Split S’s and if you have differential thrust nice Hammerhead Turns.

Take off:
Hand-launch it by holding it at the fuselage bottom (around the CG) and in case you have counter rotating props, apply full throttle for launch. All it needs then is a gentle toss.

Landing:
Nothing special, reduce your airspeed and flare it shortly before touch down. Try landing with really low speed, as this reduces the risk of breaking props. The nacelles are so close to the ground that there is a real risk of breaking a prop.


Plans: Bavarian RC Heinkel-219 Plans V1.1
Instructions: Bavarian RC Heinkel-219 Build Instructions V1.1
STL files: Bavarian RC Heinkel-219 STL files V1.1
Release Video:
Build Video:
 
Last edited:

Bavarian_RC

Elite member
Change Log:

2020-01-31
First release of Plans V1.0, Build Instructions V1.0, STL-files V1.0

2020-03-31
Updated Plans V1.1, Build Instructions V1.1 and STL-files V1.1 (check links in first post and in the resources)
Page 1:
- Spars: Small reference line at the center added to ease the cutting
- Nose skin bottom: Rotated 90 degree on the plan to fit to the grain of the foam board
- Wing: Crease line at start of dihedral added
- Spar outer RH (front) and LH (front): Servo wire cut-out enlarged
- Fuselage tail cover: Changed shape for better look

Page 2:
- Longitudinal nacelle formers: Reference lines added to better identify the inflexion points of the outline and ease the cutting
- Longitudinal nacelle formers: Step (where Powerpod ends) moved 1.5mm back
- Wing: Crease line at start of dihedral added
- Spar outer RH (rear) and LH (rear): Length corrected

Page 3:
- Fuselage rear end: Score line extended to ease cutting
- Fuselage joiner: Dimensions corrected for better fit
- Wing cover bracket front: Shape adjusted for better fit

Page 4:
- Horizontal stabilizer: Rear edge of middle section lengthened by 3mm to better fit to fuselage
- Powerpod: Step moved forward by 1.5mm
- Nacelle formers 7 added ... forgot them in V1.0 :)
- Nacelle wing transitions RH inner and outer added
- Nacelle wing transitions LH inner and outer added

Page 5:
- Nacelle cone 1: Upper circle around marking for BBQ skewer was not centered to the cross marking
- Nacelle front RH and LH: Minor correction
- Nacelle top part 1: Shape adjusted for better fit
- Nacelle top part 2 and 3: Reference line (center line) added

Page 6:
- Powerpod: Step moved forward by 1.5mm
- Plywood spar added
- Nacelle top support parts added
- VSTAB gauge added to ease the alignment of the vertical stabilizer

Page 7:
- Air-Inlet template added
- Air-Outlet template for LH and RH nacelle added

3D-printed parts:
- Nacelle Air-Inlet: new
- Nacelle Air-Outlet: new
- Nacelle End Cone: new
- Spinner CW and CCW including Spinner base plate CW and CCW: new
- Distance plate wing cover bracket fwd: dimensions adjusted for better fit
 
Last edited:

Bavarian_RC

Elite member
After completing my first own foam board design, the Nord-2501 Noratlas (Link) it was time for something a little bit bigger and more like a WWII fighter. As I really like twin engine planes, the list was quickly narrowing down to the Heinkel 219 night fighter.
Heinkel-219_01.jpg Heinkel-219_02.jpg
The first step was as usual to find a 3 view drawing:
Heinkel-219_Three_View.jpg
The scale will be approx. 1:16 which will give me around 1160 mm wingspan and an overall length of 980mm. I want to power it with 2 B-Pack motors. If my rough calculation is right, I should end up with an AUW of around 900 - 1000g… let’s see.
My Noratlas was quite square, so this time I want to use more molding techniques, especially on the huge nacelles.
I spent the last days with drawing the main parts in CAD and it is time now to start the build of the first prototype.
The first step was the fuselage:
IMG_0317.JPG IMG_0320.JPG IMG_0334.JPG IMG_0340.JPG
And the nose cover:
IMG_0337.JPG IMG_0339.JPG IMG_0341.JPG IMG_0343.JPG
Doublers for the wing support:
IMG_0344.JPG

I'll post more updates along the design and build process...
 

Bavarian_RC

Elite member
Thanks! You‘re right, the nose cover is inspired by the Bronco. If possible I will fly it also with on-board video. Depends a bit on the CG, I fear this thing could be a bit nose heavy with the position of the motors. In that case putting a GoPro in the nose will not work. Let‘s see...
 

Bavarian_RC

Elite member
The horizontal stabilizer has dihedral, which so far has caused some headache for me. I am still wondering how to connect the split elevators in a simple way. As I haven’t come up with a good idea yet, I think I will use two separate servos and mix them together. I will see when I get to that stage. Anyway the test fit looks OK :)
IMG_0348.JPG IMG_0349.JPG
Next step is the wing. After "endless" cutting of scorelines I made the bevel cut at the leading edge, glued the wing halves together in the middle and reinforced the wing tips with BBQ skewers (this helps a lot to prevent damage from “not so perfect” landings). Not that I would need that… LOL ;)
IMG_0432.JPG IMG_0447.JPG
The outer part of the wing has dihedral, so the attaching of the spar has to be done quite thoroughly to ensure a correct geometry of the wing. I first glued the inner section, then put a gauge with the correct angle under the outer wing and glued the spar in this section. To reinforce the spars I used popsicle sticks on both, the front and rear spar (in the middle of the wing and where the dihedral starts).
IMG_0450.JPG IMG_0452.JPG IMG_0456.JPG IMG_0458.JPG
So far the build is quite straight forward and things go together nicely.
 

Bavarian_RC

Elite member
Today I completed the wing. It is a classic fold-over wing. The only tricky thing was the dihedral of the outer part and the overall geometry with 3 trapezoid sections. I wasn’t too sure, that all the folds would fit together as the wing looked a bit strange on CAD. Due to the straight leading edge (without sweep) there were no wedge-shaped cut-outs needed on the upper side. Finally it all matched up. :cool:

IMG_0465.JPG IMG_0466.JPG IMG_0468.JPG IMG_0469.JPG

It’s already starting to look like the original Heinkel 219:

IMG_0470.JPG IMG_0472.JPG

It is quite a big bird, bigger than I expected it to be, but it still fits in the trunk of my car without disassembling, so everything OK ;)(y)
 

Bavarian_RC

Elite member
Thanks Grifflyer, not sure if I will paint this one, as it is the first prototype. My plan is to build this prototype, hopefully get it to flying and collect some experience with it. There will for sure be a lot of improvements I could make. At the end I want to build a version 2 of it with all of the improvement. This on I will paint for sure. I also want to do a build video, but not sure if I will find the time for that... it is quite a lot of effort to do.
For the paint scheme I think I will do this one:
DSC03163.jpg
 

mach1 rc

Master member
Today I completed the wing. It is a classic fold-over wing. The only tricky thing was the dihedral of the outer part and the overall geometry with 3 trapezoid sections. I wasn’t too sure, that all the folds would fit together as the wing looked a bit strange on CAD. Due to the straight leading edge (without sweep) there were no wedge-shaped cut-outs needed on the upper side. Finally it all matched up. :cool:

View attachment 153101 View attachment 153102 View attachment 153103 View attachment 153104

It’s already starting to look like the original Heinkel 219:

View attachment 153105 View attachment 153106

It is quite a big bird, bigger than I expected it to be, but it still fits in the trunk of my car without disassembling, so everything OK ;)(y)
Really nice!!! I love the twin tails.
 

Grifflyer

WWII fanatic
Thanks Grifflyer, not sure if I will paint this one, as it is the first prototype. My plan is to build this prototype, hopefully get it to flying and collect some experience with it. There will for sure be a lot of improvements I could make. At the end I want to build a version 2 of it with all of the improvement. This on I will paint for sure. I also want to do a build video, but not sure if I will find the time for that... it is quite a lot of effort to do.
For the paint scheme I think I will do this one:
View attachment 153107
I hear you in the build videos, I tried on once, building the plane was a pretty stressful experience always worrying about if the parts are in frame or not. The footage I got was all overexposed, so you couldn't really see what I was doing. To top it off the audio was horrible:ROFLMAO:
I have mad respect to anyone who does a build video now.

That's a cool paint scheme!
 

Bavarian_RC

Elite member
Really nice!!! I love the twin tails.
Thanks. Yeah, the twin tails and the dihedral horizontal stabilizer were one of the reasons for chosing this plane. In the mean time I read a little bit about this plane and it seems that it was quite ahead of its time. In fact it was the first serial built fighter equipped with an ejection seat. But I think I won't include that feature in my build :LOL:
 

Bavarian_RC

Elite member
I hear you in the build videos, I tried on once, building the plane was a pretty stressful experience always worrying about if the parts are in frame or not. The footage I got was all overexposed, so you couldn't really see what I was doing. To top it off the audio was horrible:ROFLMAO:
I have mad respect to anyone who does a build video now.
Yes, you are so right. Normally building is pure fun, but when you are recording it, it is far from being relaxed. Not to mention the effort for editing the video, I've seen this when doing the build video of my Noratlas.
 

Bavarian_RC

Elite member
Great model! I bought myself a 1:32 plastic model kit before starting the design of the He-219. The idea was to build the small one first so that I wouldn't have to base the design only on a 3-view drawing. In the end I was so excited to start the design, that I haven't touched the model kit yet. I have other priorities now: Build it and (hopefully) fly it!
 

Bavarian_RC

Elite member
So here comes the most challenging part … at least for me: The nacelles.
I had to spend quite some time for calculating and designing all the pieces in order to match after molding and glueing.

CAD_001.JPG CAD_002.JPG

The inner frame:

IMG_0367.JPG IMG_0368.JPG

Molding and glueing the first (cylindrical) part. I thought it was a good idea to leave the paper overlapping to get a better transition to the ring that will be installed in the front, but I finally decided to remove it.

IMG_0369.JPG IMG_0371.JPG

Step by step adding formers and cones:

IMG_0372.JPG IMG_0376.JPG IMG_0379.JPG IMG_0414.JPG

Puh, 26 grams and looking quite OK… not bad for the first try. The only mistake I made was to build it without the power pod inserted. This caused the whole nacelle to be a bit twisted.
Test fit on the wing:

IMG_0475.JPG IMG_0474.JPG

Despite the fact that I burned my fingers several times with the hot glue :eek: while trying to wrap the cones around the frame I am quite happy. Tomorrow I will do the second nacelle. Now that I know how it works it will be for sure easier.
 

Grifflyer

WWII fanatic
So here comes the most challenging part … at least for me: The nacelles.
I had to spend quite some time for calculating and designing all the pieces in order to match after molding and glueing.

View attachment 153265 View attachment 153266

The inner frame:

View attachment 153267 View attachment 153268

Molding and glueing the first (cylindrical) part. I thought it was a good idea to leave the paper overlapping to get a better transition to the ring that will be installed in the front, but I finally decided to remove it.

View attachment 153269 View attachment 153270

Step by step adding formers and cones:

View attachment 153271 View attachment 153272 View attachment 153273 View attachment 153274

Puh, 26 grams and looking quite OK… not bad for the first try. The only mistake I made was to build it without the power pod inserted. This caused the whole nacelle to be a bit twisted.
Test fit on the wing:

View attachment 153275 View attachment 153276

Despite the fact that I burned my fingers several times with the hot glue :eek: while trying to wrap the cones around the frame I am quite happy. Tomorrow I will do the second nacelle. Now that I know how it works it will be for sure easier.
That looks really good! Did you design the parts in 3D?