BBA/Winter Build 2017/18 - Top Flite Corsair

willsonman

Builder Extraordinare
Mentor
Too right!

While I'm thinking of it... there are currently NINE (9) servos in the aircraft. I still need one for the air valve, another two for the cowl flaps, and at least 4 for the animated cockpit. That is 16 servos. Then I will also have airspeed telemetry. I guess I need to get serious about a BEC.
 

willsonman

Builder Extraordinare
Mentor
I was thinking of going with my favorite trusted brand of YEP.

I mostly wrapped up the empennage last night. The rudder fairing was quite a bit of carving and blending but I am very happy with the results. I had to drill the hole in the rudder for the control horn to verify exact placement. No hinges just yet so there is a bit of slop.
IMG_5695.JPG

IMG_5696.JPG

IMG_5697.JPG

Here is where we are now. Very much looking like a Corsair.
IMG_5698.JPG

Obviously I need to carve and blend the tail cone block but I also need to do the fairings for the elevators. That should wrap up the aft end. I'll then move on to the flaps and ailerons as I still do not have a power system.
 

Grifflyer

WWII fanatic
ooh it's coming along nicely:applause: I also have a question, wouldn't it be lighter if you build the frame out of wood and then used covering to give it a skin, rather than skinning it in balsa and the painting it?
 

willsonman

Builder Extraordinare
Mentor
It would be significantly lighter but would not have the smooth finish like the full size. The construction is also based on strength of the skin so you would have to interpolate additional formers and add more stringers to achieve the same strength.

One of the nicer things about larger aircraft is that you can add more details without as much weight penalty. I can tell you though, it adds up quick so you must have a plan for it. With the weight of the FPV gear, bomb drops, detailed cockpit, tail wheel retract, this is no easy feat. I had considered using more foam blocks in this build to lighten it up in the rear but after careful examination, a lot of it is structural, either torsionally to the fuselage or to support the tail planes. The one exception is the tail cone. The issue there is that it will likely have a propensity for hangar rash. I opted against foam for that reason since I want to have this one for a loooong time.
 

Mid7night

Jetman
Mentor
That's lookin' sweeeeet! Nice tail.

Also, I really love the commitment to internal controls by using torque rods. Haven't seen that much outside my PSS glider builds!
 

willsonman

Builder Extraordinare
Mentor
The internal tail controls are part of the Top Flite design. The wings are not intended for that but guess what? Yeah, I'm a glutton for punishment. You think I would have learned after the Bugatti. Learned a few things since then that I hope to do here.
 

willsonman

Builder Extraordinare
Mentor
Got the tail wrapped up last night so lets cover it in a bit of detail.

Here is the bottom of the tail cone. Let me tell you, a razor planer makes ALL the difference in work here. Just plane it down roughly to shape and then use sandpaper to blend the seams and flat spots.
IMG_5699.JPG

And the top.
IMG_5700.JPG

After checking the fit of the elevators, I noticed that the original builder had not used the correct balsa stock on the root. I had to cut off 3/8" from the root. This left little covering to secure at the root so I stripped off the covering up to the first rib and applied new covering. Following the plan's instructions is key here. You mark the H-stab where the control rods protrude. You want to leave about 1/16-1/32" gap between the H-stab and the elevator where the balance tab is so be careful and take your time. Then you drill the holes for the control rod and dry fit them, noting if the elevators are even. Using pliers, you can twist the control rod a little to adjust and make the Elevators even. Tape the elevators flat at the balance tabs and start carving some balsa for the root of the elevator to filet into the fuselage. I used a piece of styrene sheet between the elevator and the filet to apply pressure while the glue dried.
IMG_5701.JPG

Here is the completed tail assembly. Some minor spackling was applied to fully blend things together and clean up some small gaps.
IMG_5703.JPG

Here is where we currently stand. With all the carving and sanding I took some time to clean shop a bit. Nothing major but tracking balsa dust and chips all over the house is not something that keeps the wife happy about your projects. Pro tip right there ;)
IMG_5702.JPG

Moving on now back to the wing. I'll start in the instructions to make the flaps, then install the tip blocks and ailerons. More carving on that end but I'm excited to be in the final stages of construction.

After that I need to start fitting more equipment like the air tank and valve. My camera should be arriving soonish. I need to get on the wing gear doors. I'd really like to see her on her legs so this is something that needs to happen. I suspect by this time next week she will be "sitting pretty."
 

willsonman

Builder Extraordinare
Mentor
Just a quick update of the flap progress. Video will be coming some time this weekend.

The outer flaps are trailing edge (triangle) stock that is shaped and cut. Lots and lots of shape work after the ply bits are added for the movement to be good.
IMG_5705.JPG

IMG_5706.JPG
 

willsonman

Builder Extraordinare
Mentor
Flaps are going in. Quite a bit of material has to be cut away and shaped on the wing trailing edge but one side is done.

IMG_5712.JPG

IMG_5713.JPG

I've also started applying spackle on wood seams with some slight gap. Also around the oil cooler scoops. The printer has also been going getting parts ready for the dummy radial.
 

willsonman

Builder Extraordinare
Mentor
For those just tuning in. Here is a brief summary of what has happened over the last two weeks.


In short, yes I hope to finish this in time for SEFF.
 

willsonman

Builder Extraordinare
Mentor
I did a little bit of work yesterday on this project. I needed to cool off a bit to re-focus and prioritize. While I need to get the flaps done on the other side still, I'm already making plans to move onto the front end. I did more spackling of the wing, looking for trouble spots (low and high areas) and it is looking quite good. I need to evaluate the firewall situation for the motor mount so that I can determine what sort of motor mount I want to use. I could build up a box to epoxy to the firewall or go with the large brushless mount from Great Planes. From there I can determine exactly where I need the cowl flap servos to be located and cut the firewall for them. There are little bits and bobs I need to order.

I've also come up with two ideas for the main gear doors. That needs to be worked out but only after I glass and remove the doors.
 

willsonman

Builder Extraordinare
Mentor
Ok, since this was probably THE hardest part of the balsa building portion I'm going to go over this step-by-step. This will be over multiple posts for clarity but you will find it quite logical, but it is a procedure.

We start by deviating away from the instructions here. I extend the marks on the bottom of the wing that are references for the hinge locations. Because the hole for the hinge is drilled at an angle, by the time you remove the 3/16" of wood for the flap recess, you end up with a hole being lower that you want. It will be clearer on the next steps.
IMG_5717.JPG

So use a razor blade to remove the section but NOT all the way to the top of the wing skin. Leave about another 3/16" and round that with a dremel sanding drum. So, can you now see why I did not drill yet? If you drill into the edge at an agle the hole to accept the hinge woult be in the wrong location by about 1/16".
IMG_5718.JPG

Take you inner flap and drill holes for the hinge, making a recess for the knuckle so that the hinge point is offset.
IMG_5719.JPG

You will need to further shape the top and bottom of the inner edges for a better fit for the recess you just made.
IMG_5720.JPG

Check your side profile often to look for inconsistent sanding.
IMG_5721.JPG

Dry fit your flap and further shape the recess and flap as needed.
IMG_5722.JPG

Check your top profile to make sure you have proper alignment with the wing root.
IMG_5723.JPG

Check your deflection and sand the root of the flap and/or the wing root to make sure the flap does not bind when deflected.
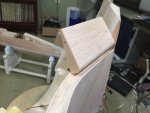
IMG_5724.JPG
 
Last edited:

willsonman

Builder Extraordinare
Mentor
The center flap takes quite a bit more time. Essentially you are doing the same thing for fitment but there are a few extra things to keep in mind. Because of geometry, the radius of the concave bevel in the flap pocket, you are going to need to sand away a fairly hefty portion of the top side of the flap where it meets the pocket. There is plenty of meat there to sand but still go slow and check your fitment often. Eventually it will line up right like this.
IMG_5725.JPG

Due to the 2-point hinge line, you will need to use your sanding bar to remove part of the flap so that it does not bind with the wing when deflected. Compare this picture with the previous one, noting the gap between the wing and the flap.
IMG_5726.JPG

And here you can see why this is important. Not sanding this portion away will not allow the flap to pivot.
IMG_5727.JPG

Really good deflection on both flaps so far.
IMG_5728.JPG

Do not forget to check your top side to make sure things are all in alignment. Sand where necessary. Note the roughness of the grain at the root of the middle flap where I had to remove quite a bit of material.
IMG_5729.JPG
 

willsonman

Builder Extraordinare
Mentor
Fitting the last flap is like clockwork now and you have your routine down. You know what to do, right? WRONG! Take your time and do it right and you will get the perfect fit.
IMG_5730.JPG

Here it the money shot. All that hard work and you have an exceptional scale detail that Will function aerodynamically as well as aesthetically.
IMG_5731.JPG

Graying at my age!? Seriously, this stuff makes a TON of dust. Use proper protection. Clean often so that you protect your family from the dust as well. Your wife will also love you for not tracking it all over the house!
IMG_5732.JPG
 
Last edited:

willsonman

Builder Extraordinare
Mentor
So, one last thing before I sign off tonight. I received my RMILEC SBus to PWM converter today. This little doodad should allow me access to all 16 channels of my Taranis using my leftover X6R Rx. I've been doing some thinking about how many channels I may actually need so, let's break that down.
IMG_5716.JPG

Throttle (may also slave cowl flaps)
Aileron 1
Aileron 2 (to program aileron differential)
Elevator
Rudder (also steering wheel)
Flaps
Tail gear retract (will also slave the main gear doors)
Main gear retract (has to be separate due to delay from the pneumatics)
bomb drop
Canopy slide
Airspeed (pitot tube sensor)

and that is just the main stuff. that makes 11 but I may have to put the cowl flaps on a different channel with a mix to limit the servo travel, should mechanical issues be encountered. I also like the idea of a tail gear that moves a bit slower so I could also separate out the tail gear and main gear doors. With those comments we are up to 13, which leaves 3 more. It is entirely possible that I may have to use separate mixes for the cockpit animation due to sizing constraints. Pretty sure I can get the throttle lever mechanics to match the servo travel so I would probably max out all 16 channels right there.
 

SlingShot

Maneuvering With Purpose
Yes. Quite sophisticated. Wilsonman, do you expect to operate all of this on your own, or will you use a co-pilot?
 

Joker 53150

Mmmmmmm, balsa.
Mentor
Looks like we’re having a competition to see who can use more channels on one project! Two different ways to achieve similar results.
 

willsonman

Builder Extraordinare
Mentor
Yeah Jeff! The funny thing is I need to test my UMX servos out on the RMILEC unit. I believe they are only rated up to a certain voltage and I think 5V is too high. So, the BEC that is coming, I want to see if it will be set low enough but the other thing is that the other servos will be slower and have less torque...

So this leads me to my last resort. I have UMX brick units and I can power the servos off of that AND use my DSM2 protocol as well. This would be only for the animated cockpit.