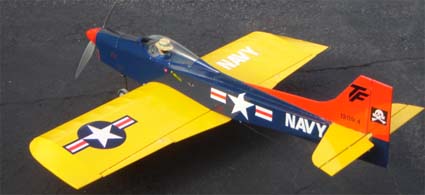
I have just landed a EARLY model Contender 40 low wing R/C Trainer Airplane Kit. It looks a Little worse than the box below.
hopefully will look like this after:
I see that Electric system Equivalent Power source to a .40 size glow motor it's 700W of power, I see Greatplanes tells me a 4645-ish 1000kv motor with 45A ESC and a a 4S battery. running a 10x5 prop. that seems more than 700w.
Can I get away with a C-pack motor? I expect to be using a 2200maH, 25C, 3S battery if I can.
As a Balsa NOOB,
What else do you recommend we have to start?
- ceiling tile,
- Balsa,
- CA, (and activator)
- plan with Wax paper,
A covering iron - I like the TopFlite one, but most any variable temp one will do.
A sanding block - I like the two sided 3M ones in medium/fine grade (I think 120 and 220 grits are what they use)
A baggie of "T" pins and one of quilting pins for holding things in place. The T pins are great for bracing things and don't hurt your fingers to push in, but they are too thick to poke through the balsa without leaving holes. That's where the quilting pins (or insect collecting pins) come in - they are much thinner and can be safely used to go through the balsa without leaving holes or splitting things.
Also very handy are some baggie weights. Just take a handful of different sizes of those little clear baggies that all the RC doodads come shipped in and fill the bags half full of aquarium sand, or BB's, or lead shot (whatever you have handy basically). These are a great cheap way to provide downward clamping pressure that molds to the shape of whatever you're working on - and glues usually don't stick to the baggies either.
You'll likely need a little bit of epoxy for firewalls and landing gear mounts - don't give into the temptation to use the 5 minute stuff. The longer the cure time on the epoxy, the more it wicks into the wood and the better the joint. Anywhere you need the strength of epoxy, go for the 30 minute cure stuff for best results.
I'd also recommend picking up a bottle of aliphatic glue (I prefer Deluxe's SuperPhatic) or classic Titebond. Yes, you can glue a whole plane together with CA and skip the slow curing glues. But there are two drawbacks to that. First, CA doesn't sand well at all. This leads to sanding down the wood on either side of the CA while still leaving that glue joint high and rough. So when using CA, try not to get a bunch oozing out anywhere it would be up against the covering. The second reason I like the slower glues is it forces me to take some time, slow down, think things through, and enjoy the process. While I'm waiting for glue to dry I can think four or five steps ahead and sometimes spot where I've miss-understood something in the instructions - and have time to correct it before the glue cures. With CA by the time I flip the instructions forward with one hand, I've already glued my other hand to the balsa parts that I probably glued together backwards too!

But - everything I've said here is optional and not necessary to have a great flying model. Just like you can get a DTFB plane in the air with a single glue gun before getting all fancy with different glues and decals and peeling techniques, you can get a balsa plane flying great with just some CA, a flat surface, and a covering iron too