Big ol' flying car

Joe M

Member
I've been planning on building a new flying car based on the RMR PM580 Pikes Peak racer for a while now. I even made a prototype a few years ago that never got off the ground. Since then I've learned a bit about 3D CAD/CAM and 3D printing and I figure it's as good a time as any to tackle this project again.

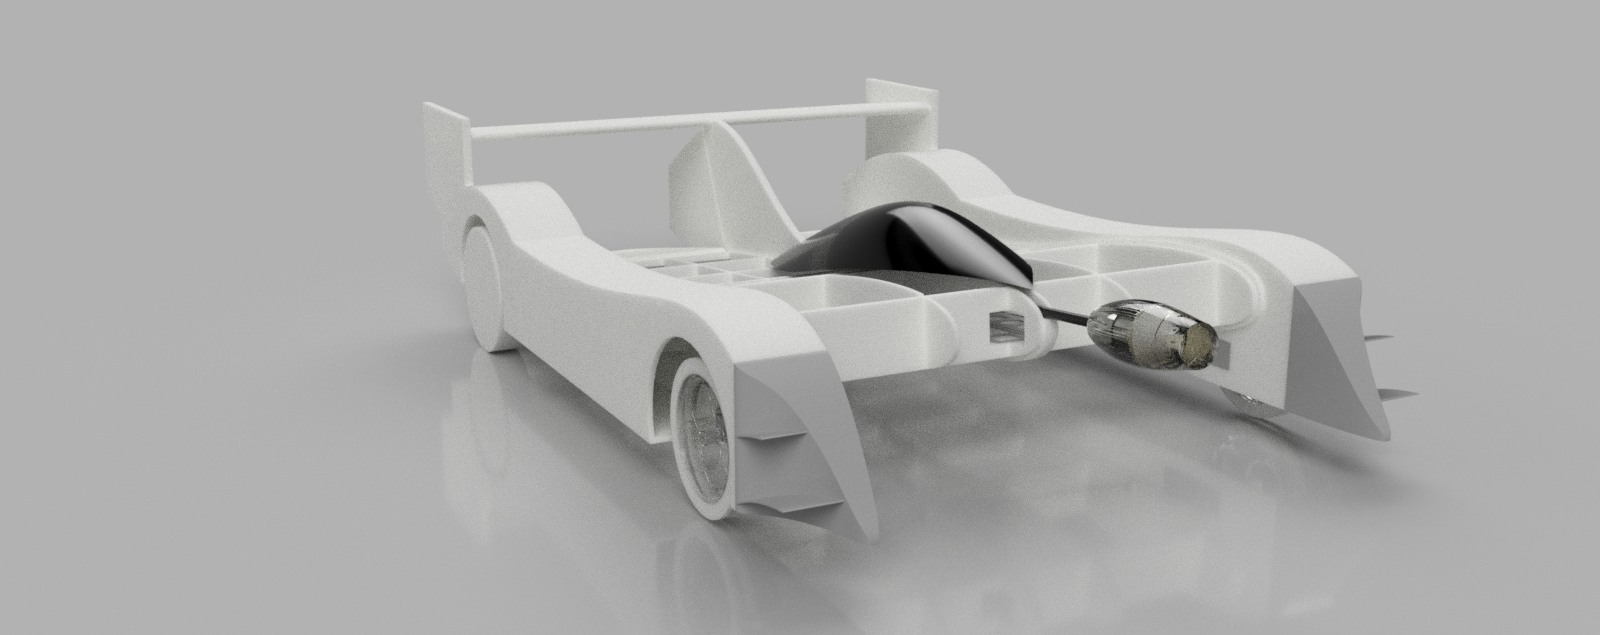
Here are some renders of what I've got in Fusion 360:
Big GTP v47 2.png


I'll be 3D printing stencils for the foam parts to save time.

Big GTP v47.png


The motor pylon can be moved forwards and backwards to adjust the CG. I'll be flying this on two 4S 2200 packs, which should fit easily in the large battery bay.

Big GTP v47 3.png


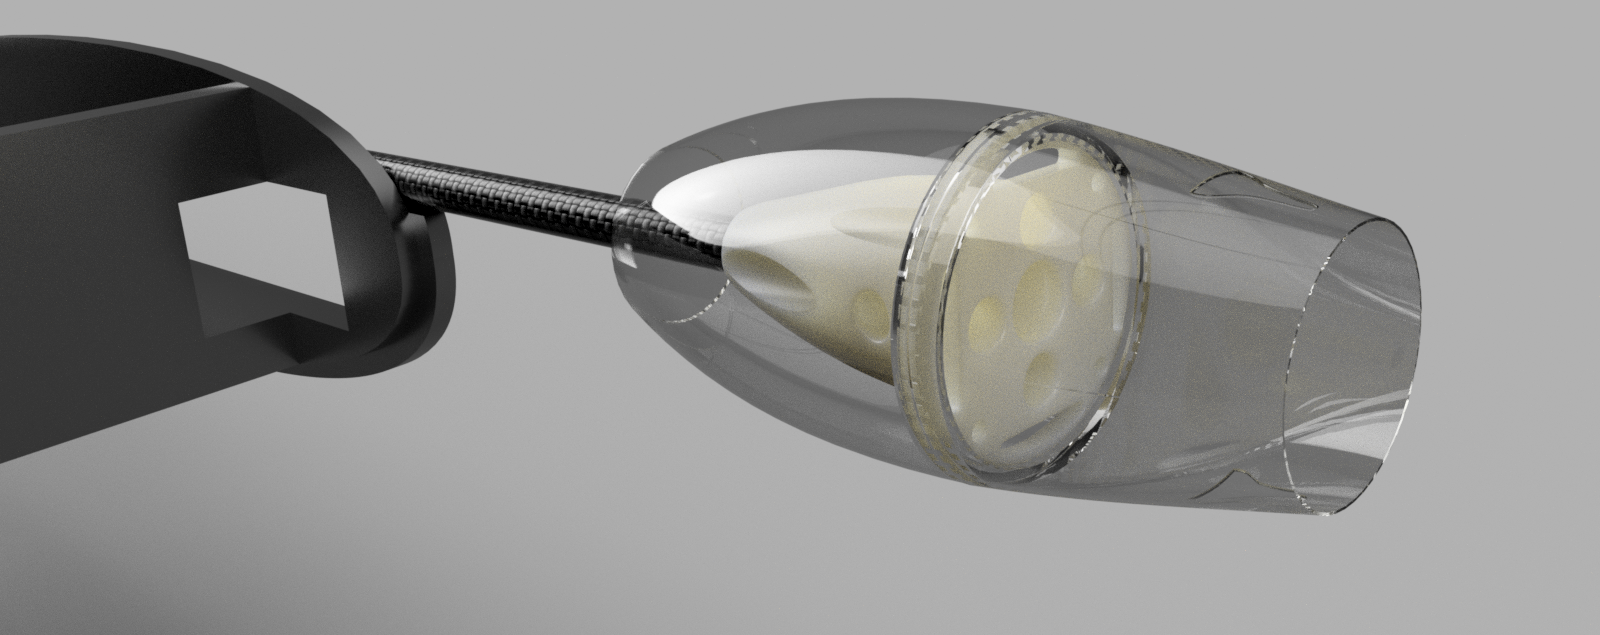
The motor pylon on the front will swing a 10x6 prop. Flying time should be about 10 minutes with the power setup I've got on hand. Wing loading will be very low, around 4 to 4.5 lbs with 900 square inches of wing area.
Big GTP v43.png


Most of the construction will be FT foam with a carbon motor tube and a few extruded carbon flat rods for bracing. The complicated bits will be 3D printed in PLA and PETG. Assuming it builds and flies alright and there's interest I might do a redesign and post plans. If all goes smoothly I'm also planning on making some buoyant pontoon wheels for flying off water.

I am partway into the build now, so I'll start posting regular updates tonight as I get pictures and information together.

-Joe
 

mayan

Legendary member
I've been planning on building a new flying car based on the RMR PM580 Pikes Peak racer for a while now. I even made a prototype a few years ago that never got off the ground. Since then I've learned a bit about 3D CAD/CAM and 3D printing and I figure it's as good a time as any to tackle this project again.

Here are some renders of what I've got in Fusion 360:

View attachment 137668

I'll be 3D printing stencils for the foam parts to save time.

View attachment 137669

The motor pylon can be moved forwards and backwards to adjust the CG. I'll be flying this on two 4S 2200 packs, which should fit easily in the large battery bay.

View attachment 137670

The motor pylon on the front will swing a 10x6 prop. Flying time should be about 10 minutes with the power setup I've got on hand. Wing loading will be very low, around 4 to 4.5 lbs with 900 square inches of wing area.

View attachment 137671

Most of the construction will be FT foam with a carbon motor tube and a few extruded carbon flat rods for bracing. The complicated bits will be 3D printed in PLA and PETG. Assuming it builds and flies alright and there's interest I might do a redesign and post plans. If all goes smoothly I'm also planning on making some buoyant pontoon wheels for flying off water.

I am partway into the build now, so I'll start posting regular updates tonight as I get pictures and information together.

-Joe
Looks amazing!
 

Joe M

Member
Thanks, mayan!

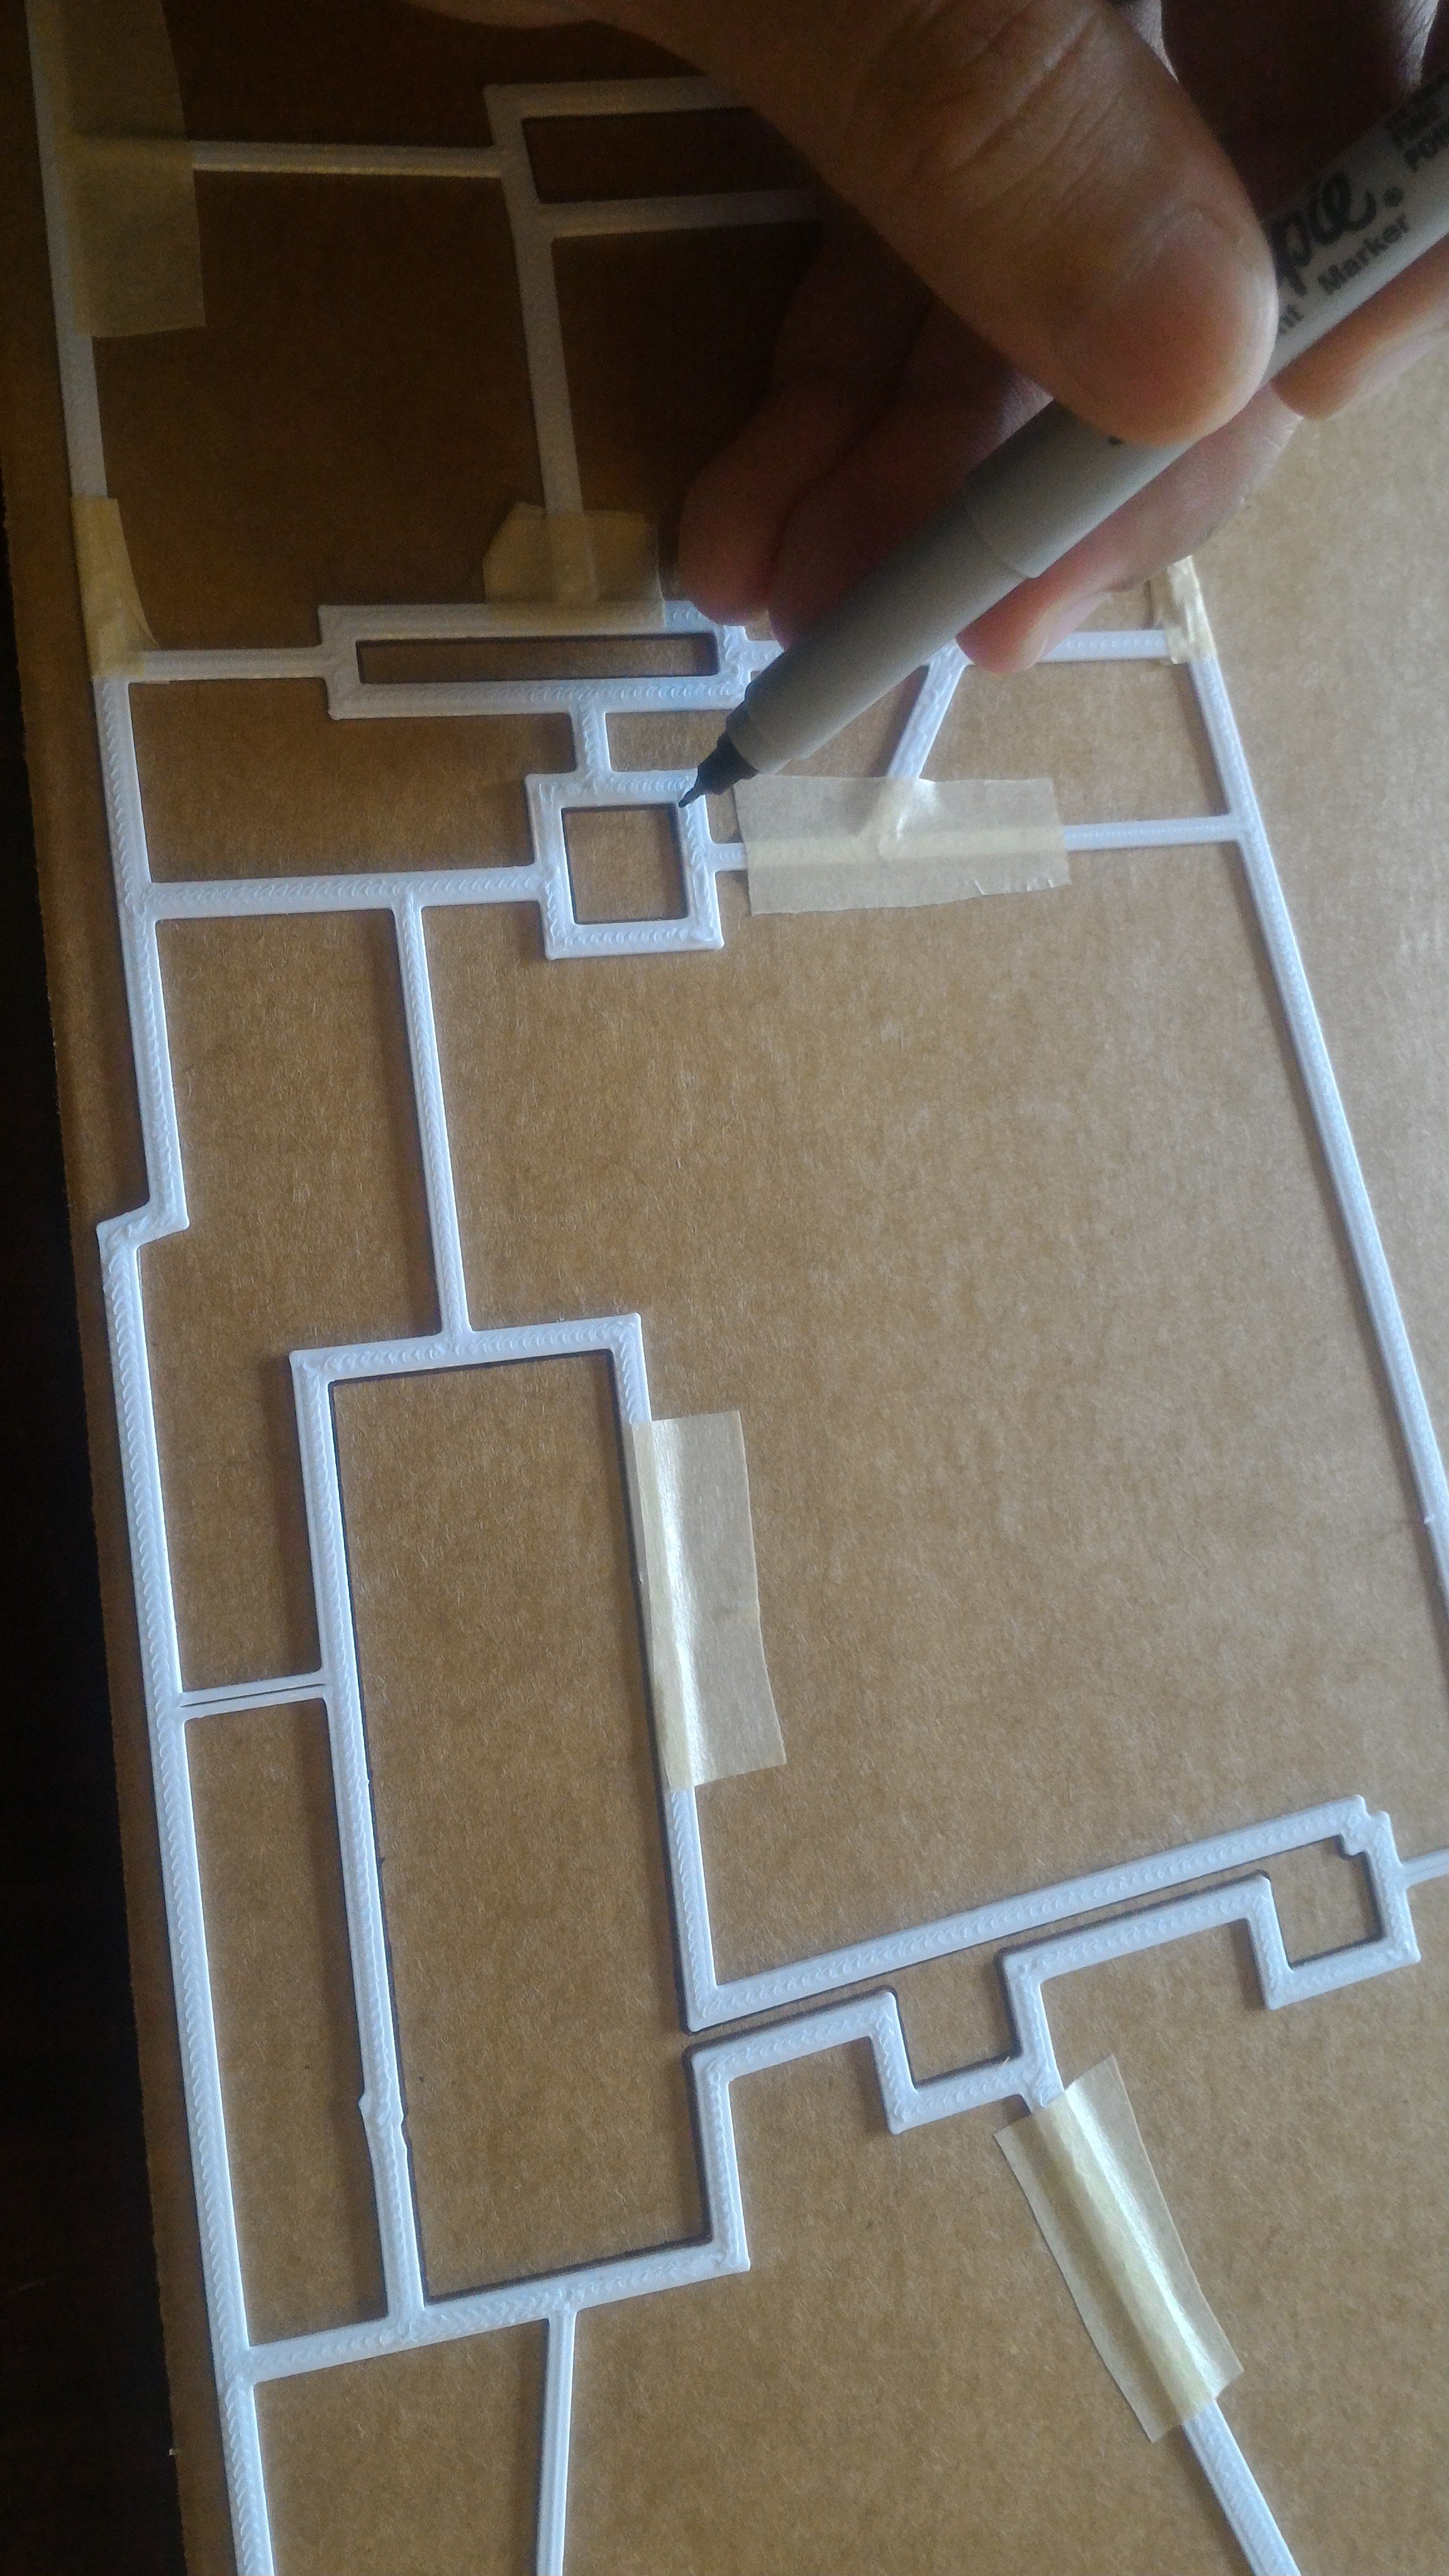
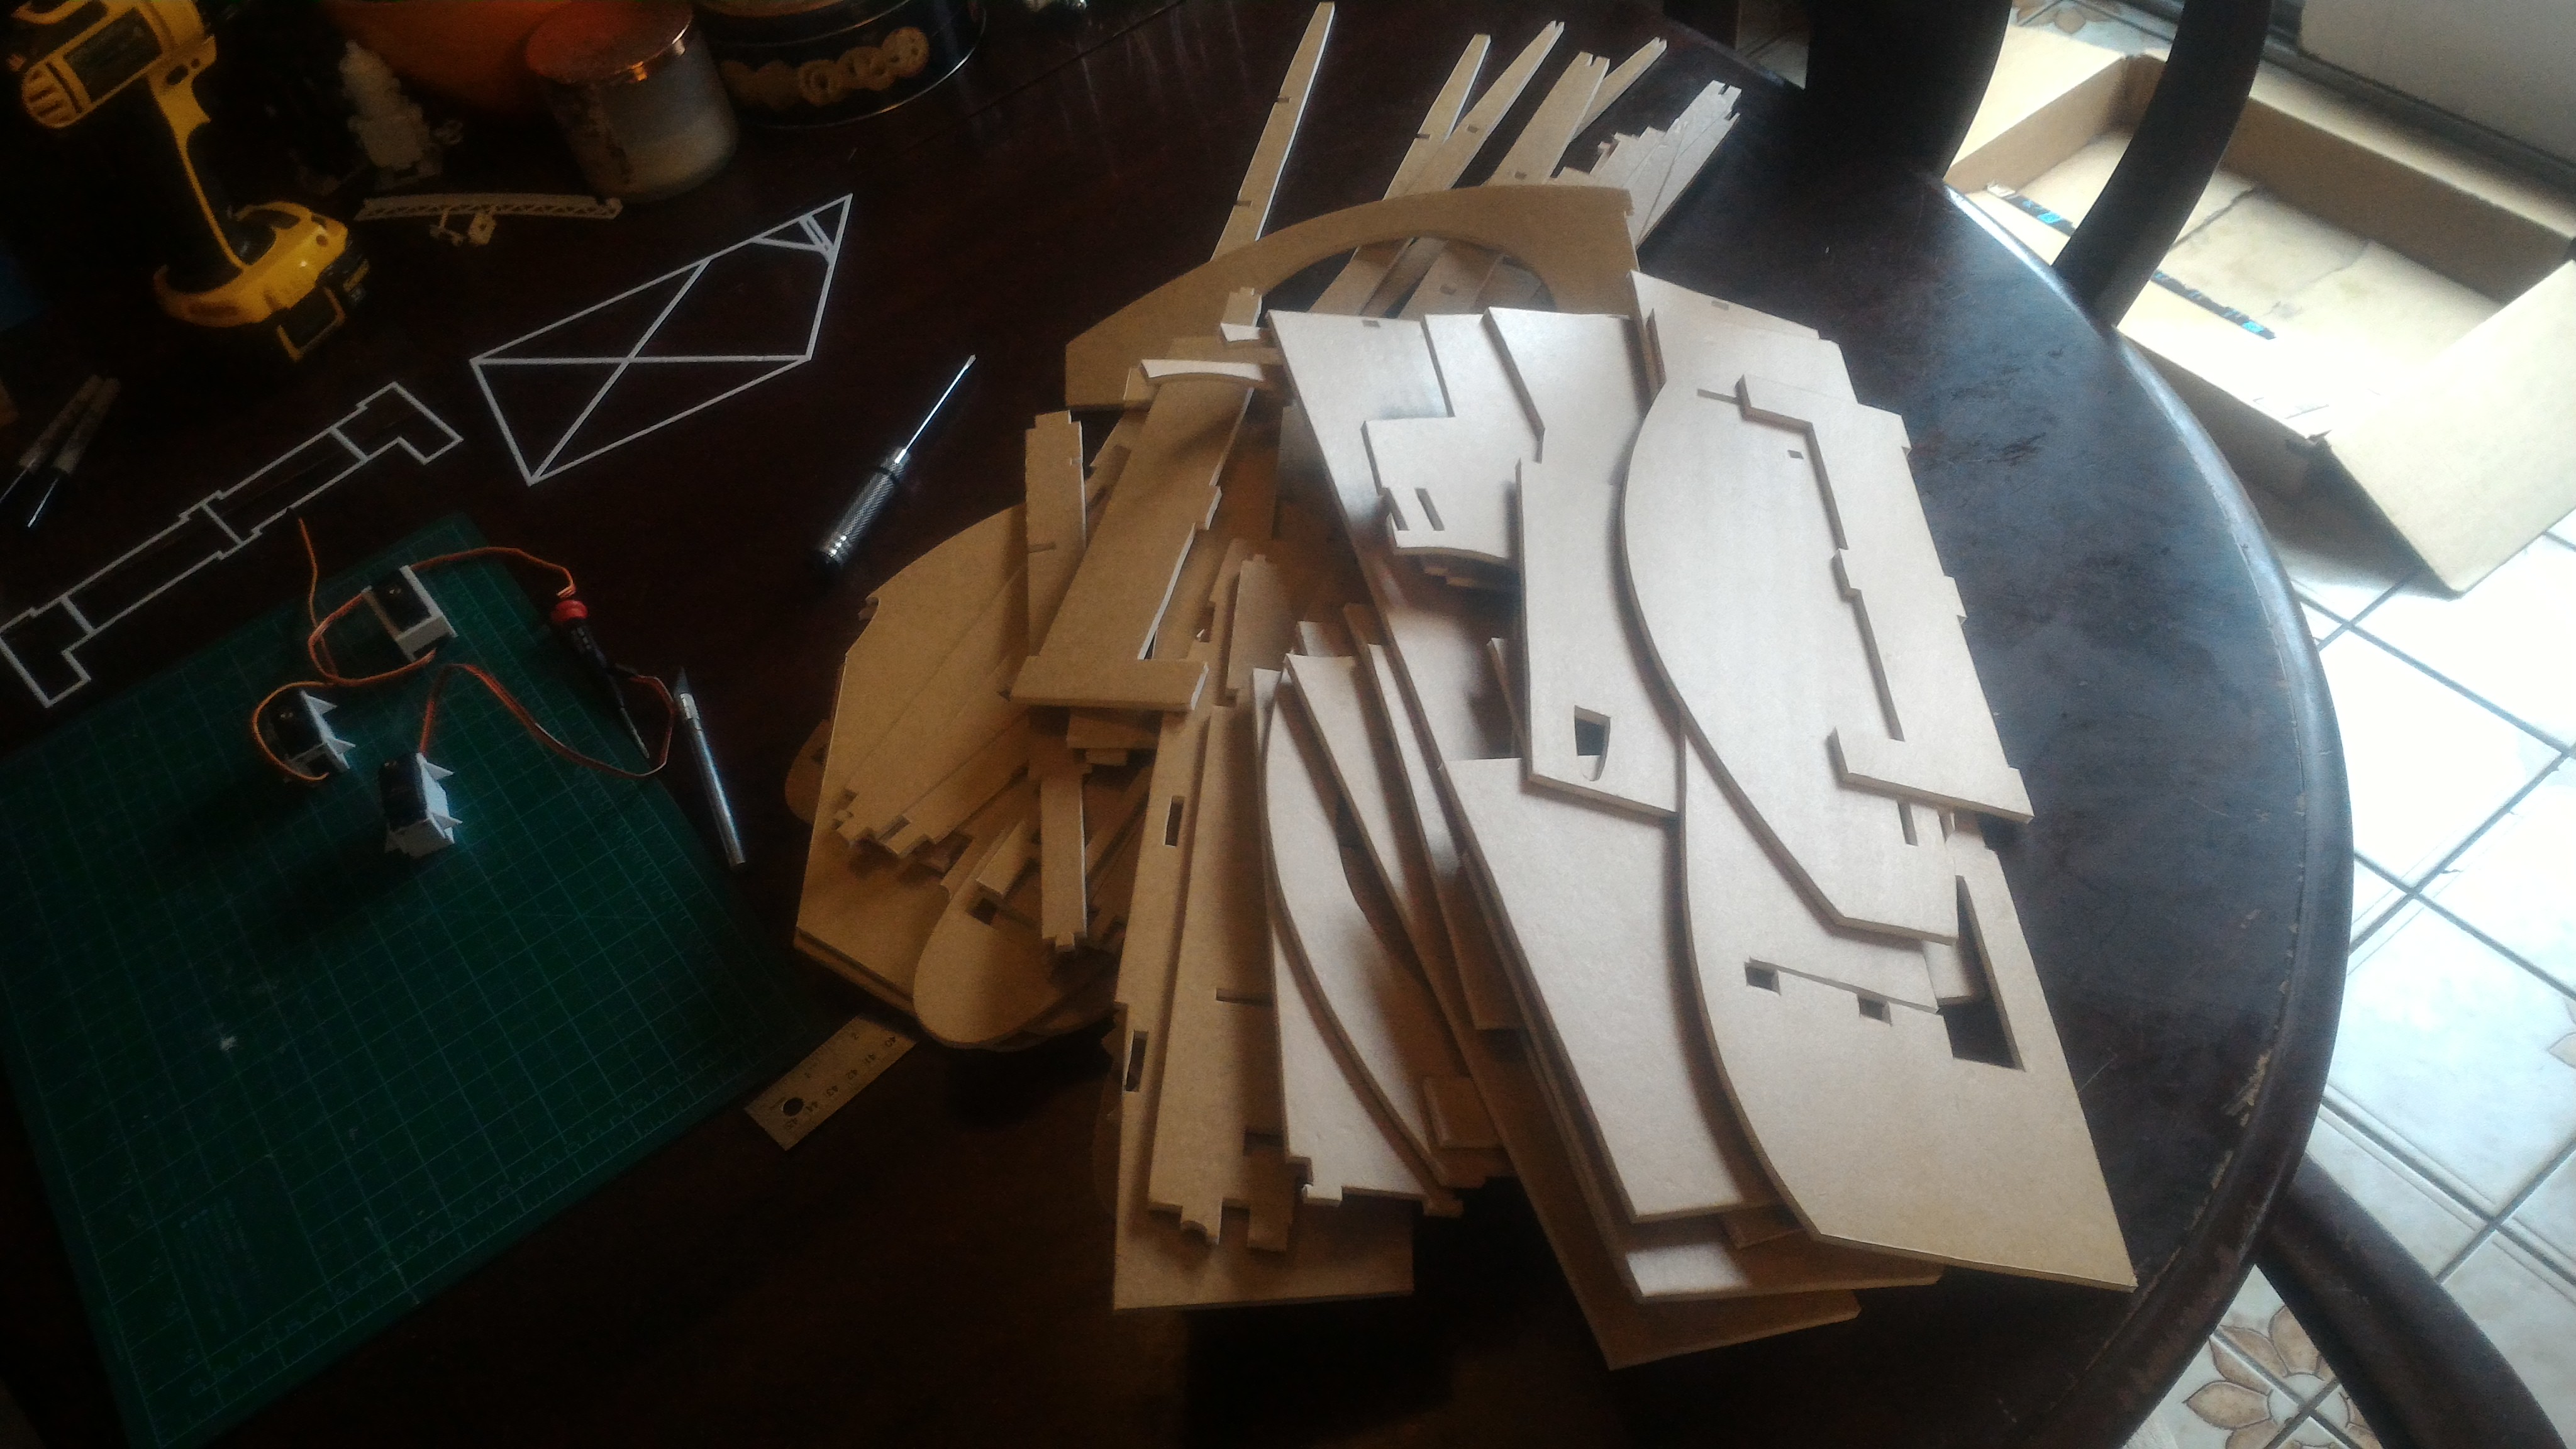
After a bit more CAD work I generated stencils for all of the foam parts and printed them in white PLA. There were a lot of stencils.

P_20190716_100431.jpg


and most of them were pretty big and complicated.

P_20190717_105803.jpg


This seemed a lot simpler on the computer screen.

P_20190717_113016.jpg


These do make it very easy to accurately trace complex shapes onto foam compared to paper stencils.

P_20190716_110433.jpg


This project is going to use a lot of foam. This sheet is just the tip of the rabbit hole.

P_20190718_084130.jpg


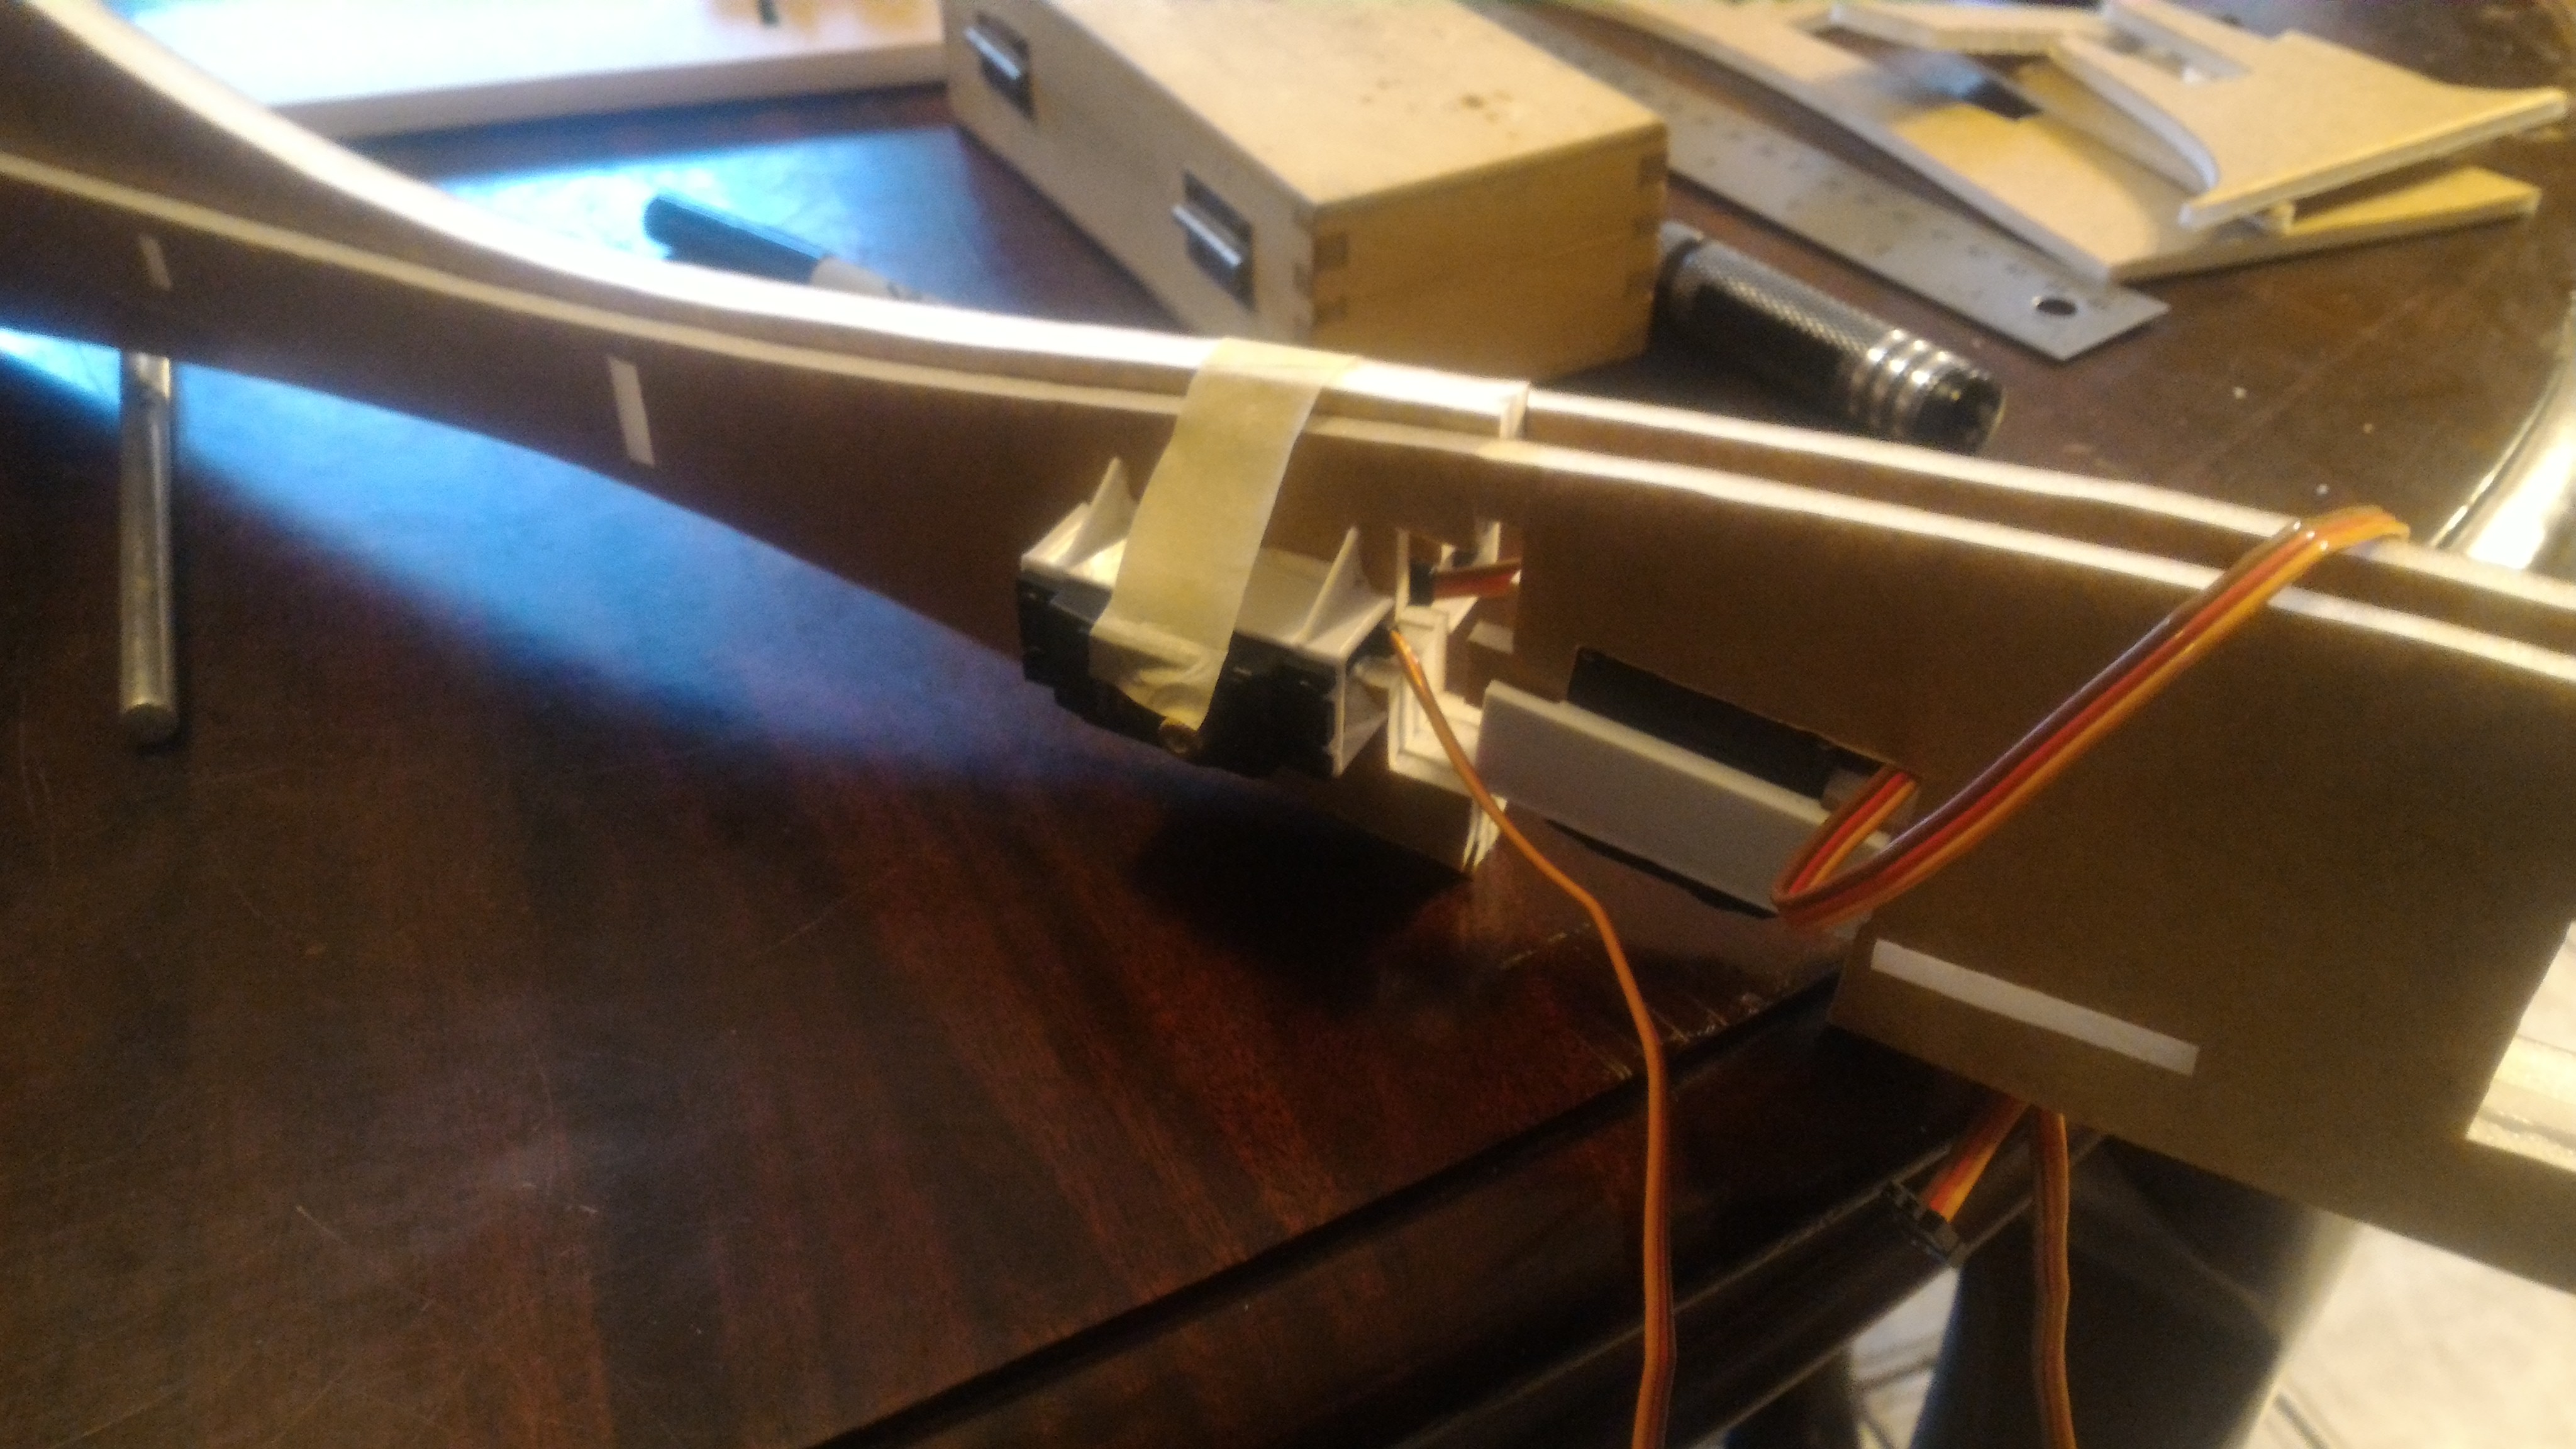
I also printed mounts for the three Corona DS339HV servos. I made the mounting brackets so tight that I had to partially disassemble the servos to get them to fit, but at least they won't go anywhere once they're mounted.

P_20190718_082522.jpg


Next time I'll design in a little more breathing room.

P_20190718_084330.jpg


That's a lotta foam. Next step is to glue that all together.

-Joe
 

techbear

Member
Wow, what a project! I wouldn't have thought that thin PLA stencils would be rigid enough. And you must have a large print bed to be able to print them at all. I've never seen anything quite like your project. Go for it!
 

The Hangar

Fly harder!
Mentor
Thanks, mayan!

After a bit more CAD work I generated stencils for all of the foam parts and printed them in white PLA. There were a lot of stencils.

View attachment 137730

and most of them were pretty big and complicated.

View attachment 137731

This seemed a lot simpler on the computer screen.

View attachment 137732

These do make it very easy to accurately trace complex shapes onto foam compared to paper stencils.

View attachment 137734

This project is going to use a lot of foam. This sheet is just the tip of the rabbit hole.

View attachment 137735

I also printed mounts for the three Corona DS339HV servos. I made the mounting brackets so tight that I had to partially disassemble the servos to get them to fit, but at least they won't go anywhere once they're mounted.

View attachment 137736

Next time I'll design in a little more breathing room.

View attachment 137737

That's a lotta foam. Next step is to glue that all together.

-Joe
It looks great man! When it is all traced out, it looked like a speed build kit😂
 

OliverW

Legendary member
Thanks, mayan!

After a bit more CAD work I generated stencils for all of the foam parts and printed them in white PLA. There were a lot of stencils.

View attachment 137730

and most of them were pretty big and complicated.

View attachment 137731

This seemed a lot simpler on the computer screen.

View attachment 137732

These do make it very easy to accurately trace complex shapes onto foam compared to paper stencils.

View attachment 137734

This project is going to use a lot of foam. This sheet is just the tip of the rabbit hole.

View attachment 137735

I also printed mounts for the three Corona DS339HV servos. I made the mounting brackets so tight that I had to partially disassemble the servos to get them to fit, but at least they won't go anywhere once they're mounted.

View attachment 137736

Next time I'll design in a little more breathing room.

View attachment 137737

That's a lotta foam. Next step is to glue that all together.

-Joe
That is a really unique and amazing way of building!
 

Joe M

Member
Thanks, everyone! I'm very happy with the build process so far, though the design could certainly be simplified.

P_20190718_181509.jpg


I started by installing the servos into the center section, being careful not to tear the foam pieces. At this point it was all pretty flimsy.

P_20190718_233707.jpg


The battery trays were tricky to slot together, but came out pretty well. I'll be using two 4S 2200s in this, but these are pretty spacious and should fit much larger batteries if I want to do a more powerful version in the future.

P_20190720_133353.jpg


It's finally starting to look like a pancake!

P_20190720_135028.jpg


I placed long cuts through the centers of the rear formers before gluing them in place. I'll be installing the elevon hinges into these slots later.

P_20190720_154500.jpg


The massive fenders had to be cut in two pieces.

P_20190721_154255.jpg


Pancake with fenders.

P_20190721_181247.jpg


These thin extruded carbon flats add incredible strength and unimaginable toughness.

P_20190721_201230.jpg


After assembling all of the stenciled foam bits I test fit some of the 3D printed parts. This pretty much ends the speed portion of the build, it'll be comparatively slow-going from here.

Next up is elevons and control hardware.

-Joe
 

Joe M

Member
Scrolling back through this mercilessly image-laden thread makes me realize I should have been using thumbnails all along. What a fool I was. Oh well, I guess I'll start using them now.

P_20190722_162648.jpg

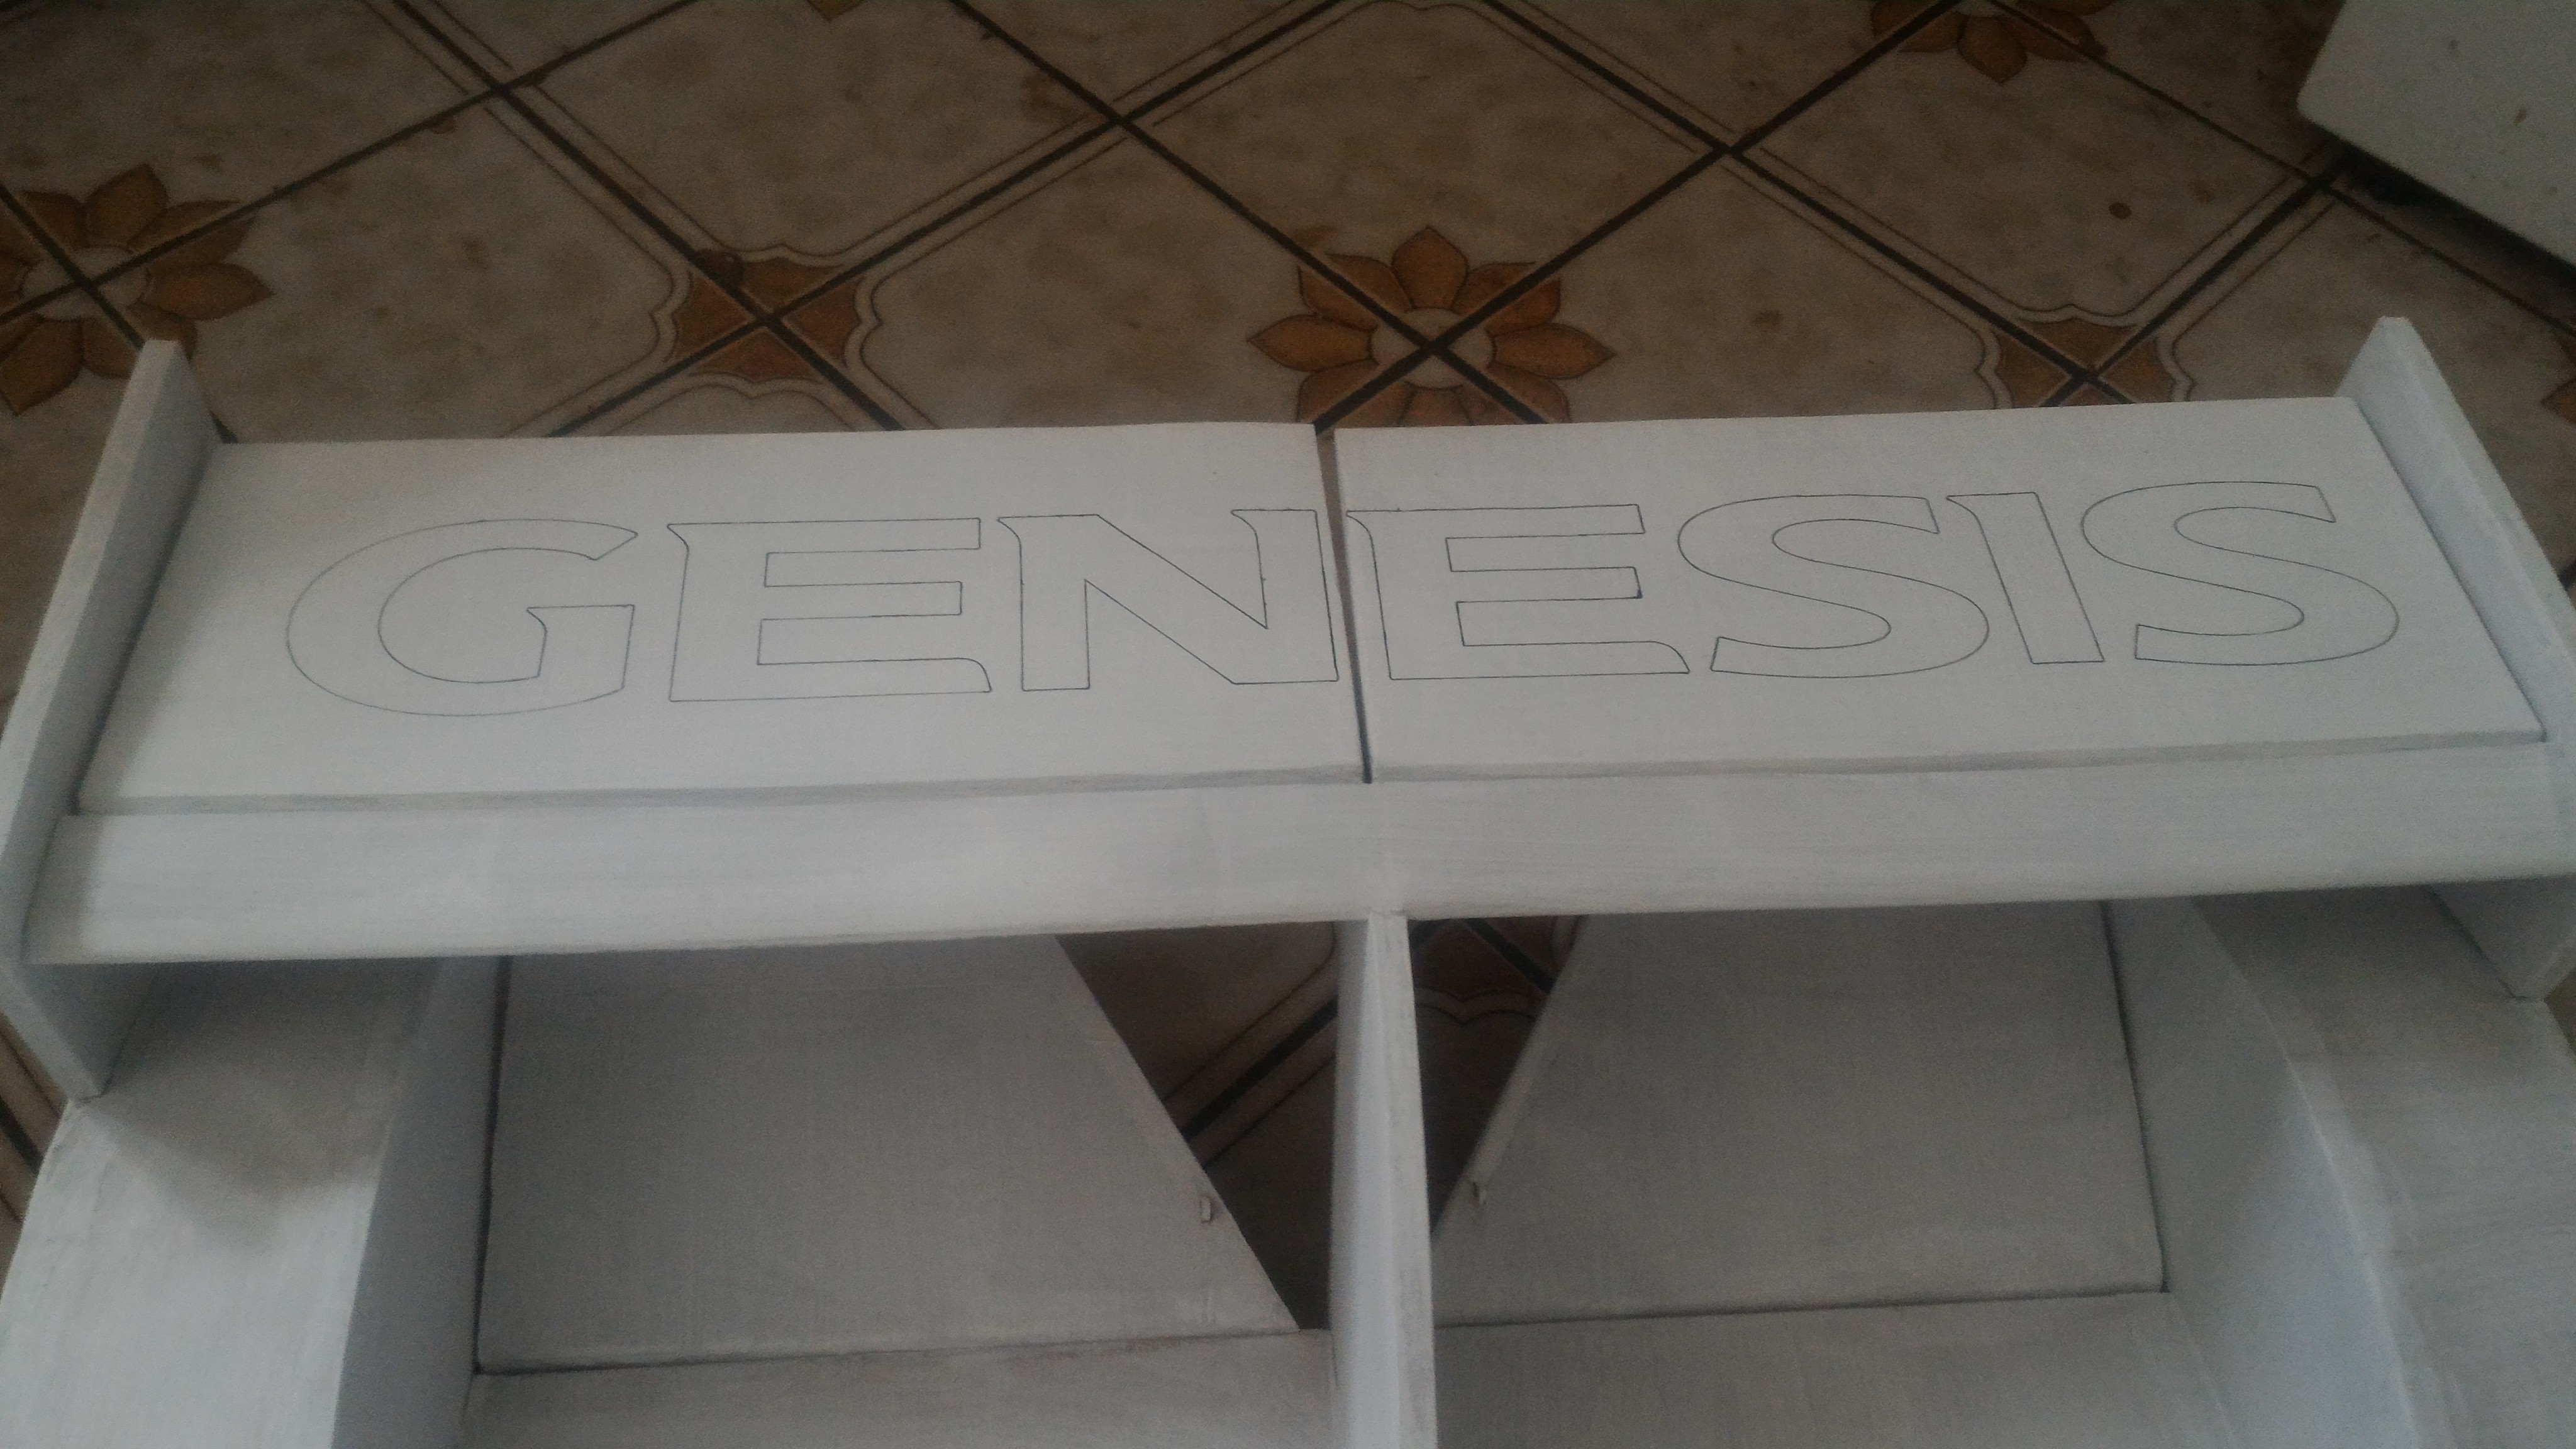
I decided to airfoil the rear wing so I cut eight pieces of foam (two halves to make sanding easier with four pieces per half) and stripped all the paper except for what's needed for the hinge. I glued two formers on either end of the foam block and sanded it down to the shape of the formers.

P_20190723_141738.jpg

Well that was a lot of work. Next time I might take the easy way out by gluing two sheets of foam together and rounding the leading edge.

P_20190724_140019.jpg

Using the same technique I cut and formed the lower elevons, leaving a good amount of paper for hinge duty. The control horns, printed in PETG, were installed prior to gluing the hinges in place on the frame.


P_20190729_175542.jpg

I also printed out the rest of the control hardware in PETG. I had to do a few redesigns on the clevises, but I'm very pleased with how the last bunch came out. I used 3mm carbon tubes for all the pushrods. One of the nicest things about doing all this in CAD first is that I know exactly how long to cut the pushrods before installing them.

P_20190729_175552.jpg

The angle of the rudder hinge line requires that the clevis be able to twist slightly throughout its movement, so for that I used a ball link. An EZ connector (drilled out to 3mm) on the other side will allow for rudder trim adjustment. Since they're on the same servo I need an easy way to mechanically adjust the rudder trim.

P_20190730_093057.jpg

There aren't any electronics or anything going behind the second spar, so at this point I covered the back side of the body and test fit the rear wing. I only got through covering half of the rear wing since I'm apparently almost out of polycrylic. Whoops.

That's all for now. Next up is electronics and a trip to Home Depot.
 

Joe M

Member
P_20190730_134125.jpg

I started by removing the included wires from the ESC and soldering 5.5mm bullets directly to the board. I much prefer this to bullets on wires as it significantly reduces the chances of the connectors arcing/shorting in flight. I soldered a single Deans-style connector to the ESC (I'll add a battery Y harness later) along with the Castle 10A BEC and voltage telemetry connector. I'm using a reversing ESC to make those all-important three-point turns.

P_20190730_142513.jpg

P_20190730_142519.jpg

I harnessed and routed the wires under, in front of, and around the battery bay as necessary, keeping everything as clean as I could. Also I glued in the battery hatch mounting plate earlier. I forgot to photograph that. I also apparently completely forgot to photograph the steering linkage.

I've gotta remember to get a video of that working once the wheels are finished, it's pretty neat.

P_20190731_115909.jpg P_20190731_135736.jpg P_20190731_150749.jpg
P_20190731_171155.jpg P_20190801_163024.jpg P_20190801_163045.jpg

With the electronics installed no one could stop me from covering the rest of the body and gluing the fenders in place. Now to finish designing the cockpit to fit over the battery hatch. I wasn't sure if I wanted to maiden it without a cockpit installed, but it looks kinda goofy without it.

-Joe
 

Joe M

Member
Thanks! I've been busy these past few weeks and haven't made much progress. Hoping to finish the covering/water sealing and maybe the base coat of paint by the end of next week. After that there's just the wheels and motor tube to do before the maiden. Here's a quick photo of it with the canopy installed with some cats for scale:

received_351804905764047.jpeg
 

Joe M

Member
Phew, it's been a while since the last real progress update.

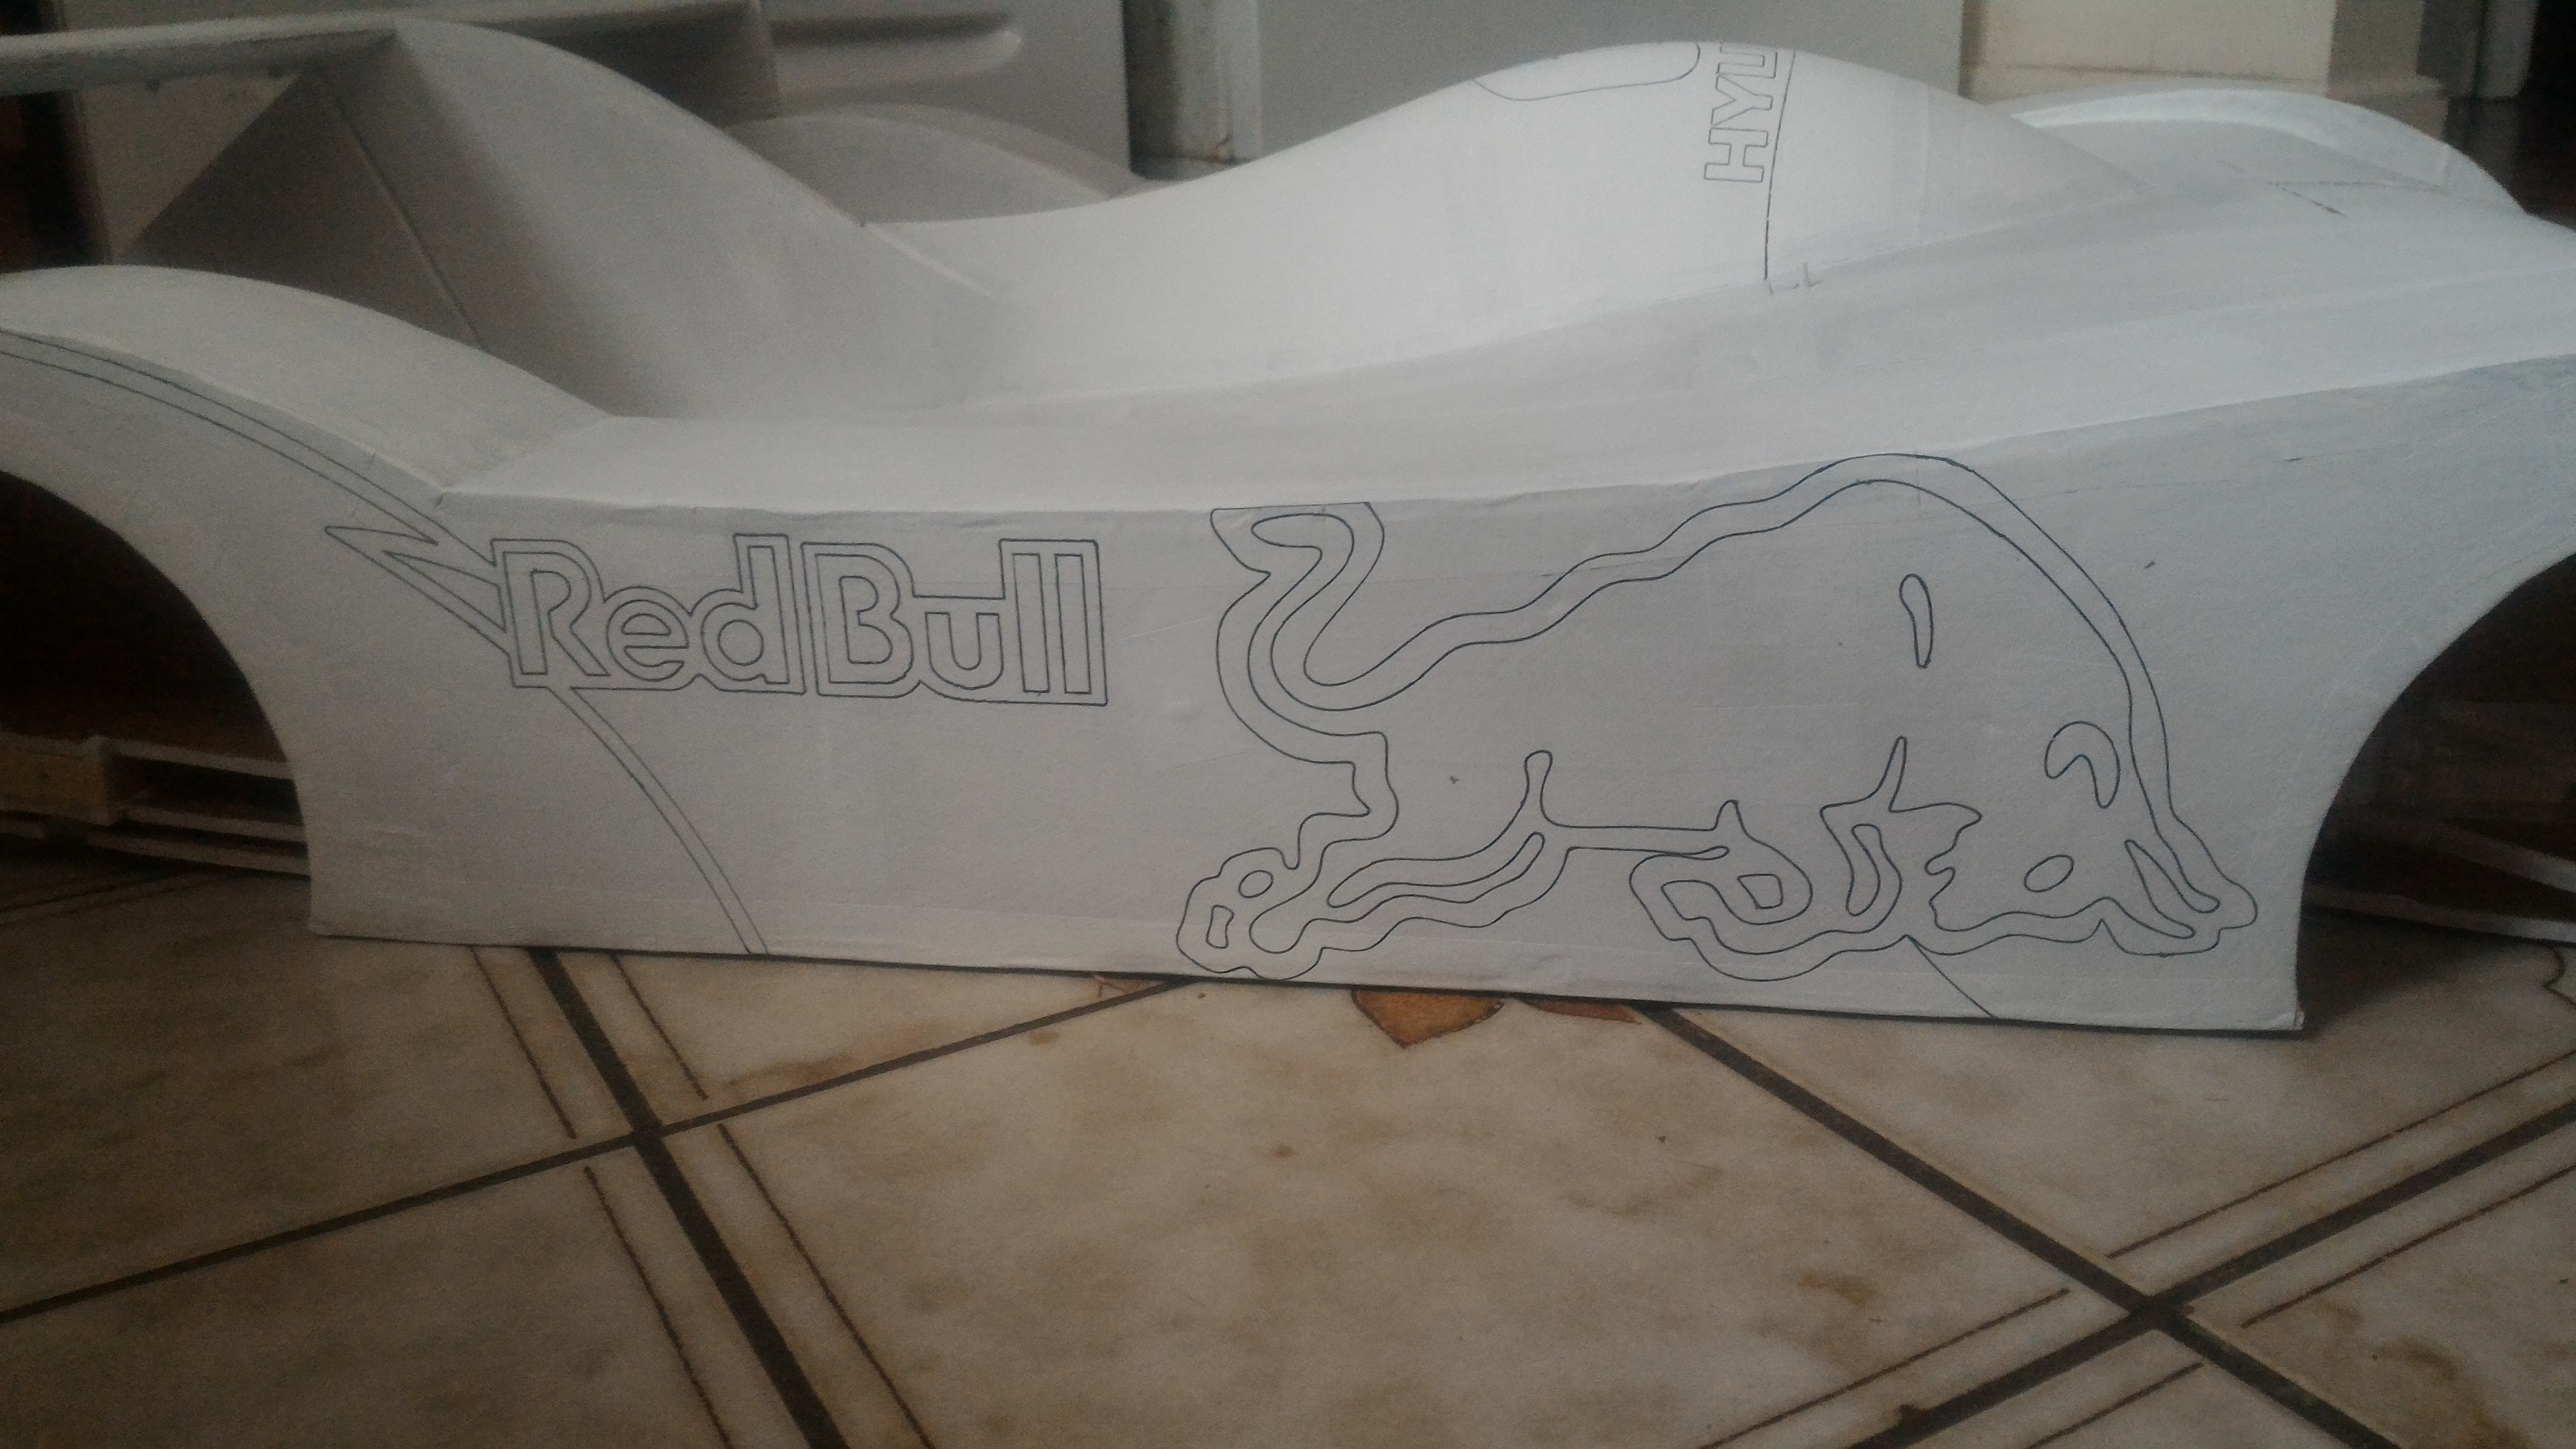
The flying car's almost finished, most of what's left is paint. I've decided to go with the trim scheme from the car that this project is based on, the RMR PM580, which was sponsored largely by Red Bull and Hyundai. I really like the Red Bull color palette so going with the original trim scheme was a pretty easy decision.

P_20190826_135140.jpg


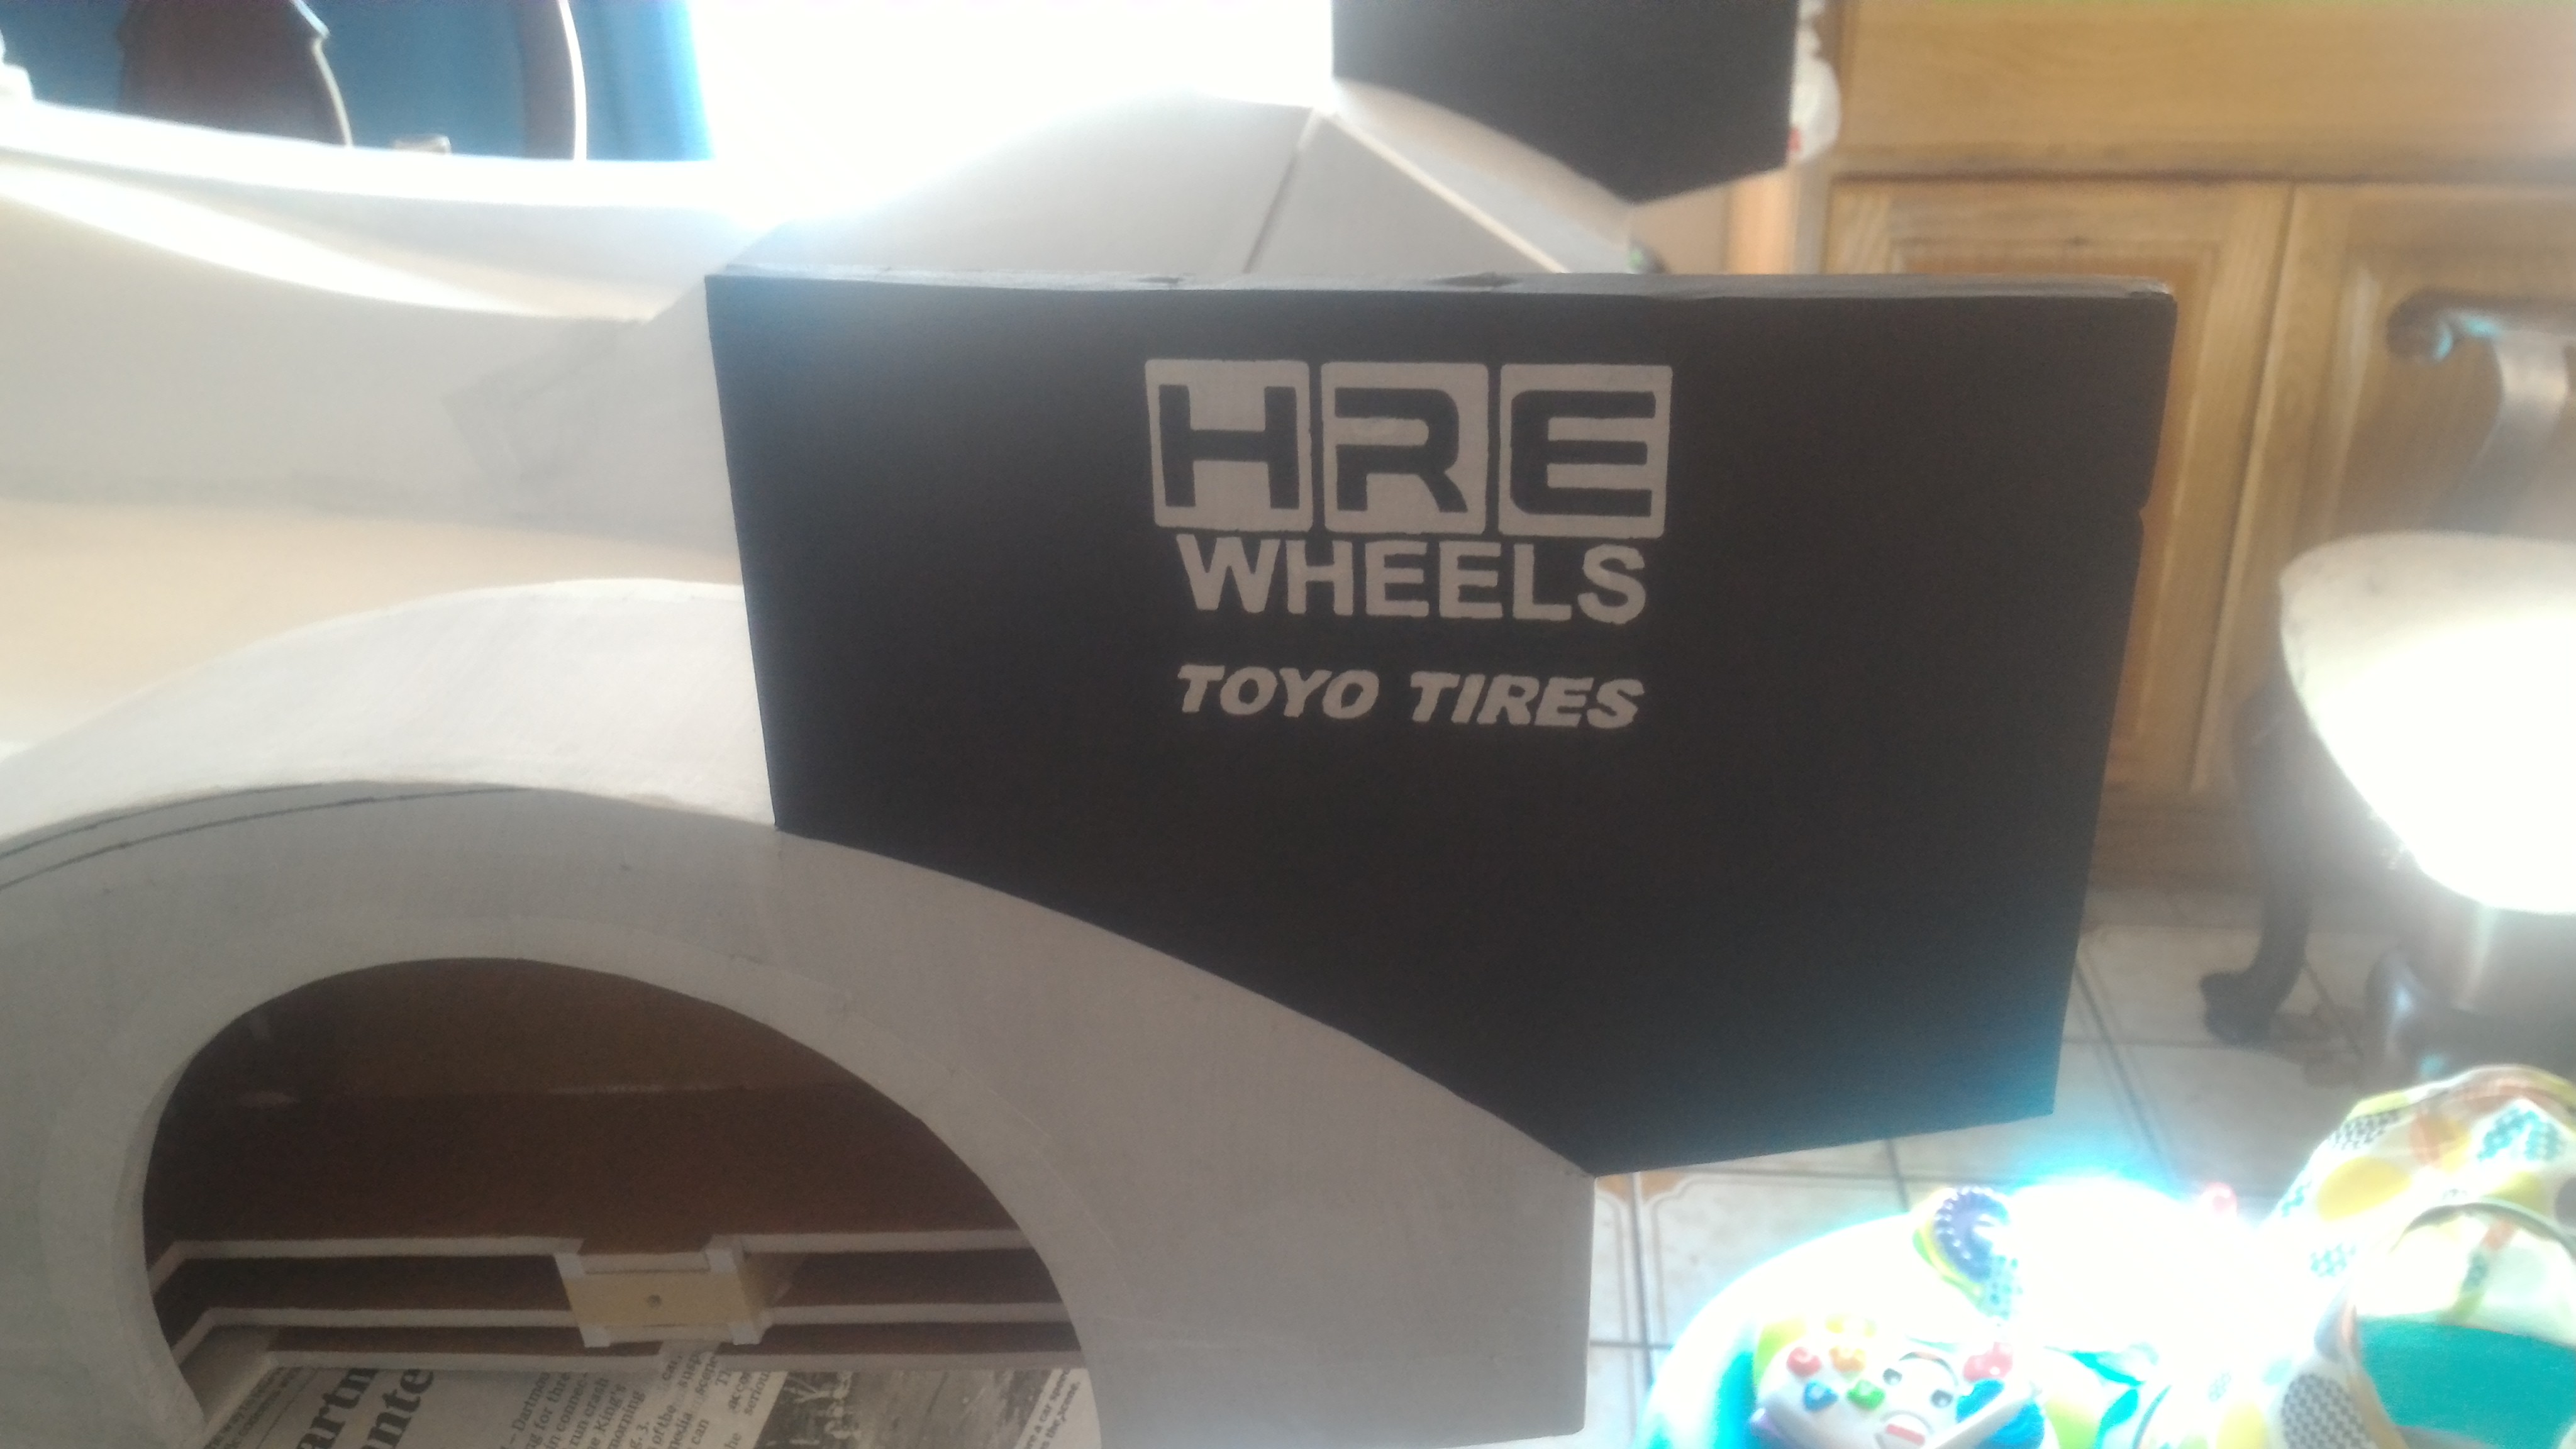
I drew up the logo in CAD from some reference photos of the car and printed out stencils for tracing onto the model.

P_20190826_135125.jpg
P_20190826_135132.jpg


I only gave myself a few hours this past weekend to generate all the stencils so I got kinda lazy on these last few. "WHEELS" and "TOYO TIRES" were just extruded text in whatever fonts seemed close-ish to the original logos.

P_20190826_161457.jpg

I painted these logos first since I knew they'd require the most attention to detail.

P_20190826_203839.jpg


I spent most of the evening working on the fenders. The center section should be pretty quick and simple compared to this. I told myself that I would only use as many stencils as I could draw in an afternoon, but I suspect I'm going to spend an hour or so making one for the center nose tomorrow. Either way I'm pretty happy with how it's coming out.

Hopefully it flies.

-Joe
 
Last edited:

Joe M

Member
After about a week of painting it's almost ready for clear coat.

P_20190903_153058.jpg


P_20190903_153111.jpg


It certainly looks better from the side than from the front. I tried my best to paint on the "nose" of the original car since I didn't physically model it into the body. I added the white stripe just to differentiate the left/right sides. Just a few areas to touch up and it'll be ready for clear coat, mounting of the wheels and motor pylon, and finally the maiden flight!

Joe
 

Joe M

Member
Not yet, sadly. I ran some taxi tests last month, but between the grubs and the fact that our club's grass runway hasn't been rolled in 18 months I'm saving the maiden for the spring. I never really know how these projects are going to fly and I'd like to give it the best possible chance of success.

I'll do my best to get video and post it here when it does come time to maiden. In the meantime I've been looking into building it some scale-looking soft foam rubber tires.

P_20191108_082723.jpg
 

Joe M

Member
Hmmmm, gears turning. :) . Couple good little quad motors as pushers, hinged for thrust vectoring

I think that would be a great setup for this plane. Assuming it flies OK I'll draw up a detailed 3-view plan sometime next year.

For the next iteration I'm planning a smaller body with thrust vectored 80mm EDF. This one's got an excellent wing loading and power to weight ratio, but man it's big and barely fits in the back seat of my car.
 

Wildthing

Legendary member
I think that would be a great setup for this plane. Assuming it flies OK I'll draw up a detailed 3-view plan sometime next year.

For the next iteration I'm planning a smaller body with thrust vectored 80mm EDF. This one's got an excellent wing loading and power to weight ratio, but man it's big and barely fits in the back seat of my car.
Are you going to use a flight controller or anything or just all you on the sticks :) ?

How big is it?