Bloody Baron - Build

SP0NZ

FT CAD Gremlin
Staff member
Admin
Moderator
Mentor
...The biggest hurdle for me will probably be cutting those nice round edges...

Good point. Make sure you use a sharp blade. One thing that I find that helps with cutting those curves is to start the cut about 1/2 - 3/4 inches from where it starts and then cut through about the same distance past the curve. That especially helps with the scallops on the ailerons. It's not really as bad as it looks, once you do it a few times it will seem pretty easy. At least that has been my experience.
 

SP0NZ

FT CAD Gremlin
Staff member
Admin
Moderator
Mentor
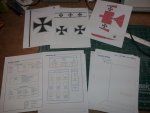
Got my tiled plans all printed. Going to try something a little different for this build. Going to apply my graphics and colored packing tape to the pieces while they are still flat and see if that makes things any easier.

Baron Build Start.jpg
 

narcolepticltd

I unbuild stuff regularly
Sponz, just a quick note (and it may be just my printer). Using the tiled plans printed at 100%, the rule on the paper is slightly smaller than actual. On paper 1" is actually running at 15/16" by real measurement (20mm = 19mm). That'd put the plans I have at roughly 93%.

Doesn't seem like much, but that's cutting almost 2" out of the wingspan. Again, it may just be my printer in the office, but I doublechecked the rule on the FT plans (blender) and it came out exactly 1" to 1"

I'm tempted to go ahead and use these anyways just to see how it goes (will likely have to cut a firewall down a bit)... I'm curious if the channels for a and b folds will allow enough give to hit 90 degrees as well.

I see you've just printed out the tiled plans for a test build above... could you measure the rule on the paper and see if it's 100% on your end?

Pretty new to these forums, so if this is something that has come up in another thread in the past, just disregard =)
 

SP0NZ

FT CAD Gremlin
Staff member
Admin
Moderator
Mentor
Sponz, just a quick note (and it may be just my printer). Using the tiled plans printed at 100%, the rule on the paper is slightly smaller than actual. On paper 1" is actually running at 15/16" by real measurement (20mm = 19mm). That'd put the plans I have at roughly 93%.

Doesn't seem like much, but that's cutting almost 2" out of the wingspan. Again, it may just be my printer in the office, but I doublechecked the rule on the FT plans (blender) and it came out exactly 1" to 1"

I'm tempted to go ahead and use these anyways just to see how it goes (will likely have to cut a firewall down a bit)... I'm curious if the channels for a and b folds will allow enough give to hit 90 degrees as well.

I see you've just printed out the tiled plans for a test build above... could you measure the rule on the paper and see if it's 100% on your end?

Pretty new to these forums, so if this is something that has come up in another thread in the past, just disregard =)

Thanks for the feedback. I just measured mine and they are spot on. Can you tell me what size paper you printed to? I printed on US Letter scale, I set the print options in Adobe Reader to Custom Scale: 100% when I printed the plans.
 

narcolepticltd

I unbuild stuff regularly
Thanks for the feedback. I just measured mine and they are spot on. Can you tell me what size paper you printed to? I printed on US Letter scale, I set the print options in Adobe Reader to Custom Scale: 100% when I printed the plans.

I'll have to check again when I'm back in the office on Thursday, but 11x8 is the paper size... However, I DID print the plans from the PDF in my browser (chrome) and not from adobe (print options are definitely different between the 2), so that could definitely be part of the discrepancy. The FT plans I referenced were printed directly from Adobe Reader.

Again, I may go ahead and just build it like this... couldn't hurt to cut out a power pod and just see if it glues up true at least =P.
 

SP0NZ

FT CAD Gremlin
Staff member
Admin
Moderator
Mentor
I'll have to check again when I'm back in the office on Thursday, but 11x8 is the paper size... However, I DID print the plans from the PDF in my browser (chrome) and not from adobe (print options are definitely different between the 2), so that could definitely be part of the discrepancy. The FT plans I referenced were printed directly from Adobe Reader.

Again, I may go ahead and just build it like this... couldn't hurt to cut out a power pod and just see if it glues up true at least =P.

Okay, thanks for the detailed info. My guess is the web based PDF print didn't scale properly. I always use Adobe Reader and set to Custom Scale: 100% just to be safe.
 

SP0NZ

FT CAD Gremlin
Staff member
Admin
Moderator
Mentor
Time to cut and tile plans = 39m10s
time to trim out parts, glue to poster board and rough cut parts = 21m51s

Up next, cut out the poster board templates. Will keep you posted. I plan on writing an article on how I create my templates and trace out the parts on the foam board.


Paper plans ready to be applied to poster board
2015-01-20 22.53.10.jpg

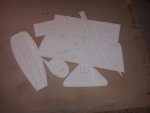
Poster board templates rough cut from sheet
2015-01-20 23.14.40.jpg
 

mad_milchmann

New member
meaured my plans, they were also exactly 1cm : 1cm.

I opened the pdf with full plans and let the pdf-reader split them and insert cutmarks. I didn't know if there would be any problems with scaling because i print on A4 size, and you probably desinged them for US letter-size. :confused: Anyway printing the full size plans split up works really good for me. did that with the other FT plane I built, too (and with the one is tarted but never came further than cutting the plans out).
I just now looked at your tiled plans and saw all the cut-marks etc. :eek: so maybe that would have been better to print, but now I already have the plans ready...

I REALLY like the way aou design your plans, Sponz! :applause: (why is there no thumbs-up simely?) especially all the labelling and the more detailledlines for the different cuts are totally awesome. since i print them in black/white it's much easier to see what to do than on the FT plans. With the baby blender i have built I made some wrong cuts and had to look at the build videos very often, since i cant see the colors of the lines. That's so much better with yours. Also you always know which template you hold in your hand after cutting since because of the labelling. Also I was quite pleased that there weren't any small parts of anything on an extra page (like the last inch of the fuse doubler on an extra page or something like that) I don't know if you planned that in advance or if it was just good luck, but if you did: thanks! There's nothin more annoying for me than have to cut out a teeny tiny part from an extra page and glue it to the big thing when this could have been prevented by moving the part half an inch on the plans.:mad:
so really great work there!

concerning the time I needed:
preparing & cutting the plans: three episodes of "Grimm" ;) - but if Ihadn't watched it would probably have taken me about 45 -60 mins

unfortunately I couldn't cut the foam yet since the foamboard I got is about one or two inches to small for the main wing :mad:
and I wanted to do it all in one go

(the problem is that foamboard isn't that easy to get here in germany and the bigger sheets are quite overpriced in my local shop for double the size you pay nearly 3 times the price) but I hope to get a big sheet and be able to build at least at the weekend.
 

SP0NZ

FT CAD Gremlin
Staff member
Admin
Moderator
Mentor
Thanks for the detailed feedback mad_milchmann. I'm glad you like the plans.

As for the wing, it's a tight fit even for the 20x30 adams foam board we use here in the states. You could seam two pieces at the center of the wing and make it that was as well. Very similar to how the FT Spitfire, Mustang wings are made.
 

SP0NZ

FT CAD Gremlin
Staff member
Admin
Moderator
Mentor
I have all my poster board templates cut out and ready to trace the patterns to foam board. Took 45m22s to cut them all out and mark the various score/fold/reference lines with pin holes.
 

SP0NZ

FT CAD Gremlin
Staff member
Admin
Moderator
Mentor
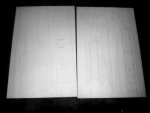
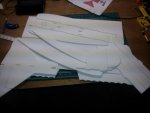
All parts cut out, beveled, and ready for construction. Time = 1h11m06s.

2015-01-23 00.32.52.jpg
 

SP0NZ

FT CAD Gremlin
Staff member
Admin
Moderator
Mentor
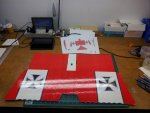
Also added the decals and colored packing tape to the wing before folding it. It was much easier to do while it was still flat. Took about an hour to do.

2015-01-22 23.07.57.jpg
 

SP0NZ

FT CAD Gremlin
Staff member
Admin
Moderator
Mentor
Just past the edges of the decal, then overlapped with red up to the black stripe.
 

SP0NZ

FT CAD Gremlin
Staff member
Admin
Moderator
Mentor
Finished the wing last night. I'm really happy with the new method of applying the printed graphics and colored packing tape prior to gluing up the wing. Unfortunately, I totally forgot about the bottom of the ailerons and the under-cambered portion of the wing. I may just leave those white and see how it looks.

2015-01-23 20.22.50.jpg