Bloody Wonder MkIII
3 View and Isometric View of 3D CAD model

3D Assembly Exploded View

PLANS
Full-Size: Bloody Wonder MkIII Rev B Full-Size
Tiled: Bloody Wonder MkIII Rev B Tiled
BACKGROUND
The FT Bloody Wonder was the first plane I really learned to fly RC on. It was not my first plane, but it was the first plane I had success with. For that reason it will always be special to me. I can't think of a better way to honor that than by trying to make an already great design even better. This is my first build thread/design, but it will not be my last.
OBJECTIVE
I set out to improve upon the FT Bloody Wonder V1/V2 designed by Josh Bixler. The goals I set for this were as follows:
SPECS
ELECTRONICS
BUILD LOG
Build of the "standard" Bloody Wonder MkIII
Plans printed, poster board templates are made, and transferring plans to foam board.

Plans transferred to foam board and starting to cut. The curves in the fuselage and doublers make this one a little trickier to cut out, but it's not difficult. Take your time with it and it will look really nice.

All parts are cut out and I'm ready to start the build.

Building the Fuselage
The fuselage uses a couple of newer FT build techniques. First, from the FT Mustang/FT Storch for the "C" fold in the front for the dowels/skewers. Second, from the Snowball are the tabs that protrude from the top of the fuselage after the "B" folds. The folds are pretty easy to make, but if you can't figure these out from the photos, going back and watching the FT build videos mentioned, should help.

When scratch building, you will need to add some relief toward the inside of the tabs to allow for clearance for the "B" folds. I'm considering adding the relief to the plans. If you build one, I'd love your feedback on this.

Apply hot glue around the score cuts and glue the "C" fold into place.


Next apply hot glue and complete the "B" folds for the sides. Note: The tabs will protrude through the top plate of the fuselage. Use the edge of your build table to make sure the sides stay perpendicular to the top plate when gluing.

Next apply glue to the inside face of the doubler and glue it onto the inside face of the fuselage. Repeat this process for both of the fuselage doublers.

Your finished fuselage should look like this.


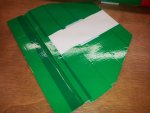
I decided to start putting some colored packing tape on this one prior to final assembly. It's a little easier to tape the individual pieces than to tape the whole plane after it's all glued together.
I waited to crease and glue the NACA duct into place until after I put the colored packing tape on.

Horizontal Stabilizer
The Horizontal Stabilizer builds very similar to the original Flite Test Bloody Wonder. For a cleaner look, leave the paper on the top surface when you create the cavities for the fuselage tabs. If you are building the optional B2 Horizontal Stabilizer, you just need to make the two additional cut outs for the Vertical Stabilizers.

Wing Construction
The MkIII wing builds the same as the Flite Test Bloody Wonder V2. The tabs/slots for the spar are slightly different, but the process to build the wing is the same. Watch the FT Bloody Wonder Scratch Build video if you need help with that.
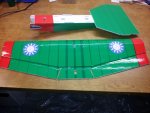
Wing completed, taped and ready for final assembly.

NOTE: I do not bevel the trailing edge of the top of the wing as suggested in the BW V1 build video above. When the BW V2 was released FT mentioned in the review video that it wasn't necessary and didn't change the flight characteristics. It can make the wing look a little nicer, but isn't worth the extra time in my opinion.
Attaching the Wing and Horizontal Stabilizer
Before you get ready to join the wing to the fuselage, pinch/squeeze the top of the four (4) locating tabs together to make a little bit of a taper. This will aid in getting everything to go together nicely.

And here it is after final assembly.

Installing Servos & Completing the Build
Follow the instructions for the FT Bloody Wonder to complete your build of the MkIII.
ADDITIONAL IMAGES
Here is a look at one of the many alternate tail configurations.

Here is a comparison of the Bloody Wonder MkIII and my upcoming Bloody Baron that some of you may have heard about or seen on recent episodes/podcasts. The BW MkIII and Bloody Baron share the same fuselage. They both make awesome combat ships.


MAIDEN FLIGHT VIDEO (VERTICAL TAILS)
3 View and Isometric View of 3D CAD model

3D Assembly Exploded View

PLANS
Full-Size: Bloody Wonder MkIII Rev B Full-Size
Tiled: Bloody Wonder MkIII Rev B Tiled
BACKGROUND
The FT Bloody Wonder was the first plane I really learned to fly RC on. It was not my first plane, but it was the first plane I had success with. For that reason it will always be special to me. I can't think of a better way to honor that than by trying to make an already great design even better. This is my first build thread/design, but it will not be my last.
OBJECTIVE
I set out to improve upon the FT Bloody Wonder V1/V2 designed by Josh Bixler. The goals I set for this were as follows:
- Maintain the look and flight characteristics of the original FT Bloody Wonder
- New single piece curved fuselage similar to the Bloody Micks FunBat
- Tabbed construction for easier alignment and positioning of wing and tail at assembly
- Multiple tail configurations to have variations of the look of the airplane
SPECS
WINGSPAN 28 IN
[/tr]
[tr]
[td]LENGTH[/td]
[td]24 IN[/td]
[/tr]
[tr]
[td]WING AREA[/td]
[td]225 SQ IN[/td]
[/tr]
[tr]
[td]WEIGHT (Combat)[/td]
[td]355 grams (w/o battery)[/td]
[/tr]
[tr]
[td]WING LOADING[/td]
[td]TBD[/td]
[/tr]
[tr]
[td]CONTROL SURFACES:[/td]
[td]AILERON, ELEVATOR[/td]
[/tr]
[/table]
ELECTRONICS
| CHANNELS: | 3 |
| SERVOS: | 2 X hekTronix HXT900 |
Combat "Beef" Setup
[tr]
[td]PROPELLER:[/td]
[td]8X6 APC[/td]
[/tr]
[tr]
[td]MOTOR:[/td]
[td]NTM PropDrive 2826 1200kv[/td]
[/tr]
[tr]
[td]ESC:[/td]
[td]Turnigy Plush 25amp[/td]
[/tr]
[tr]
[td]BATTERY:[/td]
[td]1000-2200 mah 3S[/td]
[/tr]
Basic Setup
[tr]
[td]PROPELLER:[/td]
[td]9x4.7 Slow Fly[/td]
[/tr]
[tr]
[td]MOTOR:[/td]
[td]hekTronix 24gram 1300kv[/td]
[/tr]
[tr]
[td]ESC:[/td]
[td]Turnigy Plush 12amp[/td]
[/tr]
[tr]
[td]BATTERY:[/td]
[td]500-1300 mah 3S[/td]
[/tr]
BUILD LOG
Build of the "standard" Bloody Wonder MkIII
Plans printed, poster board templates are made, and transferring plans to foam board.

Plans transferred to foam board and starting to cut. The curves in the fuselage and doublers make this one a little trickier to cut out, but it's not difficult. Take your time with it and it will look really nice.

All parts are cut out and I'm ready to start the build.

Building the Fuselage
The fuselage uses a couple of newer FT build techniques. First, from the FT Mustang/FT Storch for the "C" fold in the front for the dowels/skewers. Second, from the Snowball are the tabs that protrude from the top of the fuselage after the "B" folds. The folds are pretty easy to make, but if you can't figure these out from the photos, going back and watching the FT build videos mentioned, should help.

When scratch building, you will need to add some relief toward the inside of the tabs to allow for clearance for the "B" folds. I'm considering adding the relief to the plans. If you build one, I'd love your feedback on this.

Apply hot glue around the score cuts and glue the "C" fold into place.


Next apply hot glue and complete the "B" folds for the sides. Note: The tabs will protrude through the top plate of the fuselage. Use the edge of your build table to make sure the sides stay perpendicular to the top plate when gluing.

Next apply glue to the inside face of the doubler and glue it onto the inside face of the fuselage. Repeat this process for both of the fuselage doublers.

Your finished fuselage should look like this.


I decided to start putting some colored packing tape on this one prior to final assembly. It's a little easier to tape the individual pieces than to tape the whole plane after it's all glued together.
I waited to crease and glue the NACA duct into place until after I put the colored packing tape on.

Horizontal Stabilizer
The Horizontal Stabilizer builds very similar to the original Flite Test Bloody Wonder. For a cleaner look, leave the paper on the top surface when you create the cavities for the fuselage tabs. If you are building the optional B2 Horizontal Stabilizer, you just need to make the two additional cut outs for the Vertical Stabilizers.

Wing Construction
The MkIII wing builds the same as the Flite Test Bloody Wonder V2. The tabs/slots for the spar are slightly different, but the process to build the wing is the same. Watch the FT Bloody Wonder Scratch Build video if you need help with that.
Wing completed, taped and ready for final assembly.

NOTE: I do not bevel the trailing edge of the top of the wing as suggested in the BW V1 build video above. When the BW V2 was released FT mentioned in the review video that it wasn't necessary and didn't change the flight characteristics. It can make the wing look a little nicer, but isn't worth the extra time in my opinion.
Attaching the Wing and Horizontal Stabilizer
Before you get ready to join the wing to the fuselage, pinch/squeeze the top of the four (4) locating tabs together to make a little bit of a taper. This will aid in getting everything to go together nicely.

And here it is after final assembly.

Installing Servos & Completing the Build
Follow the instructions for the FT Bloody Wonder to complete your build of the MkIII.
ADDITIONAL IMAGES
Here is a look at one of the many alternate tail configurations.

Here is a comparison of the Bloody Wonder MkIII and my upcoming Bloody Baron that some of you may have heard about or seen on recent episodes/podcasts. The BW MkIII and Bloody Baron share the same fuselage. They both make awesome combat ships.


MAIDEN FLIGHT VIDEO (VERTICAL TAILS)
Last edited:

