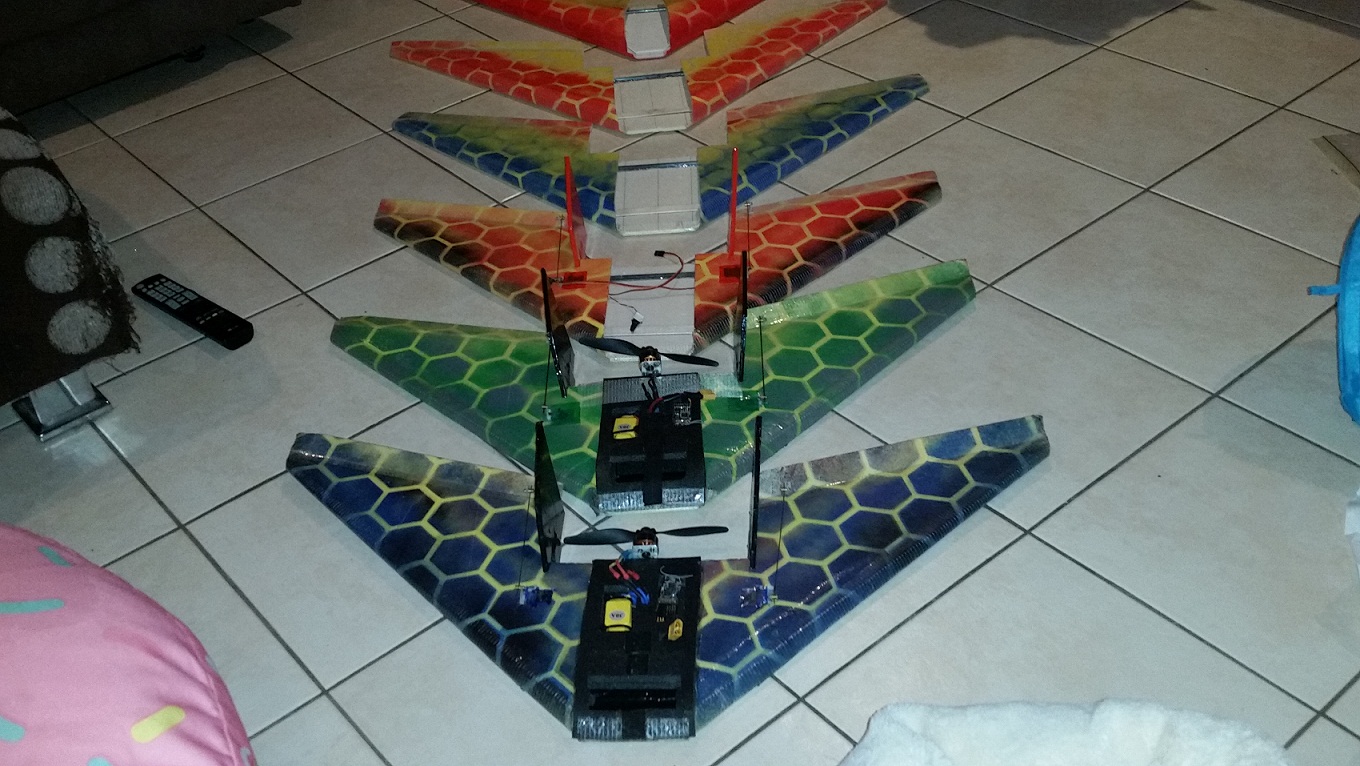
Collaborators - build 1 - 800 mm KFM flying wing

Hai-Lee

Old and Bold RC PILOT
Its been a while between drinks so to speak but just an update for those who stumble across this thread and would consider building one someday. I am still making and selling them but I have got bored with cutting wood and little bits of plywood to suit so I drew up a motor mount and a skid for my 3D printer. Note the skid has a launcher hook for those who would wish to use a bungee launcher.

The skid is best printed with a raft for added glue area. The motor mount is drawn up to suit the 'Funfighter" type motors with high Kv.

The motor Mount:
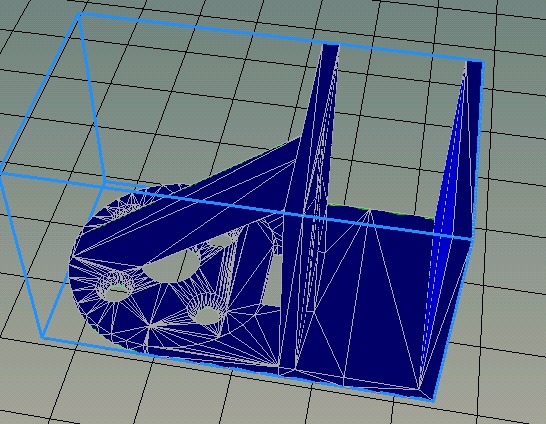
Motor Mount.jpg


The skid
launcher Skid.jpg


The STL Files are attached for your use or modification.

Have fun!
 

Attachments

  • KFM800_3D.zip
    29.1 KB · Views: 0

Hai-Lee

Old and Bold RC PILOT
Nice! Is the skid hollow to save weight?
The skid is designed or drawn as a solid but then I print it with a low percentage of infill so it actually comes out lighter. I normally use around 20% infill but anyone printing one would be best advised to make their own infill decisions. Also you do not need to use a raft for printing but it does increase the surface area for the glue to adhere to!

The motor mount obviously prints best as a solid with 100% infill.

Have fun!
 

FoamyDM

Building Fool-Flying Noob
Moderator
I wanted it to fit to the width of 1 board (dunno why) which is at 55.6%.
I just got the 1408 500g Thrust motors for the Bloody Spruce Goose build and was wondering what to do with the motors... This seems like a smart spot, after the build.
or maybe the 1806 2275kv A packs... with a 5x3.

Do you think they would be right or too much?

My brain is just not working the conversion well.
 

Hai-Lee

Old and Bold RC PILOT
Balance is the only real issue here we run from 100 Watt to 400 Watt on the same airframe/wing. So I think that if you can fit the motor and get the cg right it will do fine! Just try to not load it down too much with a huge battery or it will tend to sink like a stone when the throttle is cut!

Just one thing though, at 55% you do not need the strength of the 3 layers of FB so you could "Average" the top 2 layers and use that as the new top layer. No need to remove the paper just ensure that you glue the 2 pieces completely and it will be a little and very strong fun machine!

Have fun!
 

FoamyDM

Building Fool-Flying Noob
Moderator
Thank you guys so much. I've been looking for one to have a the ready and maybe fit in a suitcase. And or put a rubber band prop on.
 

FoamyDM

Building Fool-Flying Noob
Moderator
I have a number of kid Balsa kit rubber powered props, the kind that fit over a popsicle stick. I've been trying to find a project that I can use for Scouting that include This, and those props... but the foam tends to bend by itself. This will be tried. Possibly during the trip. I have two Micro plane setups. Maybe this is the project to occupy the week away.

Mini Hot Glue gun and sticks. - Check
5" Rubber powered, craft stick-mounted, propeller
craft sticks.
Sanding block, Mini cutting board. (card board)
Thin gauge wire.
1S Micro Setup (2-2.5g servos and receiver)
Jumper Transmitter
150-300mah 1S lipos
Hobby Knife, and Blades. (TSA states, None Shall Pass!) Hobby knife stub.
Pre-cut Foam then.

Battery Charger (for the goggle Lipo) with Lipo bag.

(BetaWhoop 65S lite) if building doesn't work.
and TinyWhoov, at night.
 

FoamyDM

Building Fool-Flying Noob
Moderator
Update: There wasn't enough room for the supplies. so I will build this between builds and update here.
 

sumone

Active member
Gday Hai-lee
Another brisbane guy here.
I also wanted a flying wing that was fast to build and had no fancy A-B folds and came up with a design a while back
that i could build in an evening over a couple beers and flown the next day.
I made a time lapse video showing the build and finished product .
Takes me about 3 and 1/2 hours to bang one up if i really commit.
i have a larger one i put lights in that i fly at night
$5.....2200kv ebay motor
$5...... 30A esc Ebay
$2.......9G servos Ebay
$9.......Dsm2 receiver Bangood
$2.50 ....5mm 500X1000mm foam sheet (Hobbyking has discontinued ):cry:
$3 ......worth of expansion foam for fuse (think it cost about $15 for the length you buy but you you can cut alot of fuselages out of 1 length)
$2.......carbon tube ( $4 tube from hobbyking cut in half to make 2 wings)

I use 1300 3s in these and they are great fun .
The design has changed a bit since this vid. and pic.
It also now has a cool paint job under the book contact.

more wings.jpg


my wing.jpg
 

FoamyDM

Building Fool-Flying Noob
Moderator
The build has started at lunch. 20 min in. I will be using my tachyon 1408 motors. With a bottle cap firewall.
IMG_20181205_143708889.jpg

If this doesn't work, I will rebuild the frame @75% original Size.
 

FoamyDM

Building Fool-Flying Noob
Moderator
🤣 hilarious! That was made from scratch foam board from the lunch sales sign leftover from the STEM event i put together in sept. The piece was bent at the 1/3 area. I don't that there will be a plane to use it with ... And here we are.

After cutting this afternoon and getting my other project to the point I wanted it out of some of the spend a little bit more time with this one. I put in the electronics I cut the screw cap part of a bottle top, and glued it to that nub at the end to mount the motor on. I Centered the 3.7 g servos and made a servo connector on the 12 amp ESC as each of these wires will take less than 4 amps I figured the 22 gauge wire should be perfect. This makes connection quick and easy and all I have to do is attach the 3056 prop and the wire to connect the control arms and I'm ready. That took about an hour
Based on the pics below you can see that the plane rolls in at a nearly all up weight of 75 g. Final weight I estimate at 80 with the All-in-1 camera (6g) wire 2-3g each.

I'm hoping this will be a nice lunch-time Park flyer easy to transport and take with me wherever I go, even with a full car.
IMG_20181206_015548941.jpg
 

FoamyDM

Building Fool-Flying Noob
Moderator
I set up the pushrods from thin galvanized wire and glued the horns. Found out the motor was backwards... With a service setup it is easy to fix, unlug-flip-plug and up you go. It seems to fly ok, made it across the yard, but my controls needed adjustment. Before I could fix it, I had to get to work. I hope to post a video soon.
 

FoamyDM

Building Fool-Flying Noob
Moderator
445mm Wing build. 45 min. all up, fun for hours. portable, durable. $22.
Just one thing though, at 55% you do not need the strength of the 3 layers of FB so you could "Average" the top 2 layers and use that as the new top layer. No need to remove the paper just ensure that you glue the 2 pieces completely and it will be a little and very strong fun machine!
As you can see above, that did as you suggested, and the result Modified KFM-2 foil, to KFM-3 balance points worked well.

Have fun![/QUOTE]
I flew it yesterday on a day off, 3S. It flies VERY well. chilled out at 50% throttle, but flies fast and well at 75-100%. A bit touchy to breezes, as expected, but it is fast and Fun! I had some expo, but I would best be suited to reduce throws.

I have a video here of a the "maiden" flight:
Thank you all here (now to FPV, and it will be even better.)
 

Hai-Lee

Old and Bold RC PILOT
That was nice. It seems to fly quite well and V Fast at times.

I noticed you had a few unexpected landings without any substantial damage. A solid performer obviously.

As it is a different design perhaps you could give it its own thread and plans/build info for others to follow!

Heck I might even give one a shot if you post the plans.

Well Done!

Have fun!