Cutting foam sheets... with a needle!

dkj4linux

Elite member
Hmm, your needle retainer looks different than moebeast's - his has a lip that the bearing rides against so the retainer can't slip off the bearing. The opening in that lip is too small to clear a nut or a washer is the issue I'm having.

View attachment 107384

I considered just cutting the lip out...but I do like the idea of it being there so the retainer can't come off.

I wonder if I still have a damaged bearing...I could take the inner race from that and use it as a spacer.....

Well, yeah... I suppose mine is a bit different.

Screenshot at 2018-05-15 19-09-07.png


I did 8mm and 10mm versions back when we were first discussing it (https://www.thingiverse.com/thing:2528032). I haven't had issues with it at all however... and it is convenient and easy to access the needle. The print quality and fit is nice enough on the bearing that I've never had it fly off... IMO there really aren't any significant side forces to pull it off if things are aligned well enough.

Excuse the clutter... here's my Onshape files. It's a pretty quick print so there's nothing lost if you want to give it a shot...

https://cad.onshape.com/documents/c...754352147776bee8cd/e/3c4b06da0b263e2c0650606a
 
Last edited:

Bristolian

New member
Hmm, your needle retainer looks different than moebeast's - his has a lip that the bearing rides against so the retainer can't slip off the bearing. The opening in that lip is too small to clear a nut or a washer is the issue I'm having.

View attachment 107384

I considered just cutting the lip out...but I do like the idea of it being there so the retainer can't come off.

I wonder if I still have a damaged bearing...I could take the inner race from that and use it as a spacer.....
I used a washer, I just held it tightly in pliers and filed it down until it did fit.
 

Michael9865

Elite member
Jason, here's my needle cutter on the Phlatprinter-inspired machine I built. I essentially replaced the small washer between bearing and flywheel with a 3mm nut. Gives sufficient clearance for retainer and also counter-balance hardware...

View attachment 107382 View attachment 107383
I am not at home now, but my flywheel assembly looks like yours. I have a nut and washer between the flywheel and bearing. I know that the link to my needle retainer was shared earlier in this thread. I had a different bearing on my flywheel, so someone from this great community remixed one for my bearing.
 

jhitesma

Some guy in the desert
Mentor
I ended up just cutting down a bit of brass tubing since I had some that was the right diameter to fit right over the screw. Unfortunately since that means the screw doesn't go quite as deep into the flywheel I need to print a new flywheel because the the threads in my flywheel were damaged when I had a bearing melt down right after building it. So had to print a new flywheel last night and didn't have a chance to get it installed. Should have it back up and going tonight!
 

jhitesma

Some guy in the desert
Mentor
So tried the needle retainer last night...did not go very smooth :(

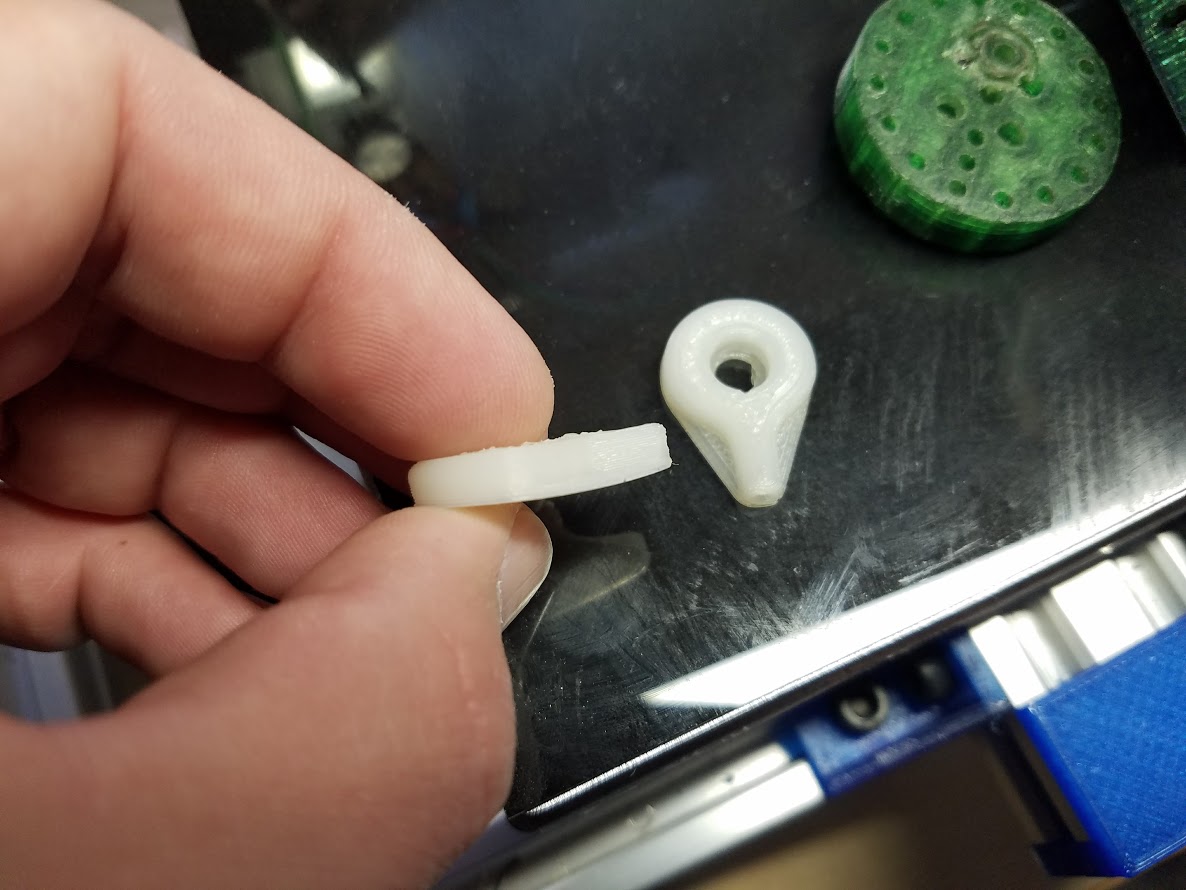
I worry a bit about PLA printed parts flying around at high RPM so I tried printing it in Nylon first. Plus Nylon is less dense than PLA so should be lighter. That did not go so great:

20180517_081509.jpg


Taulman 910 warps less than most nylons...but can still warp. I added fresh gluestick to my glass and tried again - the one in the background came out pretty good...but I couldn't get a needle through it. I wound up drilling out the hole a bit to clean it up and it seemed good.

Except my bearing wouldn't fit...was a little too snug. So...ok...let's just try it in PLA and if I like it I'll deal with Nylon later.

I wound up using a small brass sleeve as a spacer along with the cut down washer I used before to keep the brass spacer from wearing against the flywheel:

20180517_081547.jpg


This seemed to work fairly well...except it does put the needle out further than my old setup which I'm not huge on:
20180517_081555.jpg


I don't think that slight bend in the needle is a huge deal...but still not super happy about it.

Anyway swapped flywheels since the old one's threads were shot. I only used 3 screws to hold the old flywheel...and I'm only using 2 on the new one because the 3rd is going to be a bit tricky to remove due to the damage on the flywheel from my failed bearing almost a year ago:

20180517_081524.jpg


But I did get it on...and fired it up. First cut didn't look so great. Much more ragged than what I usually get. When I installed the needle I noticed that it did have a little bit of play up and down in the retainer. I wonder if I'm using a thinner needle (0.62mm) than mobeast? Except I had tried slightly thicker needle first and it didn't fit at all....

Anyway, started cutting and the cuts just didn't look as clean as I was used to. Not terrible but not like I have come to expect from my needle cutter. But I let it go...until about halfway through the sheet I I noticed it was suddenly dragging between cuts....uh...oh. It was also sounding worse and worse so I canceled the cut and took a look at what was going on:

20180517_081534.jpg


Well, that's not good.

The needle was pulling through the retainer! Needle was still cool, as was the guide and the bearing. But the motor itself was hotter than I expected. I'm really not sure how this could even have happened since there shouldn't be any real stress on the needle in that direction.

One thing that came to mind was that some of my raw needle stock was a little sticky (overspray from the spray glue I use to hold some materials down on when cutting them.) but I had cleaned it off with acetone first and oiled my oiler so the needle felt smooth and seemed to run with no real drag.

I'll try it again...maybe give the nylon retainer another try. And I'll probably sand the spacer down a bit more so the needle has a straighter shot. But so far my experience with the needle retainer hasn't been spectacular :(
 

ironkane

Member
Sorry to hear about your travails Jason.

My feeling about 3D printed flywheels and needle retainers has always been that plastic is not a good material for this use. Every single penetration of the business end of your needle is also creating a impact on the opposite end against a plastic wall....several thousand times a minute. Those impacts make micro deformations that stack up and they also generate generate heat that is stored in the steel and if run long enough will fail catastrophically.

Aluminum would be a exponential improvement but will experience wear as well as it's softer than the steel needle slamming against it.

Drilling holes in a steel retainer is probably beyond most of us because of the very small diameter of the needle hole. You'd need a milling machine to accurately position your tiny bit and using coolant and having the correct RPM's set. And then using a very delicate feed rate.

My previous setup was an aluminum flywheel that was turned on a lathe with a neck and set screws to attach it to the motor shaft and 2 holes in the face for needle and counterweight on the back. The needle is attached by winding a coil around a rod smaller than my 3 x 7 x 3 mm bearing so that it has to be pressed onto the bearing. That bearing/needle assembly secured to the flywheel with a M3 hex head. The needle needs to be positioned so that the down stroke pushes against the coil making it grip the bearing even tighter. The needle cannot have any nicks in it (as you probably know) because it's just like scoring glass to make a break. Also needs to be annealed in your oven to de-stress the steel from the winding process. 500 degrees for 30 minutes and cool in place.

In keeping with the K.I.S.S. mantra of ("Keep It Simple, Stupid" or "Keep It Simply Stupid" or "Keep It Stupidly Simple"), I've reduced it down to just Motor, Bearing and Needle. I've only made a single cut with it in scroll saw mode and it cut as clean as any of my best. I'm very confident that it's going to work as well as my aluminum flywheel version or even better. Or I'll be ordering a large portion of crow in the near future ;)
 

bperc

Member
Thanks, Jason. I also think feeds and speeds is the next issue to address...

Britt, I've only noticed melting of the foam when running too fast rpms and/or too slow feedrate... and that was before I used any sort of pre-guide. Is your cutterspeed/feedrate ratio in the 10-15 range, for DTFB? Above 15 perforations per mm I noticed localized heating of the needle (from the friction heating in the guide) would start melting the foam, which then coated the needle, and then be drawn up into the guide... again, before we ever had near straight-line motion of the needle in the guide.

I notice that you're using a single-row, 2-bearing preguide... and I know Jason's setup is dual-row, 4-bearing design. I think it's possible that you still have excessive friction heating in the guide itself since the needle is rubbing against a bearing and the top of your guide at the 3 and 9 o'clock positions. With the dual-row, 4-bearing setup the needle always rubs an upper bearing and the opposite side lower bearing... and effectively constrains the motion of the needle to straight-line motion *before* it enters the guide proper; i.e. less friction heating in the guide. Maybe you'll want to consider going to the 4-bearing setup... AFAICT it appears to be the most popular and successful preguide setup so far.

I think it is wonderful how you've got the kids so involved in building all those planes... how fun and instructive. The kids will be thankful, when they look back on their education, for teachers such as you. :)

-- David

Thanks for the input. I will try redesigning the bearing guide to incorporate 2 more bearings. I don't have any way to measure the rpm of the motor. I go by the sound when it is making a full cut.
 

bperc

Member
So tried the needle retainer last night...did not go very smooth :(

I worry a bit about PLA printed parts flying around at high RPM so I tried printing it in Nylon first. Plus Nylon is less dense than PLA so should be lighter. That did not go so great:

View attachment 107432

Taulman 910 warps less than most nylons...but can still warp. I added fresh gluestick to my glass and tried again - the one in the background came out pretty good...but I couldn't get a needle through it. I wound up drilling out the hole a bit to clean it up and it seemed good.

Except my bearing wouldn't fit...was a little too snug. So...ok...let's just try it in PLA and if I like it I'll deal with Nylon later.

I wound up using a small brass sleeve as a spacer along with the cut down washer I used before to keep the brass spacer from wearing against the flywheel:

View attachment 107433

This seemed to work fairly well...except it does put the needle out further than my old setup which I'm not huge on:
View attachment 107434

I don't think that slight bend in the needle is a huge deal...but still not super happy about it.

Anyway swapped flywheels since the old one's threads were shot. I only used 3 screws to hold the old flywheel...and I'm only using 2 on the new one because the 3rd is going to be a bit tricky to remove due to the damage on the flywheel from my failed bearing almost a year ago:

View attachment 107435

But I did get it on...and fired it up. First cut didn't look so great. Much more ragged than what I usually get. When I installed the needle I noticed that it did have a little bit of play up and down in the retainer. I wonder if I'm using a thinner needle (0.62mm) than mobeast? Except I had tried slightly thicker needle first and it didn't fit at all....

Anyway, started cutting and the cuts just didn't look as clean as I was used to. Not terrible but not like I have come to expect from my needle cutter. But I let it go...until about halfway through the sheet I I noticed it was suddenly dragging between cuts....uh...oh. It was also sounding worse and worse so I canceled the cut and took a look at what was going on:

View attachment 107436

Well, that's not good.

The needle was pulling through the retainer! Needle was still cool, as was the guide and the bearing. But the motor itself was hotter than I expected. I'm really not sure how this could even have happened since there shouldn't be any real stress on the needle in that direction.

One thing that came to mind was that some of my raw needle stock was a little sticky (overspray from the spray glue I use to hold some materials down on when cutting them.) but I had cleaned it off with acetone first and oiled my oiler so the needle felt smooth and seemed to run with no real drag.

I'll try it again...maybe give the nylon retainer another try. And I'll probably sand the spacer down a bit more so the needle has a straighter shot. But so far my experience with the needle retainer hasn't been spectacular :(

That is what happens to me too, when the foam dust builds up and causes extra friction on the needle. If I catch it right away and spray a little WD-40 it jumps back up to normal speed. If not, the needle will tear through the needle holder.
 

DKchris

Member
The inspiration for my needle cutter came from a very talented engineer/artist, Tom ("atomicwire") McGuire, whose foam cutting machine does exactly what you are describing... stopping the needle at the top of its stroke to allow movement to a new cut area. Rather than magnets, however, he used a DC motor and solenoid-operated wire loop... momentarily reversing the motor and activating the solenoid to catch a stud protruding from the edge of the flywheel to stop it at TDC. With no Z-lift requirement, his foam cutting machine is a simpler, lighter machine that works quite well...


All I did was take the concept and adapt it to a conventional 3-axis CNC machine... where having a true Z-axis allows for a simpler, free-running needle cutter mechanism and variable depth cuts. -- David

Thanks for the input - Tom's solution, while seeming slightly more complicated to implement, does appear like a simpler way of getting a working solution that'll get it right every time - I'd figure something like a one way stop cam on the rim of the flywheel and a spring loaded pal to stop the reversing flywheel ought to work exactly the same; Figuring out how to weigh the rotating mass vs the magnetic force to be sure to catch the flywheel on top every time and still have enough motor torque to overcome both the magnet and the resistance of the foam might be tricky and end up taking a lot of time to perfect.

The Maslow CNC setup keeps popping back into my mind every now and then, based on the idea of placing the 2 motors on an 8 foot 2x4 hung under the ceiling, and Then just having a removable, near upright 2 by 4 foot or so work surface on a table or the floor, leaving plenty of distance to the problematic upper and outer zones of the solution.
With a needle cutter not needing an active z-axis to make multiple cuts, all that would be needed for making both through and score cuts would be a simple manual depth adjustment, handling the 2 as separate tool paths. Would also make it simple to work with different foam thicknesses. I know a lot of people who could really use such a simple and cheap to build cutter setup.
 
Last edited:

jhitesma

Some guy in the desert
Mentor
Sorry to hear about your travails Jason.

Well, it's still better than my experiences with the crankshaft style setup :D But I like to share my success and my failure to help others - plus it helps keep me from feeling bad about the failures if I can share them as learning experiences ;)

My feeling about 3D printed flywheels and needle retainers has always been that plastic is not a good material for this use. Every single penetration of the business end of your needle is also creating a impact on the opposite end against a plastic wall....several thousand times a minute. Those impacts make micro deformations that stack up and they also generate generate heat that is stored in the steel and if run long enough will fail catastrophically.

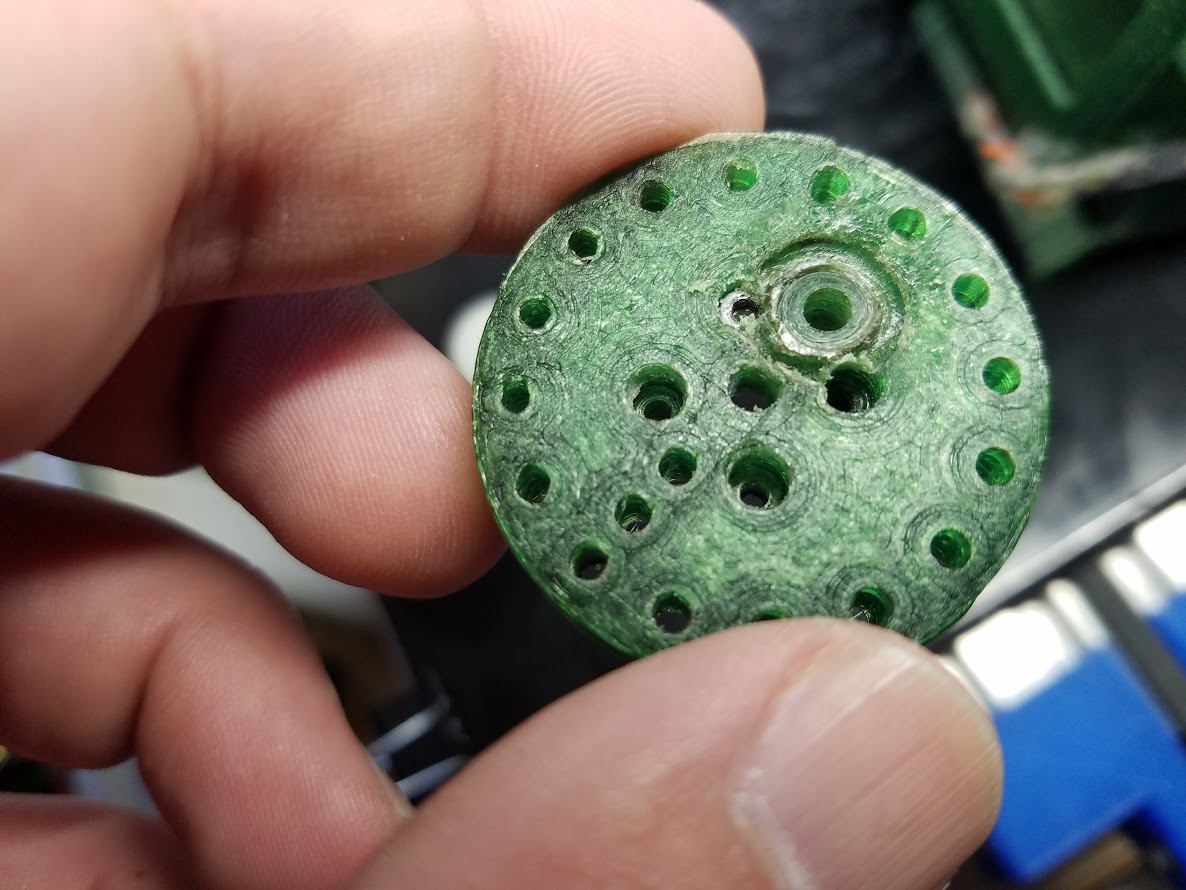
I agree that 3D printed is less than idea. Especially PLA. But my previous flywheel held up great. The big problem with it was when I had that failed bearing right after I made it. (scroll back about a year for the full story - I don't even remember the details at this point but I seem to remember it was when I tried using my dremel to score the outside of the bearing race to help retain the needle...but ended up destroying the bearing which I learned when I tried to use it and it ran way too hot melting itself out of the flywheel.) Honestly when I saw my needle was gone on Sunday I immediately suspected I had lost the bearing as well since I knew that the threads in the flywheel were iffy.

I'd love to do an aluminum flywheel...but I don't have a lathe and milling machine which would be required to replicate the design I'm currently using. I could get access to a lathe...but even then I couldn't do all the holes and counter sinks as cleanly. And since the 3D printed one has worked so well...I see no reason to add extra complications.

My previous setup was an aluminum flywheel that was turned on a lathe with a neck and set screws to attach it to the motor shaft and 2 holes in the face for needle and counterweight on the back. The needle is attached by winding a coil around a rod smaller than my 3 x 7 x 3 mm bearing so that it has to be pressed onto the bearing. That bearing/needle assembly secured to the flywheel with a M3 hex head. The needle needs to be positioned so that the down stroke pushes against the coil making it grip the bearing even tighter. The needle cannot have any nicks in it (as you probably know) because it's just like scoring glass to make a break. Also needs to be annealed in your oven to de-stress the steel from the winding process. 500 degrees for 30 minutes and cool in place.

This is basically what I was running before and which worked great for almost a year. Though I didn't even think to anneal my needle after bending it. That's a great idea and if I had bothered my needle may still be going since it did break right at the bend to go around the bearing.

In keeping with the K.I.S.S. mantra of ("Keep It Simple, Stupid" or "Keep It Simply Stupid" or "Keep It Stupidly Simple"), I've reduced it down to just Motor, Bearing and Needle. I've only made a single cut with it in scroll saw mode and it cut as clean as any of my best. I'm very confident that it's going to work as well as my aluminum flywheel version or even better. Or I'll be ordering a large portion of crow in the near future ;)

I suspect two things contributed to the issue I experienced with the needle retainer last night:

1) The needle having vertical play in the retainer allowing it to move up/down with each stroke building up heat in the retainer and softening it allowing the needle to deform it and come loose.

2) Balance. I suspect this because the cuts were way more ragged and the cutter sounded worse immediately. And when I checked after taking apart the addition of the needle retainer had indeed thrown the balance way off. Before I used a M3x8 screw and 2 M3 washers at the edge of the flywheel opposite the needle to balance out the needle. It now needs at lest 2 additional washers and could still use a bit more but I can't really fit a 5th washer and suspect it would throw it too far the other way if I could. I also suspect this is why the motor itself was hotter than usual after a much shorter cut.

My crankshaft cutter seemed good using it scroll saw style - but when running long enough to do a real cut the vibrations quickly caused things to get much worse. Same with my initial flywheel setup when it wasn't well balanced. The difference that little bit of balance makes is just so huge there's no way I'm going without it anymore ;) I want to see your setup succeed because it is wonderfully simple...but I'm still not convinced it will be balanced enough to last long term. Plus my motor lacks large enough screw holes to do that style of setup even if I was willing to give it a go - and I'm not in the mood to build a whole new cutter with a different motor right now ;)

I am however considering going back to the wire around the bearing style and eliminating the retainer. The retainer seems like a neat idea...but just adds more complexity and right now I'd rather be building planes than mucking with my cutter again :D I may give the retainer one more go....but will really depend on my mood tonight!
 

jhitesma

Some guy in the desert
Mentor
Thanks for the input. I will try redesigning the bearing guide to incorporate 2 more bearings. I don't have any way to measure the rpm of the motor. I go by the sound when it is making a full cut.

RPM is pretty important I've found. It's hard to go by sound until you know what the sound should be ;)

My first few months with the needle cutter were a nightmare until I gave in and got an optical tach ($13 on amazon or banggood) and then suddenly 90% of my issues went away when I realized I had been running it way faster than I thought due to the non-linearity of ESC's throttle curves.

In fact it was before I had a tach and was running it faster than I thought that I did have a few issues with melting foam and enough heat in the guide to actually scorch the wood it was screwed into.
 

dkj4linux

Elite member
Thanks for the input - Tom's solution, while seeming slightly more complicated to implement, does appear like a simpler way of getting a working solution that'll get it right every time - I'd figure something like a one way stop cam on the rim of the flywheel and a spring loaded pal to stop the reversing flywheel ought to work exactly the same; Figuring out how to weigh the rotating mass vs the magnetic force to be sure to catch the flywheel on top every time and still have enough motor torque to overcome both the magnet and the resistance of the foam might be tricky and end up taking a lot of time to perfect.

The Maslow CNC setup keeps popping back into my mind every now and then, based on the idea of placing the 2 motors on an 8 foot 2-by-4 hung under the ceiling, and Then just having a removable, near upright 2 by 4 foot or so work surface on a table or the floor, leaving plenty of distance to the problematic upper and outer zones of the solution.
With a needle cutter not needing an active z-axis to make multiple cuts, all that would be needed for making both through and score cuts would be a simple manual depth adjustment, handling the 2 as separate tool paths. Would also make it simple to work with different foam thicknesses. I know a lot of people who could really use such a simple and cheap to build cutter setup.

Given your interest in this approach, Tom McGuire also did a very well-done Instructable on his foam cutting machine. He describes his solenoid setup and, I'm not sure when/where, he once said it was the most "fiddly" part of the build... but once you get it working it seems to do quite well. His foam-cutting machine itself is ingeniously simple and allows for wall-mounting which would be a tremendous advantage for those who are "space challenged"... which is probably most of us.

http://www.instructables.com/id/Atomicwire-Foam-Cutting-Machine/

Using our brushless motor and Neil's (iGull) servo-activated Z-lift mechanism or similar (https://forum.flitetest.com/index.p...heets-with-a-needle.24251/page-81#post-367344), adapted to Tom's basic design, would be perfect for folks looking for an inexpensive, space-saving RC plane cutter.

I've always thought Tom's design would be a fun project but never pursued it... maybe now is the time :)

-- David
 

bperc

Member
RPM is pretty important I've found. It's hard to go by sound until you know what the sound should be ;)

My first few months with the needle cutter were a nightmare until I gave in and got an optical tach ($13 on amazon or banggood) and then suddenly 90% of my issues went away when I realized I had been running it way faster than I thought due to the non-linearity of ESC's throttle curves.

In fact it was before I had a tach and was running it faster than I thought that I did have a few issues with melting foam and enough heat in the guide to actually scorch the wood it was screwed into.


I ordered a tach from Amazon. It will be interesting to see how far off I am going by sound.
 

jhitesma

Some guy in the desert
Mentor
I ordered a tach from Amazon. It will be interesting to see how far off I am going by sound.

Even if your RPMs are correct by ear I doubt you'll regret having the tach on hand. They're kind of handy once you have one ;)

One other thing I just thought of. How long is your needle? Does it fully retract up into the guide on the upstroke? That was another mistake I made early on. I think David postulated that when it retracts up into the guide like that it gives it a better chance to cool down. But I wonder if it may also have a bit of a wiping effect cleaning off dust.

I only remembered it because I JUST cut a new needle for mine (I'm giving up on the retainer, I printed 2 more but the hole for the wire didn't come out well on one and the hole for the bearing didn't come out well on the other...so back to the "simpler" method I've been using which has worked well for me of just twisting the needle around a mandrel and slipping it over the bearing.) and am working on getting it at the right length.

I find my instinct is to leave it too long since it can always be trimmed shorter and when I sharpen it I loose a mm or two of length. In fact I do final tuning of the length just by sharpening until it's where I want it. The problem is longer needles don't work well at all. They run hotter and less accurately. Ideally if your max cutting depth is 6mm like I usually use it seems about 8mm of needle at full extension is about right....but makes me nervous that it's too short and the guide may hit and doesn't leave any extra material for a future sharpening...so I went with about 10mm. (then foolishly never bothered to sharpen it even when I noticed it getting dull and wound up breaking it before I could sharpen it so I may as well have just gone shorter anyway.)
 

Michael9865

Elite member
I remember reading about needle length. I had mine too long early on, the needle would wonder because of it flexing and wiggling. I have found 8-9mm long when fully extended. My cuts are cleaner and more accurate at that length.
 

bperc

Member
Even if your RPMs are correct by ear I doubt you'll regret having the tach on hand. They're kind of handy once you have one ;)

One other thing I just thought of. How long is your needle? Does it fully retract up into the guide on the upstroke? That was another mistake I made early on. I think David postulated that when it retracts up into the guide like that it gives it a better chance to cool down. But I wonder if it may also have a bit of a wiping effect cleaning off dust.

I only remembered it because I JUST cut a new needle for mine (I'm giving up on the retainer, I printed 2 more but the hole for the wire didn't come out well on one and the hole for the bearing didn't come out well on the other...so back to the "simpler" method I've been using which has worked well for me of just twisting the needle around a mandrel and slipping it over the bearing.) and am working on getting it at the right length.

I find my instinct is to leave it too long since it can always be trimmed shorter and when I sharpen it I loose a mm or two of length. In fact I do final tuning of the length just by sharpening until it's where I want it. The problem is longer needles don't work well at all. They run hotter and less accurately. Ideally if your max cutting depth is 6mm like I usually use it seems about 8mm of needle at full extension is about right....but makes me nervous that it's too short and the guide may hit and doesn't leave any extra material for a future sharpening...so I went with about 10mm. (then foolishly never bothered to sharpen it even when I noticed it getting dull and wound up breaking it before I could sharpen it so I may as well have just gone shorter anyway.)

Thank you for your help jhitesma. I am printing out your needle guide new mount 525 this morning to try out having 4 bearing instead of just 2.

I tried the tach this morning. It is all over the place. What do you aim the LED at? I get reading varying from 5000-16000 depending on what it is aimed at. I tried the front of the flywheel, the side, and the motor. Not sure where the sweet spot is.

I remember reading the post about needle length too. My needle retracts so that about .5mm is exposed from the tip. I got some CorrosionX to waterproof my electronics on my float plane. I applied some of it to the cotton ball this morning and had no problems with dust build up cutting out two sheets back to back.

On a side note. What a blast it is flying the Scout with floats! The Sea Duck is also a lot of fun.
 

jhitesma

Some guy in the desert
Mentor
I tried the tach this morning. It is all over the place. What do you aim the LED at? I get reading varying from 5000-16000 depending on what it is aimed at. I tried the front of the flywheel, the side, and the motor. Not sure where the sweet spot is.

I shine it at the bell of the motor. My motor is a shiny chrome finish so initially I just put some black electrical tape over most of it leaving about a 3/8" wide strip of the chrome exposed...but had the same problem with inconsistent readings. My tach came with some small strips of reflective tape (they were tucked into a pocket of the case it came in and easy to miss) so I put a bit of that over the chrome and finally was able to get good solid reliable readings. Later the black tape came off but it still reads well since the reflective tape is on there - the chrome surface just doesn't work as well as I would have expected for reflecting back the IR.

I remember reading the post about needle length too. My needle retracts so that about .5mm is exposed from the tip. I got some CorrosionX to waterproof my electronics on my float plane. I applied some of it to the cotton ball this morning and had no problems with dust build up cutting out two sheets back to back.

I'd definitely suggest trimming down your needle 2-3mm then.

On a side note. What a blast it is flying the Scout with floats! The Sea Duck is also a lot of fun.

I may have to try that. My mini scout is my all time favorite plane - just so easy and relaxing to fly (I even put a little AIO FPV cam on it for lazy FPV flying.) I started building the bigger scout but it's been sitting about 90% built for a few months because I have too many projects. Yesterday I built a FT-Alpha because after cutting the full set of Alpha/bravo/charlie for a friend I got the itch to try one myself:

20180520_112055.jpg


I still need to finish installing electronics...but it was too windy to fly yesterday so I wasn't in a rush (which is why so many of my projects reach this point and then languish!) neat looking plane but man were the nose and cockpit a pain to build. I'm not very happy with how they came out either...but not unhappy enough to build another :)


I also picked up a few sheets of ROSS board from Wally World yesterday to try...unfortunately my first try cutting it didn't go well. My machine started acting goofy and cutting backwards loosing it's position again. Not sure why it's suddenly doing this lately. It's not happening consistently or repeatably. It's almost like it's loosing steps but it's not loosing steps it's actually going the wrong direction. Seems to only happen in the X direction though - I wonder if something happened to my driver on that axis. I originally thought it was cncjs not playing nice with my old version of Marlin...but then yesterday it happened to me twice cutting from SD. The first time I had it do something like this was when I would reset my home position without rebooting the board...as soon as it hit the point where the limits would have been if I hadn't reset home it would start to freak out. So since then I've gotten into the habit of always resetting the board to set home. Think I'm going to have to break down and finally upgrade Marlin this week. May look into doing dual endstops and auto squaring while I'm at it....
 

bperc

Member
I shine it at the bell of the motor. My motor is a shiny chrome finish so initially I just put some black electrical tape over most of it leaving about a 3/8" wide strip of the chrome exposed...but had the same problem with inconsistent readings. My tach came with some small strips of reflective tape (they were tucked into a pocket of the case it came in and easy to miss) so I put a bit of that over the chrome and finally was able to get good solid reliable readings. Later the black tape came off but it still reads well since the reflective tape is on there - the chrome surface just doesn't work as well as I would have expected for reflecting back the IR.


I'd definitely suggest trimming down your needle 2-3mm then.


I may have to try that. My mini scout is my all time favorite plane - just so easy and relaxing to fly (I even put a little AIO FPV cam on it for lazy FPV flying.) I started building the bigger scout but it's been sitting about 90% built for a few months because I have too many projects. Yesterday I built a FT-Alpha because after cutting the full set of Alpha/bravo/charlie for a friend I got the itch to try one myself:

View attachment 107606

I still need to finish installing electronics...but it was too windy to fly yesterday so I wasn't in a rush (which is why so many of my projects reach this point and then languish!) neat looking plane but man were the nose and cockpit a pain to build. I'm not very happy with how they came out either...but not unhappy enough to build another :)


I also picked up a few sheets of ROSS board from Wally World yesterday to try...unfortunately my first try cutting it didn't go well. My machine started acting goofy and cutting backwards loosing it's position again. Not sure why it's suddenly doing this lately. It's not happening consistently or repeatably. It's almost like it's loosing steps but it's not loosing steps it's actually going the wrong direction. Seems to only happen in the X direction though - I wonder if something happened to my driver on that axis. I originally thought it was cncjs not playing nice with my old version of Marlin...but then yesterday it happened to me twice cutting from SD. The first time I had it do something like this was when I would reset my home position without rebooting the board...as soon as it hit the point where the limits would have been if I hadn't reset home it would start to freak out. So since then I've gotten into the habit of always resetting the board to set home. Think I'm going to have to break down and finally upgrade Marlin this week. May look into doing dual endstops and auto squaring while I'm at it....

The tach confirmed your suspicions. I was running the cutter too fast. I have it dialed down to about 7400 rpm now. I printed out your needle guide and am waiting for the 8mm bearing to arrive tomorrow. The 2212 motor mounts to it just fine. I will use the same flywheel that David has on his Thingiverse.

I think your FT Alpha turned out pretty good. I agree, the nose and canopy are difficult. Here are two of my students with their Alpha, Charlie and my Blue Angel Bravo. I flew the Scout with floats again yesterday. I love how easy the MPCNC needle cutter makes it to build planes.
 

Attachments

  • IMG_7132.JPG
    IMG_7132.JPG
    2.1 MB · Views: 0
  • IMG_7179.jpg
    IMG_7179.jpg
    465.7 KB · Views: 0
  • IMG_7225.JPG
    IMG_7225.JPG
    1.1 MB · Views: 0

ironkane

Member
I read the comments about needle Friday and looked at my new cutter and noted over the weekend that I have 10 - 12 mm protruding at retraction. Initially, I thought to myself that I probably should shorten it. Checking out the thread today, I gave it some thought.

There's not much flex in the portion protruding from the MiG tip. And if molten foam/paper were to stick to the needle...wouldn't it be better if it didn't enter the MiG tip so that it wouldn't accumulate inside it? Unless subsequent strikes incrementally push the goo up the needle and then into the tip? Or is the act of cutting doing enough of a wipe to prevent that?

I spent my Saturday playing with my CNC in Laser Mode and doing some tweaking to my config. So I haven't done any real foam cutting other than the freehand test from a while ago. That cut was clean and the foam was lightly fused by the needle heat. Not enough to affect the edge of the cut though. Ran some gcode through the laser on some DTFB and that's a good way to melt foam and start some fires! Especially the black DTFB which really caught fire, lol.

But I'm heading out to Arizona tomorrow and won't be able to cut out any DTFB until next Monday. I think I'll make a new needle/bearing assembly and try both long and short needles.
 

jhitesma

Some guy in the desert
Mentor
That cut was clean and the foam was lightly fused by the needle heat. Not enough to affect the edge of the cut though.

The only time I've had any fusing of the foam (either to itself or to the spoilboard) was when I had a longer needle and/or too high of an RPM. With either of those I did experience it...and with both oh boy did I have some fusing :D

However even with my short needle that fully retracts I can still see it deflect and bend below the guide when I'm cutting at 15mm/sec or faster. However I don't see any negative effects from it. Cuts still start and stop accurately and are just as precise as when I slow the machine down to where I don't see any needle drag. I've tried faster RPM's and didn't see any benefits, it still deflects at those feed rates and the cut doesn't get any cleaner or more accurate (which would be tough since I both were already just fine!) However at those higher needle RPM's I do have parts start to fuse to the spoilboard and the needle and motor both start to run hotter than I like. It's also louder. So with no real benefits I stick with the lower motor RPM at no more than 15mm/sec feed. I have pushed to 20mm/sec and gotten acceptable cuts...but things just didn't seem as reliable at that speed and it was louder...at 15mm/sec most foam sheets are 15-20 minute cuts, a few are 30 and I've had one or two that pushed just over 40 if they have a lot of little pieces or I get fancy and add in things like the fold style indication marks.

But I'm heading out to Arizona tomorrow and won't be able to cut out any DTFB until next Monday. I think I'll make a new needle/bearing assembly and try both long and short needles.

Good timing it's about to warm up and hit triple digits :) If you find yourself in the extreme southwest corner down south of CA and east of Mexico drop me a message ;)