Hey everyone, I thought I should share my build here to get some feedback and hopefully inspire others to build their own DIY equipment. I am currently working on a mini gimbal to compactly stabilize my GoPro Hero 2. The goal is to mount the gimbal on the end of an extendable pole to use for filming on the ground. This is actually the second gimbal I have built using this technique, the other being on my 500mm quad, and the third I have ever built. The frame is comprised primarily of plexiglass that has been bent and shaped into the desired pieces. I can't afford to work with carbon or a 3D printer so I find plexiglass to be a nice material to build with. I built this gimbal over the course of two days choosing dimensions on the fly so I do not have any plans to give, but I hope I can teach you the techniques necessary to build your own.
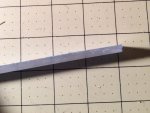
The arms of the gimbal are made from strips of two ply plexigalss. Superglue cured overnight is great for bonding the two layers together, although acetone may also work.

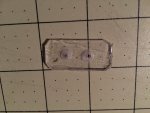
I find it is easier if you cut the slots before you bend the glass. The slots allow for adjustment of the arms to facilitate balancing the gimbal. To cut them I use a dremel with a plastic cutting bit and the flush cut mount. A fence helps keep a straight cut and scrap pieces keep the flush mount level with the piece to be cut.

To bend plexiglass you need some concentrated heat. A small tea candle will work just fine. I marked a line where I wanted the bend and held the glass shortly above the flame while moving in slow circles to avoid heating one spot too much. You'll know if one area is too hot if you see bubbles forming. After some time the plexiglass becomes flexible around the bend area. Once its ready I carefully bend the piece around a 90 degree form. A chamfer on the edge of the form helps because the plexiglass will not bend with a sharp corner without repeated heatings.


Completed bent arms with slots and motor mounts drilled.

Layout of the major components for this gimbal. Very little parts required.

Here is the plate that will be tightened to the motor with the slotted piece in between to hold the arms in place. It is made from a single layer piece of plexiglass. One side is covered with a very thin covering of hot glue to add grip.

Arm mounted to the motor. To fix some clearance issues from bad planning I used a thinner metal plate instead.

Assembled mini gimbal with GoPro mounting strap.

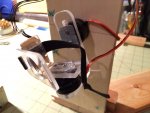
Gimbal mounted on my tuning stand and balanced with GoPro. To balance I simply loosen the two screws on the motor whose axis is in question and slide the arm whichever way is required. The control board is mounted with some carpet tape on the back of the stand.


I did some very quick tuning on the computer with the PIDs I use on my other gimbal and the initial tests are looking great. The mount between GoPro and gimbal works, but is kinda iffy so I may have to revise it. Now I need to create a way to mount this gimbal onto a pole to create my ideal "gimbal on a stick." I might also add some wire rope vibration isolation to help get smoother shots. Test footage will also come shortly.
If you found this DIY helpful, let me know if you want to see an article on DIY gimbals and or bending plexiglass. I scratch build a lot of my equipment so if you have any suggestions for other things I should make, let me know. Thanks for reading!
The arms of the gimbal are made from strips of two ply plexigalss. Superglue cured overnight is great for bonding the two layers together, although acetone may also work.

I find it is easier if you cut the slots before you bend the glass. The slots allow for adjustment of the arms to facilitate balancing the gimbal. To cut them I use a dremel with a plastic cutting bit and the flush cut mount. A fence helps keep a straight cut and scrap pieces keep the flush mount level with the piece to be cut.

To bend plexiglass you need some concentrated heat. A small tea candle will work just fine. I marked a line where I wanted the bend and held the glass shortly above the flame while moving in slow circles to avoid heating one spot too much. You'll know if one area is too hot if you see bubbles forming. After some time the plexiglass becomes flexible around the bend area. Once its ready I carefully bend the piece around a 90 degree form. A chamfer on the edge of the form helps because the plexiglass will not bend with a sharp corner without repeated heatings.


Completed bent arms with slots and motor mounts drilled.

Layout of the major components for this gimbal. Very little parts required.

Here is the plate that will be tightened to the motor with the slotted piece in between to hold the arms in place. It is made from a single layer piece of plexiglass. One side is covered with a very thin covering of hot glue to add grip.

Arm mounted to the motor. To fix some clearance issues from bad planning I used a thinner metal plate instead.

Assembled mini gimbal with GoPro mounting strap.

Gimbal mounted on my tuning stand and balanced with GoPro. To balance I simply loosen the two screws on the motor whose axis is in question and slide the arm whichever way is required. The control board is mounted with some carpet tape on the back of the stand.


I did some very quick tuning on the computer with the PIDs I use on my other gimbal and the initial tests are looking great. The mount between GoPro and gimbal works, but is kinda iffy so I may have to revise it. Now I need to create a way to mount this gimbal onto a pole to create my ideal "gimbal on a stick." I might also add some wire rope vibration isolation to help get smoother shots. Test footage will also come shortly.
If you found this DIY helpful, let me know if you want to see an article on DIY gimbals and or bending plexiglass. I scratch build a lot of my equipment so if you have any suggestions for other things I should make, let me know. Thanks for reading!


