Foam Russia with Love

BATTLEAXE

Legendary member
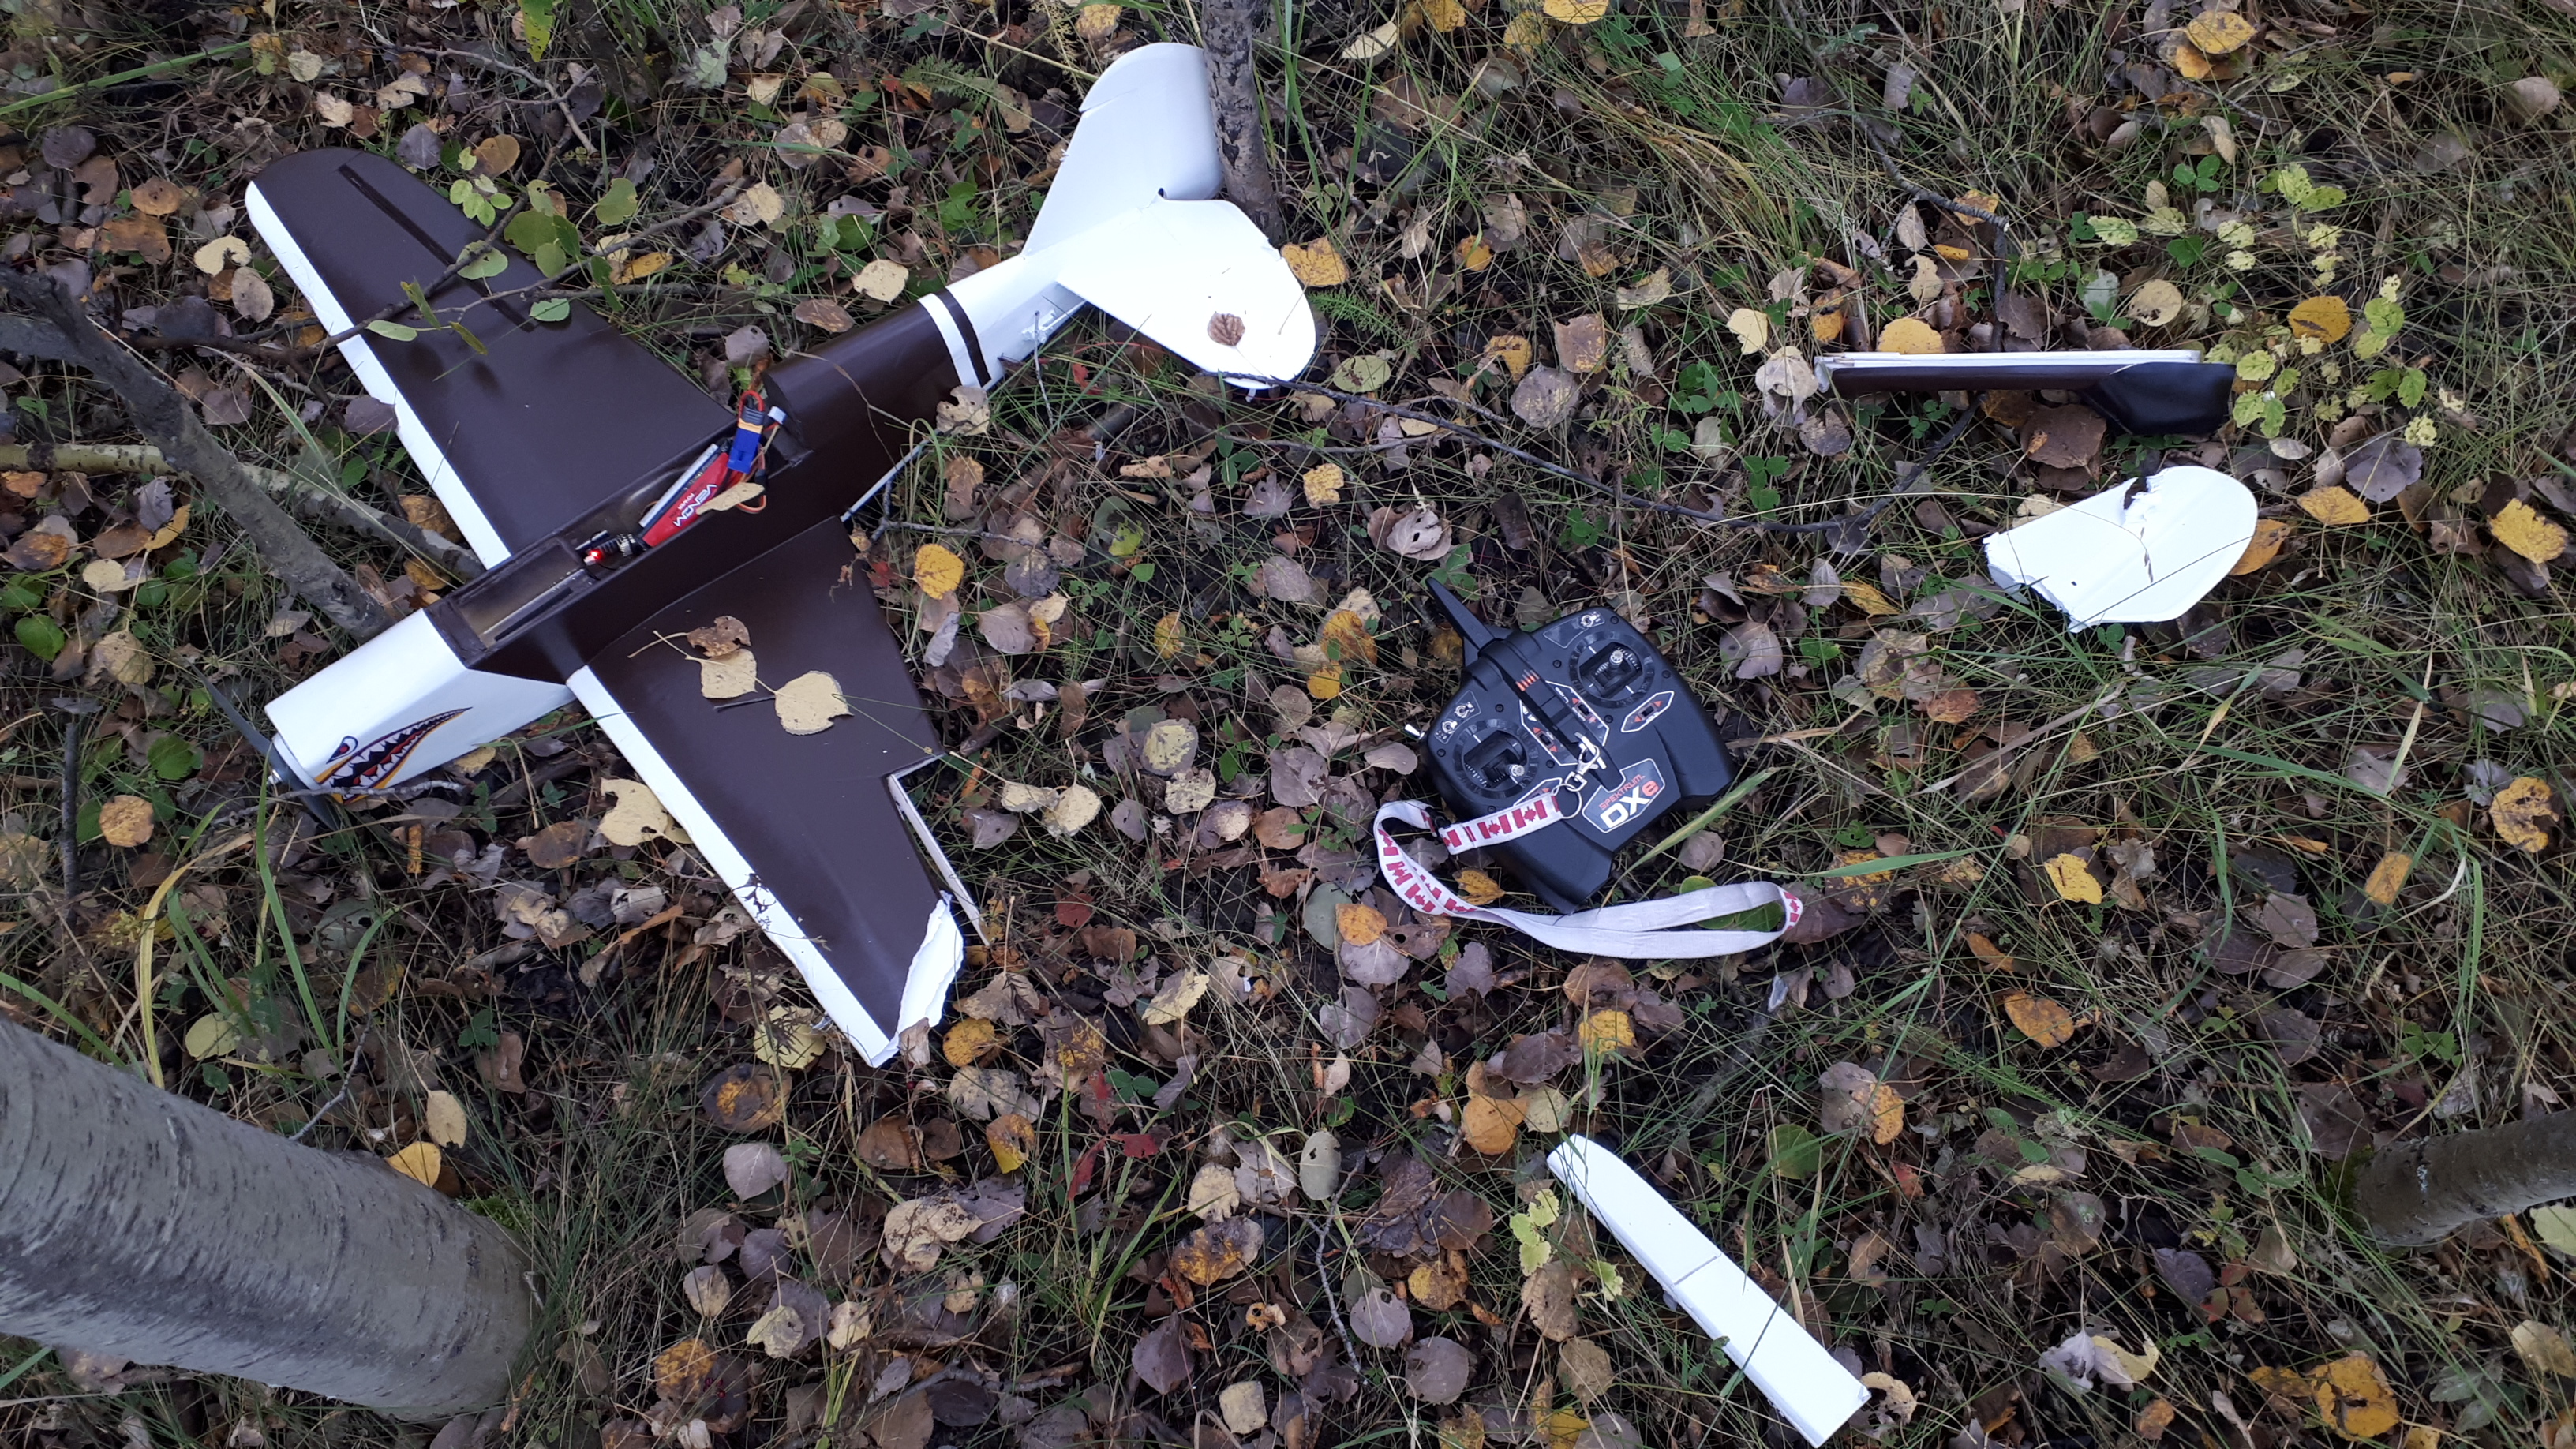
That's exactly what I did to my P-40.
Before
20190922_144742.jpg

After
20190928_101232.jpg

A 2 minute maiden, loss of signal.

There is video but it doesn't have the crash, fell through the trees top to bottom. At least I got all the electronics back
 

PsyBorg

Wake up! Time to fly!
Hey just a tip I learned and added to when I built the Caudron 460 for FF17 ... If you use that pink spackle that turns white when dry and sand that down smooth it works great on any seam to hide glue if you do the squeegee thing on every joint. The added wight is very minimal. The trick I added was to coat it with white Gorilla wood glue. It kind of makes the spackle flexible so it tends to crack less. Once that dries a light sanding and primer and it looks awesome.

The same trick works for puncture repairs. If your like me you tend to hit corn stalks and branches that tear little slots or make small holes or tear outs of paper. Spackle over them sand, add glue re sand n paint.. damage good as new.
 

K3V0

Elite member
Ouch! @BATTLEAXE that was a beautiful plane. I can feel the freedom! Bummer about the LOS. Did you print that spinner from SPONZ’s plan?

Thanks for the tip about the spackle, @PsyBorg! I’ll give it a shot next time. I was eager to get painting so I tidied up the glue and seams as best I could and went on from there.
 

buzzbomb

I know nothing!
My Mig build has begun! :D A tip @sundown57 shared with me concerning the blue 9 gram servos most of us use: The wires coming out are not really secured to the body of the servo. They're just soldered to the board and stuck through a hole. That means they'll pull free pretty easily. A drop of CA glue on either side of the wires, where they go into the servo body prevents this. :)

20191113_022644.jpg

I'm not quite ready for 4s yet. I'm thinking a 3s 2200mAh batt., SunnySky 2216-8 1250kv motor (because I've got two left ;)) 30amp esc and a 9x6 or 8x6 APC prop. My last free receiver is a 4 channel, so I won't be using an external bec on this one.

I've very little experience in forming foam into curves. This should be a fun and educational build for me. Besides, I can't wait to fly the darn thing! Zoom! :D
 

The Hangar

Fly harder!
Mentor
My Mig build has begun! :D A tip @sundown57 shared with me concerning the blue 9 gram servos most of us use: The wires coming out are not really secured to the body of the servo. They're just soldered to the board and stuck through a hole. That means they'll pull free pretty easily. A drop of CA glue on either side of the wires, where they go into the servo body prevents this. :)

View attachment 147933

I'm not quite ready for 4s yet. I'm thinking a 3s 2200mAh batt., SunnySky 2216-8 1250kv motor (because I've got two left ;)) 30amp esc and a 9x6 or 8x6 APC prop. My last free receiver is a 4 channel, so I won't be using an external bec on this one.

I've very little experience in forming foam into curves. This should be a fun and educational build for me. Besides, I can't wait to fly the darn thing! Zoom! :D
It looks good! My first plane to build that used a lot of forming was the sea angel, and its one of my favorite builds I’ve done. You’ll have fun building and flying it for sure!
 

BATTLEAXE

Legendary member
Ouch! @BATTLEAXE that was a beautiful plane. I can feel the freedom! Bummer about the LOS. Did you print that spinner from SPONZ’s plan?

Thanks for the tip about the spackle, @PsyBorg! I’ll give it a shot next time. I was eager to get painting so I tidied up the glue and seams as best I could and went on from there.
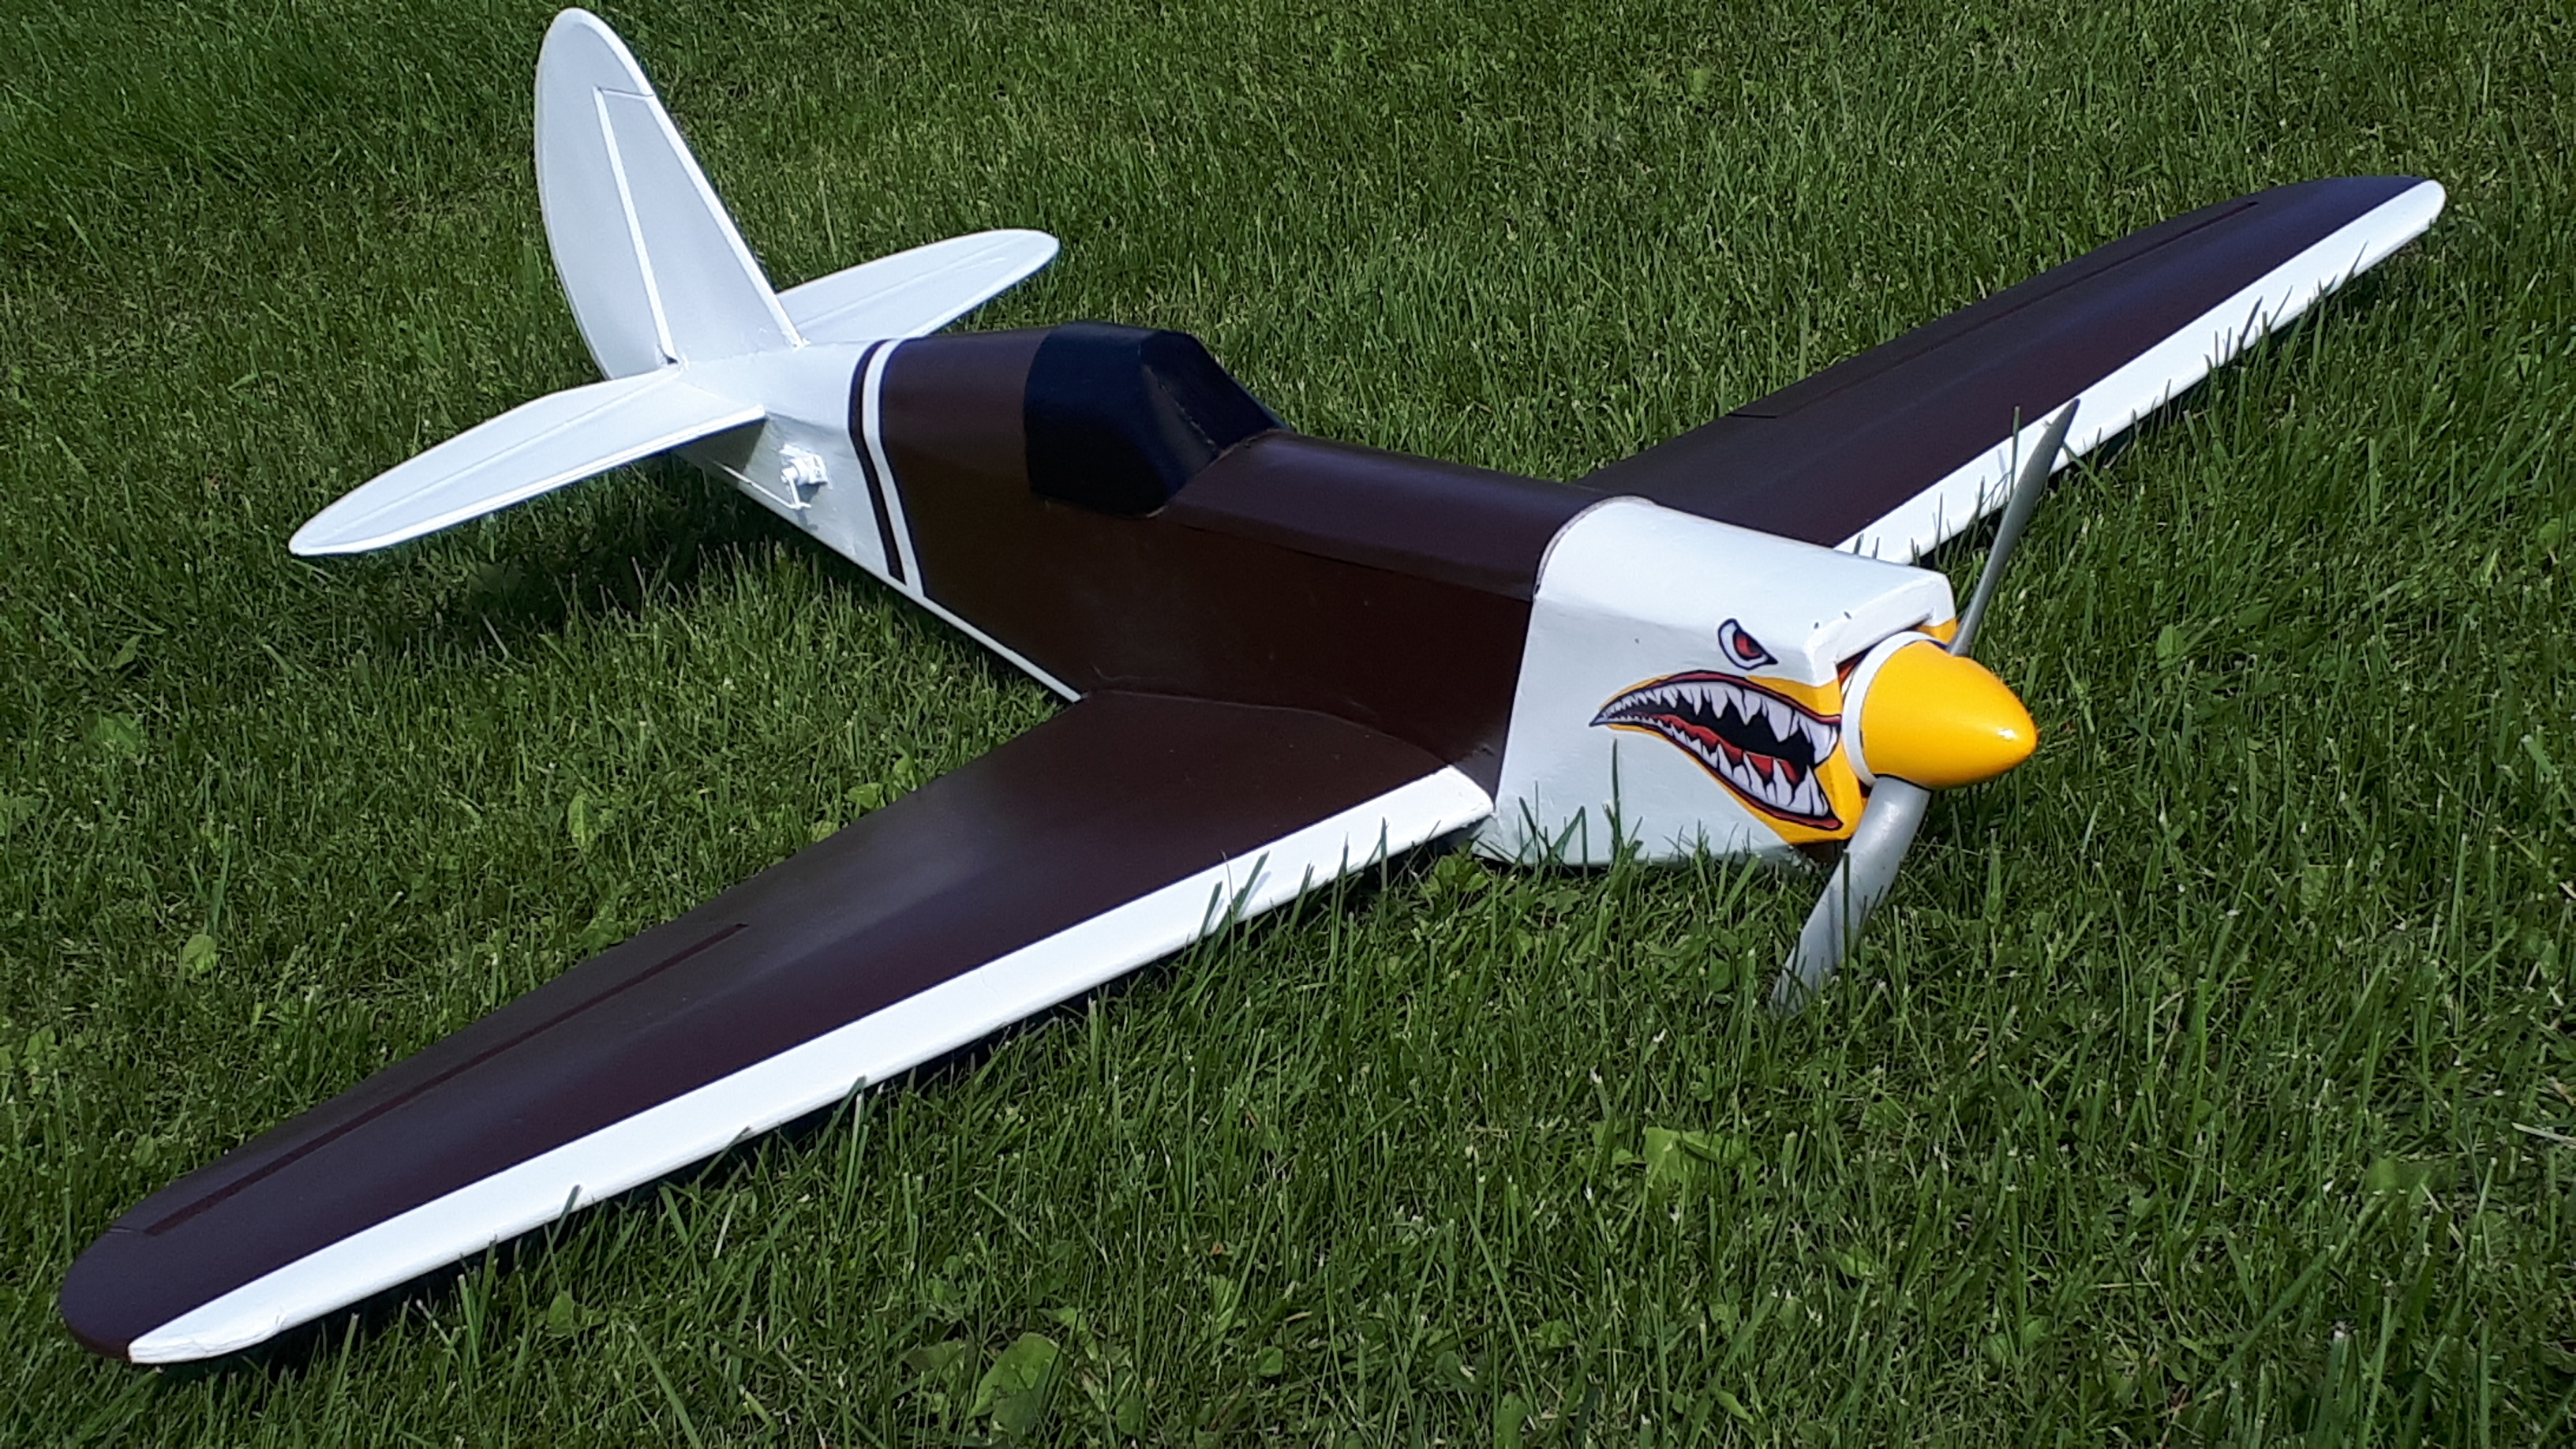
Hopefully with the new Tx this kind of shenanigans won't happen on a regular basis. I started in this hobby just this spring and I have built over 25 planes, half have met their demise like the P-40. Most of the other half have been my fault. I have 2 complete planes and a third on the way...
Oh man, just seeing it again makes me feel so bad for ya. You should make another after the bushwhacker:)
... and if I do another warbird it might either be the Mig or a master series Mustang or Spit. I am done with the P-40, bad voodoo vibes
My Mig build has begun! :D A tip @sundown57 shared with me concerning the blue 9 gram servos most of us use: The wires coming out are not really secured to the body of the servo. They're just soldered to the board and stuck through a hole. That means they'll pull free pretty easily. A drop of CA glue on either side of the wires, where they go into the servo body prevents this. :)

View attachment 147933

I'm not quite ready for 4s yet. I'm thinking a 3s 2200mAh batt., SunnySky 2216-8 1250kv motor (because I've got two left ;)) 30amp esc and a 9x6 or 8x6 APC prop. My last free receiver is a 4 channel, so I won't be using an external bec on this one.

I've very little experience in forming foam into curves. This should be a fun and educational build for me. Besides, I can't wait to fly the darn thing! Zoom! :D
Wow just been in build mode lately, seems to be in spurts of either flying or building. The past week or so has been some of column A, some of column B. Gotta get it in while you can i guess.

Wing looks good though, you don't do much of the ironed edges though huh?
 

K3V0

Elite member
My Mig build has begun! :D A tip @sundown57 shared with me concerning the blue 9 gram servos most of us use: The wires coming out are not really secured to the body of the servo. They're just soldered to the board and stuck through a hole. That means they'll pull free pretty easily. A drop of CA glue on either side of the wires, where they go into the servo body prevents this. :)

View attachment 147933

I'm not quite ready for 4s yet. I'm thinking a 3s 2200mAh batt., SunnySky 2216-8 1250kv motor (because I've got two left ;)) 30amp esc and a 9x6 or 8x6 APC prop. My last free receiver is a 4 channel, so I won't be using an external bec on this one.

I've very little experience in forming foam into curves. This should be a fun and educational build for me. Besides, I can't wait to fly the darn thing! Zoom! :D
Yeah! Nice start! I think getting the wing cut out and folded was the big hurdle for me. Thanks for the tip about the 9g servos! I was just dragging some 5g FT servos out of the mountain scout and I was thinking about how well made they were to fly in 5 different doomed planes over months of use.
I felt the same about peeling the paper and forming the foam. It’s a pretty cool technique and it does make parts of the plane look great. I made some practice pieces and learned the grain of the board. Maybe we’ll both be flying new Migs this weekend!😄

@BATTLEAXE, I saw that you had tx issues with other planes. 🤞hope the new one fixes all that!
 

BATTLEAXE

Legendary member
Yeah! Nice start! I think getting the wing cut out and folded was the big hurdle for me. Thanks for the tip about the 9g servos! I was just dragging some 5g FT servos out of the mountain scout and I was thinking about how well made they were to fly in 5 different doomed planes over months of use.
I felt the same about peeling the paper and forming the foam. It’s a pretty cool technique and it does make parts of the plane look great. I made some practice pieces and learned the grain of the board. Maybe we’ll both be flying new Migs this weekend!😄

@BATTLEAXE, I saw that you had tx issues with other planes. 🤞hope the new one fixes all that!
Thanks man, I hope the issues are alleviated as well. The more I think of it, maybe its just being wishful, but a lot of the problems I was having from the start and I figured were other issues, could have been the Tx as well. So I am guessing the new Tx will be more consistent and easier to handle.

I am looking at a new way to form FB for curved and shaped pieces. I need to experiment with it but if it works it should make things a little easier and more accurate. If there is success with it I will make a Quick Tips vid for it.

I can't wait to see you guys fly these Migs, your reactions will be so entertaining. Buzz might be a little closer to used to it because of the Spit but @K3V0, You will be shaking the whole time, put your adrenaline shorts on, and make sure you have a lot of space lol (y)
 

buzzbomb

I know nothing!
Yeah! Nice start! I think getting the wing cut out and folded was the big hurdle for me. Thanks for the tip about the 9g servos! I was just dragging some 5g FT servos out of the mountain scout and I was thinking about how well made they were to fly in 5 different doomed planes over months of use.
I felt the same about peeling the paper and forming the foam. It’s a pretty cool technique and it does make parts of the plane look great. I made some practice pieces and learned the grain of the board. Maybe we’ll both be flying new Migs this weekend!😄

@BATTLEAXE, I saw that you had tx issues with other planes. 🤞hope the new one fixes all that!
Wing looks good though, you don't do much of the ironed edges though huh?
For a while I ironed everything. Then I stopped. Simply a matter of patience. I build to fly. That's really it. I just want to fly! :) I've been busting my tail feathers up lately. I might iron the stabs for strength, but that'll be the only reason.
 

BATTLEAXE

Legendary member
I usually take 2-3 days to build a plane, and I am a bit more of a perfectionist then some. There are a lot of times here I will start over just because it is a little twisted or out of whack, wrinkled or rented, where it would fly just fine. I know it's kind of a waste of time with some since I do crash a lot as well, but that's just me. When I am in build mode I can't seem to just slap something together, my mind just can't take it when cuts are shoddy or things are mashed together.

Your builds are really clean as far as the end result and you are efficient at it, and it works for your flying fun obviously. I am excited for you every time I see you fly your Spit, the Mig will be a riot for the both of us lol :LOL:
 

K3V0

Elite member
Thanks man, I hope the issues are alleviated as well. The more I think of it, maybe its just being wishful, but a lot of the problems I was having from the start and I figured were other issues, could have been the Tx as well. So I am guessing the new Tx will be more consistent and easier to handle.

I am looking at a new way to form FB for curved and shaped pieces. I need to experiment with it but if it works it should make things a little easier and more accurate. If there is success with it I will make a Quick Tips vid for it.

I can't wait to see you guys fly these Migs, your reactions will be so entertaining. Buzz might be a little closer to used to it because of the Spit but @K3V0, You will be shaking the whole time, put your adrenaline shorts on, and make sure you have a lot of space lol (y)
Lol! if by adrenaline shorts you mean no shorts but I’m willing to fly by the seat of my pants then yes, I agree it will be entertaining! 😅I’ll try to get some footage. I expect to be screaming across the park and terrifying the dog walkers!
 

buzzbomb

I know nothing!
Progress Update:

If you're building along after us, @K3V0 mentioned the easy fix for the discrepancy in the plans. It can be accomplished in one of two ways. Either trim the bottom plate to match the wing, or trim the wing to match the bottom plate. If you've watched the build video, you probably saw where they apparently followed the second method. So that's what I did. I simply traced the angle of the bottom plate onto the wing, and cut it off at the blue line.

20191114_195206.jpg

And below is where I have to end my build session for the evening.

20191115_014851.jpg

I would have liked to have finished the hatch, but after nearly a month out of work, I am back tomorrow. I'm just out of time tonight. Hopefully I'll be able to build tomorrow night after work. I'll just have to wait and see how much oomph I've got left. ;)

Still, progress has been good. All the servos are installed with pushrods and control horns. I even ironed the horizontal and vertical stabilizers to give them some rigidity. Other than the issue with the wing, there have been no real surprises with this build thus far. Forming the foam into curves is really simple and even satisfying, as the curve forms.

I'm off work next Tuesday and Wednesday, and the weather looks conducive to a maiden, if a little windy. Hopefully I'll have her ready to go! :)
 

The Hangar

Fly harder!
Mentor
Progress Update:

If you're building along after us, @K3V0 mentioned the easy fix for the discrepancy in the plans. It can be accomplished in one of two ways. Either trim the bottom plate to match the wing, or trim the wing to match the bottom plate. If you've watched the build video, you probably saw where they apparently followed the second method. So that's what I did. I simply traced the angle of the bottom plate onto the wing, and cut it off at the blue line.

View attachment 148107

And below is where I have to end my build session for the evening.

View attachment 148108

I would have liked to have finished the hatch, but after nearly a month out of work, I am back tomorrow. I'm just out of time tonight. Hopefully I'll be able to build tomorrow night after work. I'll just have to wait and see how much oomph I've got left. ;)

Still, progress has been good. All the servos are installed with pushrods and control horns. I even ironed the horizontal and vertical stabilizers to give them some rigidity. Other than the issue with the wing, there have been no real surprises with this build thus far. Forming the foam into curves is really simple and even satisfying, as the curve forms.

I'm off work next Tuesday and Wednesday, and the weather looks conducive to a maiden, if a little windy. Hopefully I'll have her ready to go! :)
It’s looking good @buzzbomb ! Good luck at work and I’m eager to see the maiden!
 

K3V0

Elite member
Progress Update:

If you're building along after us, @K3V0 mentioned the easy fix for the discrepancy in the plans. It can be accomplished in one of two ways. Either trim the bottom plate to match the wing, or trim the wing to match the bottom plate. If you've watched the build video, you probably saw where they apparently followed the second method. So that's what I did. I simply traced the angle of the bottom plate onto the wing, and cut it off at the blue line.

View attachment 148107

And below is where I have to end my build session for the evening.

View attachment 148108

I would have liked to have finished the hatch, but after nearly a month out of work, I am back tomorrow. I'm just out of time tonight. Hopefully I'll be able to build tomorrow night after work. I'll just have to wait and see how much oomph I've got left. ;)

Still, progress has been good. All the servos are installed with pushrods and control horns. I even ironed the horizontal and vertical stabilizers to give them some rigidity. Other than the issue with the wing, there have been no real surprises with this build thus far. Forming the foam into curves is really simple and even satisfying, as the curve forms.

I'm off work next Tuesday and Wednesday, and the weather looks conducive to a maiden, if a little windy. Hopefully I'll have her ready to go! :)
Looking good! I loved making the top hatch! I think it’s my favorite individual part for any FT plane yet 😸! The fit between the back bottom plate and the wing wasn’t too bad to fix. I felt it would be easier to replace the bottom plate than the wing if I messed it up. 😬 I’m glad you’re going back to work! It can be really hard to get back into the swing of things.

I’m curious as to the ironing. I’ve seen it mentioned a few times and some folks seem to use it on every project. The extra rigidity sounds nice. I assume you’re not using the household clothes iron 😆.

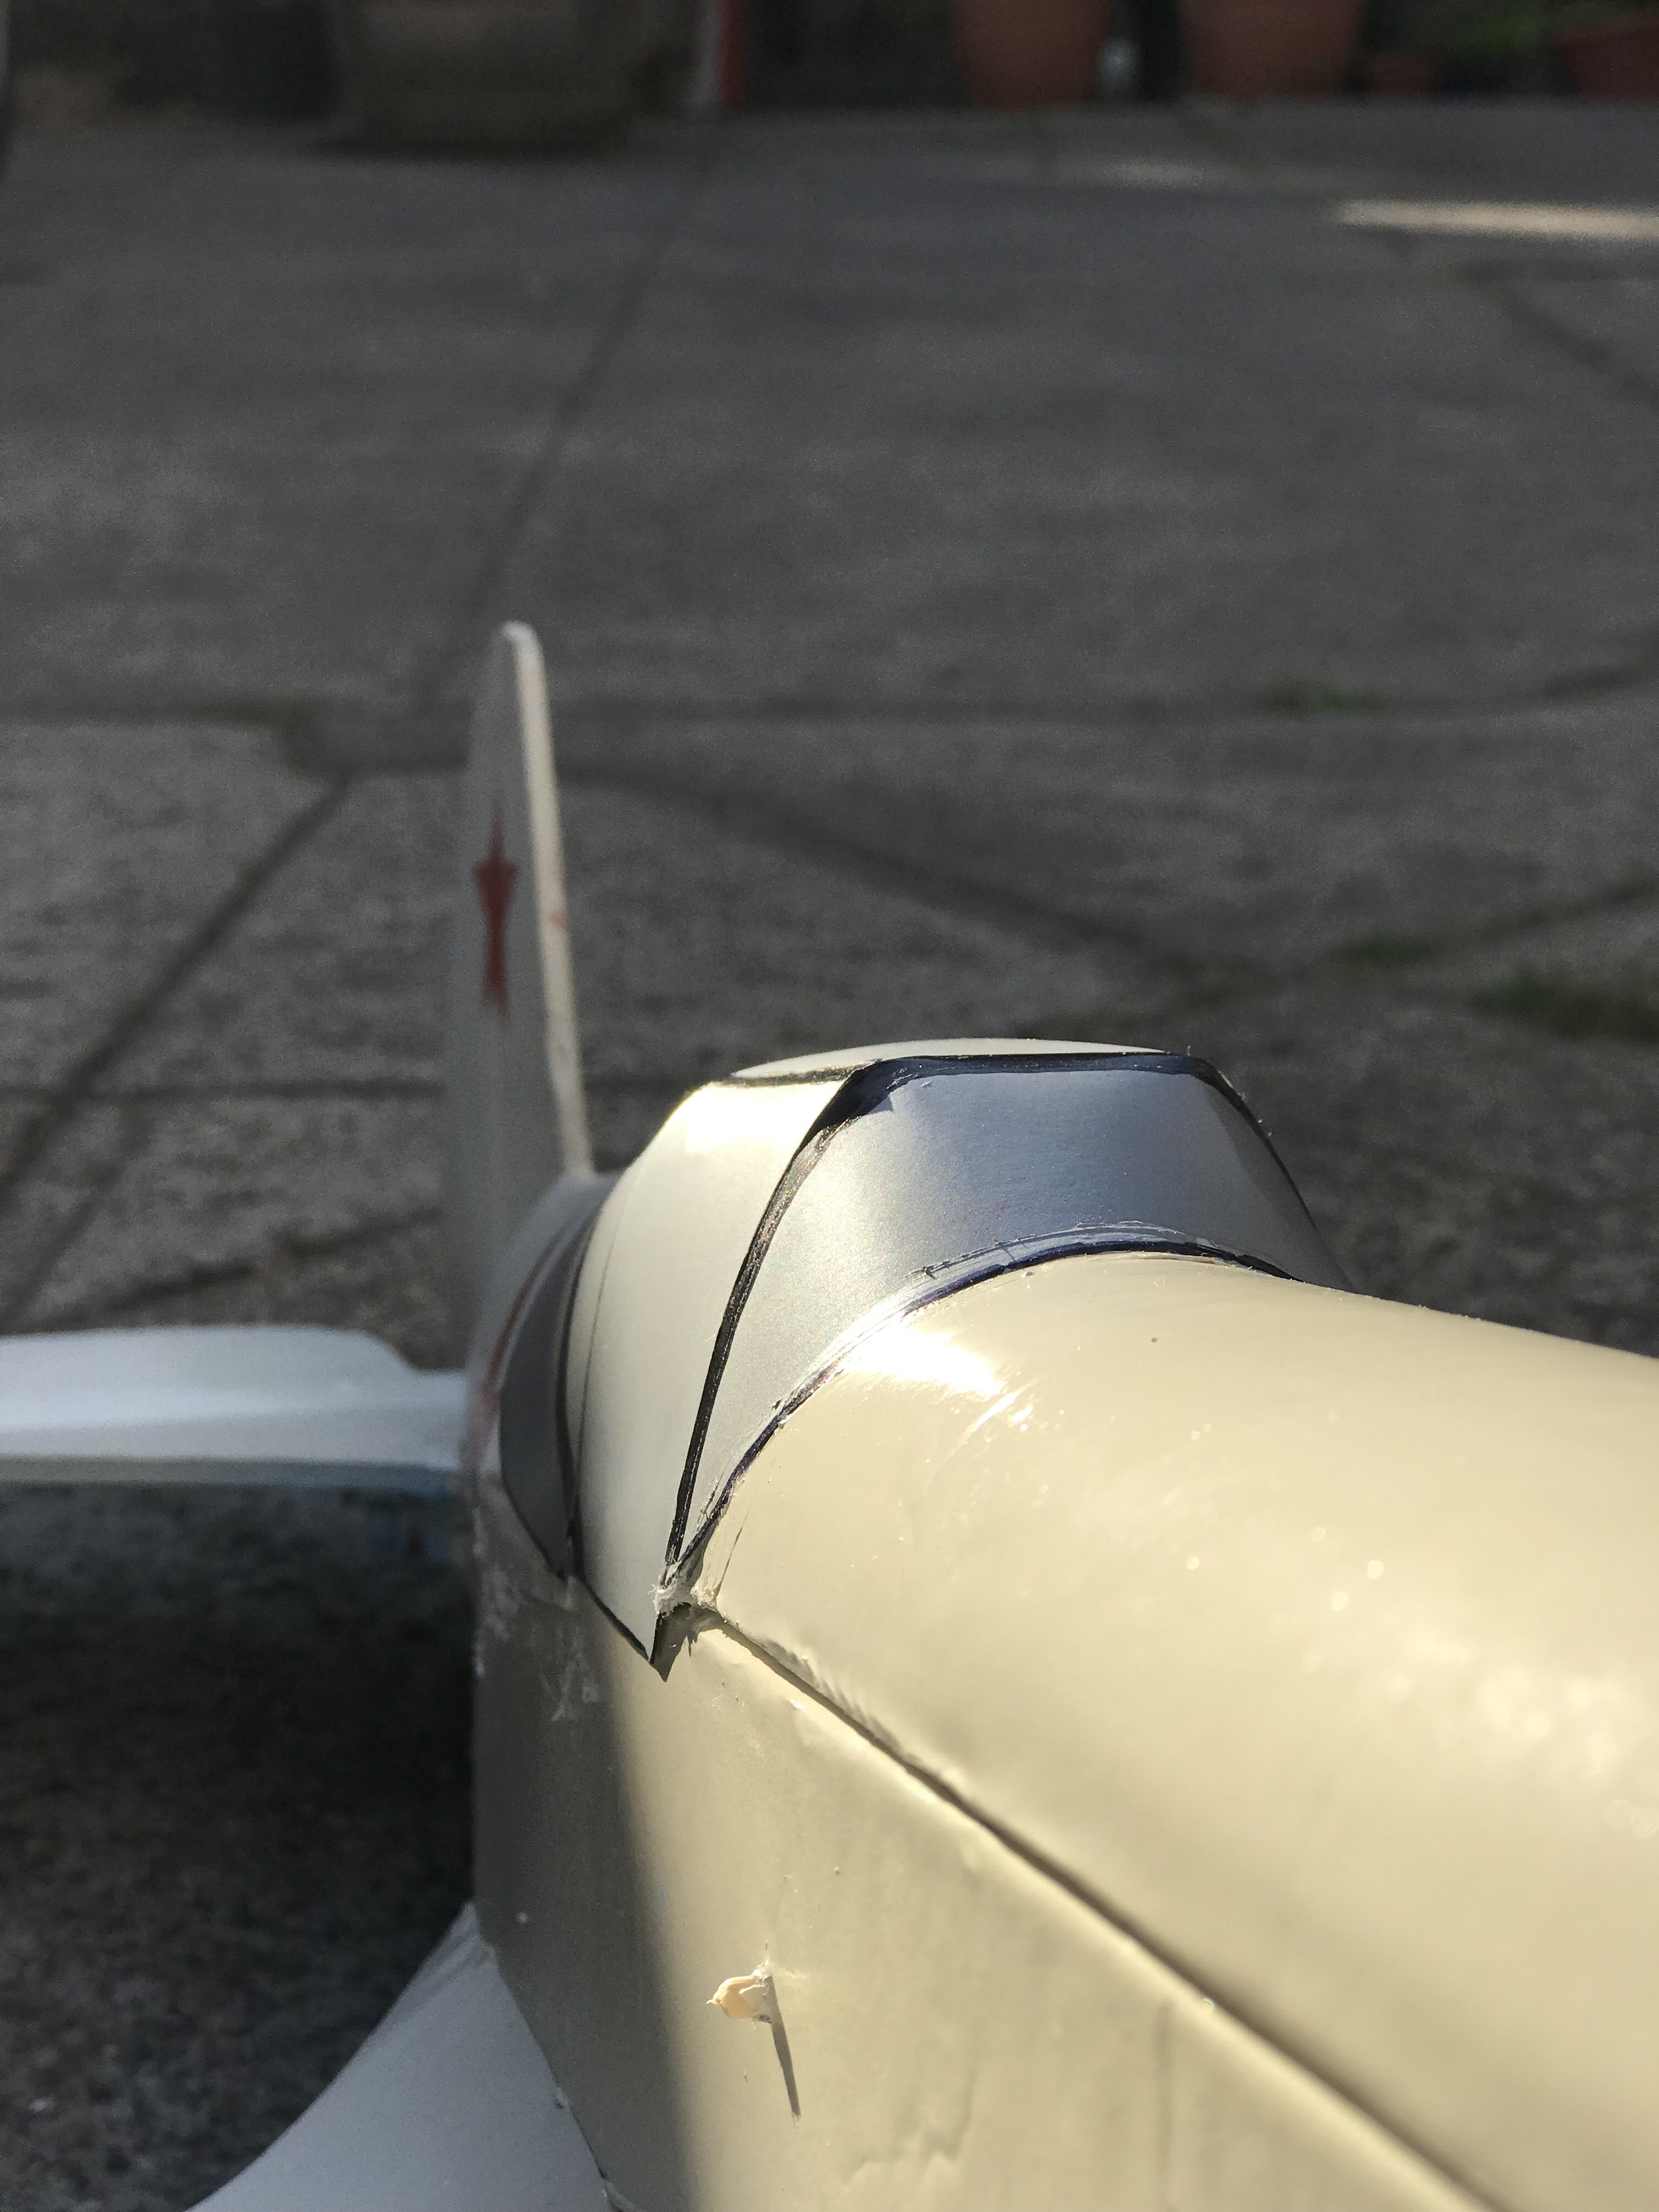
I had most of the plane built by Monday and I primed on Tuesday. I was able to get most of the paint done and have only a few touch up spots to work on. Yeah! This step adds days to the build but it’s also an extension of the building side.
5198EC2A-5E97-4342-99B9-C31F78096CD9.jpeg
294371A6-EF43-4F4A-9F49-42B43DAFB909.jpeg

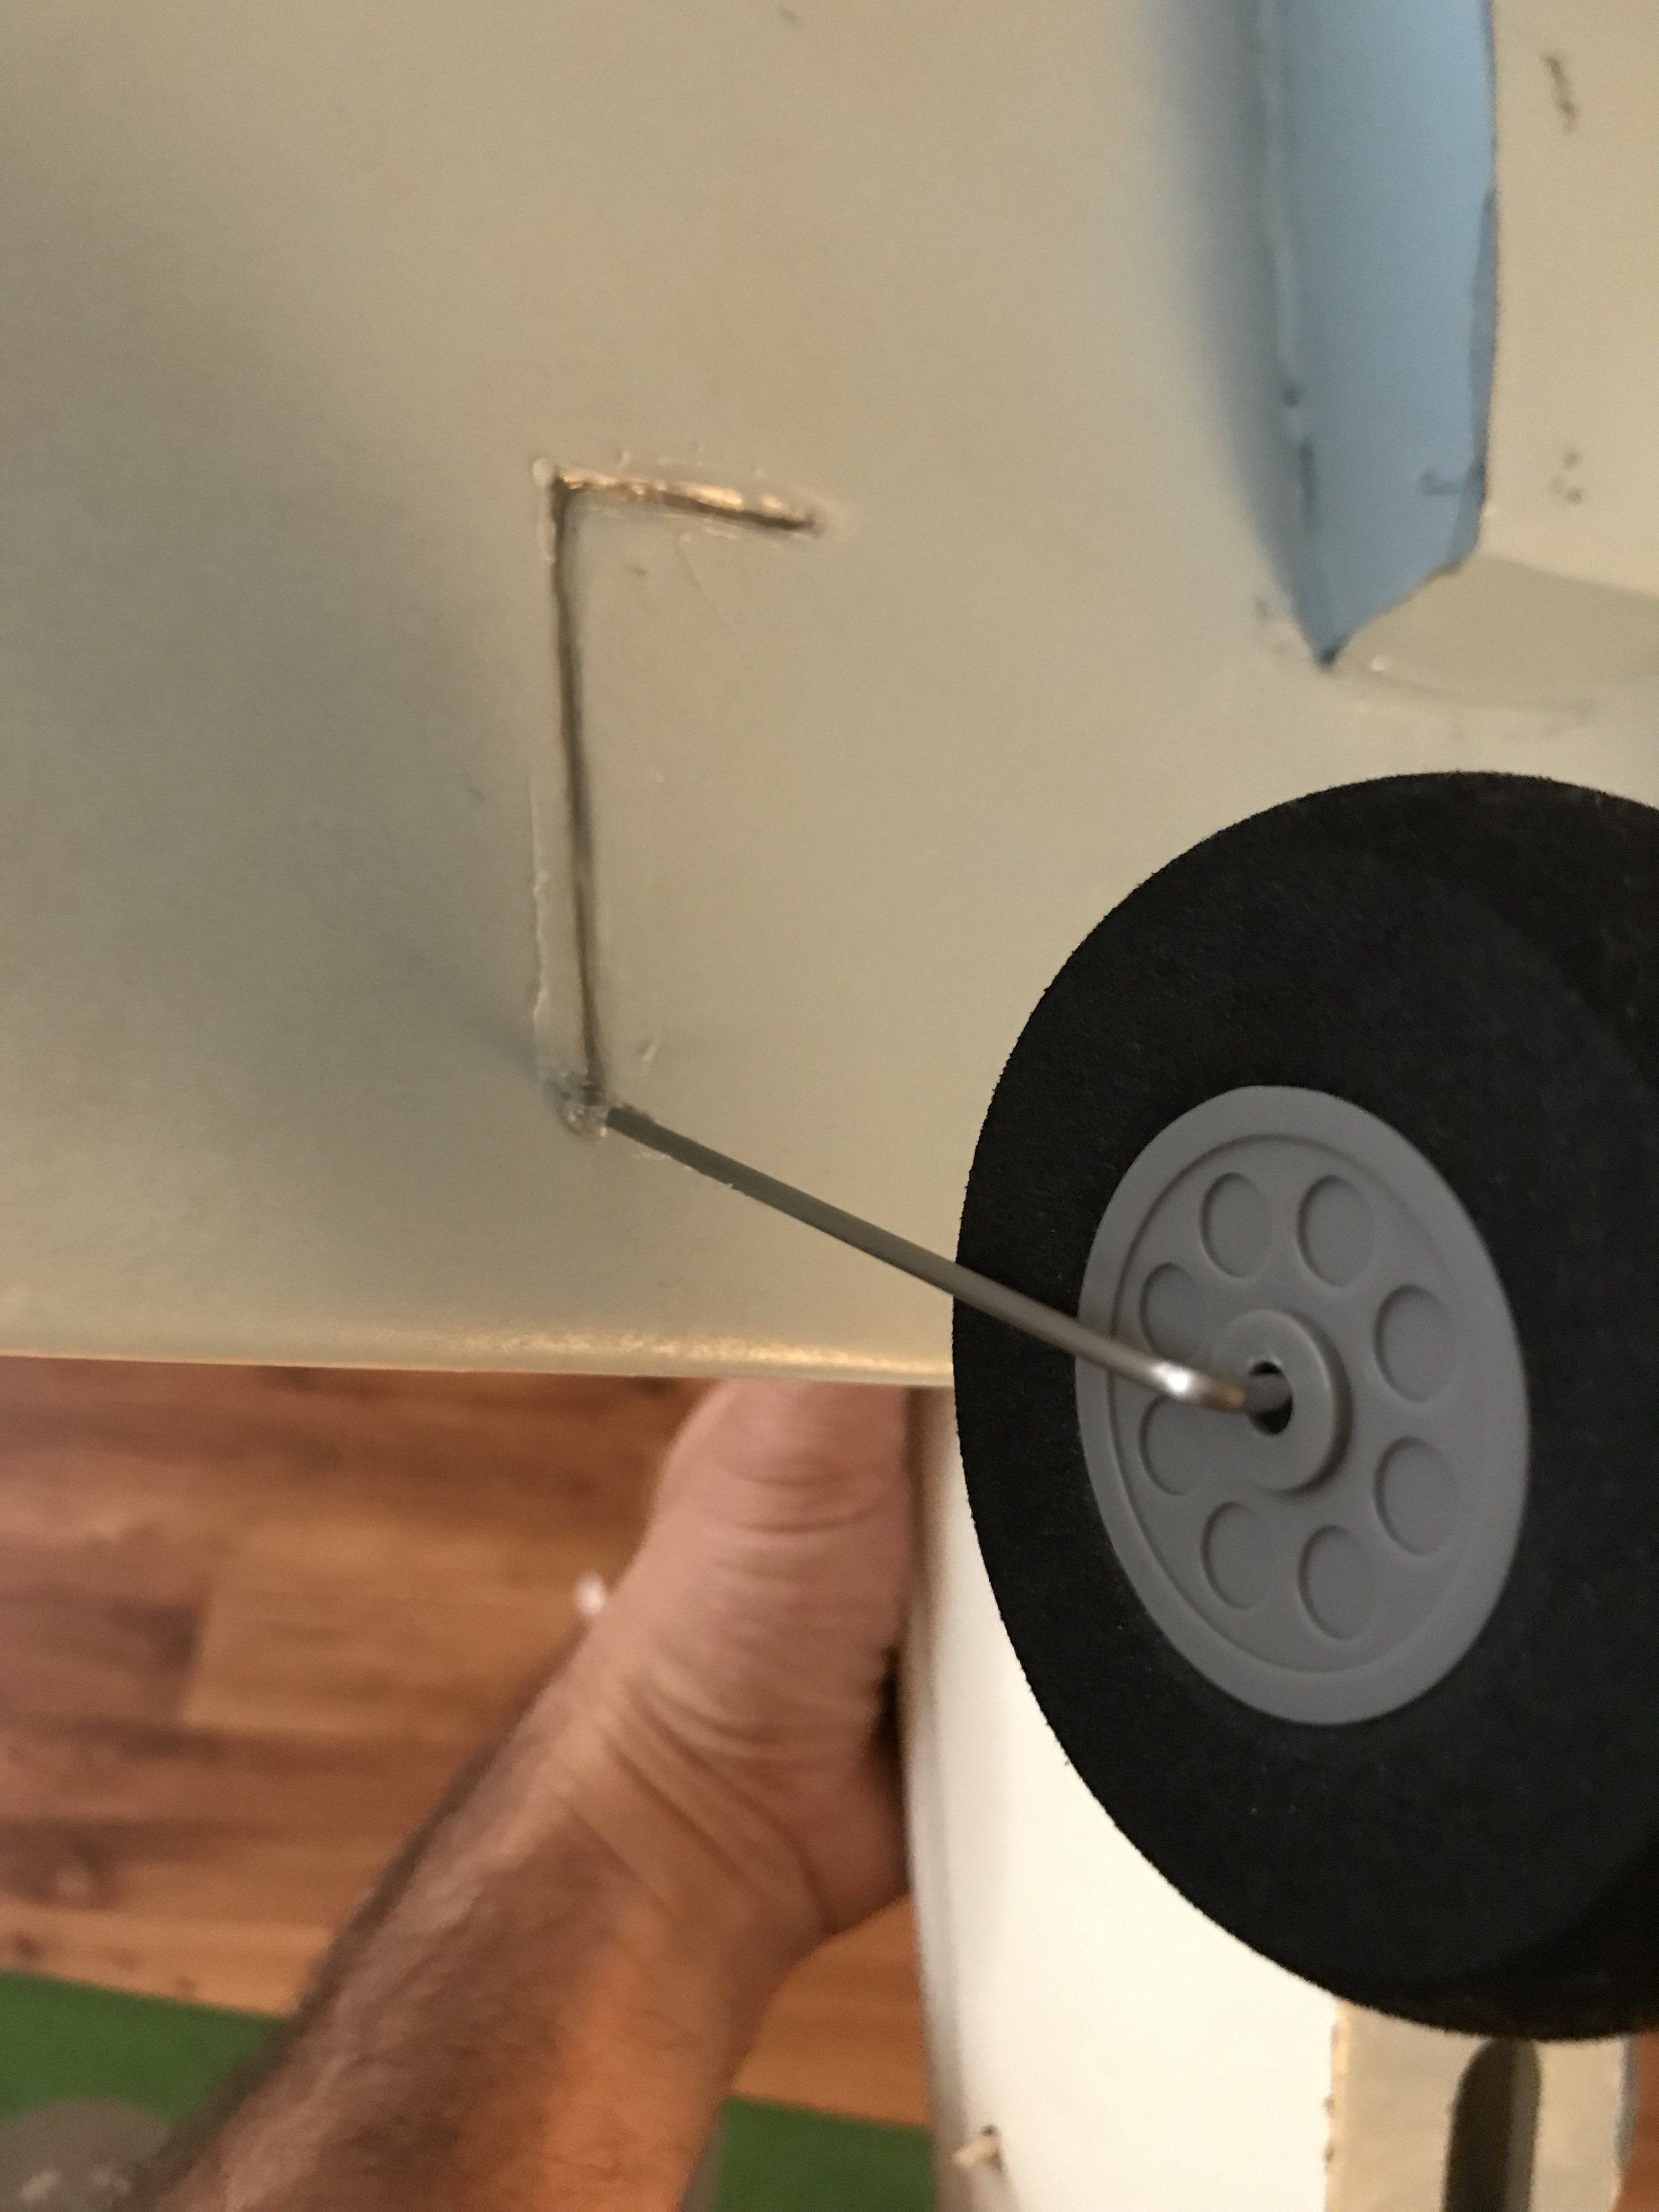
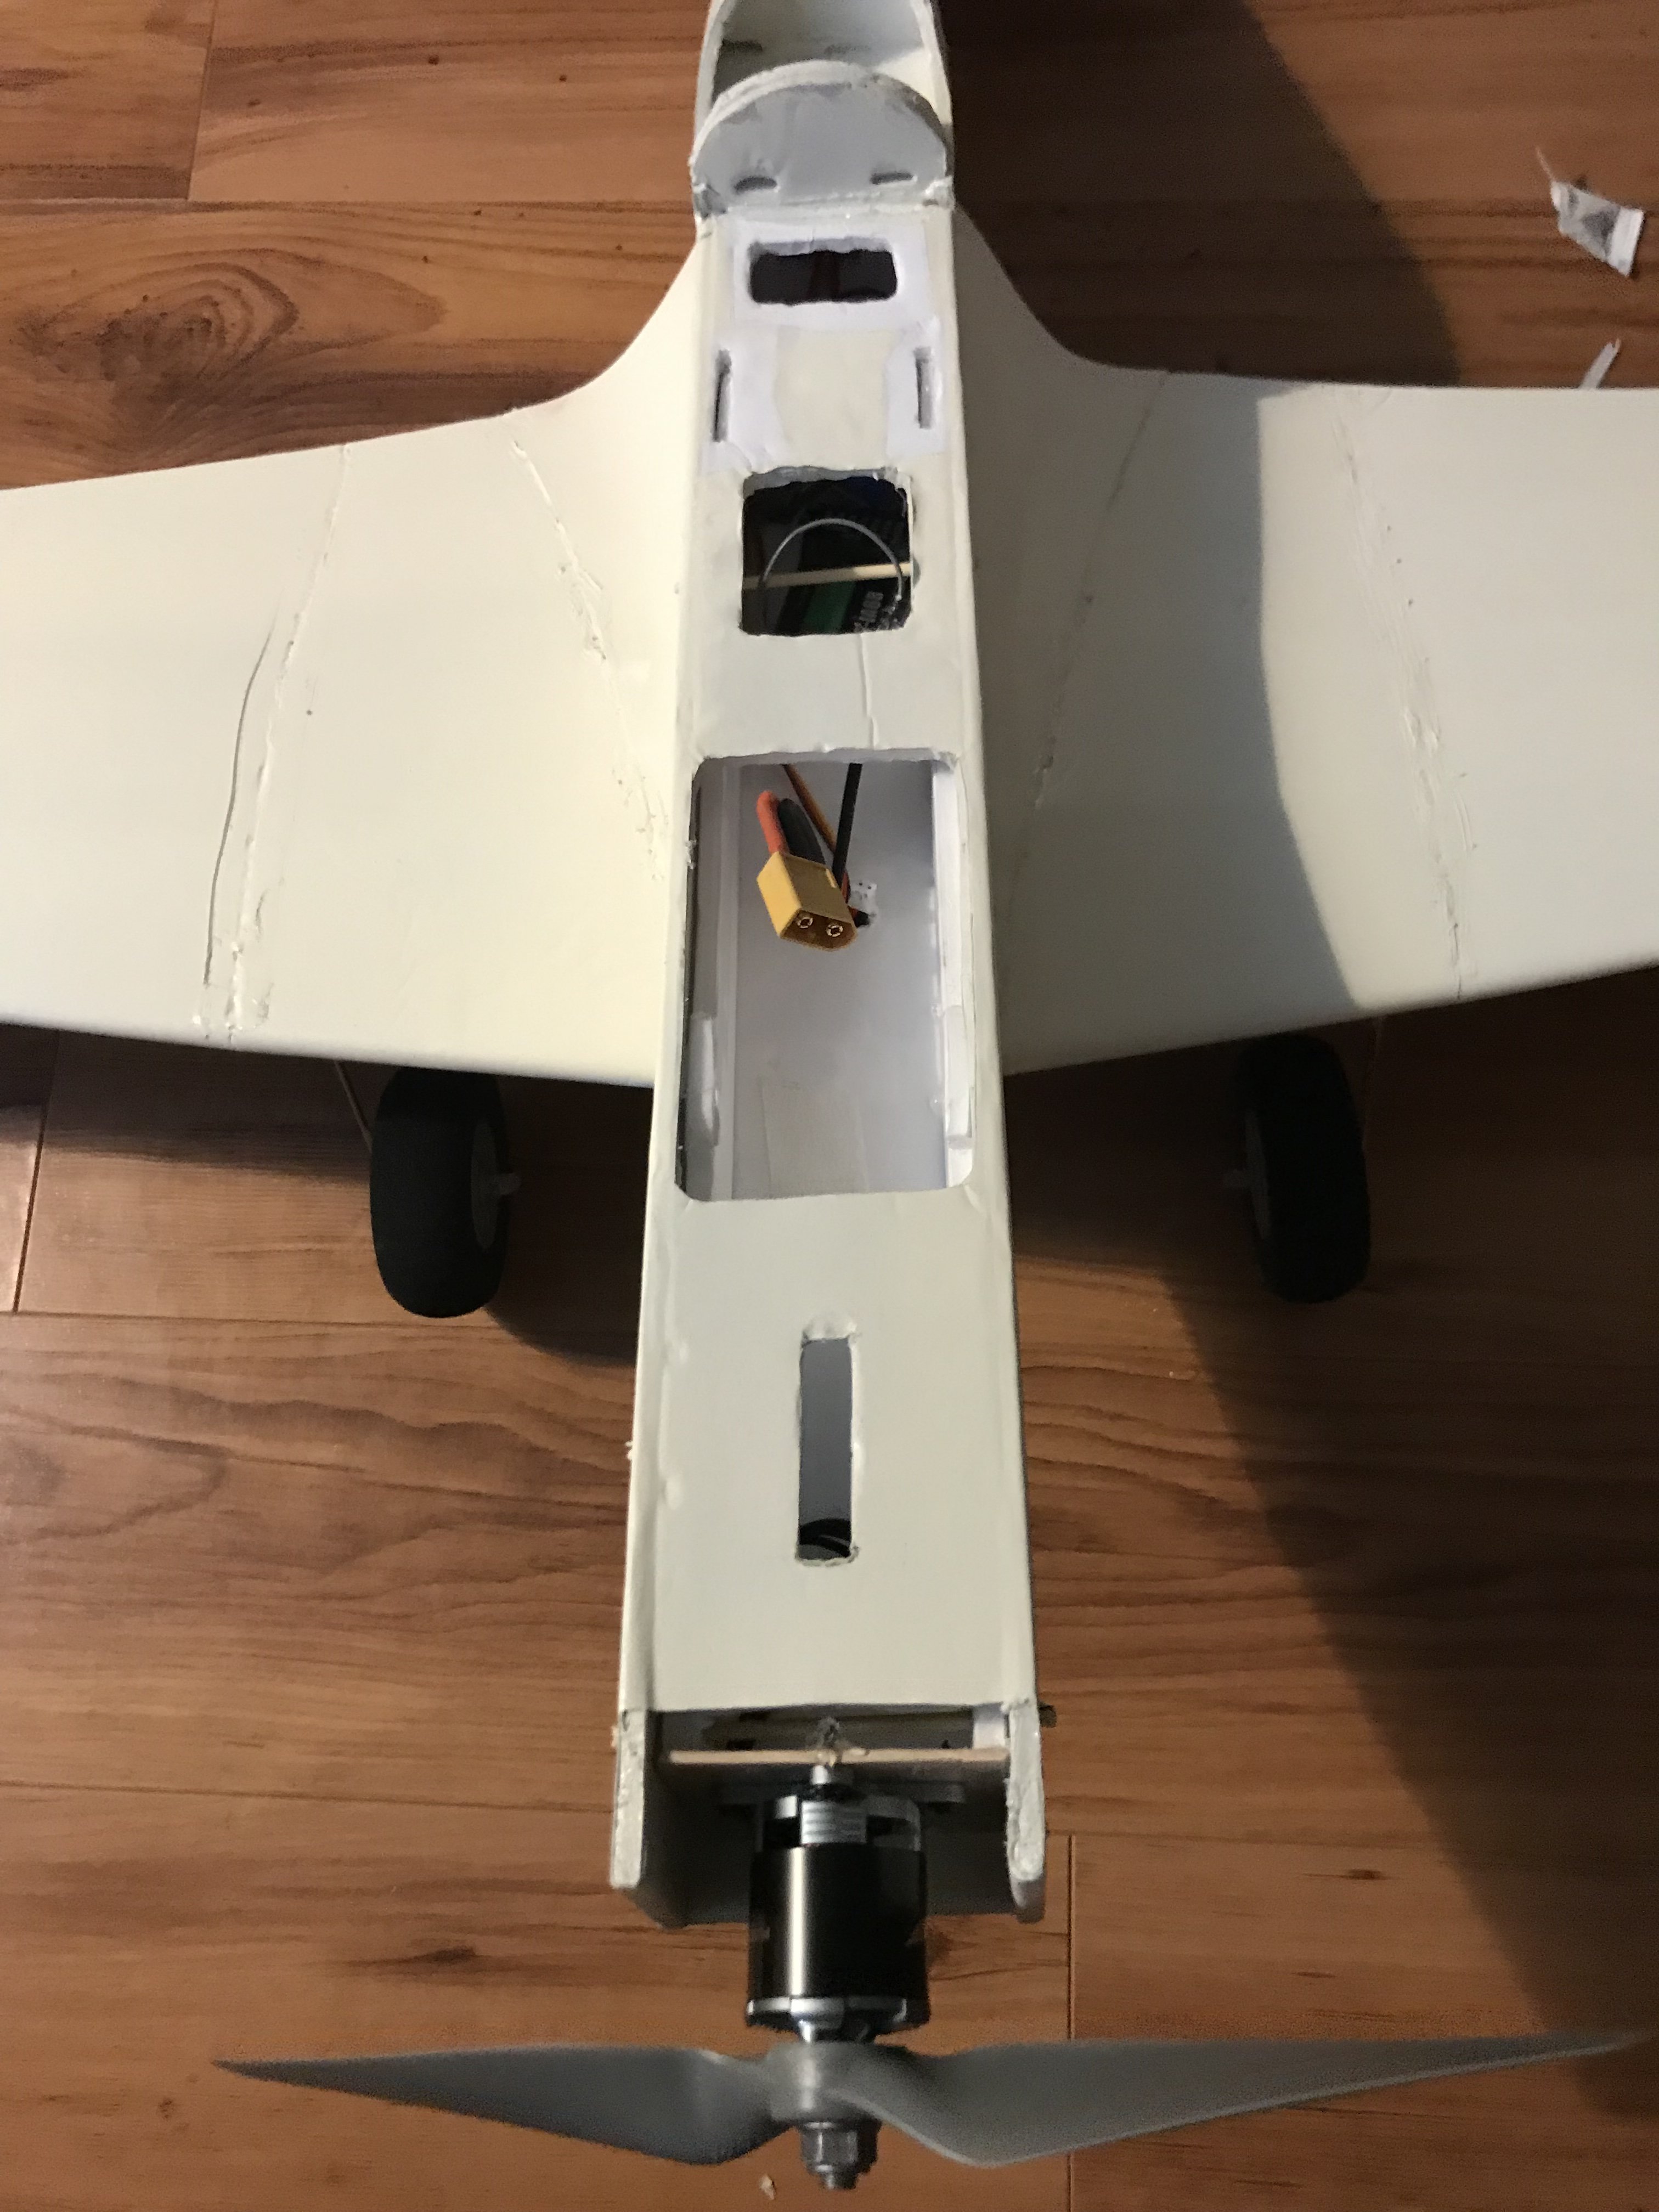
I put on the landing gear last night. I used a .78 diameter wire instead of then.10 that is used in the build video. It was easier to bend than my storch LG so I actually anticipate bent wires with hard landings.
8F7CB3E0-34B5-4701-AE40-982E30913597.jpeg


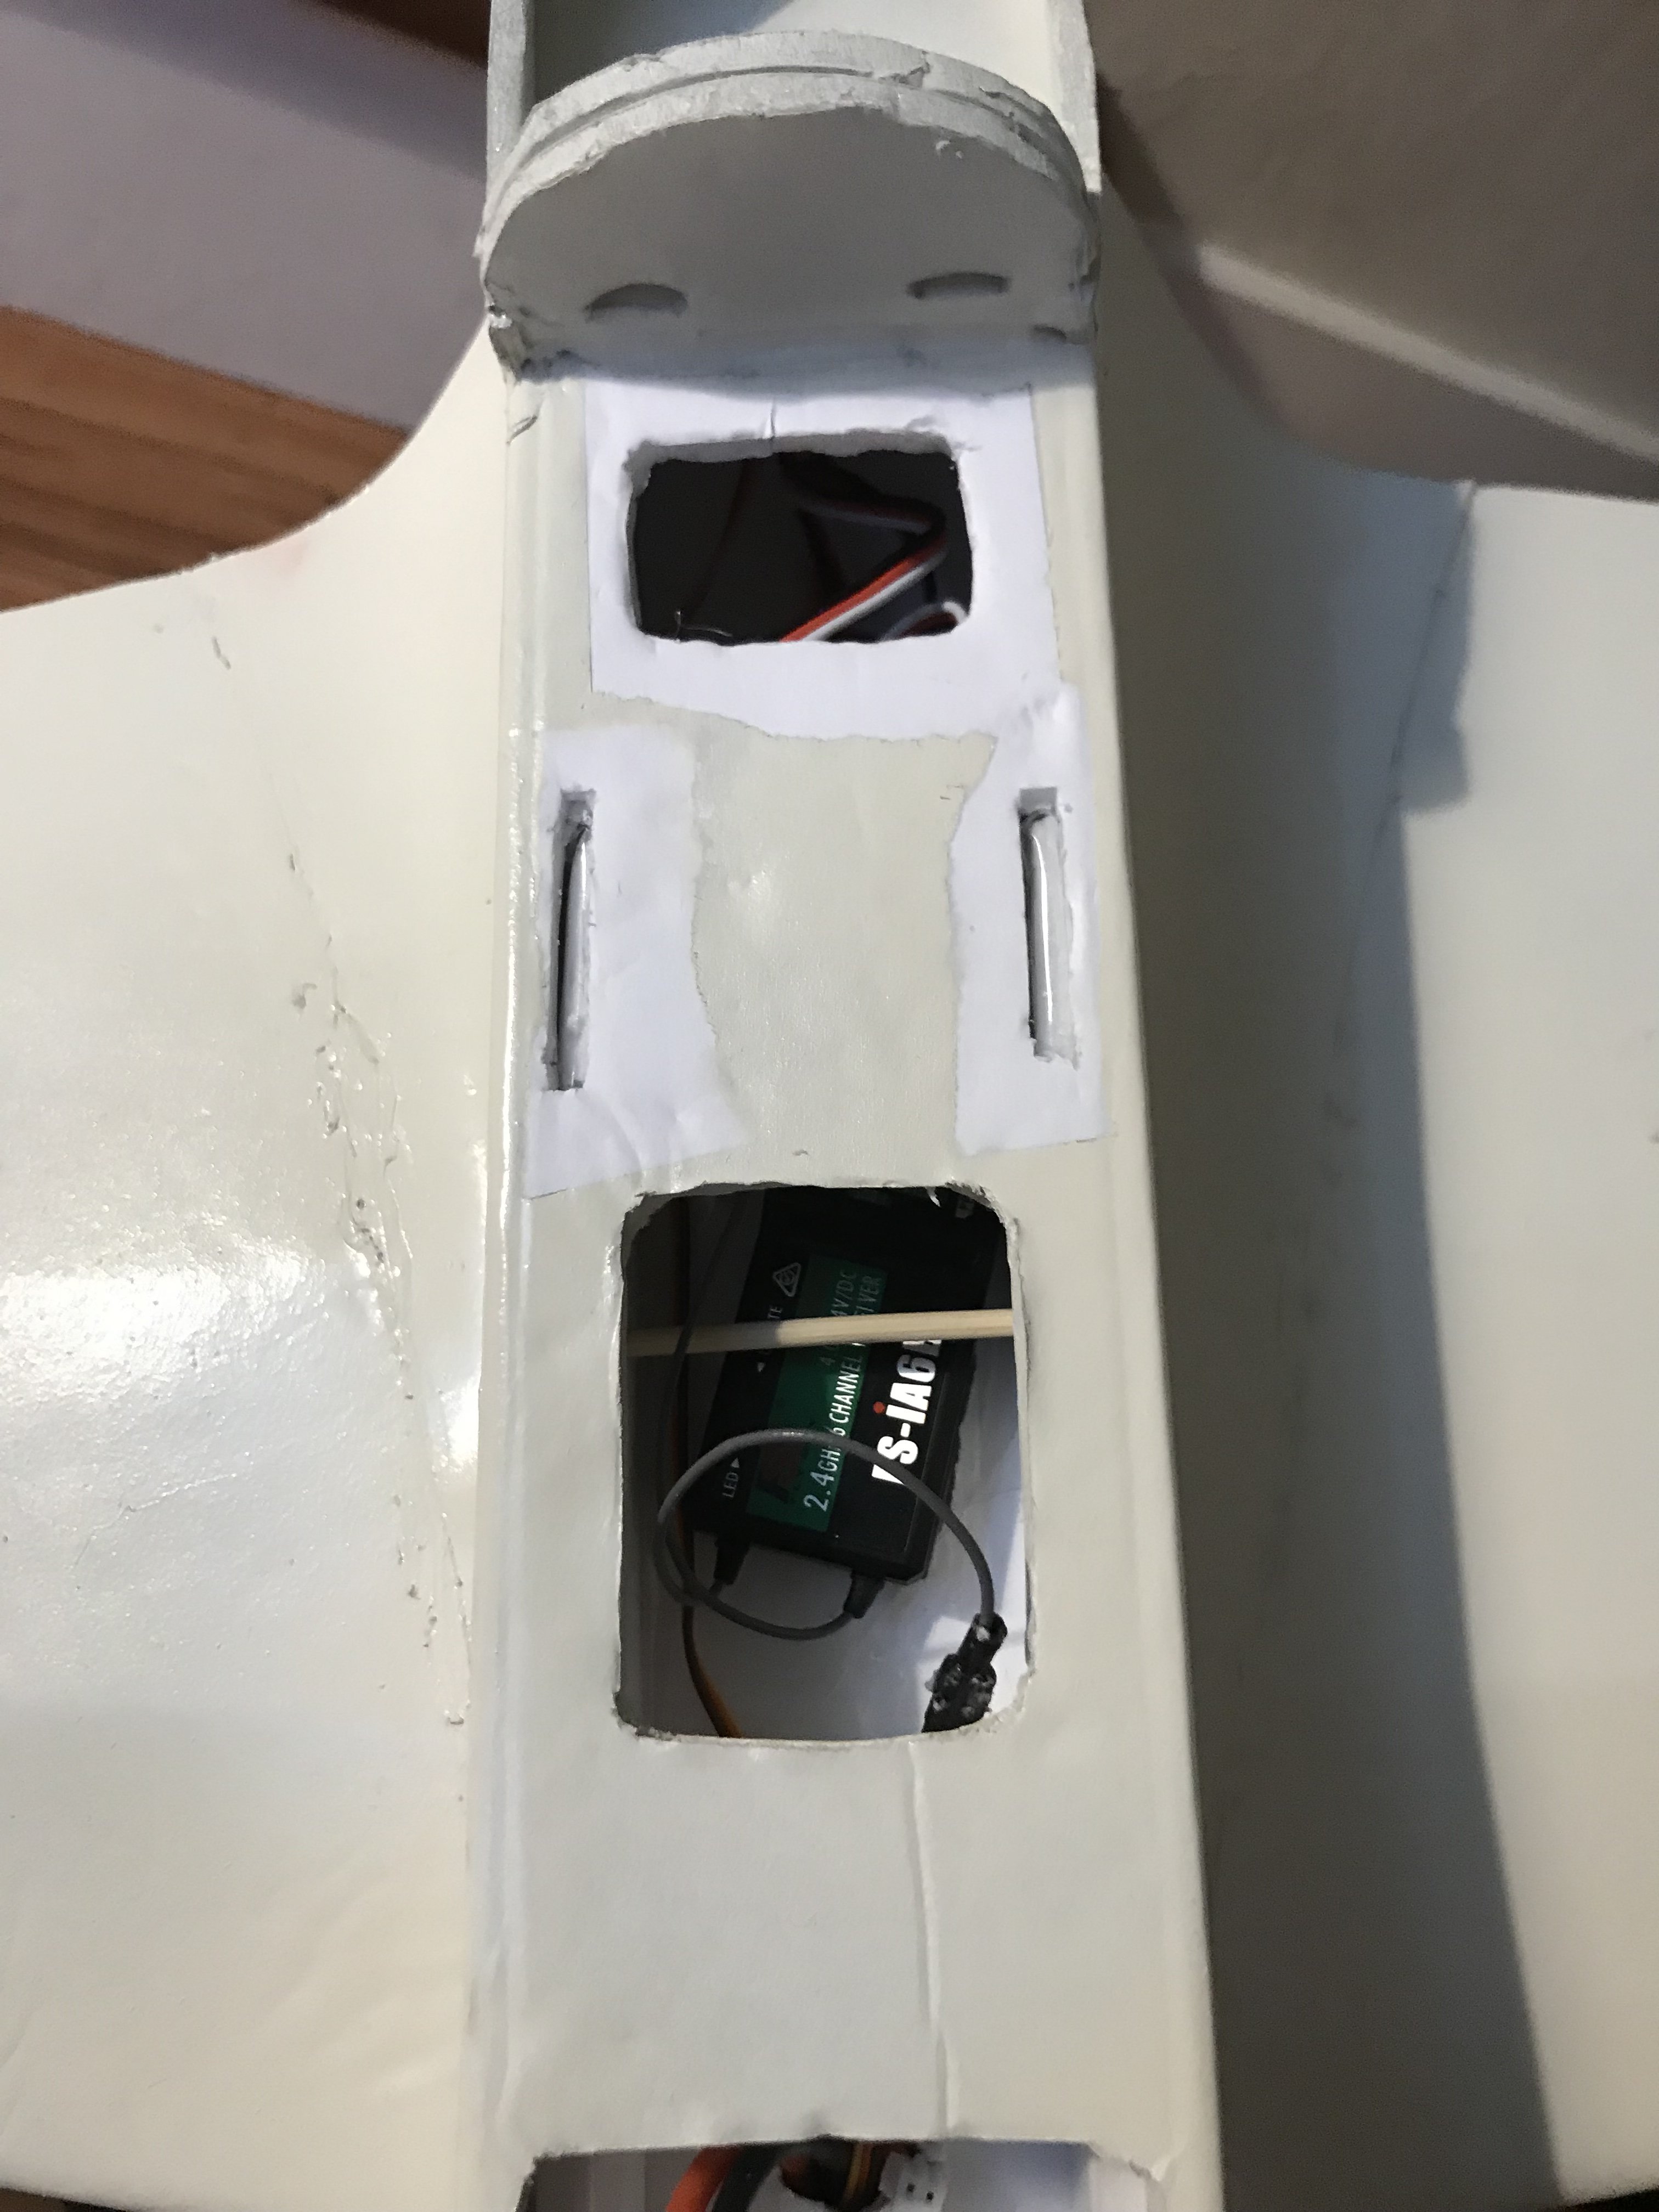
I also got the power pod installed and all electronics hooked up. I was exhausted by that point so I’ll adjust expo/rates tonight. I think I have to revisit my wire routing. I kinda just shoved everything inside from the battery hatch part and it could be cleaner.
4E507E5E-C643-4602-87E3-B9F224DE30BC.jpeg

9FC1B5A1-1678-4B8F-B75D-7E90E3037F58.jpeg

I wanted to use a different prop from my storch so I’ve put on a 9x 6. I know it’s more aggressive than recommend but it’s what I have. If this is a big no go, then let me know.

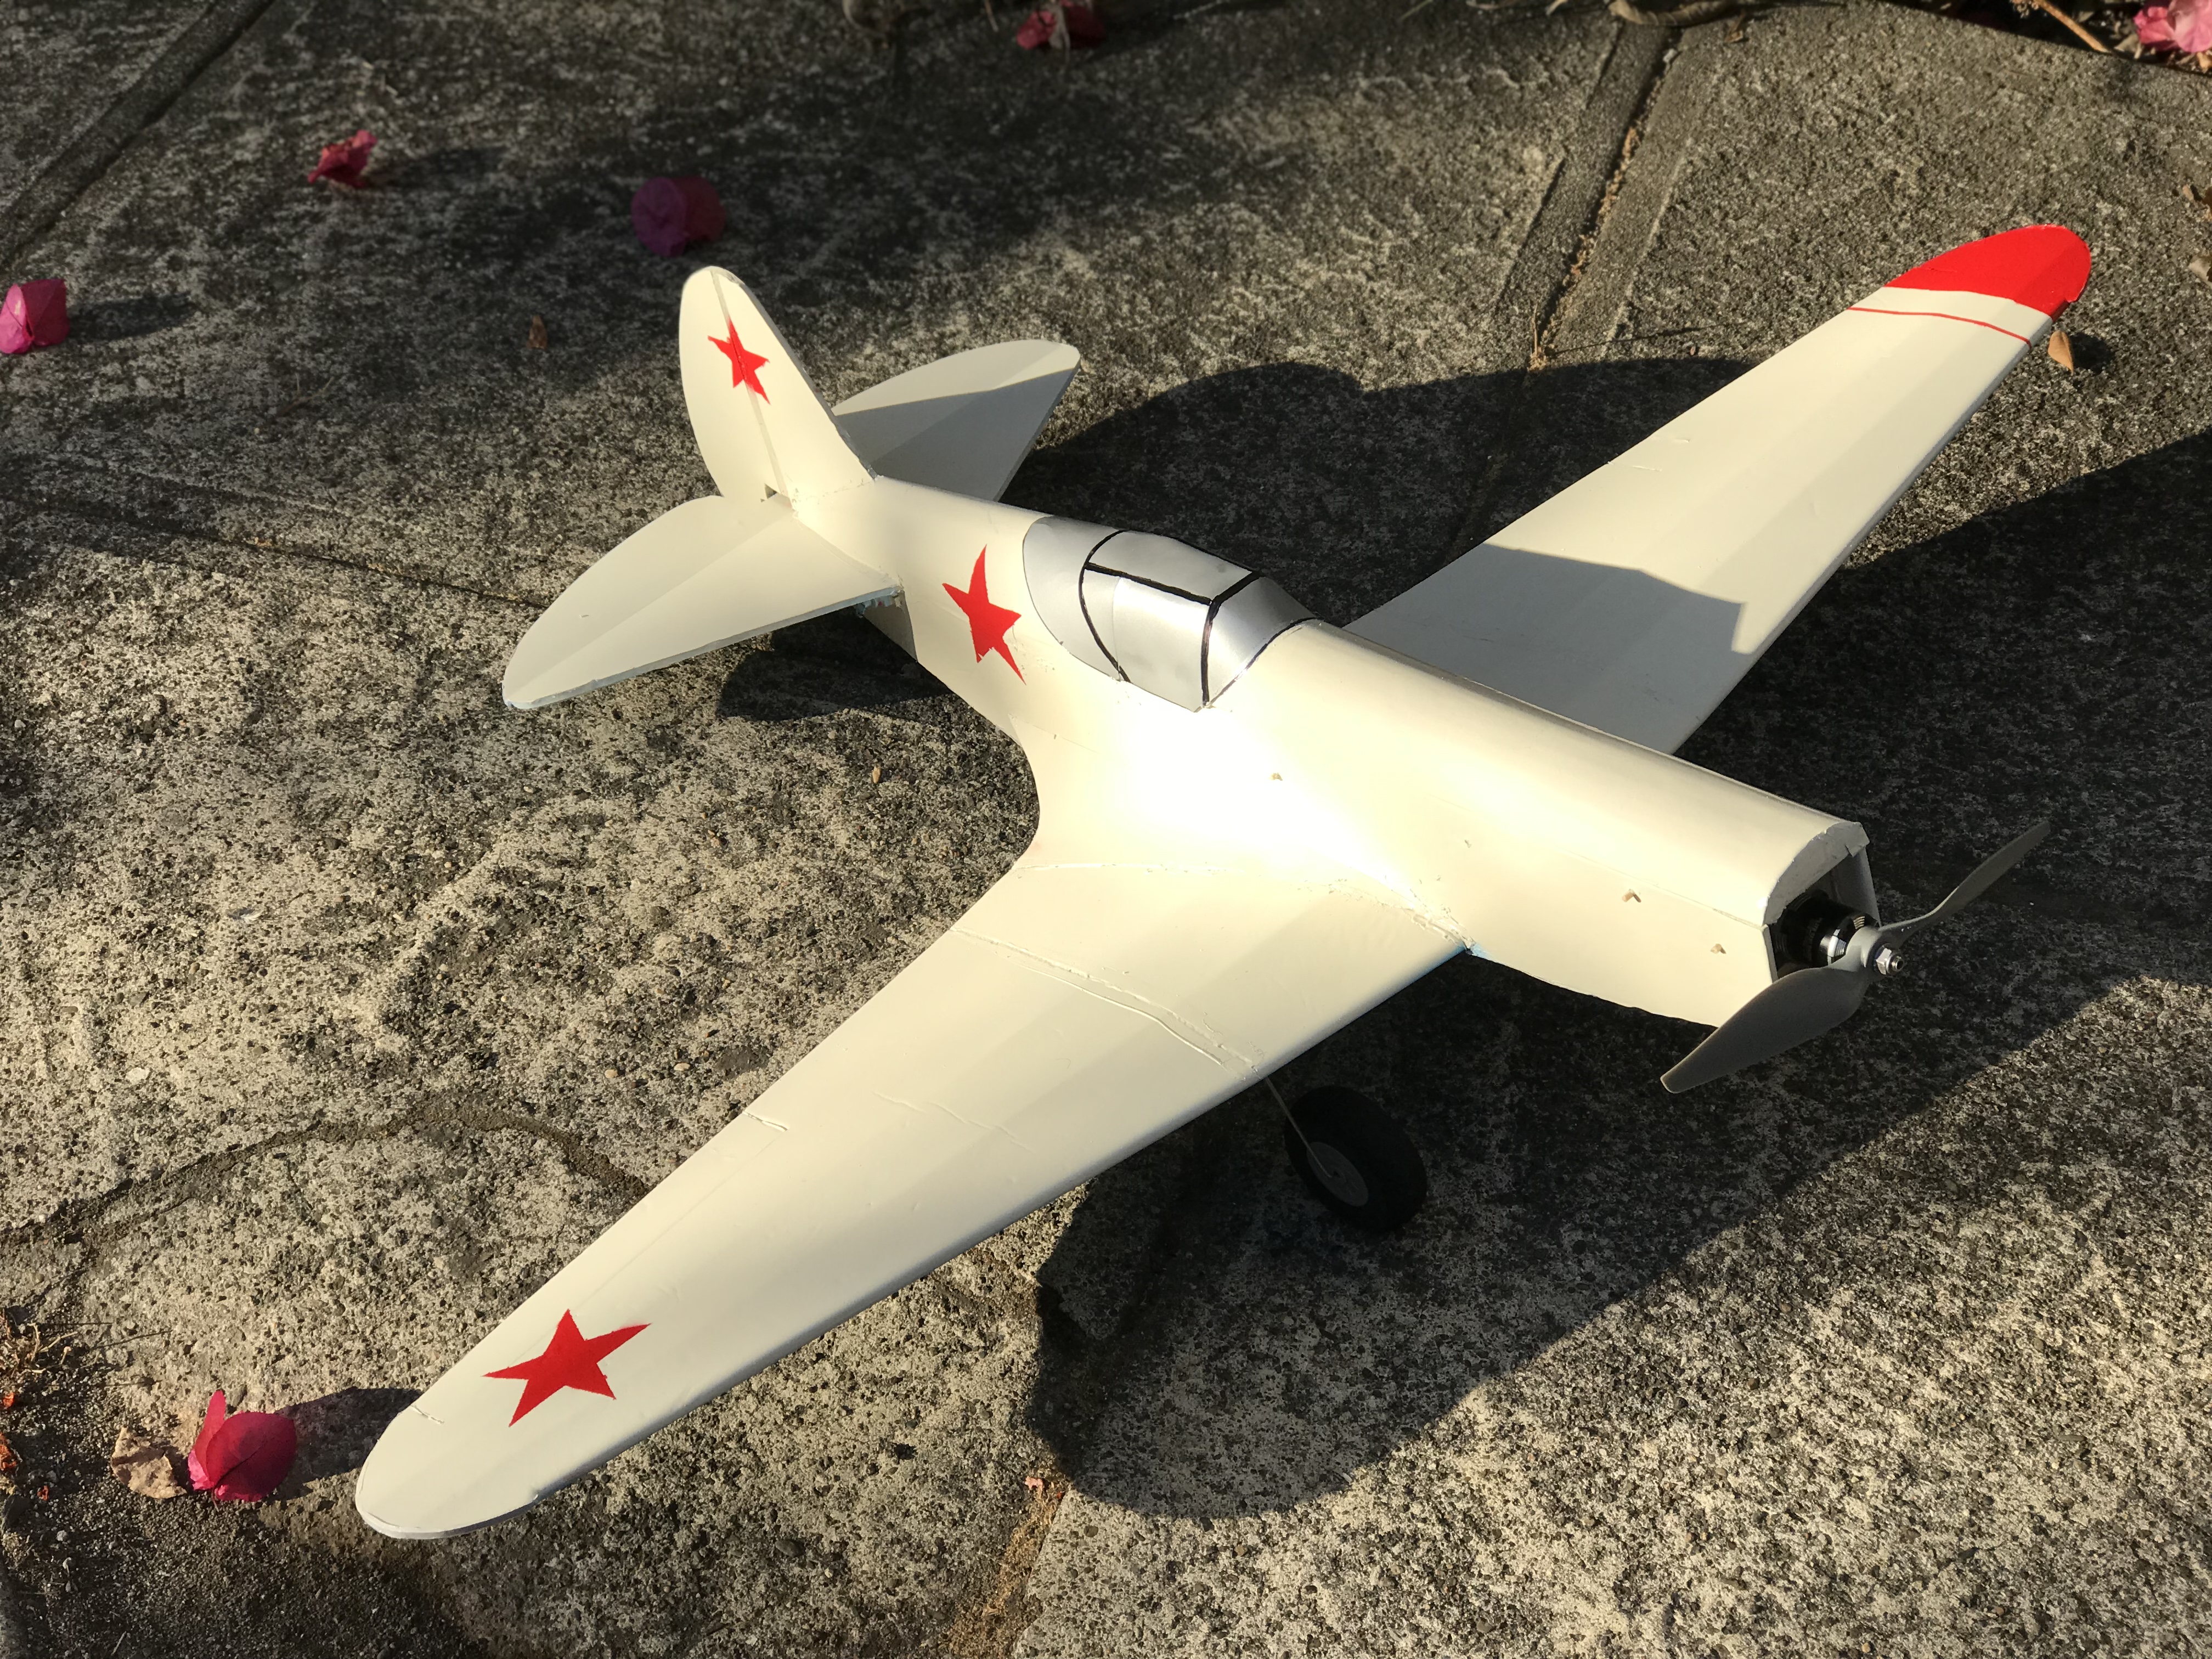
So, here she is!
0F537044-54C8-484C-87B0-3A4CBCA37EDB.jpeg
98655976-1C89-46C2-BA75-05C3E8940CBC.jpeg

This was a involved but fun build! I think it went easier than the storch, but i think that plane set me up for better success here. I’m excited and terrified to maiden the mig and I want to thank the FT community for support and encouragement
I’ve been imagining all the other planes being built and readied for flight weekend and it makes me smile thinking I’ll be flying with all of you!