Ratcheeroo
Legendary member
It fought me the whole wayLooks amazing! And you didn't glue your nose on pointing off to the left like I did.
Chris


It fought me the whole wayLooks amazing! And you didn't glue your nose on pointing off to the left like I did.
Chris
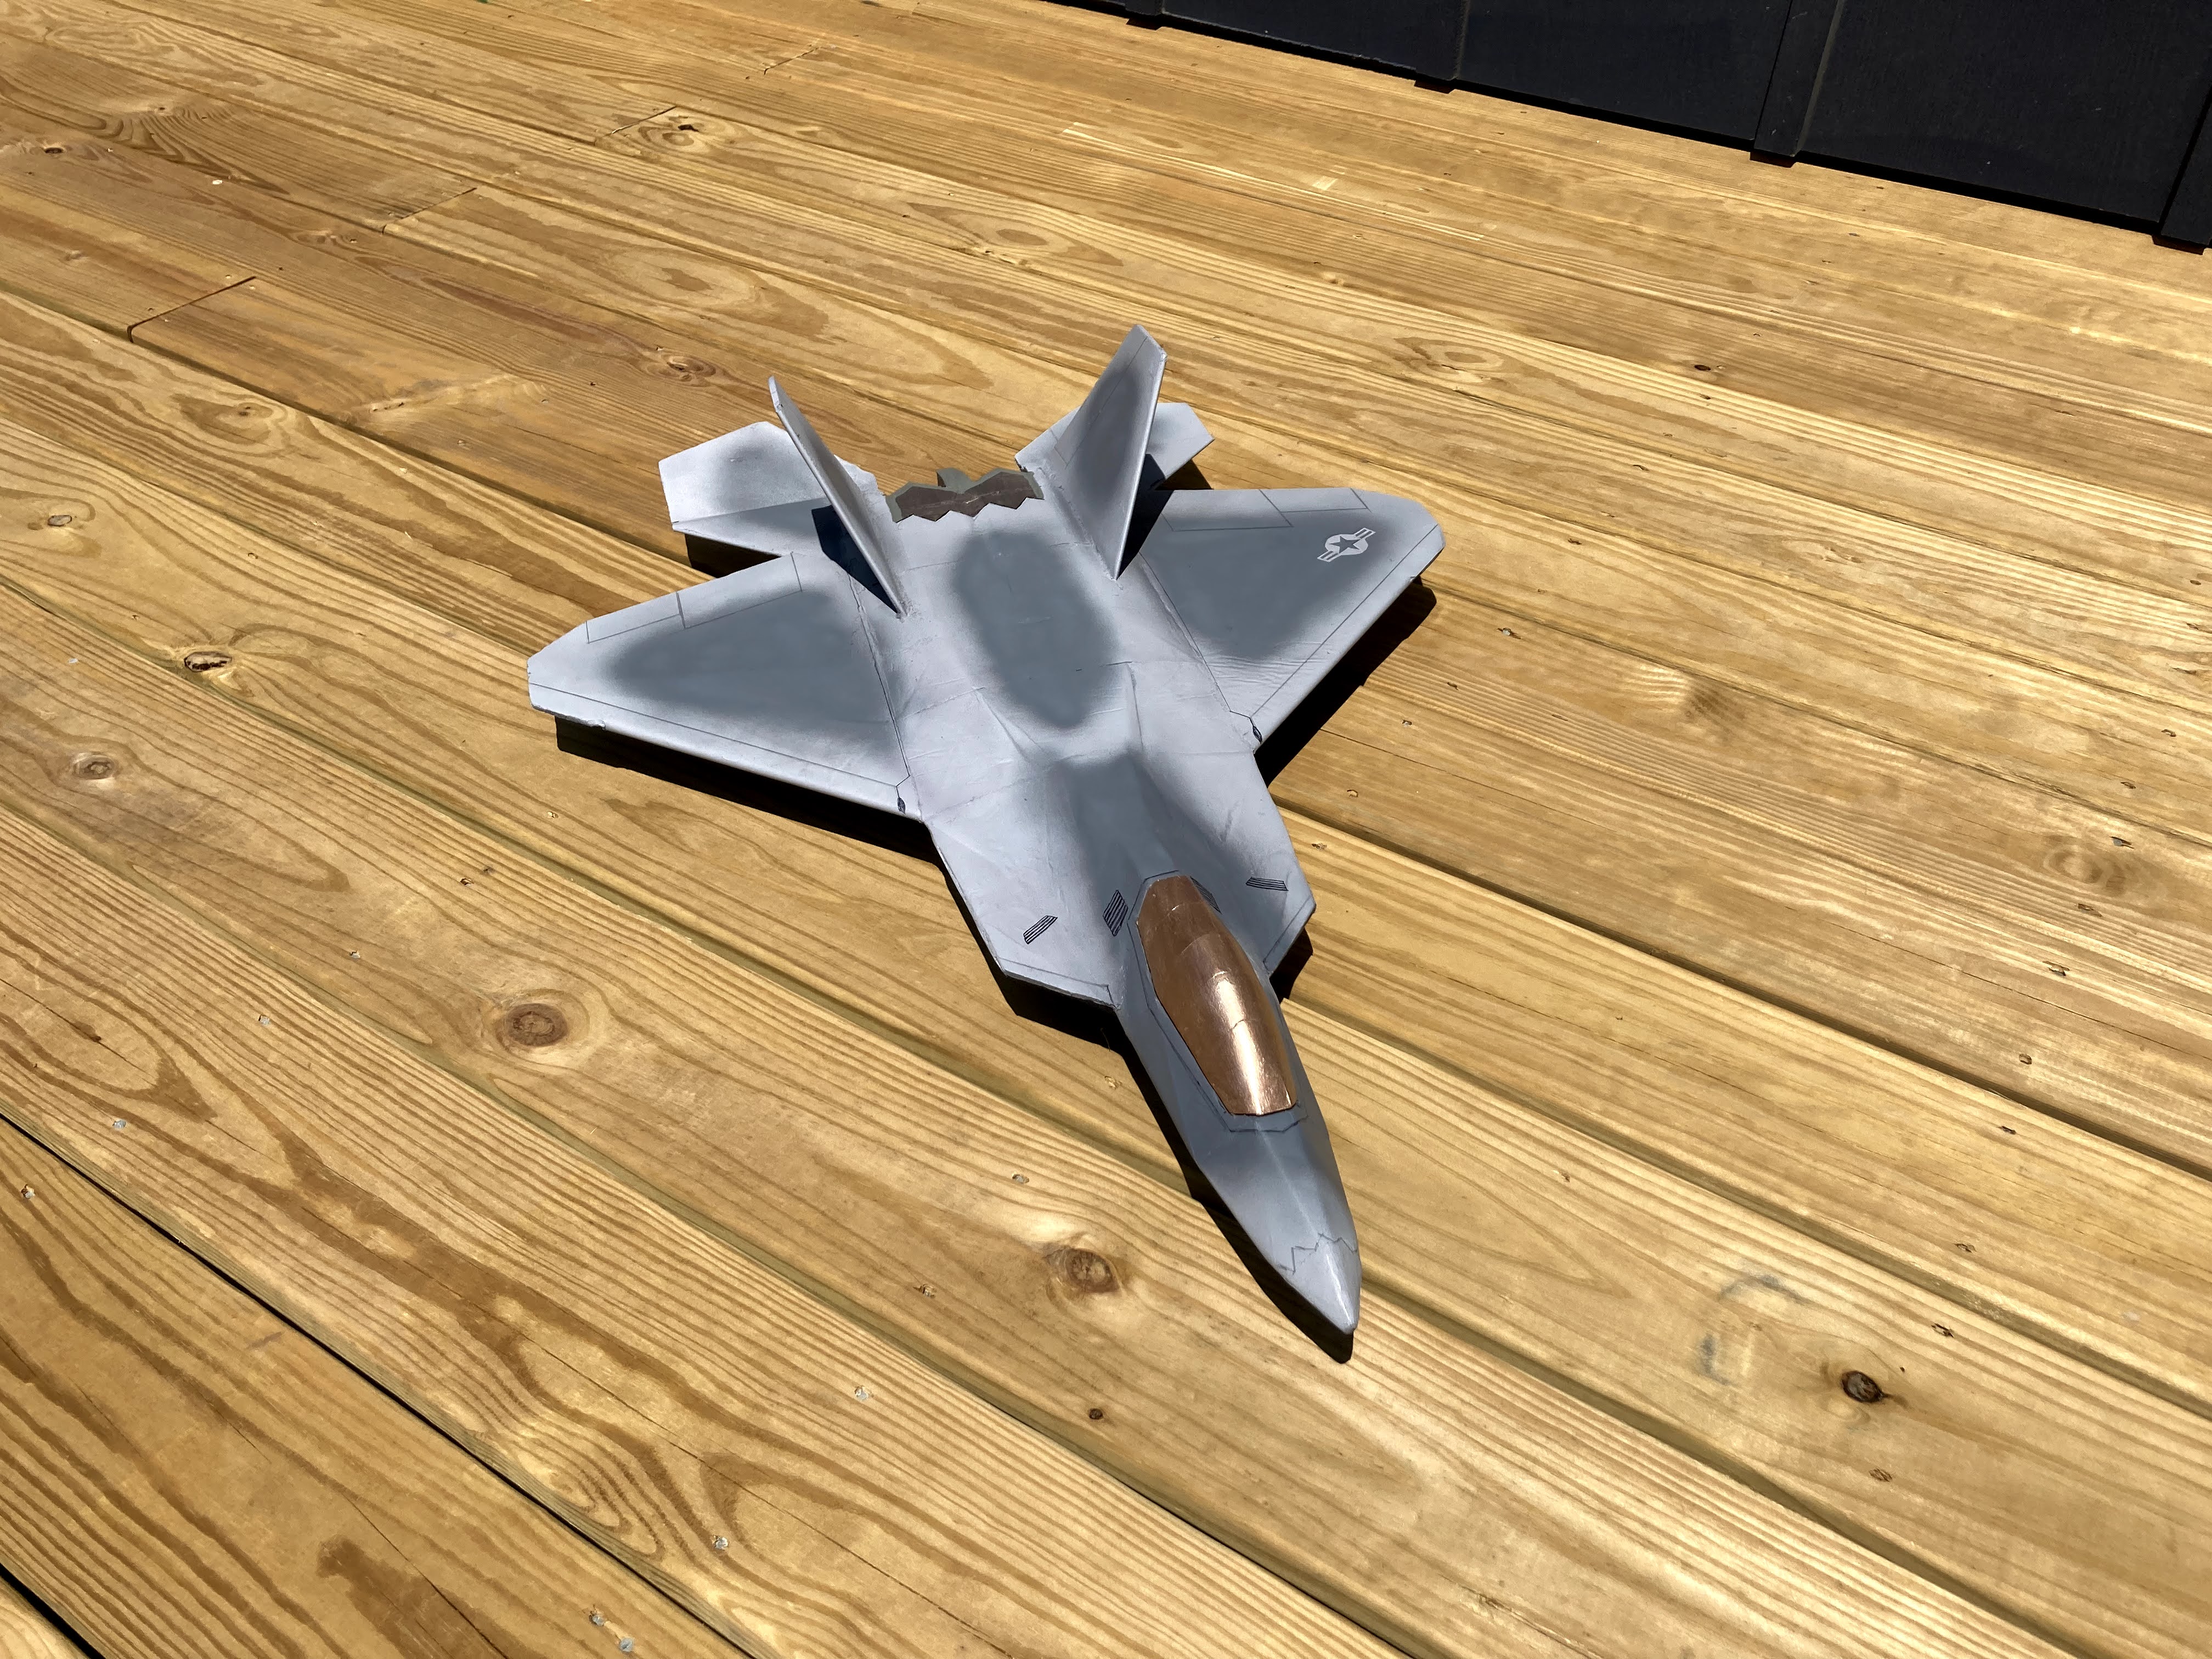
Looks alot like a RaptorAlmost there! Basic colors are on (two different kinds of primer). Now I just need to come up with some pseudo-markings and do some sort of hatch latch. Not perfect by any measure, but it kinda looks like a Raptor.
Chris
PS: Ignore the naked Mamba in the background, it just got de-stickerfied in preparation for some custom vinyl.
. Going to hold my latch down with a popsicle stick on front end to slide in and back end gets held down with a magnet.That's my plan as well. I really don't want to add any more weight up front (magnet) but it's kinda necessary.Looks alot like a Raptor
looks like a good maiden day there., sun shining...That's it, I'm calling it done. I could spend WAY too much time geeking out and adding details to what is supposed to be a "cheap fun plane".
Chris
It would be, except by the time I can sneak away from work and get to the field the heat index will be well over 100F. That takes the fun out of it! But I might do it anyway.looks like a good maiden day there., sun shining...


How are you liking the mamba? I just put the 4s setup in mine and that gave it a bit more power, and I have a 12x6 prop on order to try out. Did you mess with the aura tune at all?Almost there! Basic colors are on (two different kinds of primer). Now I just need to come up with some pseudo-markings and do some sort of hatch latch. Not perfect by any measure, but it kinda looks like a Raptor.
Chris
PS: Ignore the naked Mamba in the background, it just got de-stickerfied in preparation for some custom vinyl.
Yeah that makes sense - If you surrender aesthetics for just this once then the repair work becomes a fairly straightforward job, right? Leave it with raggedy edges, but there's already so much work in the plane, the repairs aren't all that much.Well, that ended poorly.
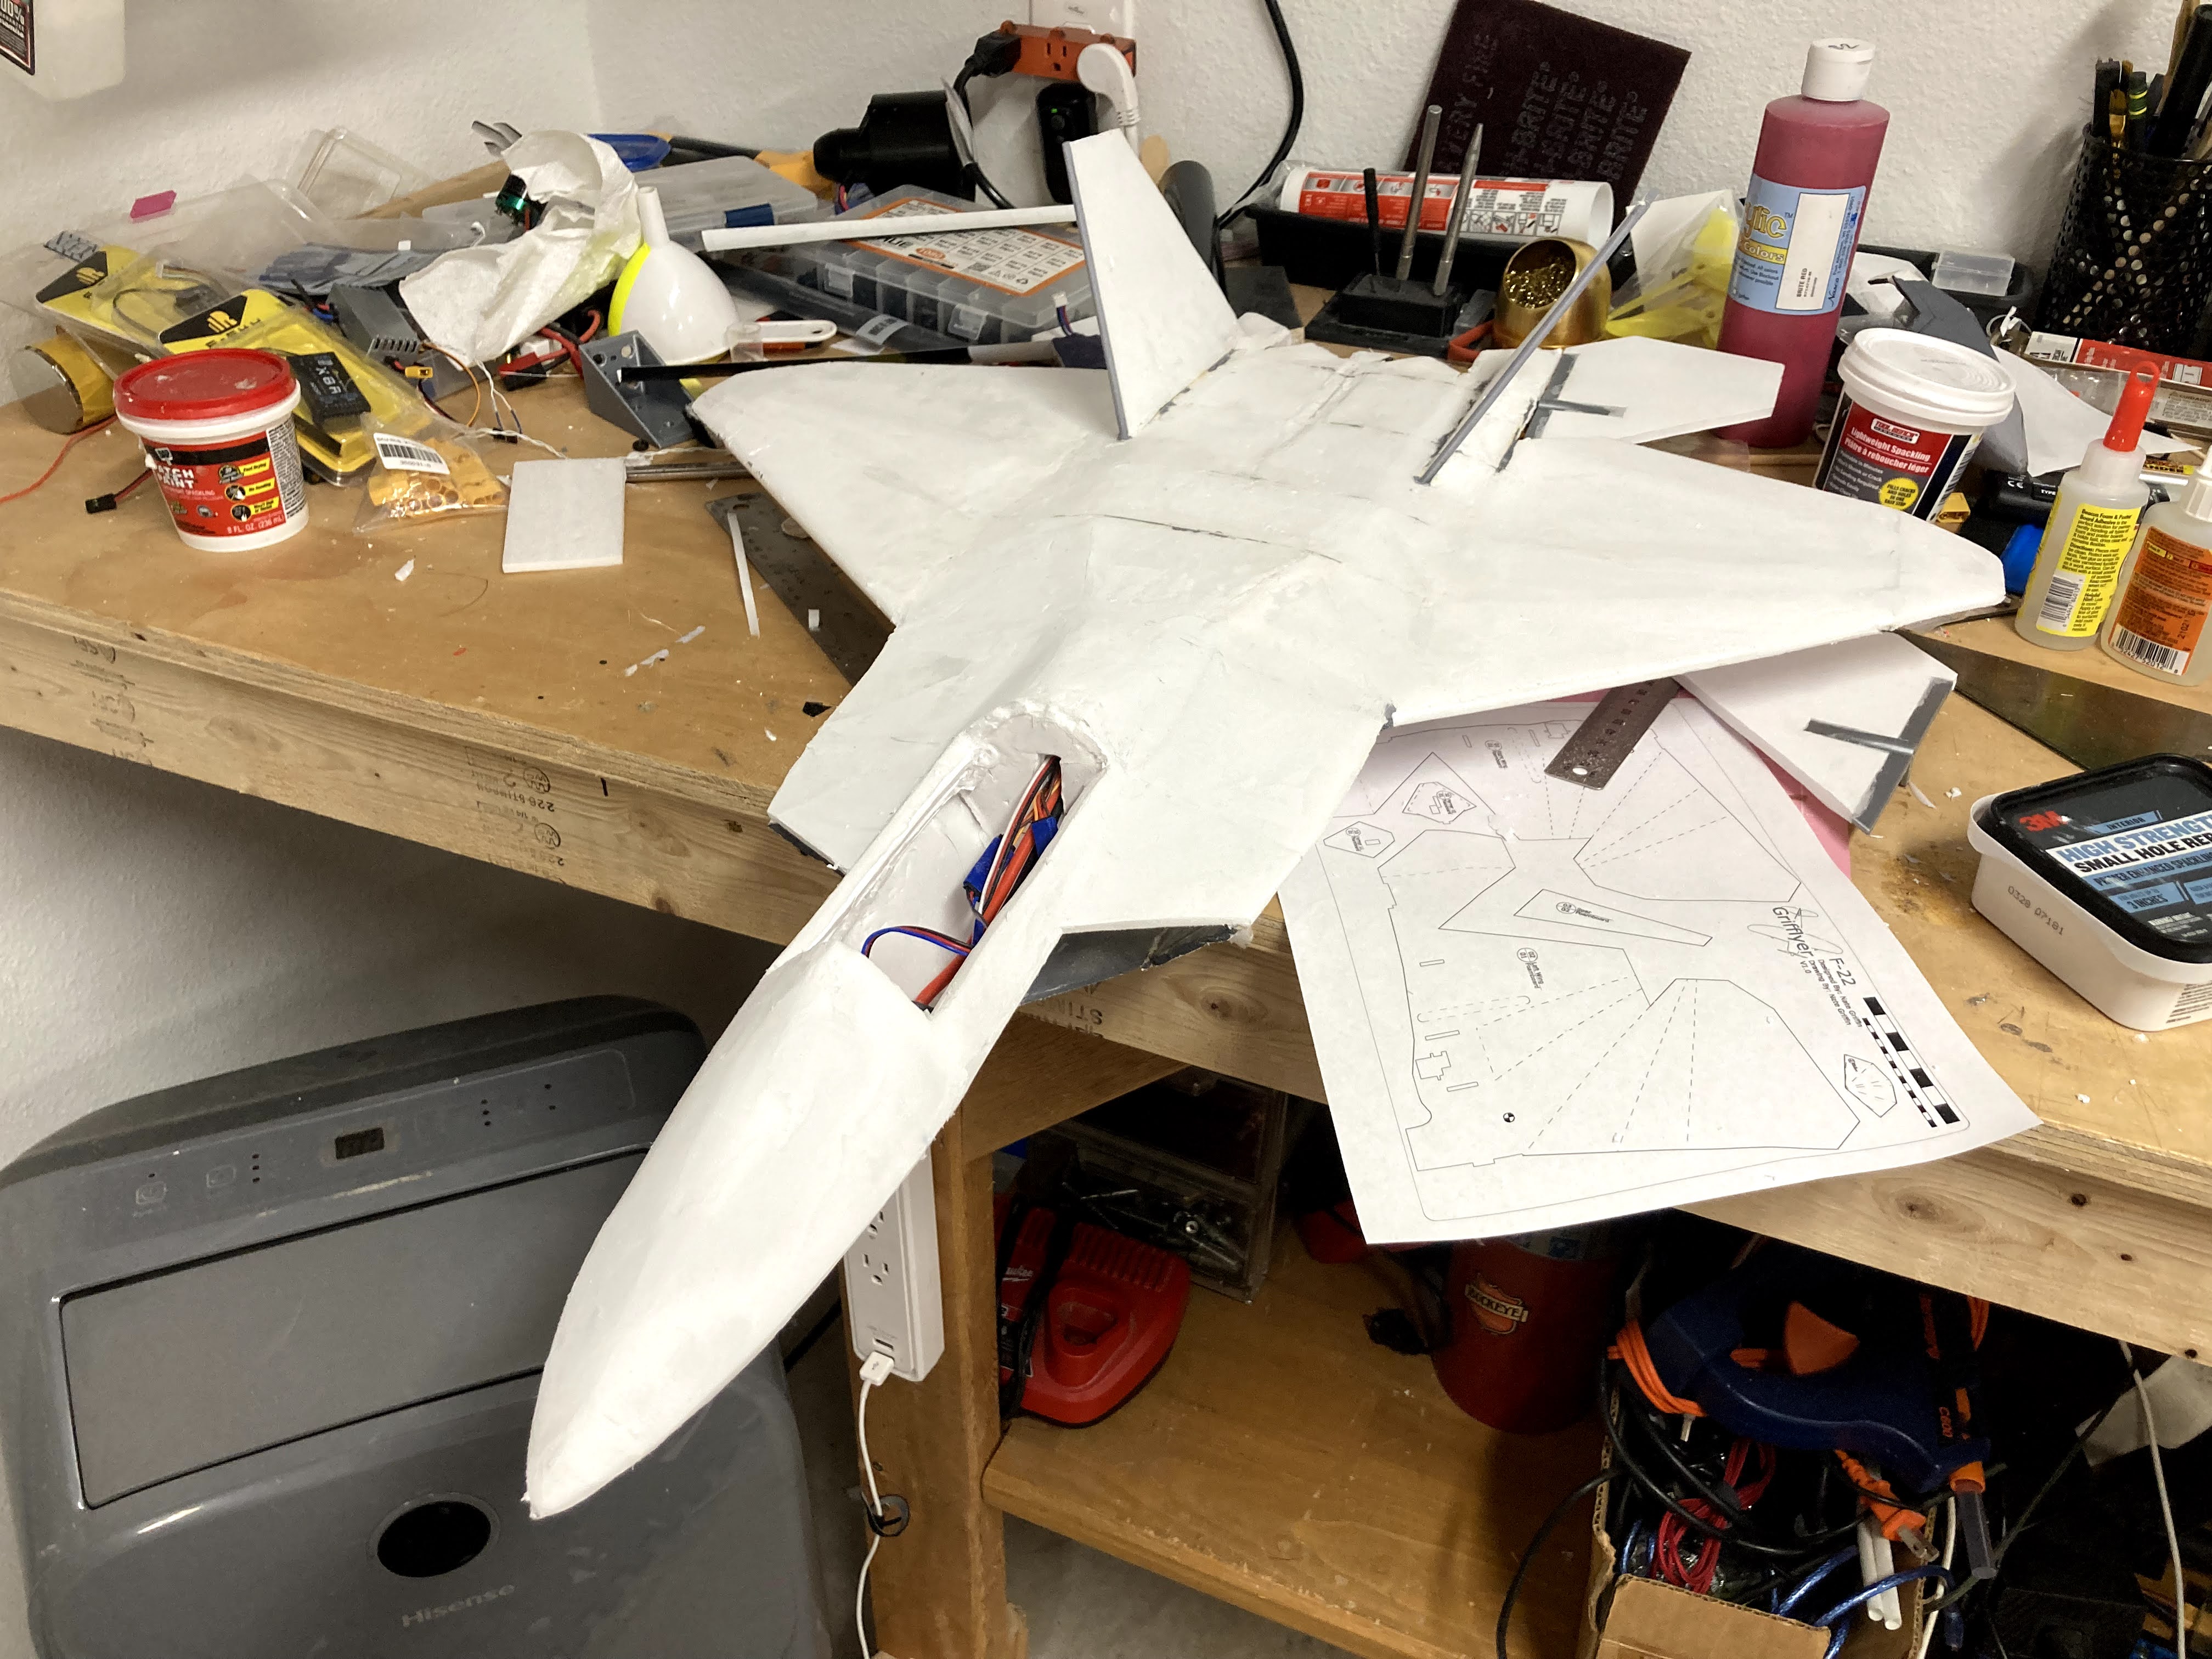
Be careful - When we were younger I had a friend who bought a jeep. He decided to take it all apart - the whole thing - because he's an idiot. Of course he didn't know how to put it back together again, so he sold the entire pile of parts right off his garage floor.I've been pecking away at the rebuild, in my spare time. The first thing I did was cut away all the smashed areas, and then decided (perhaps unwisely) to strip all the paper. My logic being that my paint job was garbage, and there were various wrinkles. More on the paper stripping later...
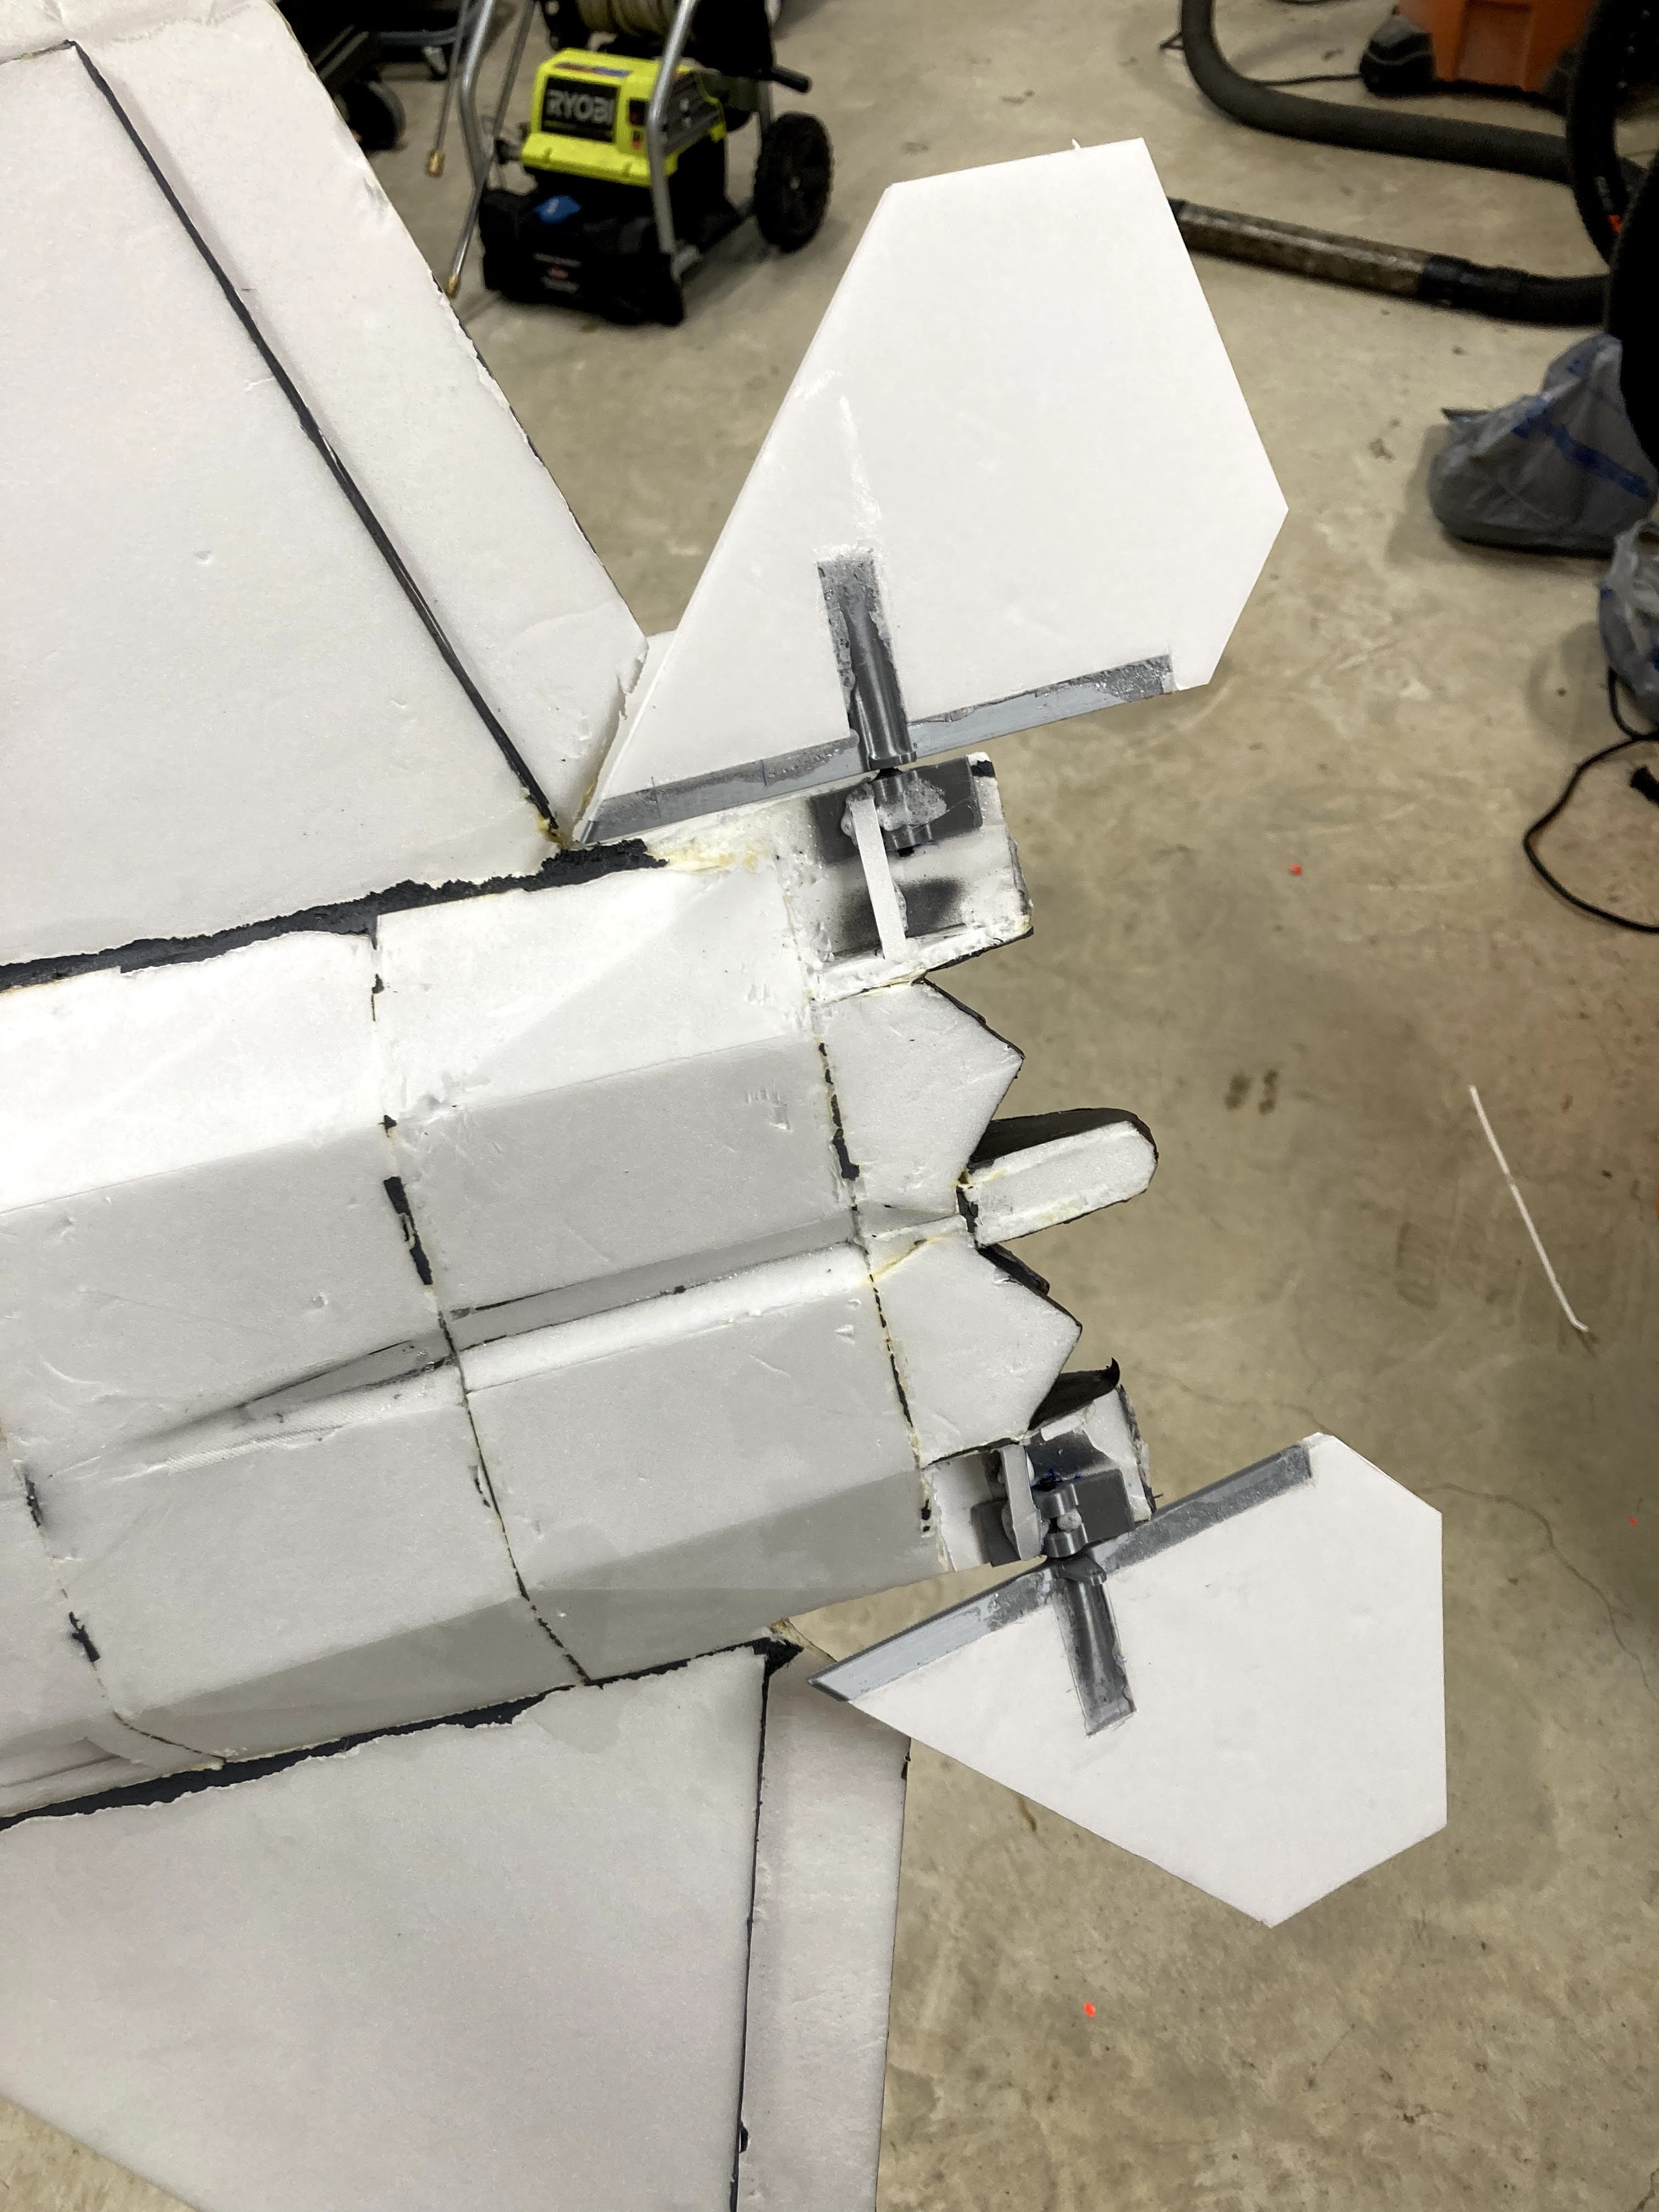
I also wasn't happy with my pushrod routing, so I opened up the servo area and pulled that out. While I had it that far apart, I went ahead and drew up a stabilator mechanism that uses 3mm carbon rod to pivot the stabilizers. Retention will be handled by the pushrod (simple, and OK for a small model like this).
It's coming together, but of course now it looks worse than it did right after the crash! It'll get better.
Oh, about that paper: I did several test pieces, trying various types of paper and adhesive to try and replicate the stiffness and lightness of the DTFB. To my surprise, it's really hard to beat! The closest I've come to the original weight and stiffness is by using regular typing paper and a 3:1 mixture of white glue and WBPU. It's not ideal, since it won't drape well over curves like the newsprint-type paper I wanted to use. But... the stiffness will likely be worth it We'll see. I may use a combination of both types, reserving the newsprint for the curvy areas.
Onward!
Chris
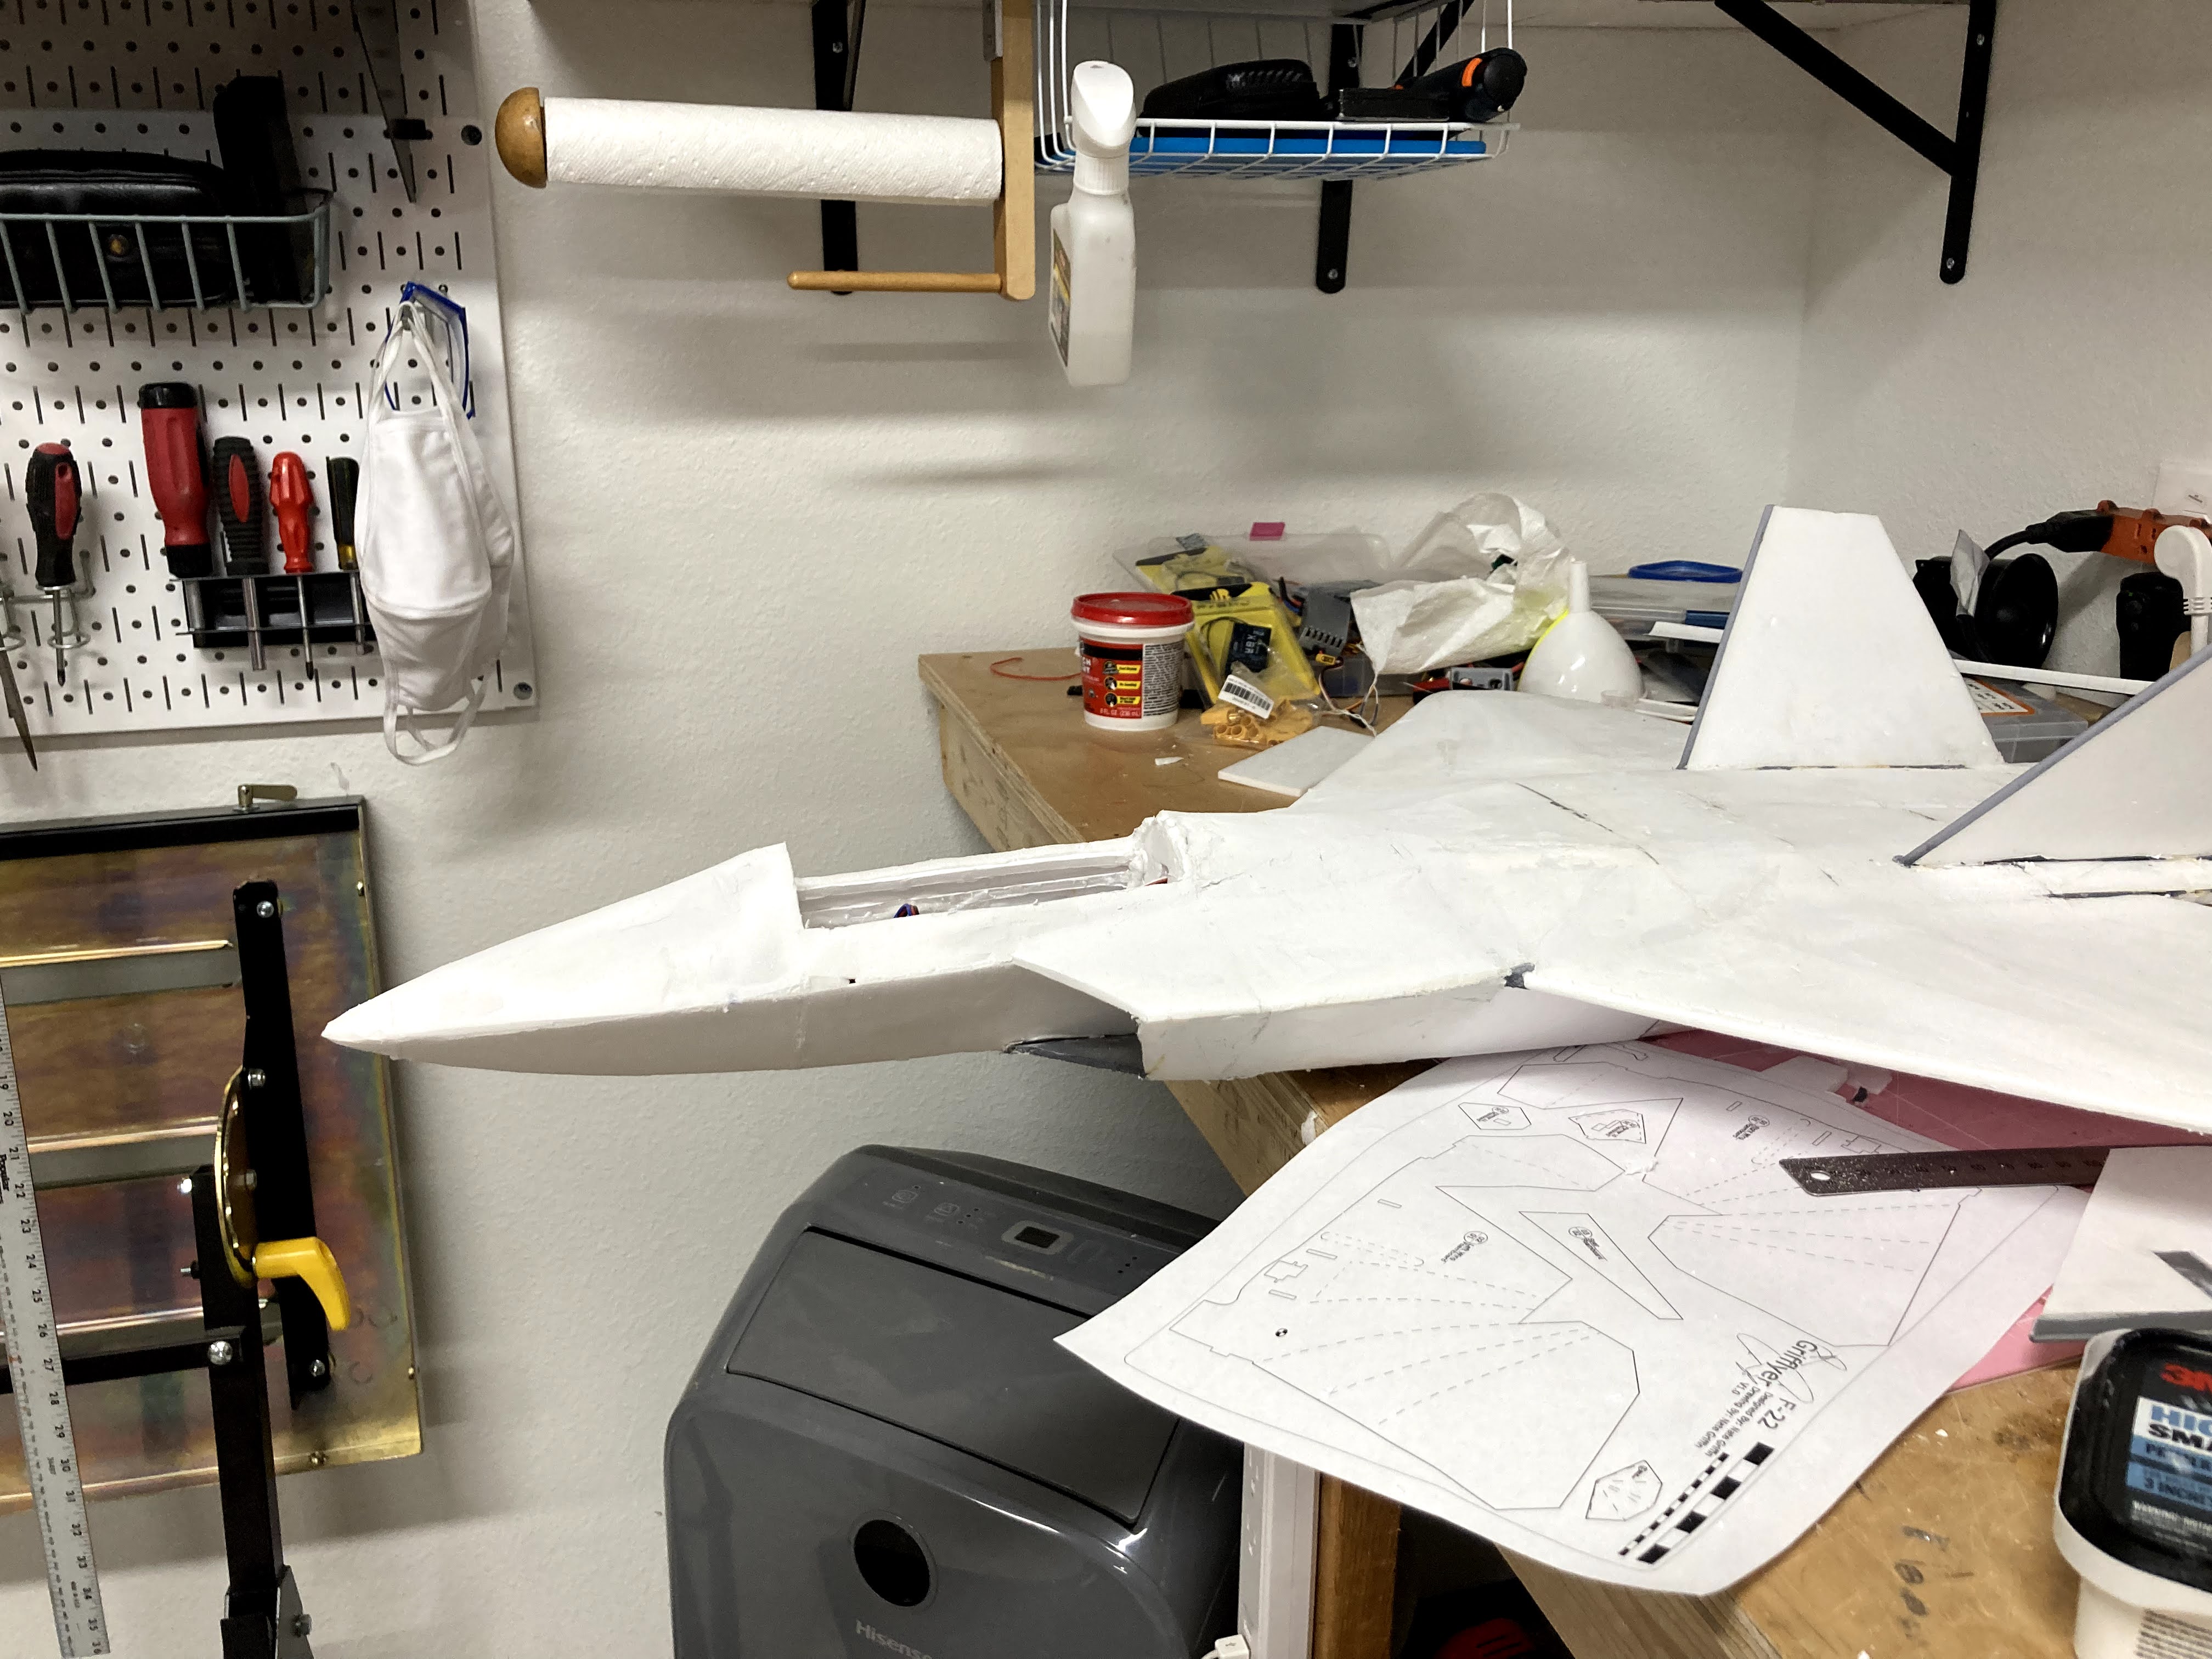
There ya go, Great repair work!Repairs are coming along! I still need to route the pushrod for the right stabilator, then close up the holes over the servos. Once that is done, it'll be ready for re-skinning. Oh, and of course I need to make a canopy! This time it's going to be carved from foam. The new nose section was created using a side and top view cut from foam board, then skinned with individual sheets of foam. Basically like old-school balsa construction except with foam!
I'm thinking I will cover the wings and fins with printer paper, and the forward fuselage (all the curvy bits) in 1.5oz fiberglass cloth. In both cases, the adhesive will be a 50/50 mix of Elmer's School Glue and WBPU. Incidentally, the School Glue is better than regular Elmer's glue because it dries to a harder consistency. Regular Elmer's stays rubbery.
Chris
Amazing.Repairs are coming along! I still need to route the pushrod for the right stabilator, then close up the holes over the servos. Once that is done, it'll be ready for re-skinning. Oh, and of course I need to make a canopy! This time it's going to be carved from foam. The new nose section was created using a side and top view cut from foam board, then skinned with individual sheets of foam. Basically like old-school balsa construction except with foam!
I'm thinking I will cover the wings and fins with printer paper, and the forward fuselage (all the curvy bits) in 1.5oz fiberglass cloth. In both cases, the adhesive will be a 50/50 mix of Elmer's School Glue and WBPU. Incidentally, the School Glue is better than regular Elmer's glue because it dries to a harder consistency. Regular Elmer's stays rubbery.
Chris