
roversgonemad
Member
As some of you may have read in the Not Quite Flight forum, my Avistar had a rather violent unplanned landing when the elevator control horn failed... At first I thought it was a radio glitch, but I was able to cut the throttle, so that kind of ruled out radio glitch. The horn failed during a stall turn. Exiting the turn, I initially had some up elevator and then had nothing at all...
When I first walked up to the crash site, I was not confident that the fuselage was even going to be repairable. I didn't have a camera with me, so there are no "scene of the incident" pictures. I was also quite worried that my old OS FP40 was going to be ruined. I have since cleaned it up, and it seems to have suffered no ill effects besides the broken propeller. I have yet to run it, but the crank does not appear to be bent and there is no binding.
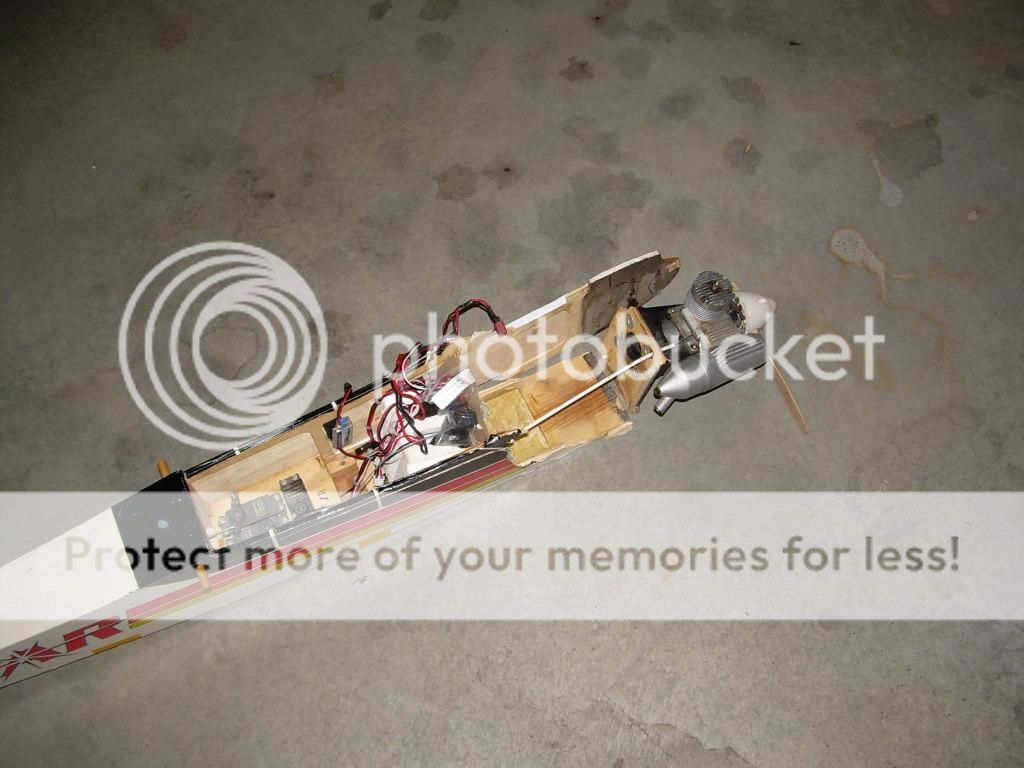
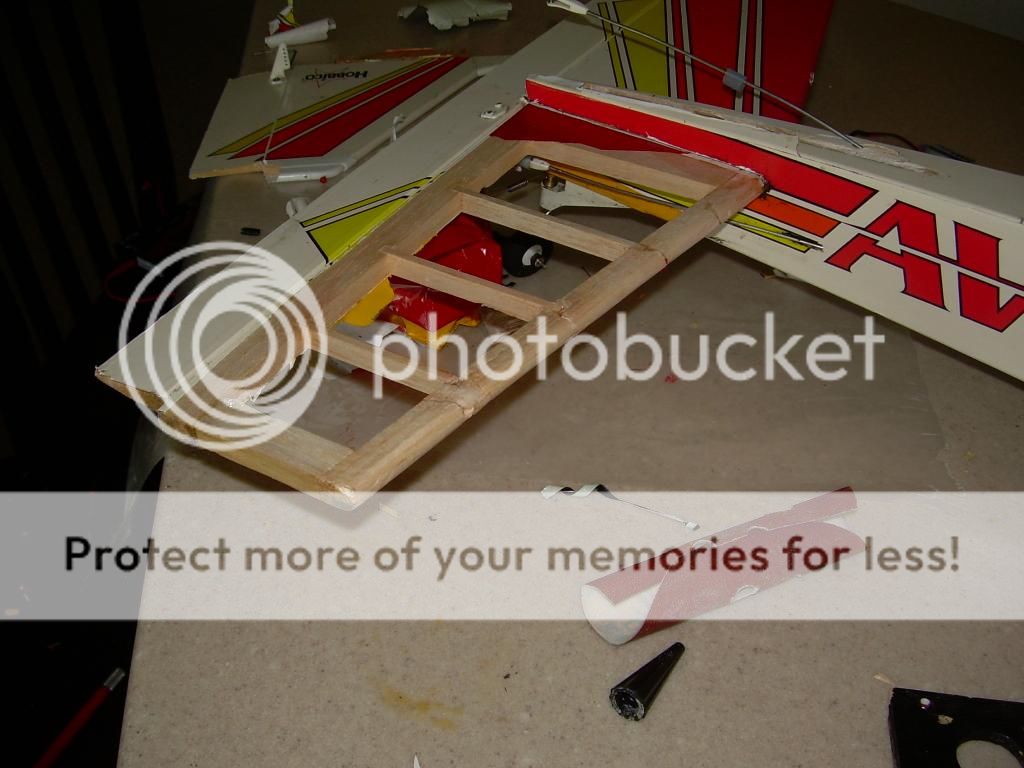
Here's the damage, without the shattered bits of the right side of the fuselage in the picture:
I made multiple trips to the crash site to try to find all the little bits. It took a while of walking concentric circles around the crater before I found the windscreen and the front wing mounting dowel. I spent quite a few hours that night trial fitting shattered bits of balsa and ply together. After a while, I decided that it might actually be possible to piece the fuselage back together. Here is the sort of reassembled right side laying next to the fuselage. At this point there are still few bits of framework not reattached. You can also see that the firewall is missing a corner. Unfortunately, I was not able to find all the bits of the firewall. The multiple pieces of the bulkhead that supports the rear of the fuel tank have been glued back together at this point, and the wing mounting dowel is glued also back in place.
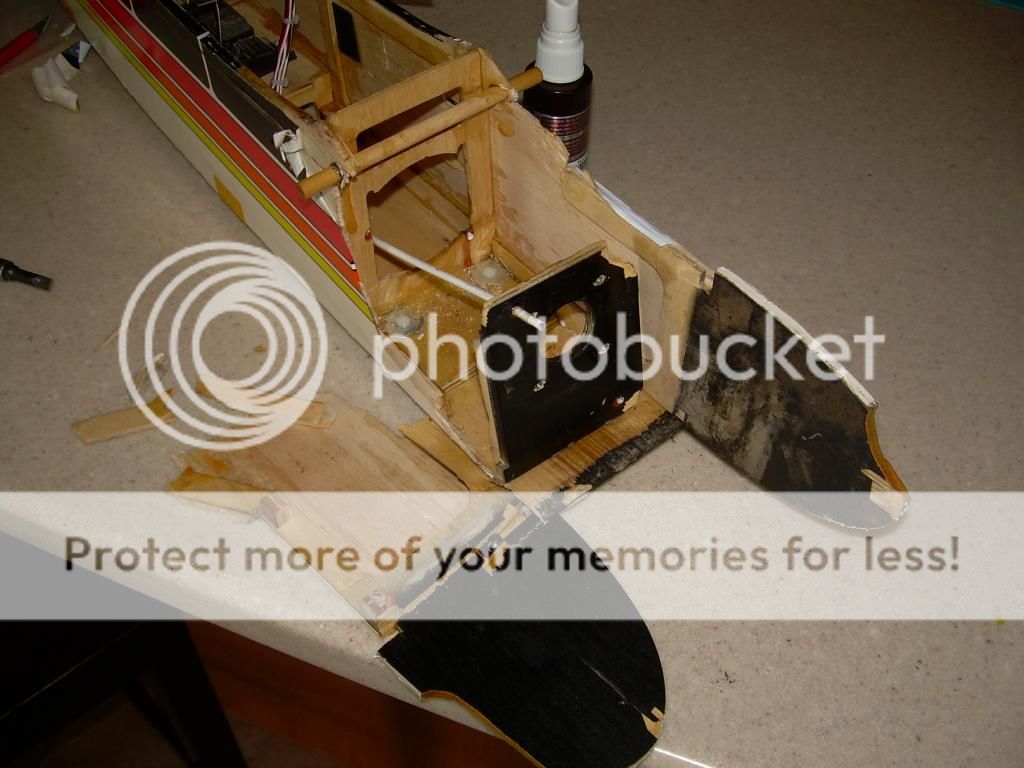
Here is the side during a trial fit. It doesn't look too bad at all! This is the point where I decided that it was genuinely salvageable. It was also at this point that I realized I needed to make a new firewall...
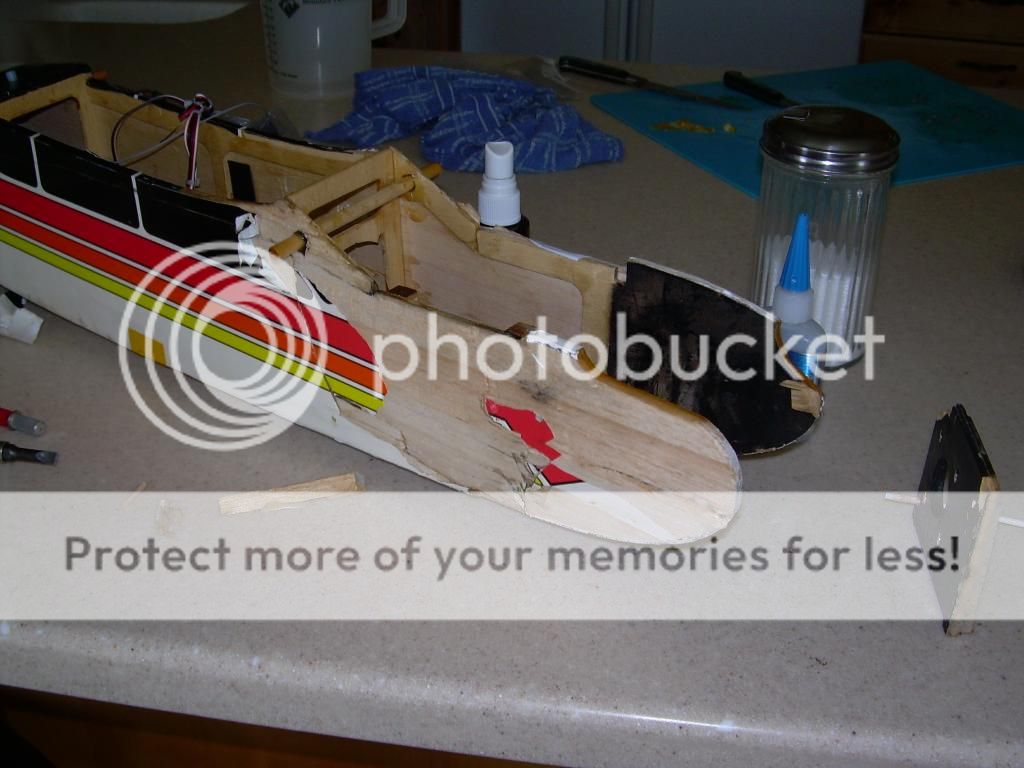
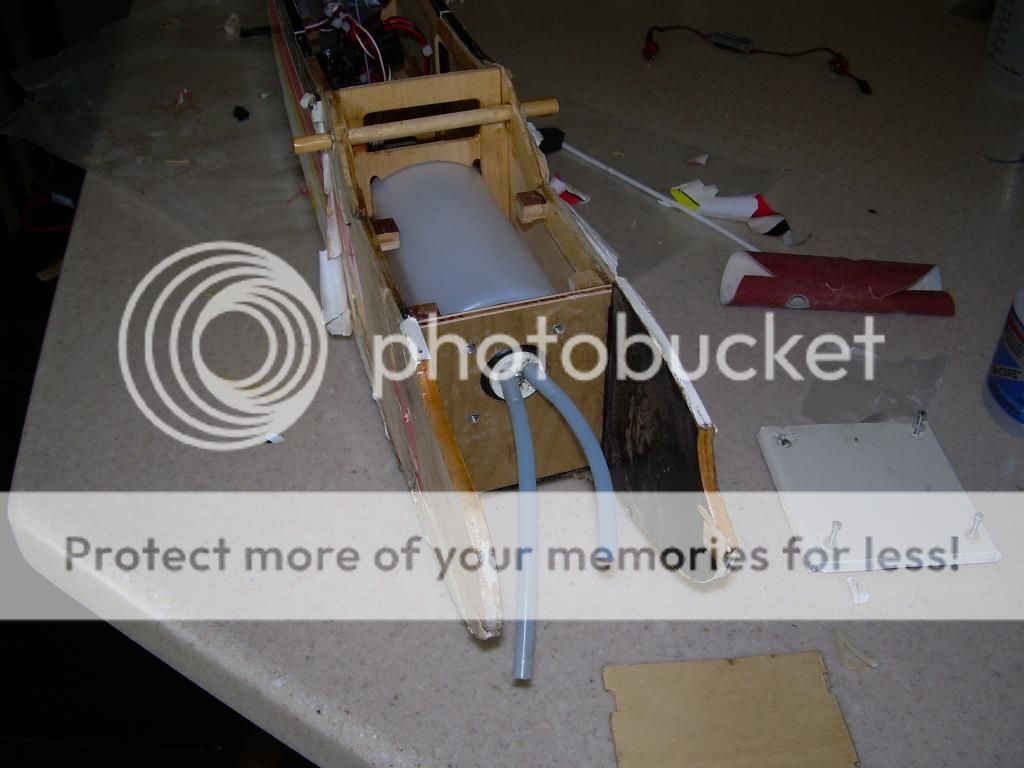
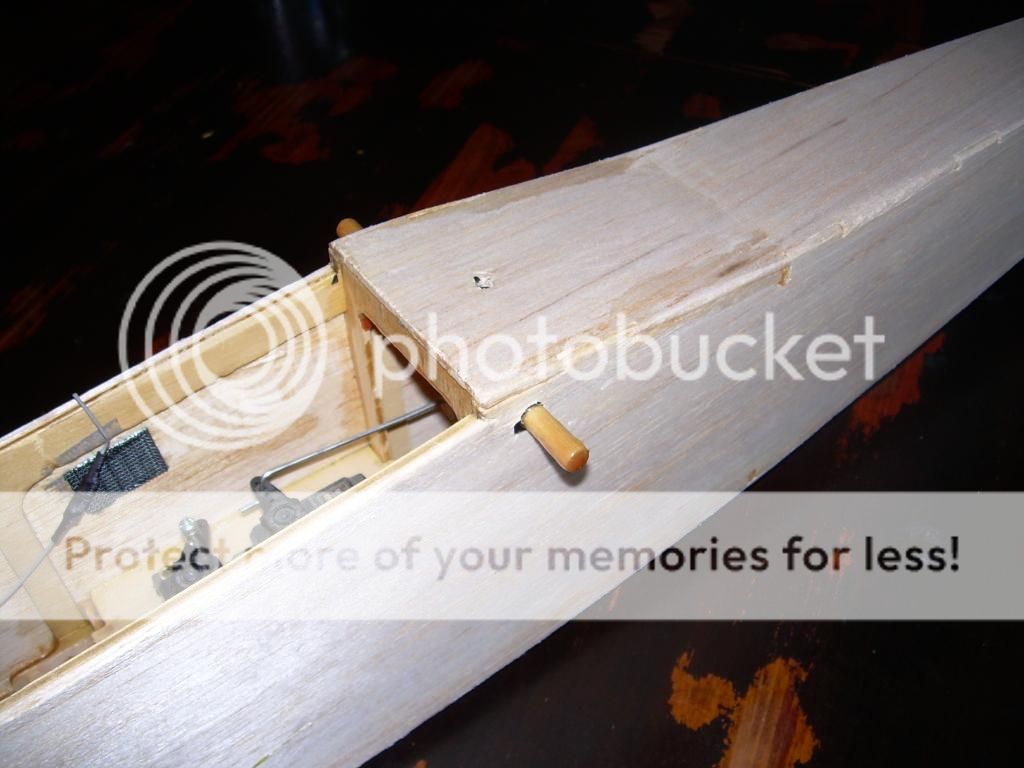
Fortunately, I had some 1/4 inch ply in the garage, left over from one of my wife's projects. I was able to make a close enough simile, using the old firewall as a template, that fit quite well. It is not the greatest quality plywood in the world, but a thorough soaking with thin CA really made it stiff. I was a little hesitant to use it, but it is what I had on hand. With no LHS, hobby grade ply is hard to come by... Here it is in the plane. At this point, the side is glued back on and the fuel tank is mocked up to check clearances.
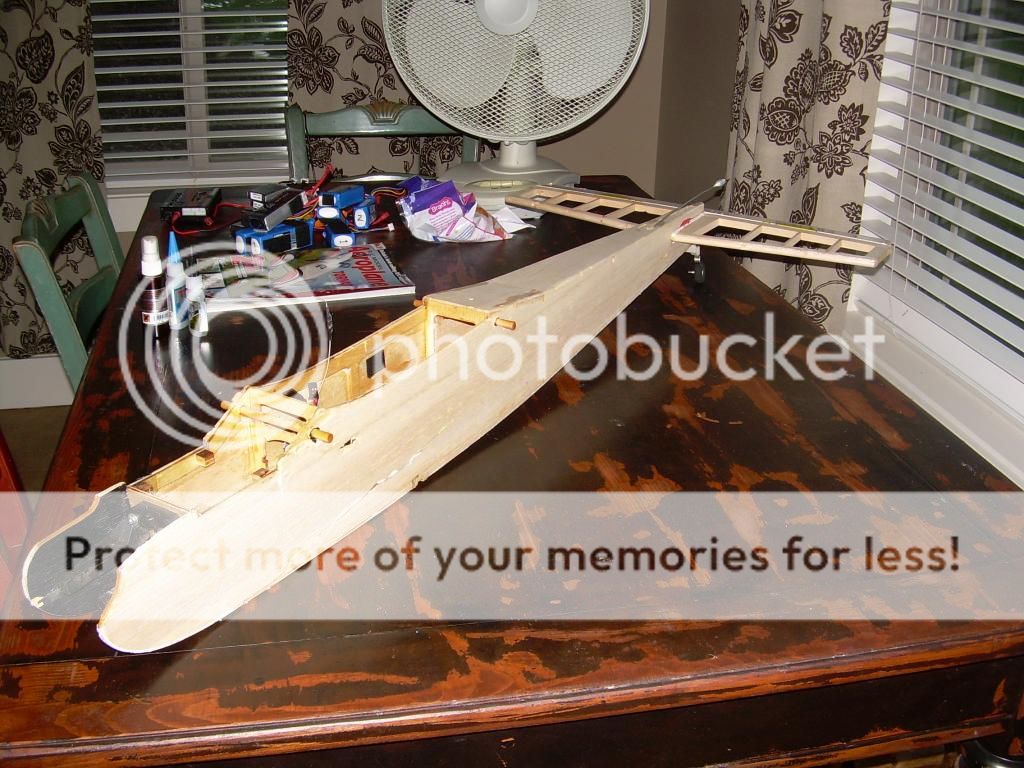
The crash caused some damage to the tail as well, so stripped the covering from the horizontal stabilizer and got it glued back together.
Since the tail has now been broken at every rib, I am also going to make some corner gussets to reinforce the leading edge.
Based on the damage to the front of the fuselage, I knew I needed to strip the rest of the fuse and check for any damage that was not obvious with the covering in place.
Notice how far back this crack runs:

And these cracks on this side:

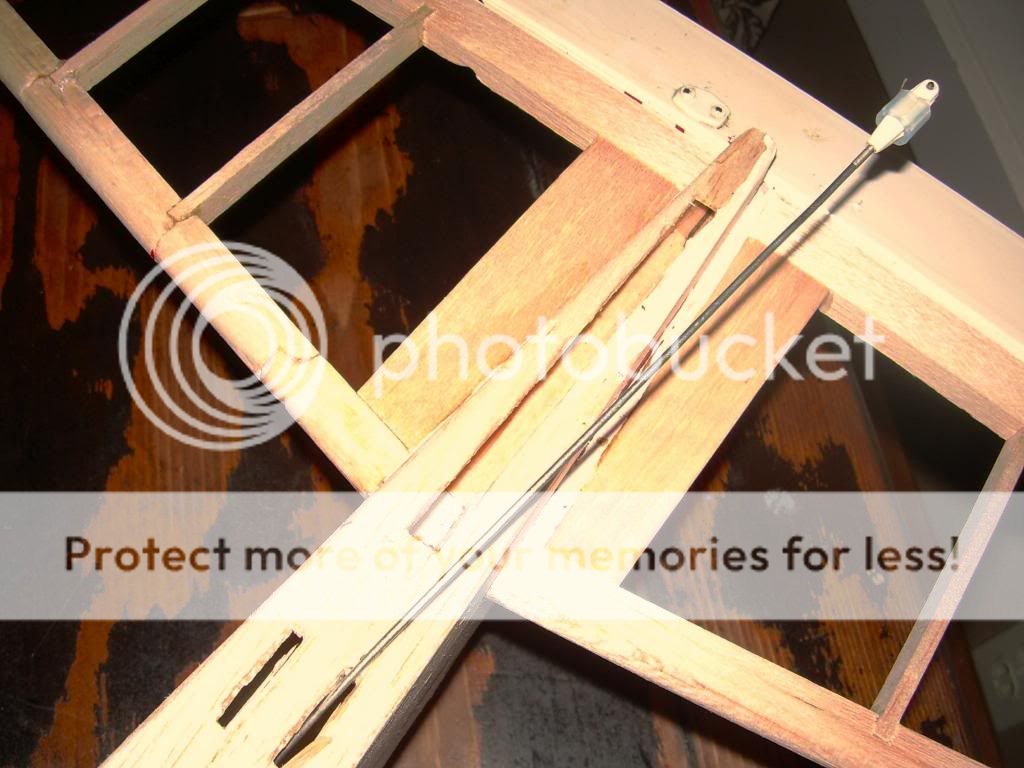
It was also broken behind the wing saddle:
Thin CA is a wonderful thing for wicking into all the cracks and open joints in balsa and ply! I still need to add some stiffening in a place or two, and will likely glass a few areas, but overall I think the fuse is in good shape now. There was also some damage from the vertical stabilizer popping out in the crash, but mostly just cracks that were easily sealed with thin CA.
At this point, it seems that I have added minimal weight with the repairs. I will have some repairs to do on the wing as well. It has some damage in the region where it meets the fuselage and one shattered rib. The mounting region I will glass, to regain strength, and I think I have all the pieces of the rib. The fuselage will need some filler and some balsa grafts in a place or two, but I am really pleased with how it is coming back together.
With the fuse as torn up as it was, I really didn't want to patch the covering, so it's getting a full re-cover. I have ordered some colors that I think will go quite nicely together, and are also the colors of my alma mater.
More to come as I progress. I am going get the wing stripped in the next couple of days and will hopefully be to a point where I can start the covering by next week.
When I first walked up to the crash site, I was not confident that the fuselage was even going to be repairable. I didn't have a camera with me, so there are no "scene of the incident" pictures. I was also quite worried that my old OS FP40 was going to be ruined. I have since cleaned it up, and it seems to have suffered no ill effects besides the broken propeller. I have yet to run it, but the crank does not appear to be bent and there is no binding.
Here's the damage, without the shattered bits of the right side of the fuselage in the picture:

I made multiple trips to the crash site to try to find all the little bits. It took a while of walking concentric circles around the crater before I found the windscreen and the front wing mounting dowel. I spent quite a few hours that night trial fitting shattered bits of balsa and ply together. After a while, I decided that it might actually be possible to piece the fuselage back together. Here is the sort of reassembled right side laying next to the fuselage. At this point there are still few bits of framework not reattached. You can also see that the firewall is missing a corner. Unfortunately, I was not able to find all the bits of the firewall. The multiple pieces of the bulkhead that supports the rear of the fuel tank have been glued back together at this point, and the wing mounting dowel is glued also back in place.

Here is the side during a trial fit. It doesn't look too bad at all! This is the point where I decided that it was genuinely salvageable. It was also at this point that I realized I needed to make a new firewall...

Fortunately, I had some 1/4 inch ply in the garage, left over from one of my wife's projects. I was able to make a close enough simile, using the old firewall as a template, that fit quite well. It is not the greatest quality plywood in the world, but a thorough soaking with thin CA really made it stiff. I was a little hesitant to use it, but it is what I had on hand. With no LHS, hobby grade ply is hard to come by... Here it is in the plane. At this point, the side is glued back on and the fuel tank is mocked up to check clearances.

The crash caused some damage to the tail as well, so stripped the covering from the horizontal stabilizer and got it glued back together.

Since the tail has now been broken at every rib, I am also going to make some corner gussets to reinforce the leading edge.
Based on the damage to the front of the fuselage, I knew I needed to strip the rest of the fuse and check for any damage that was not obvious with the covering in place.

Notice how far back this crack runs:

And these cracks on this side:

It was also broken behind the wing saddle:

Thin CA is a wonderful thing for wicking into all the cracks and open joints in balsa and ply! I still need to add some stiffening in a place or two, and will likely glass a few areas, but overall I think the fuse is in good shape now. There was also some damage from the vertical stabilizer popping out in the crash, but mostly just cracks that were easily sealed with thin CA.

At this point, it seems that I have added minimal weight with the repairs. I will have some repairs to do on the wing as well. It has some damage in the region where it meets the fuselage and one shattered rib. The mounting region I will glass, to regain strength, and I think I have all the pieces of the rib. The fuselage will need some filler and some balsa grafts in a place or two, but I am really pleased with how it is coming back together.
With the fuse as torn up as it was, I really didn't want to patch the covering, so it's getting a full re-cover. I have ordered some colors that I think will go quite nicely together, and are also the colors of my alma mater.
More to come as I progress. I am going get the wing stripped in the next couple of days and will hopefully be to a point where I can start the covering by next week.


") I know I didn't use any of the schemes for the wing I sketched out, but it's close enough. For my first two tone job, it was tricky enough. Please excuse the crude sketching of the drawing, I was just trying to get an idea of how it would look. I have to plan this sort of thing out. For the fuselage covering I am going to seam and tack on the covering with it on a piece of glass. I ordered a 24x36" piece of plate glass yesterday to use for covering work. It worked okay doing it on the wing, but the tutorials I have watched make it look quite a bit easier to do on the glass. The pin strip between the colors will also hide a few sins.
I know I didn't use any of the schemes for the wing I sketched out, but it's close enough. For my first two tone job, it was tricky enough. Please excuse the crude sketching of the drawing, I was just trying to get an idea of how it would look. I have to plan this sort of thing out. For the fuselage covering I am going to seam and tack on the covering with it on a piece of glass. I ordered a 24x36" piece of plate glass yesterday to use for covering work. It worked okay doing it on the wing, but the tutorials I have watched make it look quite a bit easier to do on the glass. The pin strip between the colors will also hide a few sins. 


