Hai-Lee
Old and Bold RC PILOT
I must have made and gifted away, (as well as flown and crashed myself), what seems to me to be a large number of FT Mighty Minis. Each one used a mini PowerPod and often required a number of replacements before the planes themselves were retired or destroyed entirely.
At times I needed to make a dozen or more in a single session. As you might imagine doing many individual PowerPods by most of the scratch build methods on the forum would take a fairly long time. I needed to do them faster! Recently I made mention of making PowerPods quicker than one at a time and @buzzbomb suggested I do it as a separate thread, as did @mayan , and so here it is!
From my own measurements the sides of the powerpods were 21mm high and the base piece was 31mm wide. Between the sides and the bottom piece there are two 5mm channels for the appropriate fold, (A or B). This meant that the FB used for the Mini Powerpod from my measurements was 83mm. (Do your own checks and measurements to ensure that your Powerpods are the exact size you require).
The long side of the powerpod is 64mm and the short side is 62mm. The base piece is tapered between the long and short side pieces at the motor end.
The tools I use. Ruler, Pencil, "T" Square, Sharp Knife, Balsa Stripper.

My procedure is to grab the FB and using a straight edge or after cutting a straight edge using a ruler and knife, I measure out and mark a parallel line 83mm from the straight edge. I cut along this line so I end up with a strip of FB that is 83mm wide.


I use a "T" square and measure and mark out as many 64mm lengths along the 83mm wide FB strip. (DO NOT CUT YET).

Now comes the tricky part! I use a balsa stripper that I have added a spacer to so that I can cut strips 21mm wide. I use the
balsa stripper down each long edge of the 83mm wide strip, (Only on one face do not do both sides!!).


Once this is done I change the balsa stripper setting to 5mm, fold the 21mm side pieces out of the way and cut the 5mm wide
channel for the A or B folds. When the channel is cut I then alter the Balsa stripper to do 2 mm only.


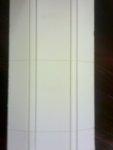
Now cut through the lines across the FB strip at 64mm so that you end up with a number of 83 x 64 FB rectangles with
score cuts in them.


Now I cut the 2mm side thrust from a single 21mm side. With the A or B fold channels running from right to left I score the bottom 21mm side for a CCW PowerPod or the top 21mm side piece for a CW powerPod. This is done on the right hand end of the FB piece.

I then use a sharp knife to cut through the base piece along the line from the long 21mm side to the short 21mm side.

Just clear out the 5mm channels and it is ready to fold glue and fit the firewall.

Sorry it took so long to complete this post but at this time of day the connection to FT from Aus slows to an absolute crawl and some of the pics required 30 minutes and many attempts to upload! So much for modern tech and for my perceived reluctance to post photos normally! In the time it took to post this item I could have done at least another 50 PowerPods!
Have fun!
At times I needed to make a dozen or more in a single session. As you might imagine doing many individual PowerPods by most of the scratch build methods on the forum would take a fairly long time. I needed to do them faster! Recently I made mention of making PowerPods quicker than one at a time and @buzzbomb suggested I do it as a separate thread, as did @mayan , and so here it is!
From my own measurements the sides of the powerpods were 21mm high and the base piece was 31mm wide. Between the sides and the bottom piece there are two 5mm channels for the appropriate fold, (A or B). This meant that the FB used for the Mini Powerpod from my measurements was 83mm. (Do your own checks and measurements to ensure that your Powerpods are the exact size you require).
The long side of the powerpod is 64mm and the short side is 62mm. The base piece is tapered between the long and short side pieces at the motor end.
The tools I use. Ruler, Pencil, "T" Square, Sharp Knife, Balsa Stripper.

My procedure is to grab the FB and using a straight edge or after cutting a straight edge using a ruler and knife, I measure out and mark a parallel line 83mm from the straight edge. I cut along this line so I end up with a strip of FB that is 83mm wide.


I use a "T" square and measure and mark out as many 64mm lengths along the 83mm wide FB strip. (DO NOT CUT YET).

Now comes the tricky part! I use a balsa stripper that I have added a spacer to so that I can cut strips 21mm wide. I use the
balsa stripper down each long edge of the 83mm wide strip, (Only on one face do not do both sides!!).


Once this is done I change the balsa stripper setting to 5mm, fold the 21mm side pieces out of the way and cut the 5mm wide
channel for the A or B folds. When the channel is cut I then alter the Balsa stripper to do 2 mm only.


Now cut through the lines across the FB strip at 64mm so that you end up with a number of 83 x 64 FB rectangles with
score cuts in them.


Now I cut the 2mm side thrust from a single 21mm side. With the A or B fold channels running from right to left I score the bottom 21mm side for a CCW PowerPod or the top 21mm side piece for a CW powerPod. This is done on the right hand end of the FB piece.

I then use a sharp knife to cut through the base piece along the line from the long 21mm side to the short 21mm side.

Just clear out the 5mm channels and it is ready to fold glue and fit the firewall.

Sorry it took so long to complete this post but at this time of day the connection to FT from Aus slows to an absolute crawl and some of the pics required 30 minutes and many attempts to upload! So much for modern tech and for my perceived reluctance to post photos normally! In the time it took to post this item I could have done at least another 50 PowerPods!
Have fun!
Last edited:
