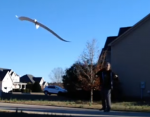
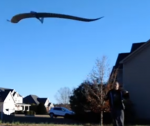
FTFC20 Mara designed by FoamyDM - The Flying Mustache

FoamyDM

Building Fool-Flying Noob
Moderator
This the entry of the MARA designed by FoamyDM
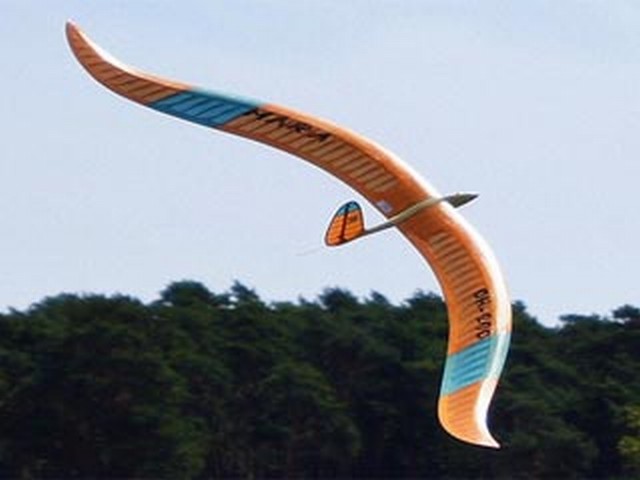
The graceful swept curves of this Thermal Soarer are enticing, I am drawn to the unique construction methods employed to build this unique craft.
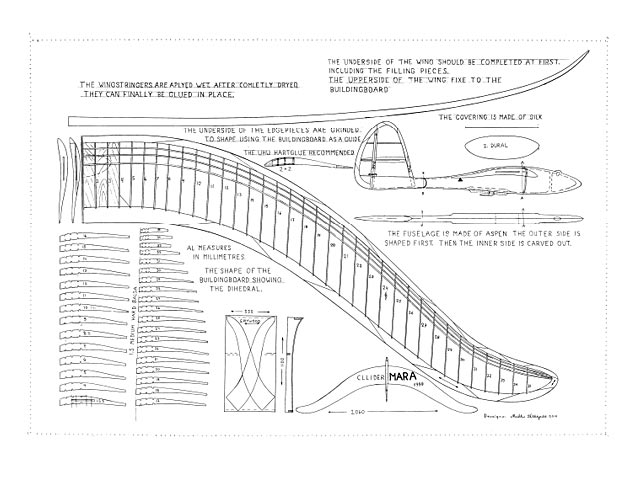
6029.jpg

Capture.PNG FlightPic.PNG
PreFlight1.jpg PreFlight2.jpg
History:
The craft was designed in 1999 by Markku Tähkäpää, reknown veteran Finnish modeler. but plans weren't drawn up until 2014. according to the RC GRoups thread and outerzone, Markku indicated there are no thermal decouplers... so plan accordingly.

FDM Plans:
FDM-Mara.V1.0PlanSet1-4.PNG FDM-Mara.V1.0PlanSet5.PNG
Resource link
Build Log:
This wing is a LONG slender build, and I will be relying heavily on the Skin (and glue up) for the heavy lifting. Also worth noting is this seems to be Rudder only.

Maiden Flight:

Take-away:
Stop
taking on these crazy project/challenges:LOL:
Start
Gluing in CF tube prior to closing up the wing.
Painting the project with spray
include more keys and slots. - they add mechanical strength.
add a part index.
Continue
Planning out the build process, and putting in the labels
include building steps for the complex parts.
 
Last edited:

Vimana89

Legendary member
This one really stood out to me browsing Outerzone. This is an extremely unique plane, can't wait to see what you come up with! For full motorized effect, you could switch it to elevons only like a normal flying wing and leave the VS uncut with no rudder, or you could do 4ch elevons and rudder.
 
Last edited:

FoamyDM

Building Fool-Flying Noob
Moderator
This beast is gonna be a tricky one at least at first. I know I plan to use this foamboard, in part. The slightly larger size, and thinner profile @ 3/32" is attractive, however, it is double density and it weighs in at 115g. Same as adams ready-board.
 

kilroy07

Legendary member
@kilroy07 - I add this as I am nearly complete with Three of the ones I signed up for. *Guiltily looking around*
Looks up from workbench where there’s an SR-71 laying in pieces.... “uh huh!”

That said, it is a very “interesting” design!....... 🤔
 
Last edited:

FoamyDM

Building Fool-Flying Noob
Moderator
Beta Plans are completed and Printing:
FDM-Mara.BetaPlanSet.PNG
The 1st Page is the Lay-down ramp sides for the curve, and the spars. This craft was sized to use on full sheet to cover the ramp. one side has parts or all of the paper removed. The 2nd is the Fuselage. and ramp cross pieces. The other two are the tops and bottoms of the left and right wings respectively. These plans don't include any reinforcement, lightening holes (sorry 1 in each win), or any guides about paper removal (critical) or tapering. Updates as I go/experiment. I suspect a big piece of this planes success will be in lock notching, and gluing methods, (blocking, etc.)

Electronics are going to be a 3.7 300 mah 1S battery with a 9g and receiver for the rudder.
at least this is where I will start.
 

Attachments

  • FDM MaravB1.pdf
    146.8 KB · Views: 0

Vimana89

Legendary member
Beta Plans are completed and Printing:
View attachment 144333
The 1st Page is the Lay-down ramp sides for the curve, and the spars. This craft was sized to use on full sheet to cover the ramp. one side has parts or all of the paper removed. The 2nd is the Fuselage. and ramp cross pieces. The other two are the tops and bottoms of the left and right wings respectively. These plans don't include any reinforcement, lightening holes (sorry 1 in each win), or any guides about paper removal (critical) or tapering. Updates as I go/experiment. I suspect a big piece of this planes success will be in lock notching, and gluing methods, (blocking, etc.)

Electronics are going to be a 3.7 300 mah 1S battery with a 9g and receiver for the rudder.
at least this is where I will start.
Very interested in seeing how this one turns out. Are you going for a glider or motorized(or starting as a glider and possibly doing a motorized version later?)
 

FoamyDM

Building Fool-Flying Noob
Moderator
I will be starting as a glider, then I'll motorize it. I have so many that are planned, (at least Beta Planned) and just need to be cut and assembled... then of course flown.

I would love to power it with a twin micros with a 3" prop to get some yaw authority.
 

FoamyDM

Building Fool-Flying Noob
Moderator
After working on the Windfreak, I learned these models tend to be Tail Heavy... so I made a Beta 2 plan set that removes board behind the CG. This should lighten it and make it easier to balance with less ballast.
FDM-Mara.Beta2PlanSet.PNG
 

Attachments

  • FDM MaravB2.pdf
    227.1 KB · Views: 0

FoamyDM

Building Fool-Flying Noob
Moderator
IMG_20191227_031421996.jpg IMG_20191227_032634874.jpg
Putting some of it together... to make the shaping ramp guide
IMG_20191228_110445523.jpg IMG_20191228_124253913.jpg IMG_20191228_110431314_HDR.jpg
Then it was time to turn toward the wing parts. Cut out, and ironed...
IMG_20191228_115427548.jpg IMG_20191228_115439643.jpg IMG_20191228_120415096.jpg IMG_20191228_114846717.jpg IMG_20191228_114955279.jpg
Now it's time to mold the pieces by pulling small strips on the upward face to allow the piece to curl with the ramp. Then pull apposing sides of the two vertical spars to allow you to shape them to follow the spar linen on the lower wing. This goes for both spar pieces.
IMG_20191228_135023456_HDR.jpg
Then the spars need to be glue to each other over the line and glues to the bottom wing. Mirrored for the other wing.
 

FoamyDM

Building Fool-Flying Noob
Moderator
I will need to add specific hatch patterns and notes on the sections needing paper removal and tapering. I will also put together a pattern for holes in the wing to lighten the rear half of the craft, as the CG is a the back of the wing. (note the black triangle below):
1577719149735.png

As I build this, I am already trying to figure out an FT build style version of it. Something far simpler to build, but one that still has the twist, and the upturned tips.
 

FoamyDM

Building Fool-Flying Noob
Moderator
Spent some more time with the project.
I glued up spar and wings have a large heavy bag of food, or Kitty litter, or Cornhole bags.
To prep curve the two pieces by relieving some paper on the top sides of both parts. And shaping them to match the form. Then take alternating sides of The spar paper off. Are the middle it's the back side near the tips it's on the front side. Do this with both spars. Glue the first one down and place being bags on top to keep it in place while it cools. Then glue the backside of that one and along the bottom part of the wing where the second spar goes and push that in place. Then replace the bean bags and wait for the glue to cool.
IMG_20200103_015557830.jpg
in the picture above the prepared tape on the front edge of the top wing former.
IMG_20200103_020042733.jpg IMG_20200103_020342366.jpg
Then work your way along the front edge of the wing alternating glue and folding over the table on the front edge to close the seam. It'll look like an open clamshell when you're done.
the next step is to place glue along the top of the spar along the whole length.
Then place as much malleable weight as possible across the top of the wing. This ensures a good bond between spar and the top of the wing. It is important that you build the former well to be able to support the weight.it's also important to make sure the wing is in the appropriate spot before you load it up in each step,so that the the wing curvature and twist remains consistent throughout the process.
IMG_20200103_020953624.jpg IMG_20200103_020949352.jpg
Once The spar glue pools now it's time to close up the back seam of the wing. All you need to do now is just fold the top half to meet the bottom flat part. For this you're going to need to bring in the big guns I used this nearly full 40 lb bag of dog food.
IMG_20200103_021658329.jpg IMG_20200103_021041014.jpg IMG_20200103_021648475.jpg
To be sure the wing doesn't shift I put a piece of masking tape at the tip and taped it to the tall former at the top of the ramp.
If you've done it right both sides of the wing will come out identical and they'll be strong and secure.
IMG_20200103_015612278.jpg
All I have to do is put some color on this beautiful flying wing and it'll be time to give her a test drive.
IMG_20200103_024148204.jpg IMG_20200103_024205033.jpg IMG_20200103_024158082.jpg IMG_20200103_024210558.jpg
The pictures below show off the front edge curved and twist pretty well.
IMG_20200103_024226980.jpg IMG_20200103_024237096.jpg
It looks like all the trouble of building that ramp was worth it! :D
What's next
The next step is to create a carbon fiber arrow shaft joiner between the wings going through the fuse, and some craft stick guides to keep the wings from a rotating. Then of course to put a little bit of control surfaces and servos and some paint.

I'm really excited about how the wings turn out and I'm looking forward to seeing if I could get this to be a giant success.
 
Last edited:

FoamyDM

Building Fool-Flying Noob
Moderator
I spent some time today putting together the fuselage and working out The spar. it looks like what I've come up with should work pretty well the tail might need some reinforcements and I will need to adjust a couple quick things before posting the plans, but after finishing this up late tonight and giving a minute or two I took it out front and threw it across the front of the house, and it flew pretty well., It's definitely a big success, the methods used to produce the model I was looking to to fly oh, and it looks very reproducible
I didn't have to put in a lightening holes and the craft and it balances with a 1300 milliamp hour 3 cell battery. This means that it's very cramped oh, so you can go with a smaller battery but be prepared to add ballast in the I nose.

She weighted in at 424g.
IMG_20200105_010140250.jpg

Here's some Glamour shots some of which have a ruler for size reference: IMG_20200105_010527090.jpg IMG_20200105_010435058.jpg IMG_20200105_010416429.jpg IMG_20200105_010403483.jpg IMG_20200105_010313812.jpg IMG_20200105_010258731.jpg IMG_20200105_010510987.jpg IMG_20200105_010307202.jpg IMG_20200105_010313812.jpg

During the midnight front yard test glides well, but will need inputs forn longer flights. After some quick adjustments, the plans Will be ready .
IMG_20200105_010435058.jpg
 

Attachments

  • IMG_20200105_010510987.jpg
    IMG_20200105_010510987.jpg
    1.6 MB · Views: 0
  • IMG_20200105_010400080.jpg
    IMG_20200105_010400080.jpg
    1.6 MB · Views: 0
Last edited:

Vimana89

Legendary member
Just can't get over that wing shape, really unique. I think with a 650 on 3s and a little 1806 and some elevons, this would be a nice light and floaty motorized plane. Perhaps a larger low KV motor with a big slow fly prop might work well too. This is granted you are doing a basic single engine, twins would be sweet too!
 

FoamyDM

Building Fool-Flying Noob
Moderator
Now to get a Tow hook and make a bungee launcher, to get it up in the air and fly it longer. (I wouldn't trust a Discus style launch yet)
@willsonman - Bungee Launcher Article
@CarolineTyler - bungee-catapult build thread
A Vid containing good Line-to-Bungee and Launching Guides:
Another High Start Guide - Complete with Knots:

Just can't get over that wing shape, really unique. I think with a 650 on 3s and a little 1806 and some elevons, this would be a nice light and floaty motorized plane. Perhaps a larger low KV motor with a big slow fly prop might work well too. This is granted you are doing a basic single engine, twins would be sweet too!
I like your thinking.
I think that is where this is going I designed (and am re-designing) the fuslage to accomodate an A/F Pack Pod.
 

Vimana89

Legendary member
Now to get a Tow hook and make a bungee launcher, to get it up in the air and fly it longer. (I wouldn't trust a Discus style launch yet)
@willsonman - Bungee Launcher Article
@CarolineTyler - bungee-catapult build thread
A Vid containing good Line-to-Bungee and Launching Guides:
Another High Start Guide - Complete with Knots:


I like your thinking.
I think that is where this is going I designed (and am re-designing) the fuselage to accomodate an A/F Pack Pod.
That's a good and practical choice. The 1806 will have decent power and great efficiency, not to mention lower weight. The 2205 won't be a lot more weight, but will make CG easier, and have a ton of spare power and punch-out. Either way, should be awesome(y)