FTFC20 Travel Air Mystery Ship by Basslord1124

basslord1124

Master member
Well I have switched gears on this plane...the following may disappoint some, but I do think it will make things easier for me. Basically I am scratching the idea of doing a larger model (41" currently) and going with something smaller. I'm now aiming for 25"-30".

Main reason being is that I currently have a motor and ESC that would be suited for that size. I thought about keeping it for when I do the FT22 build, but figured this plane was more important right now. PLUS, I sorta hated the way the diagram looked all blown up like that. Most of the existing diagrams are in the 25"-30" size model anyways. This also saves me from having to order new gear amidst this pandemic going on (although I still may have to order servos) which would be safer in the long run anyways.
 

basslord1124

Master member
So being couped up, it was time to get to work.

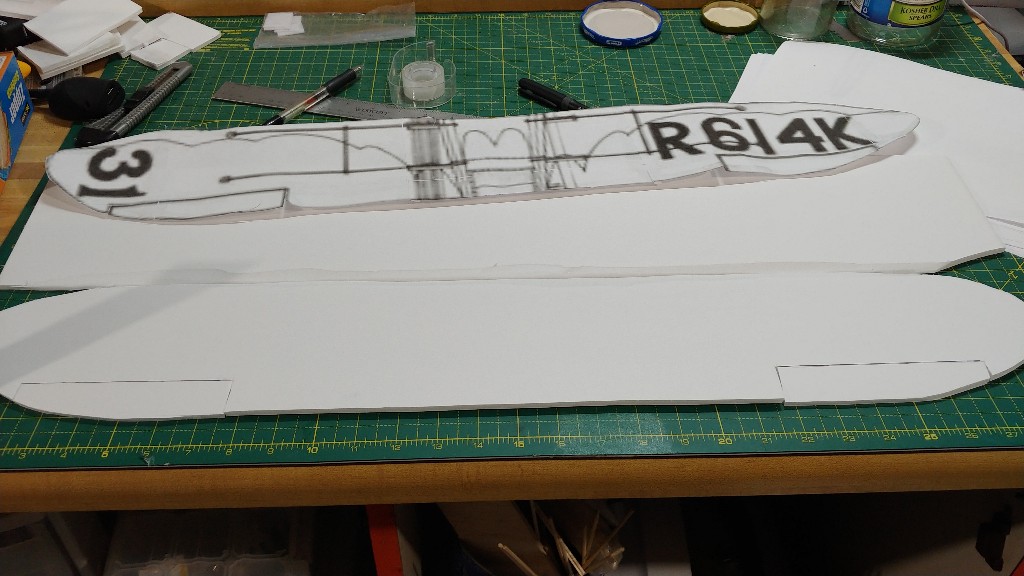
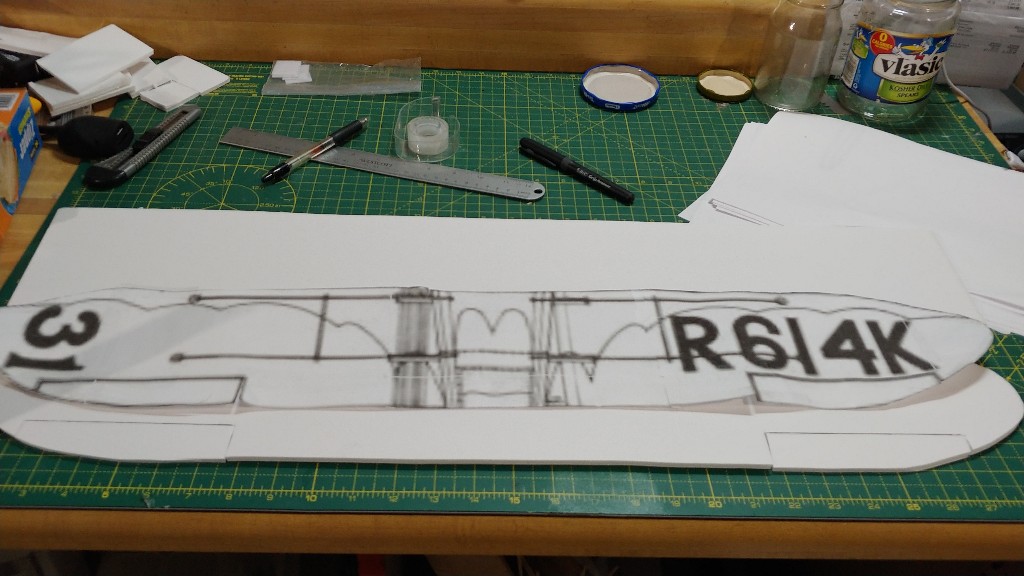
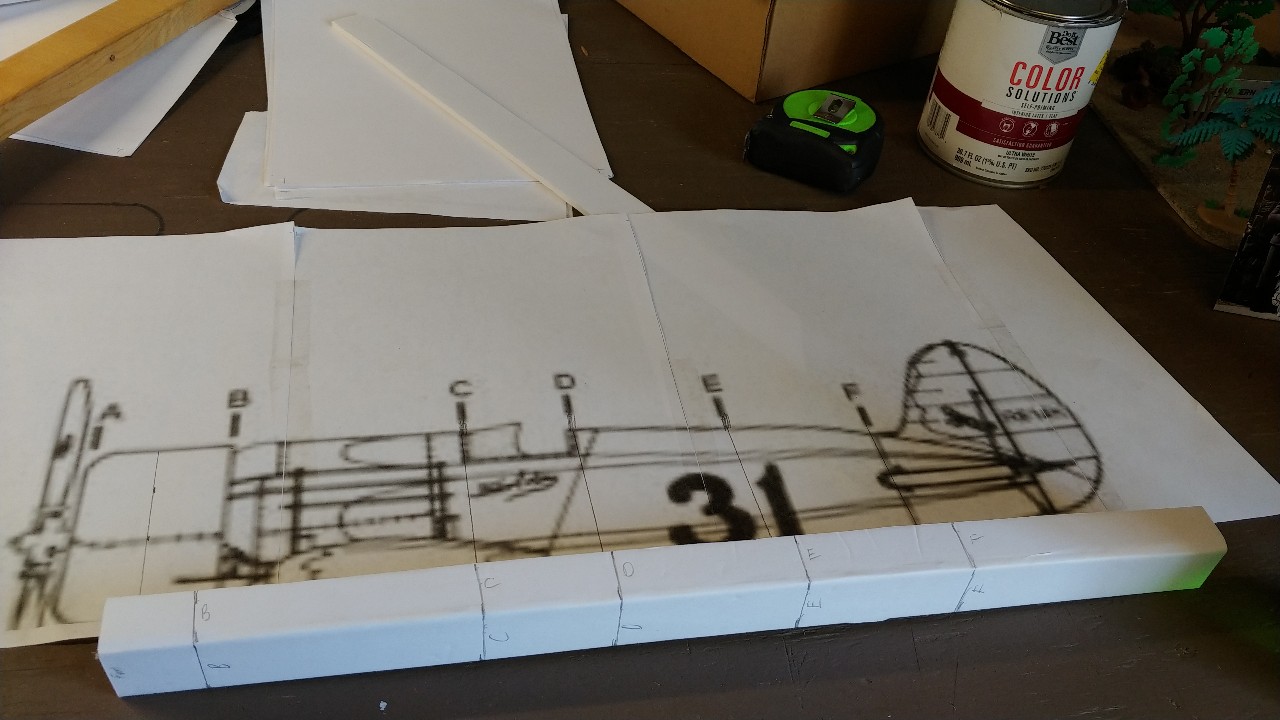
So hey looky...some progress! The scaling I picked for this was perfect...almost as wide as a sheet of foamboard...maybe a cm short. Due to the uncertainty of the actual size of the bottom of the wing I just made it a larger rectangle for now and will trim it later. I know that once I make my airfoil the size is going to change a little. I am seriously thinking of doing a John Overstreet curved airfoil vs the FT score cut/boxy airfoil. I am planning on making the bottom of the wing go the full width vs the open ends that FT wings usually have.
mystery-ship-wing-resize.jpg


mystery-ship-wing2-resize.jpg


The ship apparently had some dihedral to the wing as well, need to figure out how much that is.

Overall I think it was a pretty good start on this project. :)
 

basslord1124

Master member
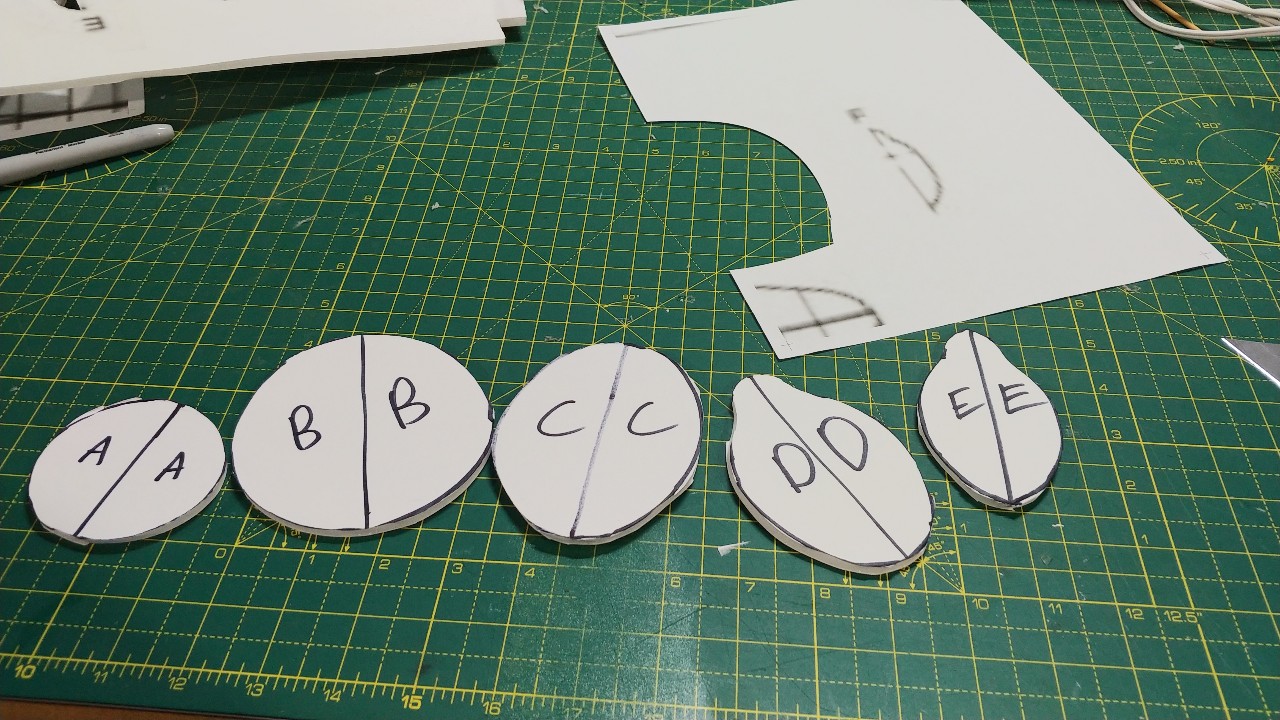
Gotten some more progress done on the ship. Here are the various formers cut out for the fuse.

ms-formers-small.jpg


Spent more time working on the wing though.

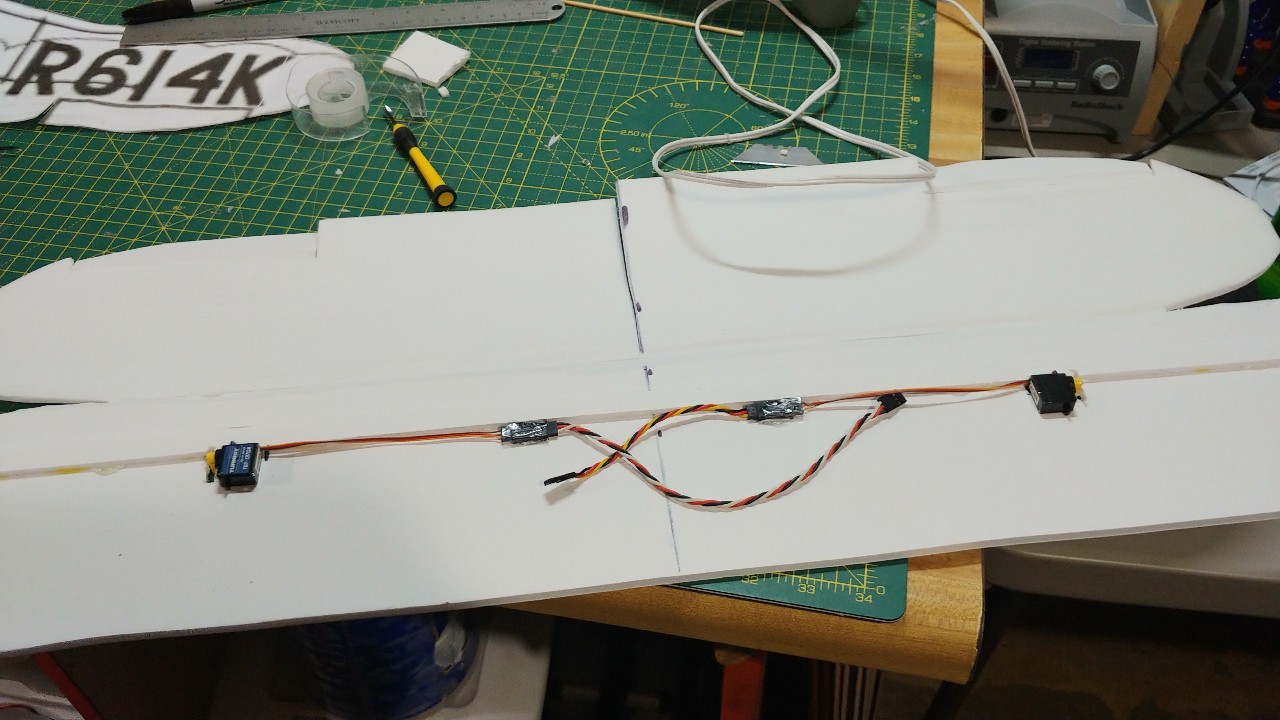
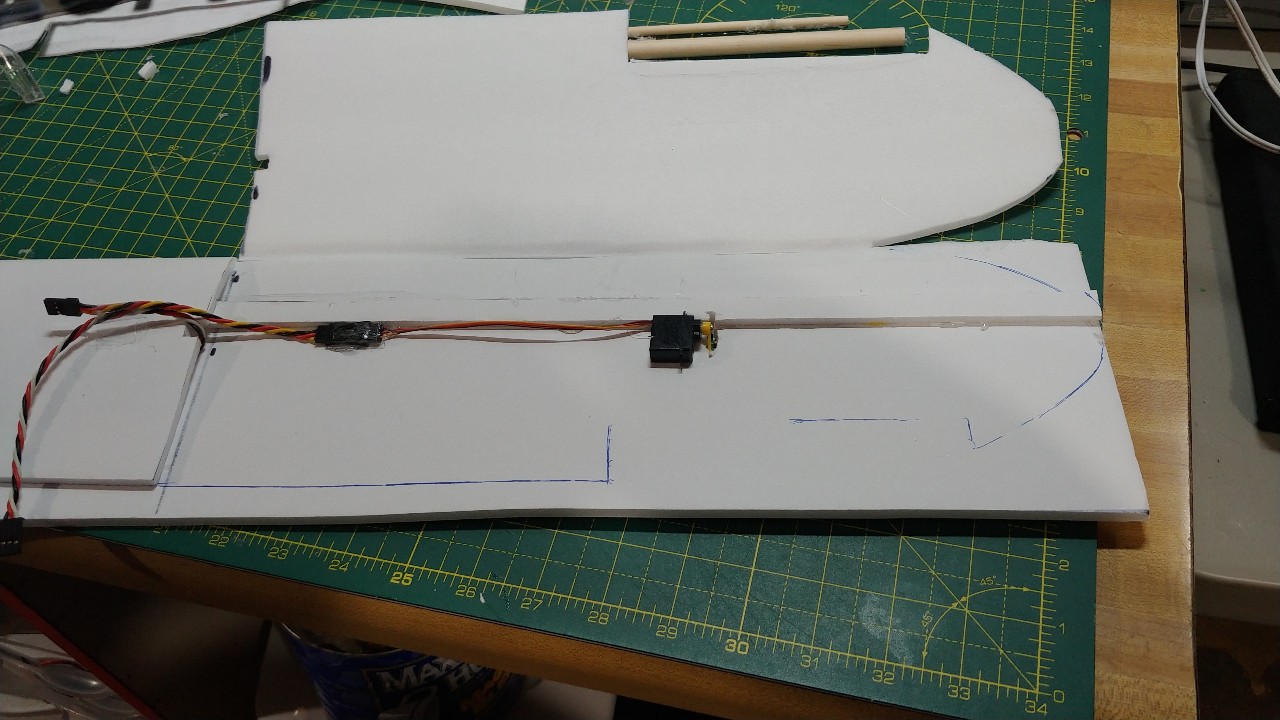
Here are some shots of the servos being installed. I ended up using some more of those Turnigy 3.7g servos I had laying around. Originally was going to use 5g servos but only had 1 of those available. So I settled on the 3.7g size. I think they will work out ok...and honestly I think it was a wise choice. These servos are a tad more skinny so I was able to hide the servos up in the wing with only the servo arms showing undearneath (a technique I love). Plus, less weight. :) I figure with our tax/stimulus money I'm gonna buy some more servos and other small electronics.


ms-servo-install-unfold-small.jpg


I split the wing in half and folded it over in halves for gluing. The top of the wing was a full cut through and the bottom of the wing was a middle score cut on the bottom (so not a complete split).

ms-wing-half-fold.jpg


Spar is a small 1cm wide piece of foamboard going the full length. I added a 2mm thick flag wire on one side of the spar for added strength.

ms-wire-reinforce.jpg


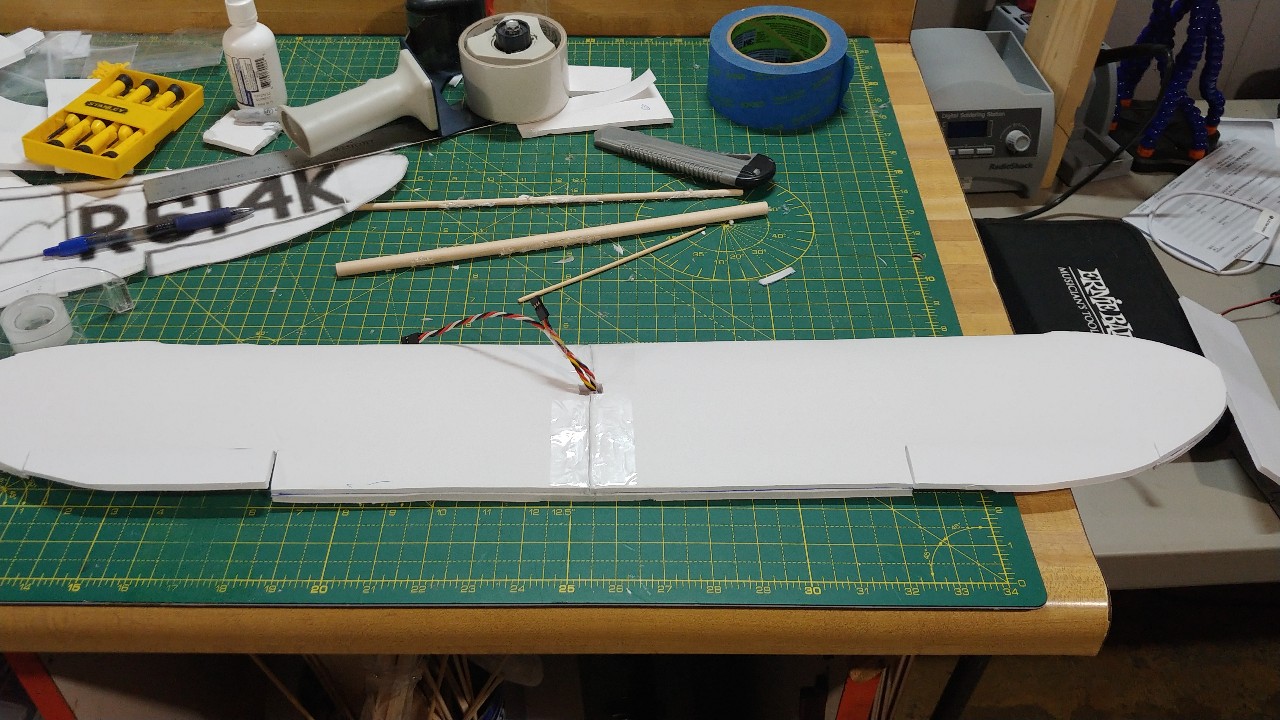
I used the John Overstreet molding technique for giving the top of the wing it's airfoil.

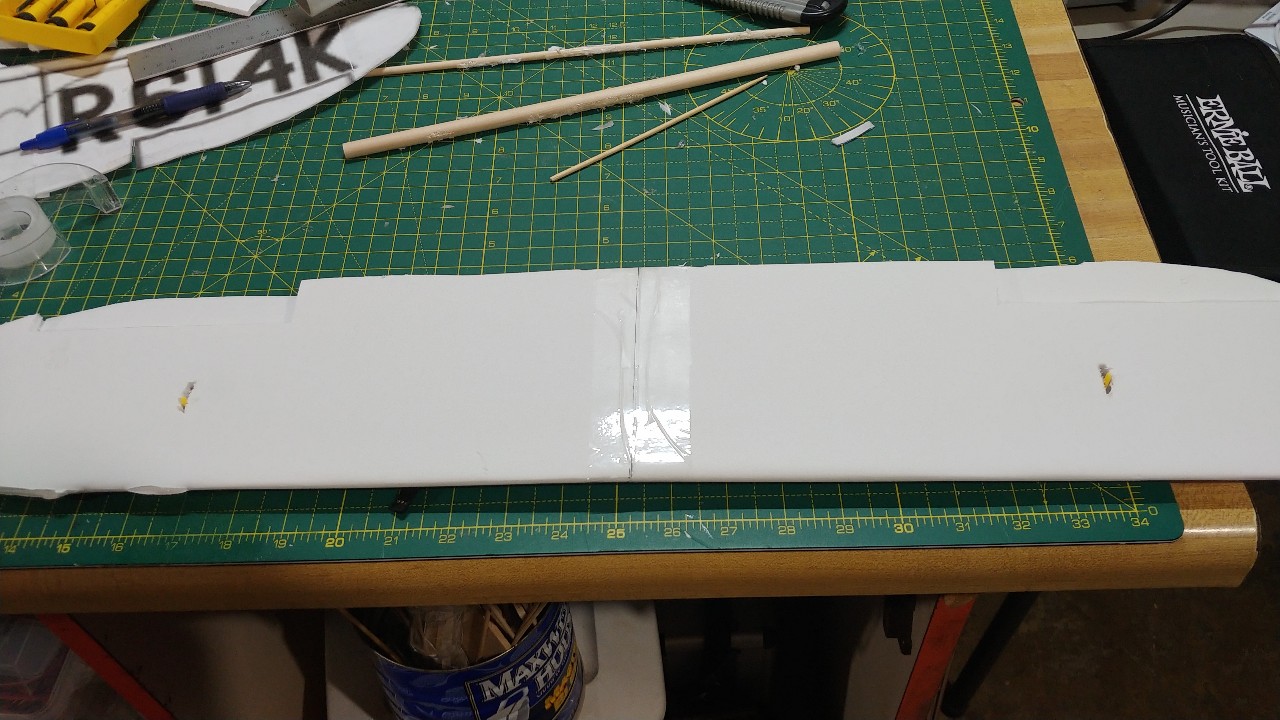
Here is the mostly completed top and bottom of the wing. See the small slit for the servo arms on the bottom of the wing....
ms-wing-top.jpg


ms-wing-btm.jpg


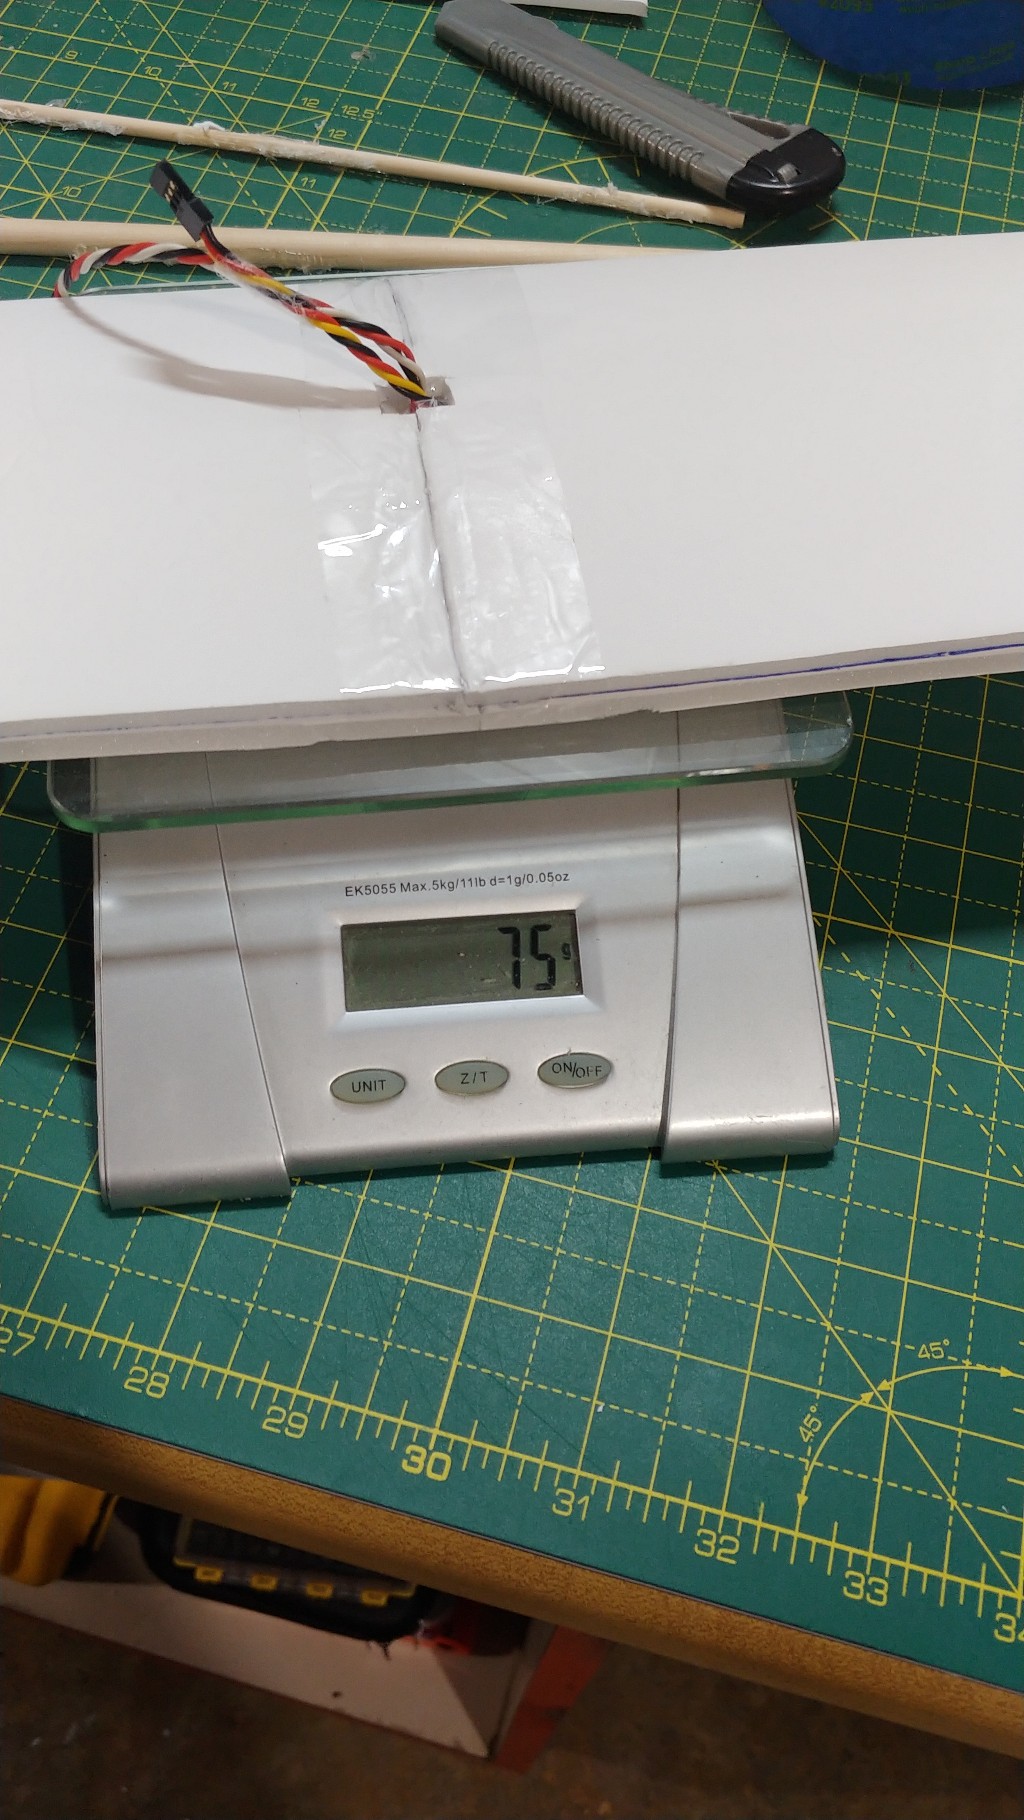
Weight so far of just the wing....
ms-wing-weight.jpg


Diehedral was added to...just laying a single piece of scrap foamboard underneath one side of the wing was enough to give it that slight 4 degree angle. It's really hard to tell but it is there.

Only things left on the wing are attaching the aileron linkages and some more foamboard trimming of the wing bottom (I had cut the bottom of the wing larger to accommodate the change in size of adding the top airfoil).

Overall I am happy with the way it turned out...especially for relying solely on my learned FT build techniques AND the images/diagrams to go by. I think the "no plan" part intimidated me some on this build as I am so used to having full plans available and/or a build video to go by.

Next will be the fuse, and I really feel like it's going to be kinda tricky....
 

mayan

Legendary member
Gotten some more progress done on the ship. Here are the various formers cut out for the fuse.

View attachment 166592

Spent more time working on the wing though.

Here are some shots of the servos being installed. I ended up using some more of those Turnigy 3.7g servos I had laying around. Originally was going to use 5g servos but only had 1 of those available. So I settled on the 3.7g size. I think they will work out ok...and honestly I think it was a wise choice. These servos are a tad more skinny so I was able to hide the servos up in the wing with only the servo arms showing undearneath (a technique I love). Plus, less weight. :) I figure with our tax/stimulus money I'm gonna buy some more servos and other small electronics.


View attachment 166593


I split the wing in half and folded it over in halves for gluing. The top of the wing was a full cut through and the bottom of the wing was a middle score cut on the bottom (so not a complete split).

View attachment 166594


Spar is a small 1cm wide piece of foamboard going the full length. I added a 2mm thick flag wire on one side of the spar for added strength.

View attachment 166595


I used the John Overstreet molding technique for giving the top of the wing it's airfoil.

Here is the mostly completed top and bottom of the wing. See the small slit for the servo arms on the bottom of the wing....
View attachment 166596

View attachment 166597


Weight so far of just the wing....
View attachment 166598

Diehedral was added to...just laying a single piece of scrap foamboard underneath one side of the wing was enough to give it that slight 4 degree angle. It's really hard to tell but it is there.

Only things left on the wing are attaching the aileron linkages and some more foamboard trimming of the wing bottom (I had cut the bottom of the wing larger to accommodate the change in size of adding the top airfoil).

Overall I am happy with the way it turned out...especially for relying solely on my learned FT build techniques AND the images/diagrams to go by. I think the "no plan" part intimidated me some on this build as I am so used to having full plans available and/or a build video to go by.

Next will be the fuse, and I really feel like it's going to be kinda tricky....
Looking good so far waiting to see how this looks in the end :).
 

OliverW

Legendary member
Gotten some more progress done on the ship. Here are the various formers cut out for the fuse.

View attachment 166592

Spent more time working on the wing though.

Here are some shots of the servos being installed. I ended up using some more of those Turnigy 3.7g servos I had laying around. Originally was going to use 5g servos but only had 1 of those available. So I settled on the 3.7g size. I think they will work out ok...and honestly I think it was a wise choice. These servos are a tad more skinny so I was able to hide the servos up in the wing with only the servo arms showing undearneath (a technique I love). Plus, less weight. :) I figure with our tax/stimulus money I'm gonna buy some more servos and other small electronics.


View attachment 166593


I split the wing in half and folded it over in halves for gluing. The top of the wing was a full cut through and the bottom of the wing was a middle score cut on the bottom (so not a complete split).

View attachment 166594


Spar is a small 1cm wide piece of foamboard going the full length. I added a 2mm thick flag wire on one side of the spar for added strength.

View attachment 166595


I used the John Overstreet molding technique for giving the top of the wing it's airfoil.

Here is the mostly completed top and bottom of the wing. See the small slit for the servo arms on the bottom of the wing....
View attachment 166596

View attachment 166597


Weight so far of just the wing....
View attachment 166598

Diehedral was added to...just laying a single piece of scrap foamboard underneath one side of the wing was enough to give it that slight 4 degree angle. It's really hard to tell but it is there.

Only things left on the wing are attaching the aileron linkages and some more foamboard trimming of the wing bottom (I had cut the bottom of the wing larger to accommodate the change in size of adding the top airfoil).

Overall I am happy with the way it turned out...especially for relying solely on my learned FT build techniques AND the images/diagrams to go by. I think the "no plan" part intimidated me some on this build as I am so used to having full plans available and/or a build video to go by.

Next will be the fuse, and I really feel like it's going to be kinda tricky....
I would personally not use them. I run them in my GLH, and theyve been nothing but trouble. I'm at a point to where I'm deciding if I should tear the plane apart and take all of those servos out or not.
 

basslord1124

Master member
Thanks @mayan and @SquirrelTail for the replies. Are the servos just stripping or what? What issues have you had with them?

I got about 6-7 of these probably 3-4 years ago for some old mini build kits for my father-in-law. Still got the kits, but never got around to putting them together (it's a long story). So I've started using them...just in the builds so far, not actually used them in flight. So far I have a couple in the Shrubsmacker and now the Mystery Ship.

The Mystery Ship is a 30" wingspan size plane...do you think that's too big for a 3.7g servo?
 

mayan

Legendary member
They tend to strip fast, on big control surfaces they won't move with enough deflection, and if the HG is too hot they they also tend to burn at least the Emax ones I had.
 

OliverW

Legendary member
Thanks @mayan and @SquirrelTail for the replies. Are the servos just stripping or what? What issues have you had with them?

I got about 6-7 of these probably 3-4 years ago for some old mini build kits for my father-in-law. Still got the kits, but never got around to putting them together (it's a long story). So I've started using them...just in the builds so far, not actually used them in flight. So far I have a couple in the Shrubsmacker and now the Mystery Ship.

The Mystery Ship is a 30" wingspan size plane...do you think that's too big for a 3.7g servo?
With any little bit of force, the servo arm would be able to move. You could feel the motors giving out after 1 flight in my GLH (23" wingspan)
 

basslord1124

Master member
Thanks...luckily I didn't have any hot glue burning issues. I do wonder how much throw they are going to have. I'll give the ailerons a good test to see if they will work out ok. Luckily I have used all hot glue on this build so switching the servos shouldn't be a big deal if it comes down to it.
 

mcdo

New member
Found these plans free on aerofred.com for a 47" wing span balsa model. The wingtip profile looks pretty good. Maybe someone has the skills to modify this for a flitetest foam board build?
 

Attachments

  • Travel_Air_R_Plan_11761.pdf
    254.4 KB · Views: 0

basslord1124

Master member
Another update...seems like I have been on a kick recently to work on some projects.

I have mainly been using the plans/layout that @skymaster posted so thanks for finding those @skymaster ! ;) They have given me better guidance on how to do the design and it lays out different formers to use on the fuselage.

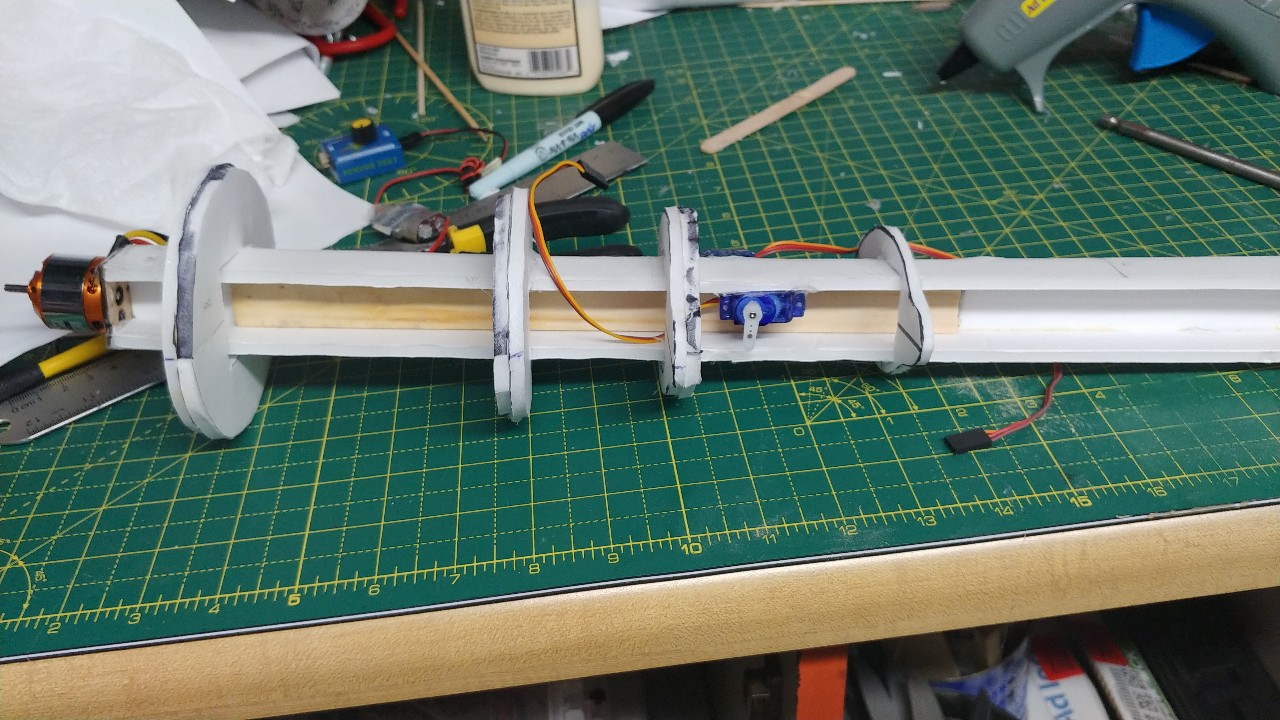
I ended up utilizing an "extended" mini power pod throughout the structure of the fuse. The plane will be using a mini power pod size anyways, and I felt this would be a good stable foundation for which to attach the formers. Debating on if I should add some wood or metal rod reinforcements to the pod for added strength.

ms-power-pod-plans.jpg


ms-power-pod-structure.jpg


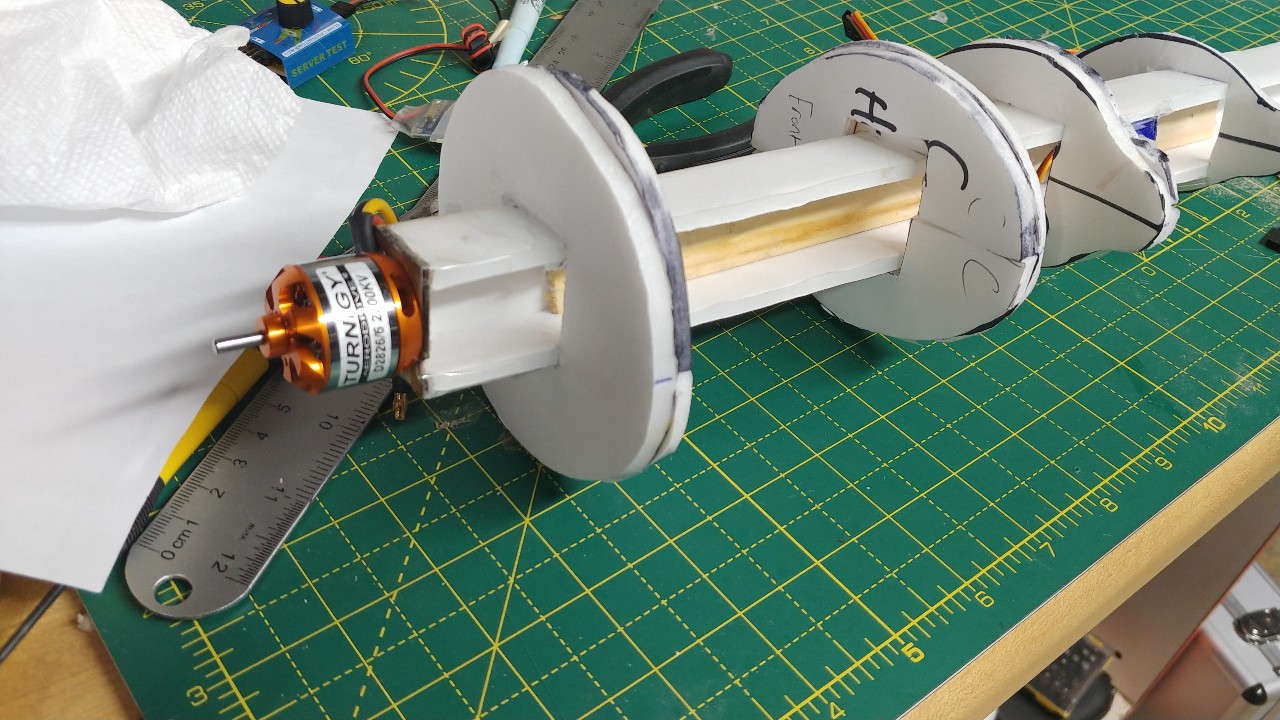
To try and go for a more authentic look, I extended the pod about a half inch past the B former at the front of the plane instead of all the way to the front to the A former. Reason for this, is to allow some room for the motor inside the cowl and NOT sticking too far out in front of the plane. I think it would look totally cool to have only the very tip of the bell of the motor and shaft/collet adapter sticking out. I can trim the length of the cowl for those final adjustments. At least I'm hoping in the end it will look pretty cool and close to the actual plane. Of course sometimes my hopes and what comes out don't always jive. But hey I'm trying and going to give it a shot.:):)

ms-B former-power pod.jpg


ms-formers.jpg


I also, for now, intentionally made the pod longer than what was needed so I can trim and make adjustments. Have plans to add doublers to each former to make attaching the outer skins easier.

Hoping to get some more work done to it in the coming week.

I have also opened the wing up a little and will be replacing the 3.7g servos with 5g ones. Just going to play it safe with this plane.
 

mayan

Legendary member
Another update...seems like I have been on a kick recently to work on some projects.

I have mainly been using the plans/layout that @skymaster posted so thanks for finding those @skymaster ! ;) They have given me better guidance on how to do the design and it lays out different formers to use on the fuselage.

I ended up utilizing an "extended" mini power pod throughout the structure of the fuse. The plane will be using a mini power pod size anyways, and I felt this would be a good stable foundation for which to attach the formers. Debating on if I should add some wood or metal rod reinforcements to the pod for added strength.

View attachment 171926

View attachment 171927

To try and go for a more authentic look, I extended the pod about a half inch past the B former at the front of the plane instead of all the way to the front to the A former. Reason for this, is to allow some room for the motor inside the cowl and NOT sticking too far out in front of the plane. I think it would look totally cool to have only the very tip of the bell of the motor and shaft/collet adapter sticking out. I can trim the length of the cowl for those final adjustments. At least I'm hoping in the end it will look pretty cool and close to the actual plane. Of course sometimes my hopes and what comes out don't always jive. But hey I'm trying and going to give it a shot.:):)

View attachment 171928

View attachment 171929

I also, for now, intentionally made the pod longer than what was needed so I can trim and make adjustments. Have plans to add doublers to each former to make attaching the outer skins easier.

Hoping to get some more work done to it in the coming week.

I have also opened the wing up a little and will be replacing the 3.7g servos with 5g ones. Just going to play it safe with this plane.
Looking good so far buddy happy to see you take on a project like this just don’t let it break ya. Small tip from me try thinking a few steps ahead and dry fit do a lot of dry fitting before you go on and glue things in place.
 

basslord1124

Master member
Looking good so far buddy happy to see you take on a project like this just don’t let it break ya. Small tip from me try thinking a few steps ahead and dry fit do a lot of dry fitting before you go on and glue things in place.

Thanks @mayan ...I'll definitely be test fitting everything. ;)
 

basslord1124

Master member
Got tied up with some other things, but got a little bit more done to the Mystery Ship. Most of the doublers are in place and got the wing apart to put in some new 5g servos. Once I get that, I'll start with the fuselage skin, installing servos, and so on.

ms-wing and doublers.jpg
 

basslord1124

Master member
I did manage to get the wing 3.7g servos switched out for some new 5g ones.

Here are a few small updates to the fuselage. One of these was the addition of the fuselage servos. Sometimes in my builds, servos are one of the last things to put in. Not for this plane, they are going in early. The plan is to put the outer skin of the fuselage around the servos, so that the servos (at least the fuse servos) are not seen. I will be using coffee stirrers/straws/tubes to guide the pushrods through the formers to the control surface. I have a 5g servo on top for the rudder, and a 9g on bottom for the elevator.

ms_pod_servo.jpg


ms_pod_wood_reinforcement.jpg


Also managed to put in part of a paint stirring stick for pod reinforcement. Also got the motor mounted.
ms_motor_pod.jpg


Got a small trip planned over the 4th holiday, so it'll be next week before I make some more progress.
 

basslord1124

Master member
Well the slow as molasses Mystery Ship build continues with some more updates. Overall, I think it's been progressing fine even though I have no plans to go by, no laser cutter, or experience using CAD software (still haven't gotten far with that either). So anyways, here's some pics:

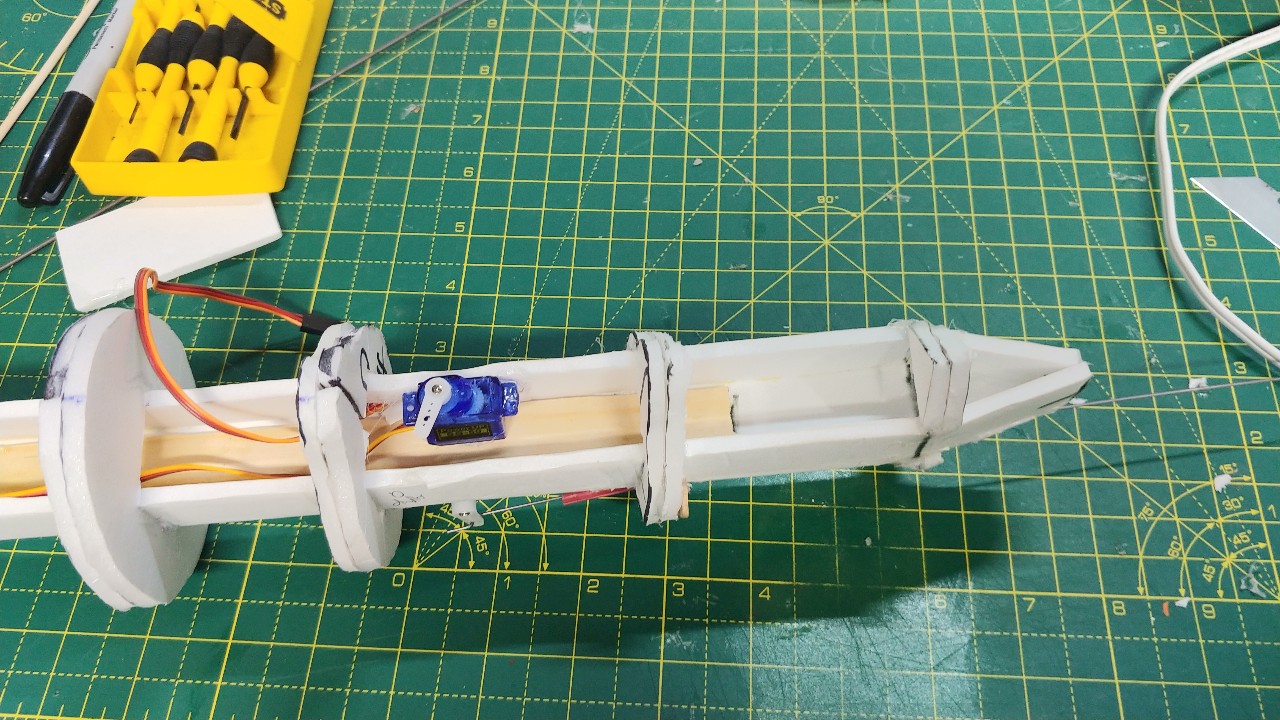
Big focus was to get the final fuselage former and doubler in place, and find a decent way to close off the end of the pod.
ms-end-bevel-cut-2.jpg


Starting with the former line, i cut the 2 sides of the pod and did an angled bevel cut so that the sides would fold in. I folded the sides in to a point, reglued those to the bottom part of the pod and trimmed the excess. Basically creating a small triangle point at the end of the fuse pod. Once I did this, I glued the final former and doubler in place. This is also the position where the elevator/horizontal stab will start.

ms-fuse-top-tail-servo.jpg


I also used a coffee stirrer to use as a guidetube for the elevator pushrod. Will be doing something similar for the rudder pushrod.

ms-servo-coffee-stirrer-pushrod.jpg


Next thing I am working on (just started before I had to quit), was test fitting the first part of the outer skin for the fuse. Focused on the small piece between the last former and next to last former. At this point, it's proven to be a little tricky as the outer skin starts large and goes small (which most all fuses do obviously). I'm going to have to do a little bit of studying or probably refreshing my mind on how that is accomplished. I feel like it's something I know, but am overlooking. We'll report back with more updates as I get them.