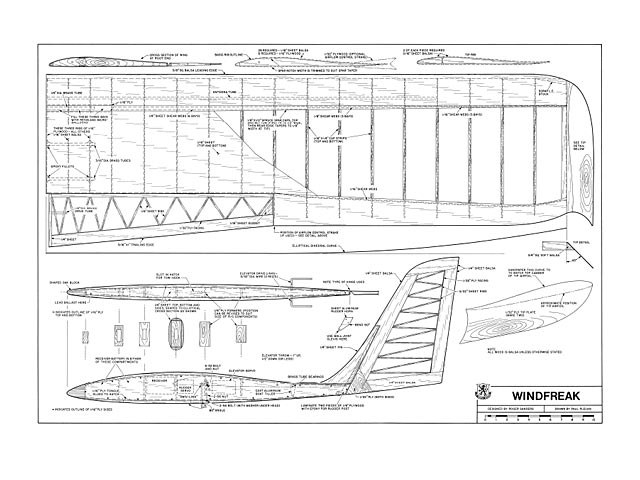
FTFC20 Wind Freak designed by FoamyDM

FoamyDM

Building Fool-Flying Noob
Moderator
003.jpg

5725.jpg

Original Post on outerzone: https://outerzone.co.uk/plan_details.asp?ID=5725
Selection
I chose this because the slight curve and Alula-like look caught my eye, and I wanted a plan that I could record a How I go from Inspiration to Full DTFB Plan. and I didn't want that to go longer than 1 hr.
The Basic Wing shape is a shallow Clark-Y wing foil. Being nearly entirely wing, the Incident angle is largely irrelaevent I believe. On this Craft, (like most wings) correct C.G. is critical. This plane is important to note the slight upward washout at the wing tips.
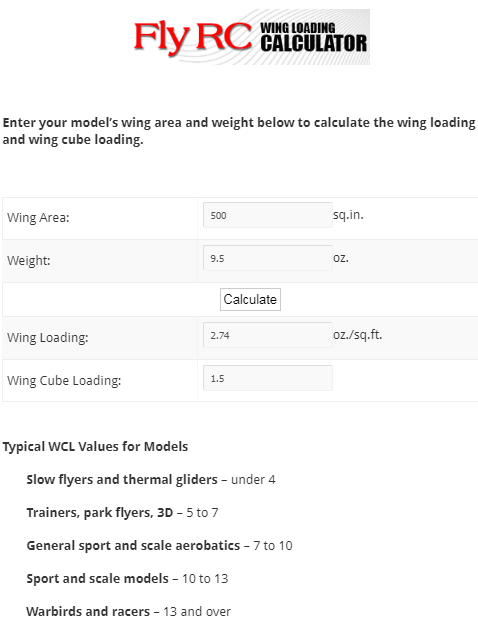
Plans & Preliminary Wing Loading:
CADDpgimage.PNG
WFWingloading.PNG

Build Instruction/Notes:
Starting viewpoint - This craft has a Gently up-curved outer wing. the trick here will be adding strategic locations of Paper removal.
Pulled Highlights from the BLOG Below

Takeaways: Stop, Start Continue

Maiden Flight Vid:
Reserved
 

Attachments

  • Windfreak.pdf
    198.1 KB · Views: 0

FoamyDM

Building Fool-Flying Noob
Moderator
I Started Cutting last night
IMG_20191028_074704822.jpg
Cut out, trimmed and paper removed.
IMG_20191029_004748798.jpg
Trailing edges tapered with and iron on cotton, placed at/near the edge of the board.
IMG_20191029_005423992.jpg
Next step is to assemble the foldover support and get weights to keep it there while the glue sets.
 

FoamyDM

Building Fool-Flying Noob
Moderator
Small progress last night, but progress none-the-less
IMG_20191029_214535651.jpg
You can see I used the scrap curve from the spars. Only one side is needed. Pay attention to keeping the ends even. Otherwise the wing will glue-up warped. I just cut 1x3" pieces from scrap, for the spacers.
 

FoamyDM

Building Fool-Flying Noob
Moderator
I had some time and managed to finish this last night. At least for a glide test.
IMG_20191030_194649243.jpg
To get the curve, I glued in the spars inner bottomed half. Let that cool. Then I glued the outer bottom, the front edge, and top of both spars, then filed the wing over and weighed it down on the support. Like so:
IMG_20191030_194913069.jpg
When fully cooled - minutes. When complete I noticed the curve sprung back by about half. Oh, note where I put score lines on the inside (50%, 65% 80%) and removed strips of the top paper about a 1/8" wide, to relieve the compression. Trim any spare ends to the 45° end treatment and glue on the edge fins.

It was time for the fuse.
Basic 4 panel construction. I trimmed the inside rear of each side panel to accommodate the rear fin. Please note, this space is thin! You cannot fit much. I also added an extra piece of faom on the rear trapezoid at the fin to build up the height to match the wing. This did two things. 1 provides better air flow, give a surface for friction fitting the wing in. Lastly the very. Stab was flimsy, and reinforce on each side with a 1/2 length of bbq skewer imbeded in the side panel 1/4".

I had to adjust the control surfaces by approx. 1/4" each to accommodate the fuse width. Now all that was left to test it.
IMG_20191030_235459818.jpg IMG_20191030_235420627.jpg IMG_20191030_235411070.jpg
Looking good.
IMG_20191030_235446930.jpg

Testing
This portion went poorly. I flew it once for fun without nose weight. And it fluttered back-flipping to the ground. As expected it is a very tail heavy wing. So I started adding weight.
And more weight
And more weight.
I have nearly $2.50 in nickels pennies and quarters (8each) dumpped in the nose just to get it close. The CG marked is just in front of the front spar.
When given a moderate toss it would fly for about 20' then nose in -HARD. It's good I taped the fuse bottom and nose to protect against nightly dew. I had 1 toss the was about 50' before nosing down.
At one point I attached a steel drilling tooth to the bottom at the wing front. (I think it weighs 1 lbs) just to balance it.

I had a similar difficulty with the Alula clone.
I stopped when cracking the fuse in half a second time with little glide success.

Possible Sources for Adjustment
I checked the wing airfoil, and I don't have any reflex built in like the section prescribes

I'll try and get footage
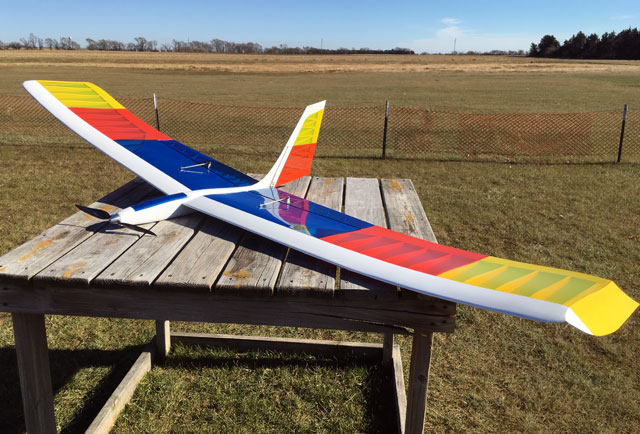
 

FoamyDM

Building Fool-Flying Noob
Moderator
Had a thought about this build coming up to the weekend, but couldn't try it until yesterday in the dark.
Idea; Mount a long stick so I can fine tune the CG weight location easier. Smaller weight on a longer moment arm means a large window for balance.

I have a 59" broom-handle-turned-walking-stick (~1.3#/600g) that I rubber banded on. Balanced out and found the perfect spot, first try. about 2/3 down the stick. It turned out, the CG was at the marked CG holes.
Figure that?:unsure:
IMG_20191103_194726024.jpg
:giggle: but it is ONLY there. Stray an 1/8" (2-3mm) and nope. I tried many things. This was after I manually curled the TE up. (It crinkled the paper.:cautious:) however it flew. Flew nice too. When from the sidewalk at the porch to the ditch at the street. It was too dark for video. So I will try to get a shot tomorrow morning.

It is a TIGHT window. As a little nose heavy and it lawn darts. To far back and the porpoise, stalls and stabs vertically in to the dirt.
the trick is now, is how to make a FUSE that is long enough to balance the wing, but make it usable.

Here are my ideas;
1. Put a motor and big battery up there. (I'm thinking 8" folding prop. with a b-pack level motor)
2. Cut out large-ish holes in rear half of the wing and rudder, then cover with cello wrap.
3. Lengthen the Fuse by 6"
4. Do a combo!

What do you think?
 
Last edited:

FoamyDM

Building Fool-Flying Noob
Moderator
After getting out the ruler. I have a few corrections to the broom handle information.
1. The length is 48"
IMG_20191104_181501289.jpg
2. The balance mark is 25.5" from the front. OR the center of mass of the broom stick is 1.5" for. C.G. IMG_20191104_181456742.jpg
3. The handle weighs much less than I originally thought, 365g (~8oz.)
IMG_20191104_181744048.jpg

This means, I need a fuse with a net moment of 547.5 inch-grams. With a fuse CM 6" in front of the plane/wing C.G, I need it to have a mass of 91.2g. This is doable with a battery.
 

FoamyDM

Building Fool-Flying Noob
Moderator
I have had this project rolling through my mind as I work on others. The more I think about it, the less I want to change the fuse much. Watching this plank glide serenely across the lawn means I will really enjoy what I'm building here. :love:

Unless I want to build a long-nosed Fuselage, I better lighten that back half...
I have noticed, in a 20g section(roughly 1/5 a DTFB sheet), if I remove the paper on a side, it weighs 13g. Remove both paper layers, I'm left with 6g, and low rigidity. I imagine cellophane and glue are only a few grams for a 5"x20" Piece. This leaves me with replacing 20g with 3-4g. :confused:

I suppose I shall see tonight. :D:coffee:
 

FoamyDM

Building Fool-Flying Noob
Moderator
I just decided to make it a large long fuselage. Which makes me kind of sad. But I'm going to use this to get success and to design the perfectly sized fuse to build out of foam board. I built this one so that you could put a power pot around it oh, but I I didn't really measure anything of the timer planet so a little ad hoc.
So I got the servos in and all the wiring up and I think the nose is nearly a foot too long but that's okay that means I can use a really small battery if I want. However right now I'm going to use an 800 mAh, 3 cell battery. Replace it halfway up the fuselage
IMG_20200105_011728639.jpg
IMG_20200105_012103147.jpg
IMG_20200105_011724710.jpg
It weighs in at 311. Auw is 385 with the battery described.
Here are some beauty shots:
IMG_20200105_010608157.jpg IMG_20200105_010626122.jpg IMG_20200105_010615295.jpg
I went outside and it flew great at the printed C.G. marks. Video didn't work out so I will have to grab some footage tomorrow.

Looks like the one's nearly wrapped up!:cool:
 

FoamyDM

Building Fool-Flying Noob
Moderator
Last night I took the Windfreak outside and give it a couple quick tosses to guesstimate where the battery has to be and what size. An 800 3s (71g) is is balancing right around the mid fuse.

This morning I went out before my trek to grab my boys, and filmed this quick proof-of-flight/ maiden video.
Last step is to update the plans for an appropriate sized fuselage. And post the plans.
Enjoy the vid.
 
Last edited:

FoamyDM

Building Fool-Flying Noob
Moderator
On the plans in the resource you will notice an alternate fuselage and some holes to make the rear half lighter in green.
This is what they look like: IMG_20200220_004243290.jpg IMG_20200220_004252275.jpg IMG_20200220_004318862.jpg IMG_20200220_004326408.jpg IMG_20200220_004334748.jpg IMG_20200220_004348627.jpg
IMG_20200220_004417116.jpg