Funtana S90 Wing Repairs

Joker 53150

Mmmmmmm, balsa.
Mentor
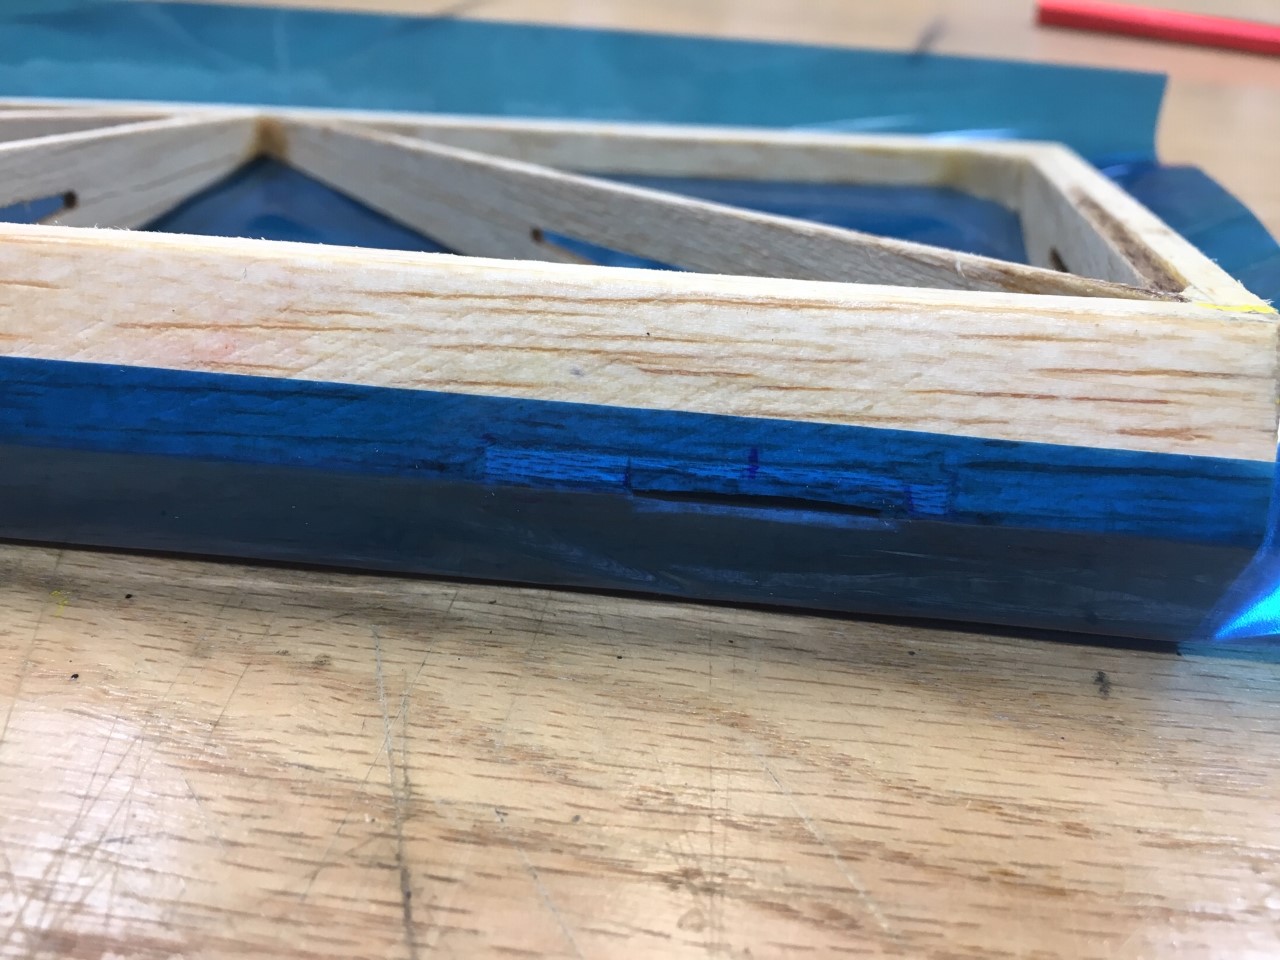
So that wasn't quite the whole story when it comes to hinges like I'm using. That barrel which is the actual hinge joint takes up space between the wing and aileron and gives you a noticeable gap. While it'll still work fine like this, it can easily be improved upon by simply recessing the hinges slightly. To start, insert the hinge and mark where the hinge barrel will sit. (The more visible lines here are from when I fixed the original hinge slots)
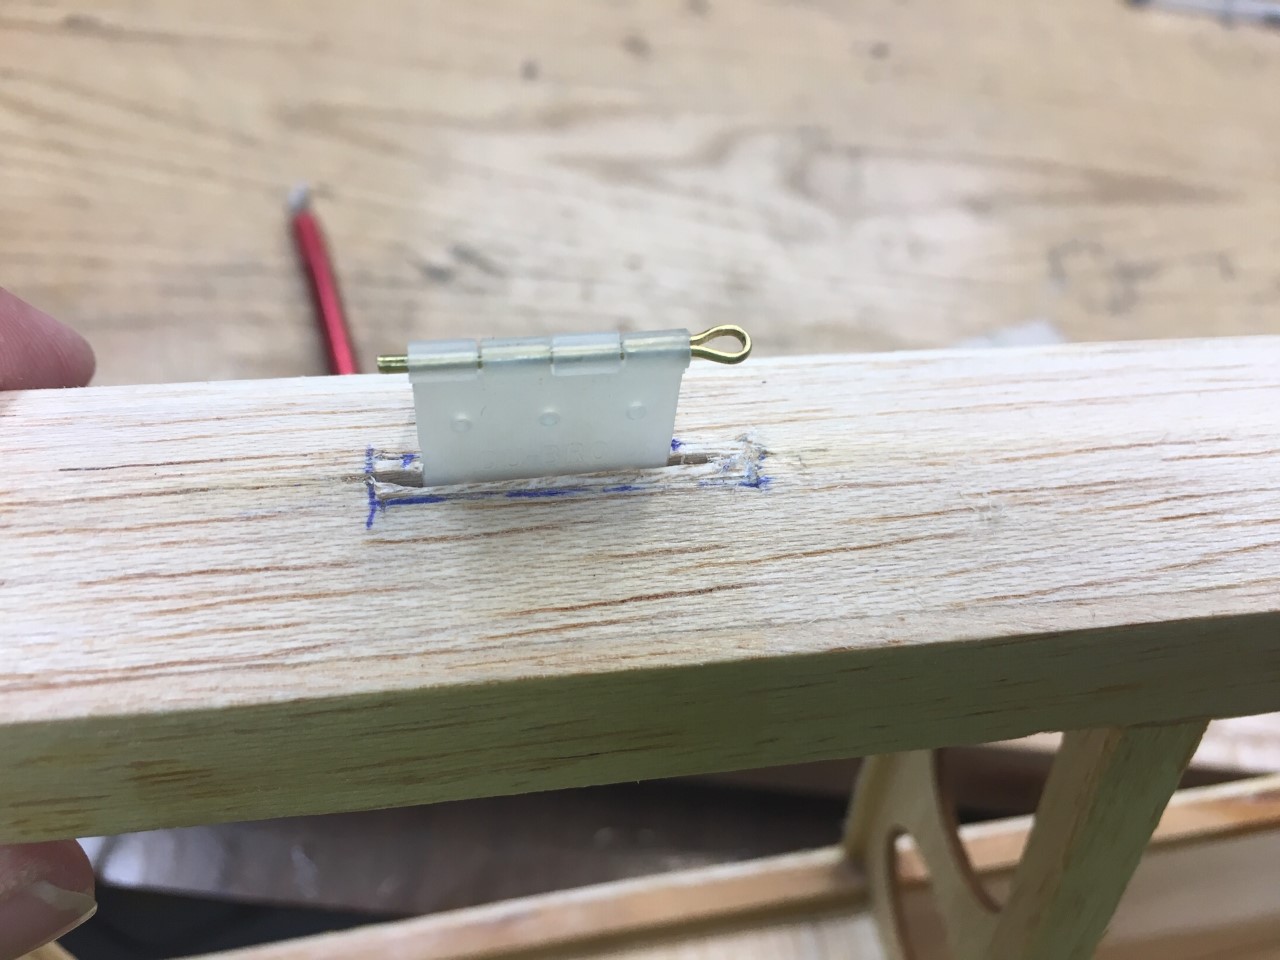
thumbnail_IMG_0596.jpg


A sharp knife cuts a small slice at the edges of where the hinge will sit.
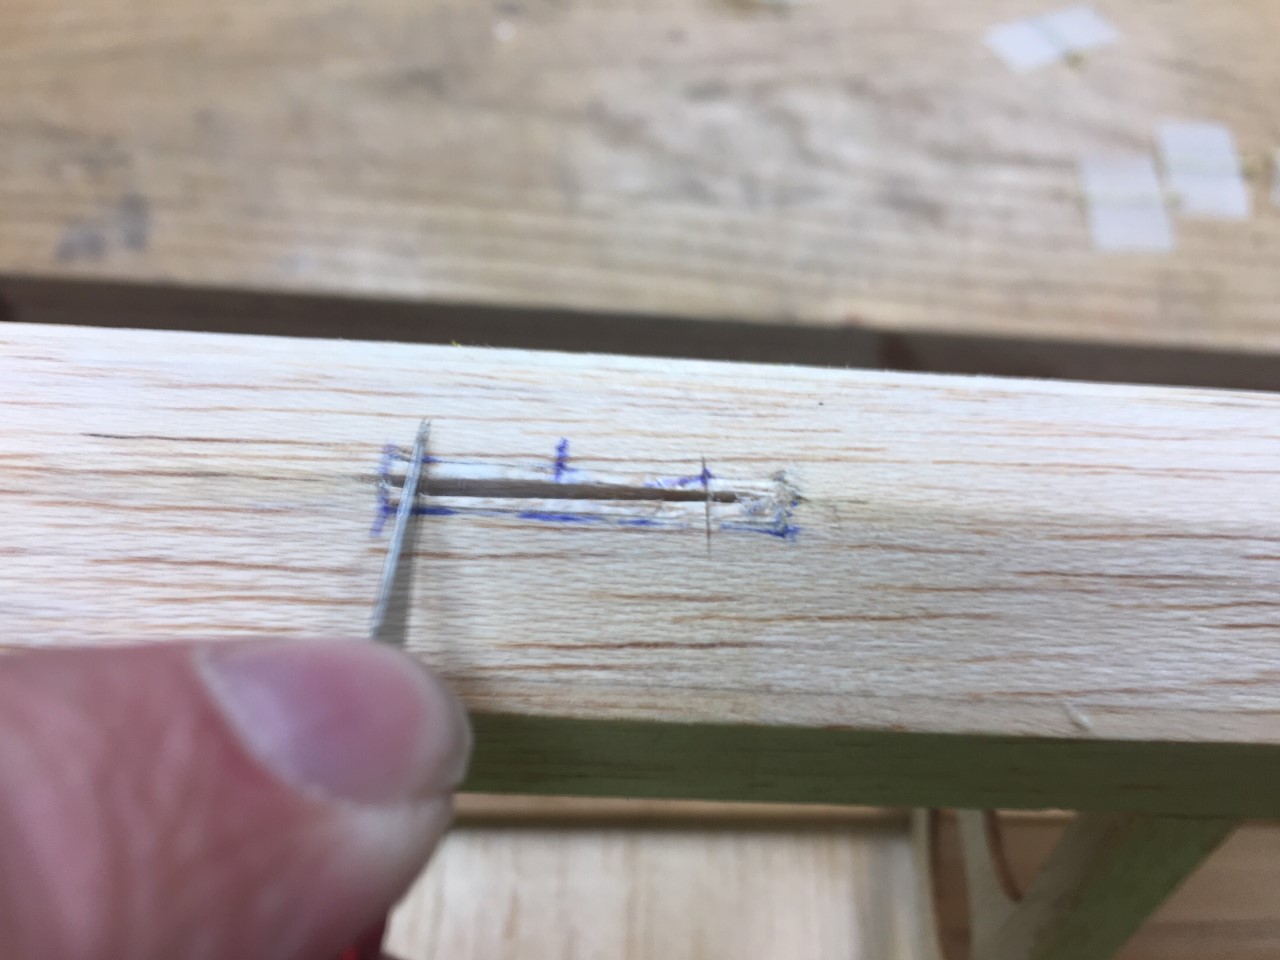
thumbnail_IMG_0597.jpg


Making very shallow cuts, remove a bit of the surface which will let the hinge sit a little deeper into the wood.
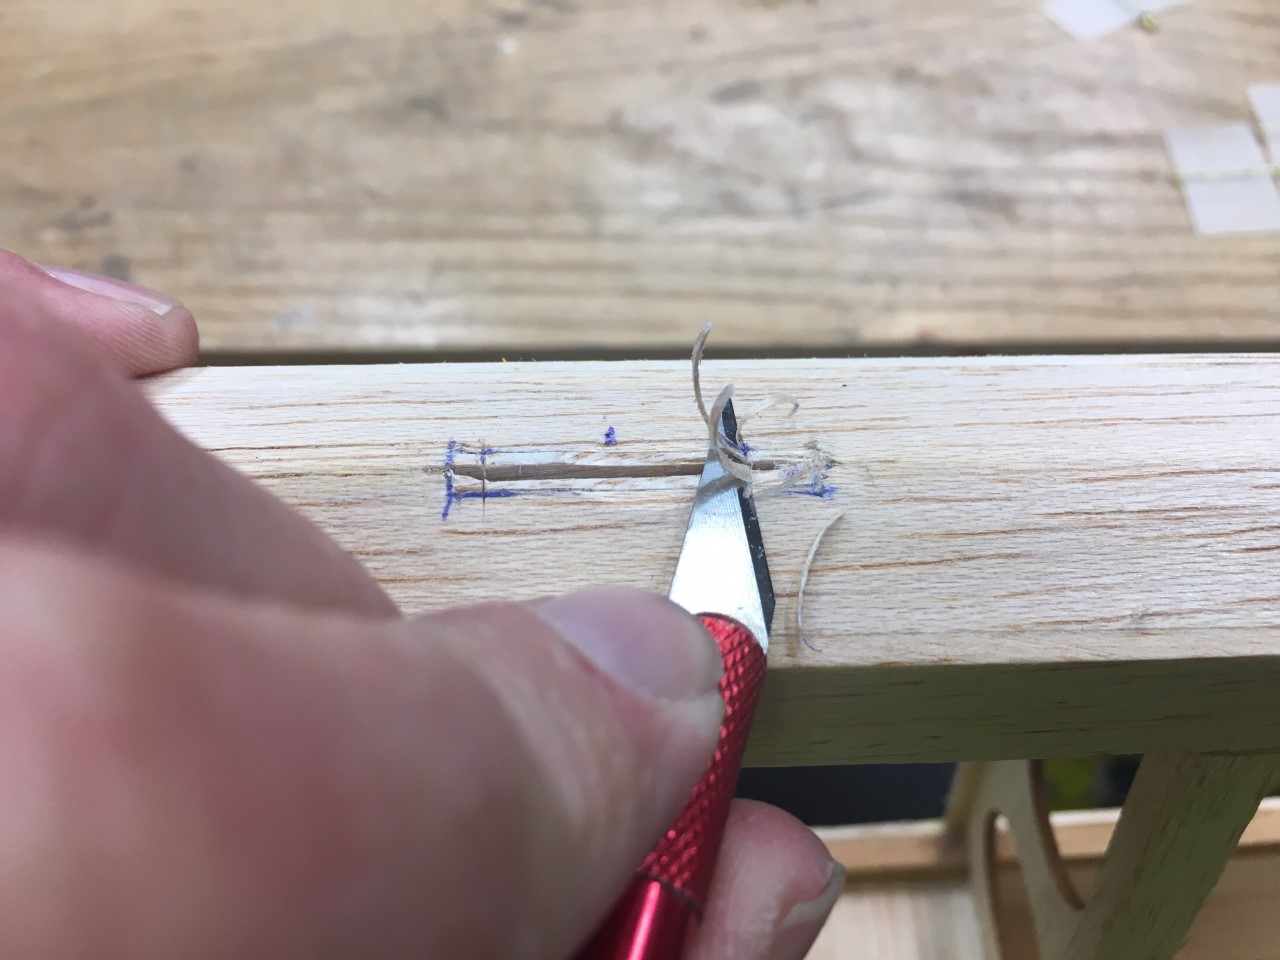
thumbnail_IMG_0598.jpg


Like this. It doesn't take much, maybe 1mm or less.

thumbnail_IMG_0599.jpg


In doing this for all hinges I've now got a tighter fit from the aileron to the wing. Note that the hinges won't be permanently installed until the surfaces are covered.
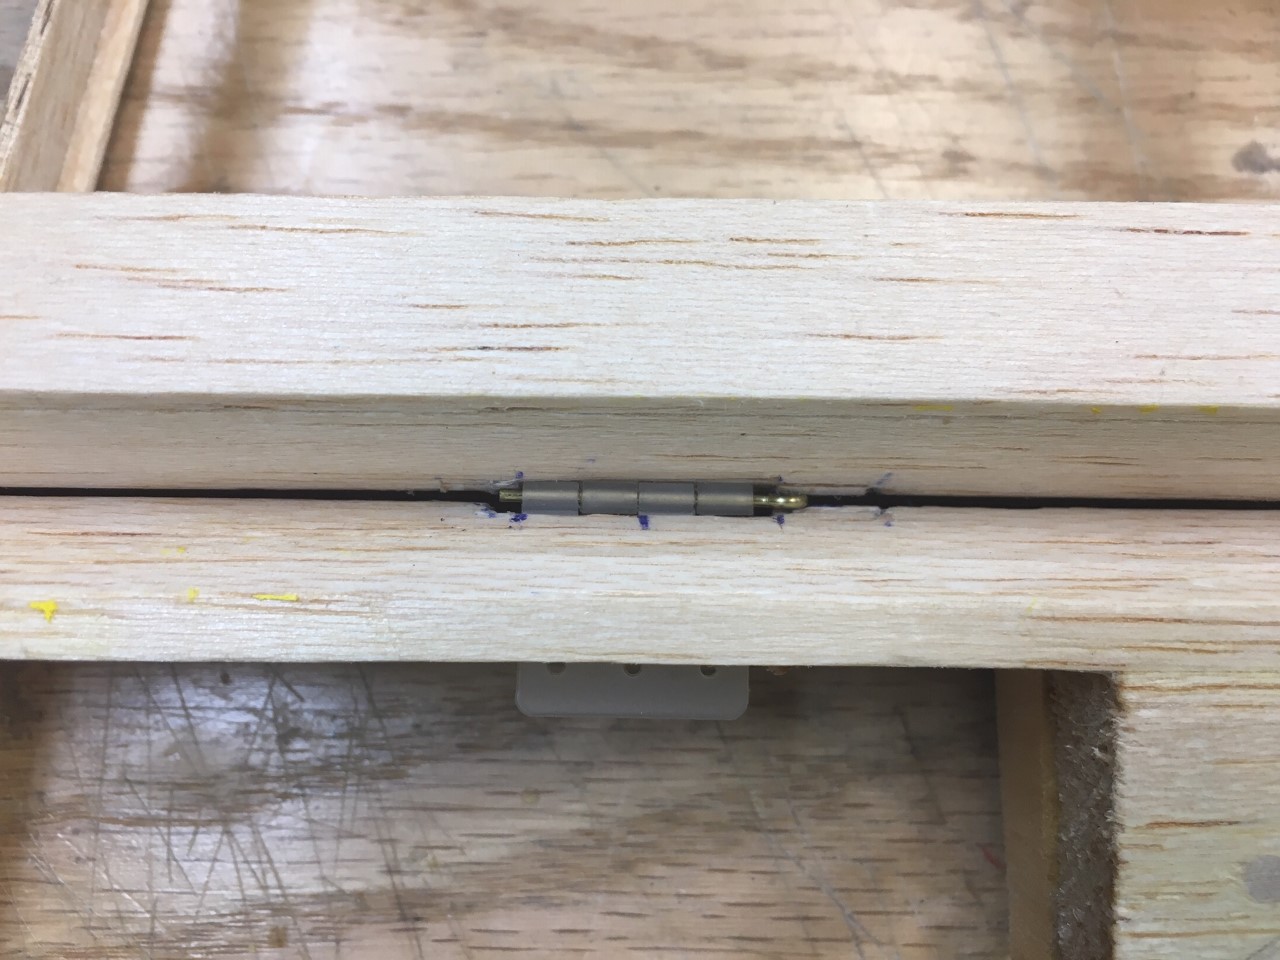
thumbnail_IMG_0600.jpg


There is still plenty of deflection for the aileron. Note that I did sheet the outside end of the aileron to match the newly sheeted outside end of the wing.

thumbnail_IMG_0601.jpg
 

Joker 53150

Mmmmmmm, balsa.
Mentor
Well, I think all of the damage is fixed so I'm going to start prepping the wood for covering. That includes filling any remaining dings and plenty of finish sanding. The filler I use is sold as "balsa filler", and I think I've seen it under a few different brands. It's available in white or balsa-color, with the only difference being color. If you're using a solid color covering it probably won't matter which you use, and white is easier to see as you're filling and sanding. With that said, I normally use the balsa-colored filler so I only have to stock one flavor, and it works fine when using transparent covering. It's not invisible since you don't see the woodgrain, but it does blend in pretty darn well.

Some people apply it straight from the tub, but my preference is to dilute it with a little water (typically VERY LITTLE water!) till it's somewhere between peanut butter and pancake batter consistency. I apply it with a plastic squeeze made for Bondo, and apply it slightly thicker than it needs to be. Most of it gets sanded away, probably 90% or more at times.

thumbnail_IMG_0607.jpg


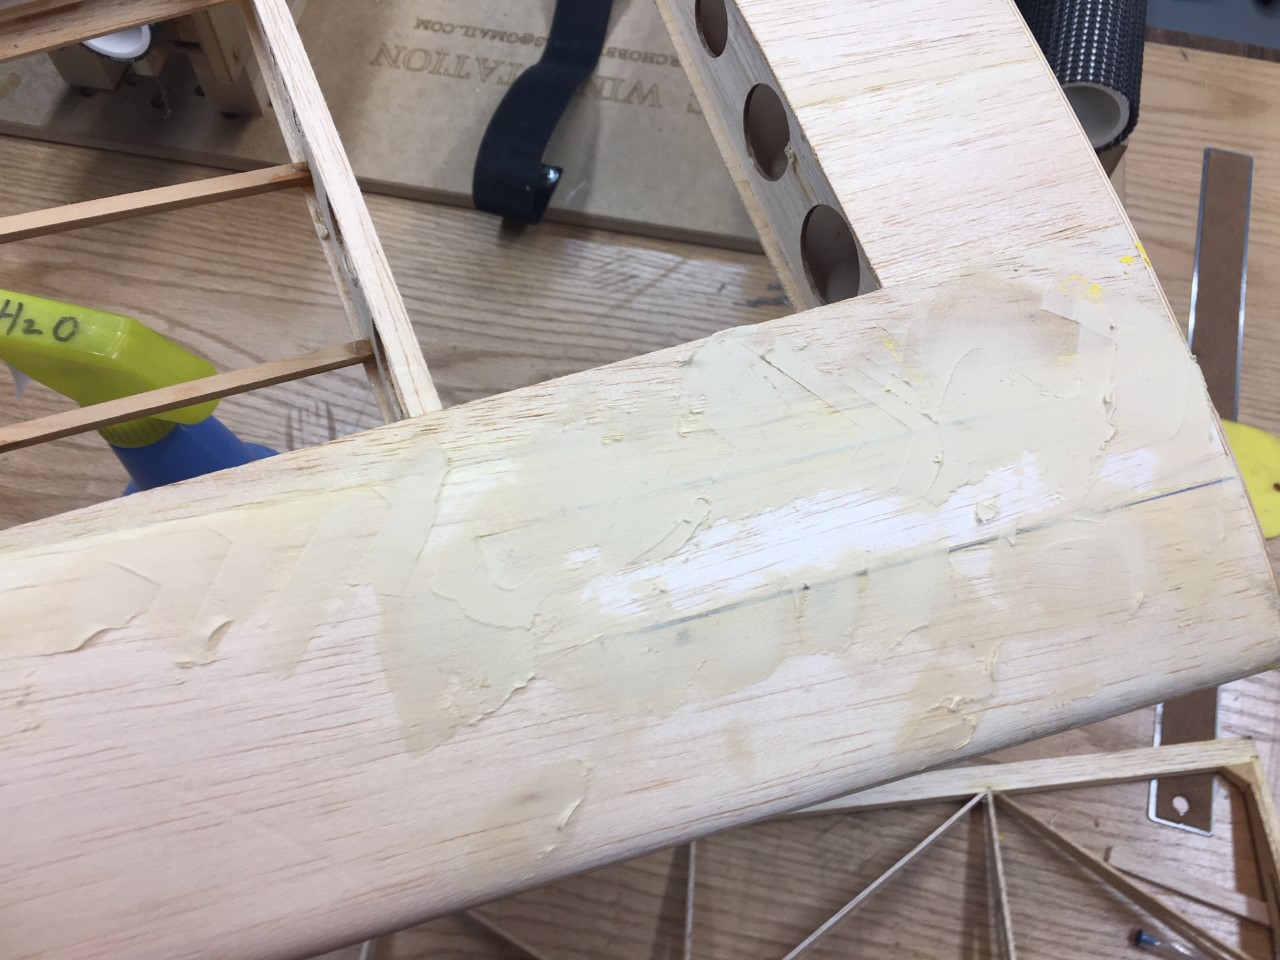
Here it's applied over the sheet repair I did, and you can still see the pen outline I made. My error on that, hopefully it won't be visible through the yellow covering! If I was covering with white or transparent I'd likely cut that pen line out with a knife and fill it back in, but it'll probably be ok in this application. I'm not going for perfection with this exercise... :) After it fully dries I'll go after it with 120 grit or finer sandpaper. It sands VERY easily, so don't feel the need to attack it with 80 grit or coarser! Also, this wing didn't require any degree of finish sanding like a newly built wing would have, so I skipped over that task for now. I'll do all my finish sanding when I sand the filler.

thumbnail_IMG_0608.jpg
 

Joker 53150

Mmmmmmm, balsa.
Mentor
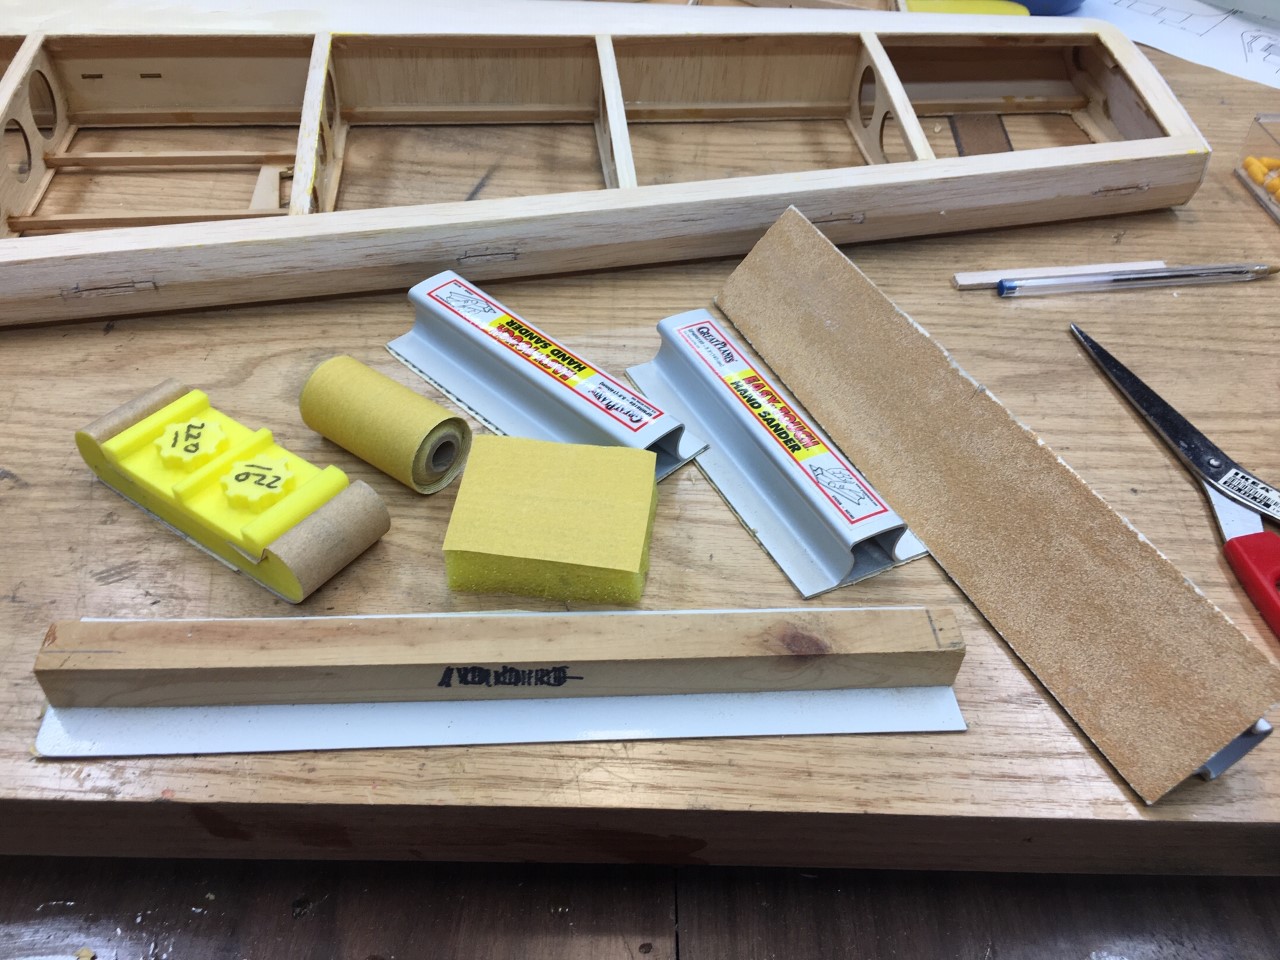
When the filler is fully dry (wetting it like I do makes the drying process take longer) you can break out the sandpaper. Generally, it's very rare that I just use the sandpaper without some kind of block or surface behind it. Using just your hand holding the paper gives very uneven results, so use a sanding block. Or stick paper to a paint stir stick, popsicle stick, or even a flat pool noodle! Really, the pool noodle is probably my favorite sanding block for uneven or curved surfaces. It's pictured below in the middle - about 2" x 2", and cheap. Also pictured are a 3D printed block (to the left with 220 grit paper) and two sizes of the Great Planes sanding bar. Big flat surfaces = big flat sanding bar to get the best finish.

thumbnail_IMG_0609.jpg


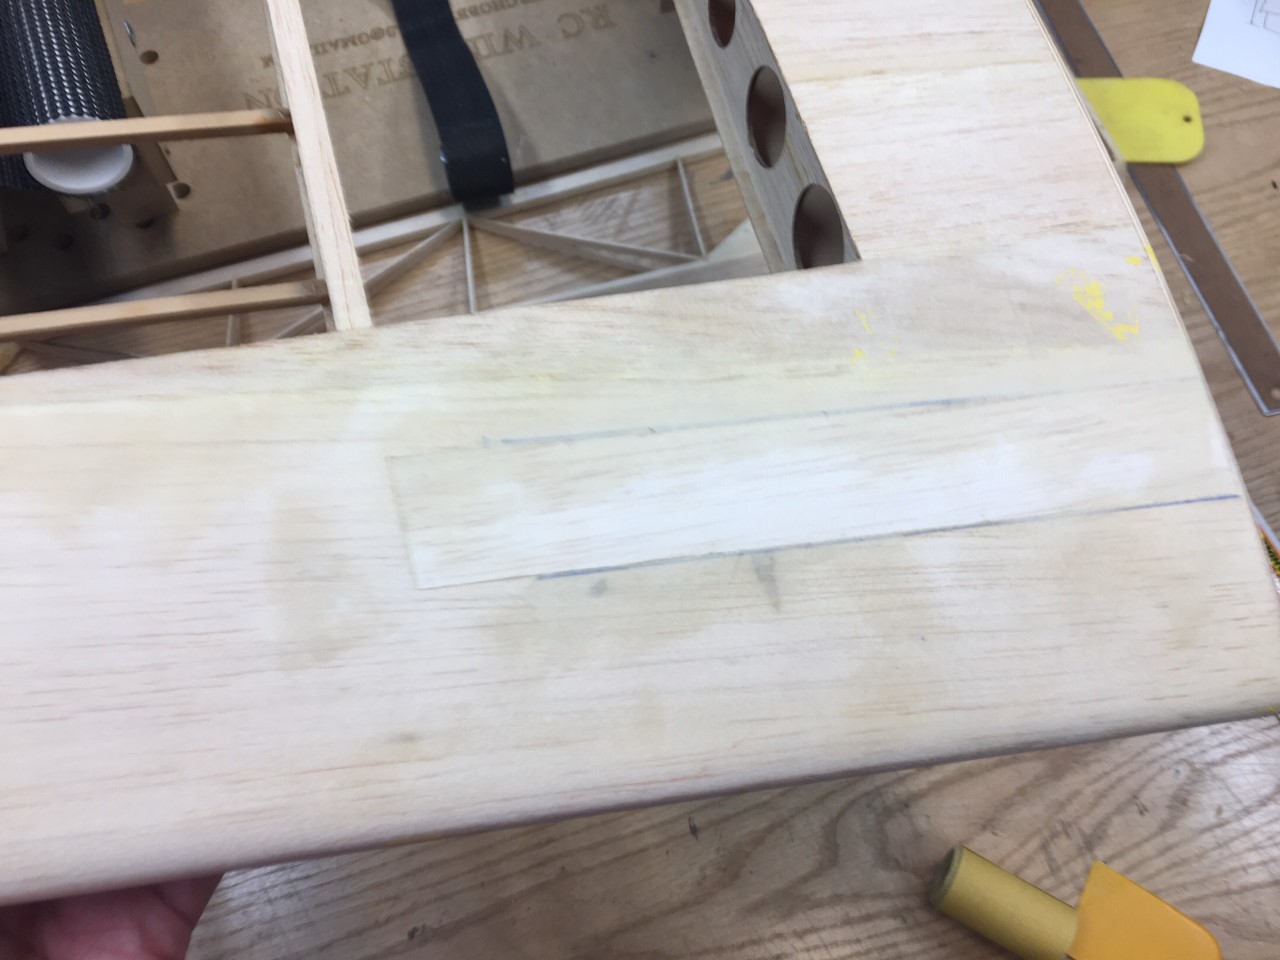
With the sheet patch I started first with the long sanding bar sanding slightly against the grain to remove most of the excess filler. Then I switched to a smaller sanding bar with 180 grit paper and sanded at about a 45* angle to the grain, taking care to follow the curve of the sheet. It only took a few minutes and most of the filler was removed, leaving a skim over it. Last I used the flat pool noodle and 220 grit and lightly sanded in circles to feather it out a bit more and to help remove any lines from the sanding bar. The edges of the patch are nice and smooth and shouldn't show through the covering now. Before final sanding I'll break out an even finer grit and do the entire wing.

thumbnail_IMG_0610.jpg
 

Joker 53150

Mmmmmmm, balsa.
Mentor
On a related note, if you’re planning to use transparent covering and want to hide your body work (balsa filler), the best option in my opinion is to use as little filler as possible. That means do as “neat” of a repair as possible and don’t spread the filler all over. In the pictures above you can see the balsa is discolored a bit from the filler, even though it’s mostly sanded off. The filler isn’t super noticeable through transparent film, but a sharp eye will pick it out. I’m usually more concerned with a smooth finish.
 

L Edge

Master member
One thing you might do with the hinges, as you glue it, add a straight pin thru the balsa and hinge and then cut it smooth on the other side of the balsa. This insures additional strength of the hinge in cases of aging glue or if your suface start to flutter.

The Funtana is a real easy plane to do knife edges and other acrobatics, as well as hovering in a 3D fashion. Excellant work for rebuilding a plane.
 

Joker 53150

Mmmmmmm, balsa.
Mentor
One thing you might do with the hinges, as you glue it, add a straight pin thru the balsa and hinge and then cut it smooth on the other side of the balsa. This insures additional strength of the hinge in cases of aging glue or if your suface start to flutter.

I've pinned hinges like that in the past with wood toothpicks. Most often I did it after applying covering over the hinge slot first. Then I drill a pilot hole, add a dab of glue in the hole, and then pop the toothpick through. Trim the toothpick, fill, and sand as needed. Once done the rest of the covering goes on and I don't have to fight to get the covering tight to the hinge as that wood is already done. If that hinge ever comes out it means your wing is probably destroyed! :) I just fixed a wing for a buddy who's flap hinges (2 of 3) came out. Both were epoxied, and one looks like the epoxy never made contact with the hinge! Pins through the hinge would have helped, and luckily the loose hinges didn't cost him a plane.
 

rockyboy

Skill Collector
Mentor
I've pinned hinges like that in the past with wood toothpicks. Most often I did it after applying covering over the hinge slot first. Then I drill a pilot hole, add a dab of glue in the hole, and then pop the toothpick through. Trim the toothpick, fill, and sand as needed. Once done the rest of the covering goes on and I don't have to fight to get the covering tight to the hinge as that wood is already done. If that hinge ever comes out it means your wing is probably destroyed! :) I just fixed a wing for a buddy who's flap hinges (2 of 3) came out. Both were epoxied, and one looks like the epoxy never made contact with the hinge! Pins through the hinge would have helped, and luckily the loose hinges didn't cost him a plane.

So THAT's how to pin a hinge! I've heard about the idea for a while now, but never could figure out the order of pinning vs. covering before!

Thanks!
 

Joker 53150

Mmmmmmm, balsa.
Mentor
I sat down last night and went over the wing and aileron. It looks like everything is done on it other than covering and hinges, so that'll be next. Going over the covering I have on hand, I've got multiple rolls of yellow and blue, but not the "RIGHT" color yellow and no transparent blue. Looking at the manual for the plane online I found the color codes from the factory so a roll of each was ordered. Those colors just look so good together I felt it wasn't worth going for "close enough". :) The other wing will be used for a reference to make sure it's covered properly, and then that wing will get re-covered as well. That wing has pretty limited damage so the biggest thing will be re-doing the hinges.

Eventually I'll move on to the fuselage, which requires a ton of work. One horizontal stabilizer is wrecked, the elevators don't operate properly, Landing gear was torn out on the last "landing", the cowl is shot, some fuselage stringers are broken, but otherwise it's in great shape! :)
 

TooJung2Die

Master member
Eventually I'll move on to the fuselage, which requires a ton of work. One horizontal stabilizer is wrecked, the elevators don't operate properly, Landing gear was torn out on the last "landing", the cowl is shot, some fuselage stringers are broken, but otherwise it's in great shape! :)

If you're thinking of a nick-name for this airplane you should call it "LUCKY". :p
(Lucky it ended up in your workshop and not the trash).
 

rockyboy

Skill Collector
Mentor
It’s one way to do it. Maybe I’ll pin some hinges on this project to show how it can be done.

That would be great - when I was going over the wreckage of Snoopy I found that one of the aileron hinges came out cleanly and didn't have a succesfull glue joint in the wing! :eek: It's made me a little paranoid and suspicious of my hinge epoxy technique...
 

Joker 53150

Mmmmmmm, balsa.
Mentor
If you're thinking of a nick-name for this airplane you should call it "LUCKY". :p
(Lucky it ended up in your workshop and not the trash).

It may be lucky, but I certainly won't be with all the work ahead of me! One thing I like about working on it so far is that it's a small plane, at least compared to what I've been working on recently. ;)
 

Joker 53150

Mmmmmmm, balsa.
Mentor
That would be great - when I was going over the wreckage of Snoopy I found that one of the aileron hinges came out cleanly and didn't have a succesfull glue joint in the wing! :eek: It's made me a little paranoid and suspicious of my hinge epoxy technique...

As the planes get bigger it's probably more and more important to do stuff like pinning the hinges, just in case and for extra strength. Looking at the hinges on this plane, I can probably pin the hinges internally so there is no external hole to fill, making the job even easier. That'll make more sense when I get to that point and I'll be sure to add some pics covering a couple ways to do it.
 

L Edge

Master member
As the planes get bigger it's probably more and more important to do stuff like pinning the hinges, just in case and for extra strength. Looking at the hinges on this plane, I can probably pin the hinges internally so there is no external hole to fill, making the job even easier. That'll make more sense when I get to that point and I'll be sure to add some pics covering a couple ways to do it.

Are you doing 3D, aerobatics or sport?
 

Joker 53150

Mmmmmmm, balsa.
Mentor
Covering arrived a few days ago, and I really like this color combination a lot! I'm starting with the bottom for a couple reasons - first, it's generally best to start covering on the bottom rear of the plane and then work towards the top front. This makes for the least visible seams and also helps avoid seams lifting from airflow. In this case I'm also doing it because yellow is the predominant color and it'll be easier to get the color transitions where I want them. Plus, covering over the yellow with transparent blue will show the yellow underneath and just look bad. The yellow is opaque and does a pretty good job at keeping the blue from showing through.

I started by cutting a section of blue a little bigger than the finished size needed for the aileron.

thumbnail_IMG_0661.jpg


You want to overlap the covering by around 3/16", so I applied the blue just past the hinge slots. Yellow will come down and overlap just to the slots so from the bottom you only see blue, and from the top it's all yellow.

thumbnail_IMG_0662.jpg


I don't remember who makes this tool, but it's used to trim excess covering in a straight line on edges like the aileron has. It gives just enough excess material to fold over after cutting to seal an edge well. It's a bit of a pain to get started, but once it's cutting along an edge it generally gives good results - at least better results compared to trying to free-hand cut a long straight piece.

thumbnail_IMG_0663.jpg


Here is where I ran into a problem. The plane I'm working on was glow-powered, and some of the wood on the aileron was exposed to the glow exhaust "slime". The blue covering was having difficulty sticking to the balsa along one edge so instead of doing the hinges like planned I got the yellow covering on right away. The yellow stuck very well to the blue and held everything in place. Not ideal, but it'll work. Once the glue for the hinges dries I'll go back and shrink a few little remaining spots like the one in the top left corner of the aileron below.

thumbnail_IMG_0664.jpg


Before gluing in the hinges I went through and made sure the covering in the hinge pocket was sealed well. The covering over the hinge pocket was then cut open and the hinge glued in place. You can see I'm using a wire instead of the cotter pin for the hinge. I'll probably use the wire like this to connect the aileron to the wing once the wing is finished up. It's a little easier to install than using the small cotter pins, and I like the look a little more.

thumbnail_IMG_0665.jpg


From the bottom, everything looks nice and neat. I'm painting the control horn blue to match the covering and will re-install it when the hinges and covering are all done.

thumbnail_IMG_0666.jpg
 

L Edge

Master member
When you have that slime from the exhaust, pour some baking soda powder over and work it in and let it sit for a couple of days. Over time, it will soak up the slime and allow you then to cover it so it will stay.

When I was building pattern ships, I use to use a letter carrier opener that if sharp, will cut a straight line(held at the right angle and slid across the trailing or leading edge) so it gives a nice straight line. Takes some practice to get it right.
 

Joker 53150

Mmmmmmm, balsa.
Mentor
I've done some planes in the past that were soaked with slime, and the baby powder (or baking soda) trick worked well, but never seemed to get enough of the residue out for the covering to stick as well as it does to "clean" balsa. This wood wasn't soaked, but must have had just enough to cause adhesion problems.