Glowforge Settings for DTFB?

jryd2000

New member
I just found out that my local library has a Glowforge laser cutter available which can be used for free. I would like to give it a try and spoke with the library rep about using it but I would need to know/figure out the settings for the different cuts. Has anyone figured out a good jumping off point for the laser settings for the different cuts (through cut, 50% score, crease, and reference) for the white dollar tree foam board. Also if anyone has the settings for the brown FT foam board I would take also like that as well since I plan on buying some the next time I order from them. Any help would be appreciated.
 
The glowforge is not ideal for cutting foam board planes. The largest material size is 18 x 20 inches. The "Pro" model offers a passthrough slot for larger materials, but offers no way to register the material after moving it. (at least that's how it was a few months ago when I was looking into purchasing one.)

I just found out that my local library has a Glowforge laser cutter available which can be used for free. I would like to give it a try and spoke with the library rep about using it but I would need to know/figure out the settings for the different cuts. Has anyone figured out a good jumping off point for the laser settings for the different cuts (through cut, 50% score, crease, and reference) for the white dollar tree foam board. Also if anyone has the settings for the brown FT foam board I would take also like that as well since I plan on buying some the next time I order from them. Any help would be appreciated.
 

kilroy07

Legendary member
My first tip expect to burn through at least one sheet figuring it out. 😜

Start with speed around 80% and power around 20.

In your cad software just make small (maybe 1/2”) squares to cut out to test.
One for each cut, etch and mark.

Also, you’ll get the best results making two passes. If you try to cut through in one, you’ll have to have the power higher and the foam melts back from the cut more.

What is the power/working area of the laser?
Mine is 60 watts, and the tube “just” energized to mark.... it cut up to 1/2 plywood like butter! 🤣
 

jryd2000

New member
Thanks for the input. I found some settings on the GlowForge forum for some other FT patrons that have used it to cut DTFB for some planes. Once I give it a try at my library I will post all my settings if anyone else wants to use it. I realize that the GlowForge's size is not ideal for FT models but it should be fine for the Mighty Mini series. I have restructured the Mini Guinea plans to fit on 3 - 20" x 18" size boards. We'll see how it goes.
 

kilroy07

Legendary member
Thanks for the input. I found some settings on the GlowForge forum for some other FT patrons that have used it to cut DTFB for some planes. Once I give it a try at my library I will post all my settings if anyone else wants to use it. I realize that the GlowForge's size is not ideal for FT models but it should be fine for the Mighty Mini series. I have restructured the Mini Guinea plans to fit on 3 - 20" x 18" size boards. We'll see how it goes.
Good Luck, keep us posted!
 

Sardog

New member
Yes, please update us. We've just ordered a Glowforge for our tech lab in our Middle School and I'm interested in using it to get our 8th graders into flight!
 

jryd2000

New member
I finally got around to using the Glowforge laser cutter at the library to cut my Mini Guinea. First a note. The advertised cutting size of the GlowForge is 20" x 12". In reality due to the cutting head needing time to slow down as it approaches the edges, the software will only allow you to cut 19.5" x 11". So when you are organizing your SVG files make sure everything fits into that space. In the case of the Mini Guinea I was able to organize it all into 5 documents that fit those dimensions, however I wasn't able to cut out the tail section since it was more than 11" tall and had to do that manually.

The following are the settings that worked well for me. I used settings that I found on the GlowForge forum as a jumping off point and adjusted after a few test cuts, I suspect everyones GlowForge will need the Power level tweaked up or down 1-2 levels.

Cut OrderCut TypeColorSpeedPowerPassesUse

1

Engrave

Black

500

4

1

Annotating A,B,C Folds, reference lines, etc.

2

Crease

Dark Green

200

5

1

For crease lines on wing folds.

3

50% Score Cut

Navy Blue

200

5

2

Score Cuts for A,B,C Folds and Bevel Cuts.

4

Through Cut

Bright Green

200

12

2

Cut out inset pieces

5

Through Cut

Brown

200

12

2

Cut out pieces

The color indicated above is how I identified in the SVG file the different types of cuts I wanted GlowForge to perform. If you want a specific order for your cuts, then GlowForge by default will order them as above for the given color, otherwise you will need to reorder them your self. For the most part I think the ordering was unnecessary but it made it easier in the GlowForge UI to know what cuts to make for each. What also made it easier, is after you define the custom cut settings you can save them for use on the other SVG files in your project.

Here is an example of one of my SVGs cut out. I should hopefully start building the plane this weekend.
IMG_3624.JPG
 

Flying Monkey fab

Elite member
Thanks for the numbers, they don't seem to match mine even close so I'll go back and check mine. Sometimes there are several sweet spots.

I've cut out a bloody brit with mine.
 

kilroy07

Legendary member
Even with a large laser (700x500mm) I run into issues getting everything to fit.
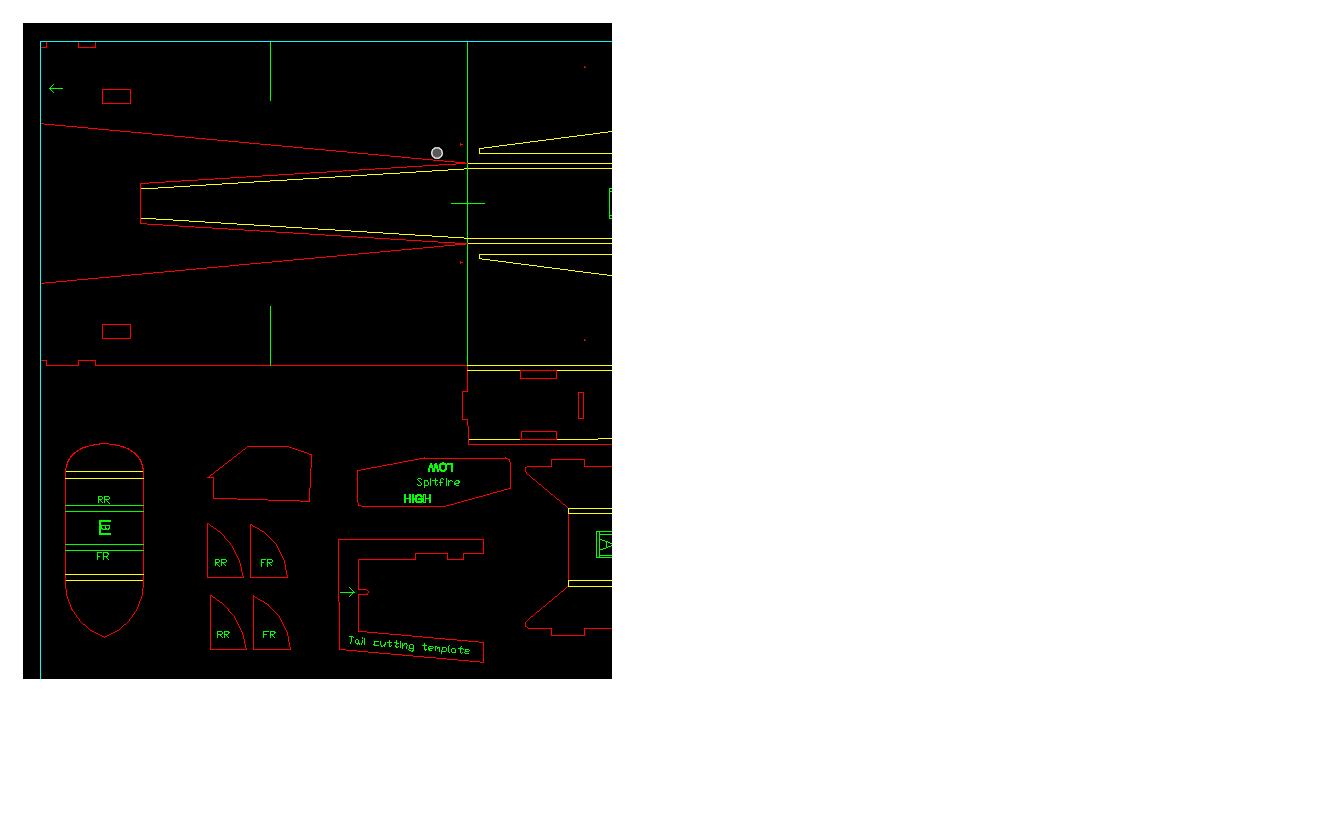
It's a bit of CAD work, but I designed a cutting template for the tail for the Spitfire as it would not fit on the sheet otherwise.
laser.jpg

You can see how the tail is at the edge of the cut window and see the template below it on the sheet.
(when the arrows line up, you cut out the notch for the control horn.)