GREAT PLANES EXTRA 300S, 60 SIZE, ELECTRIC CONVERSION, 2019 BUILD ALONG

nhk750

Aviation Enthusiast
I used Great Planes plan protector for years and also on this build and I really liked the stuff, but unfortunately it is no longer available as Great Planes is out of business. SO, I am going to try this plastic material from Michaels craft store, it's called Celebrate It transparent wrap. I already bought a roll for $12 and there is a lot at 40" x 100' ! There are a few guys that use this stuff and they seem to like it better than wax paper and other solutions, so we will see on my next build. I use Titebond II and epoxy (joining wings and such) for the most part and CA only when needed as the fumes kill me, so this wrap material looks like it will work well. I also build with magnets and this wrap looks like it will not tear when I slide the magnets around.

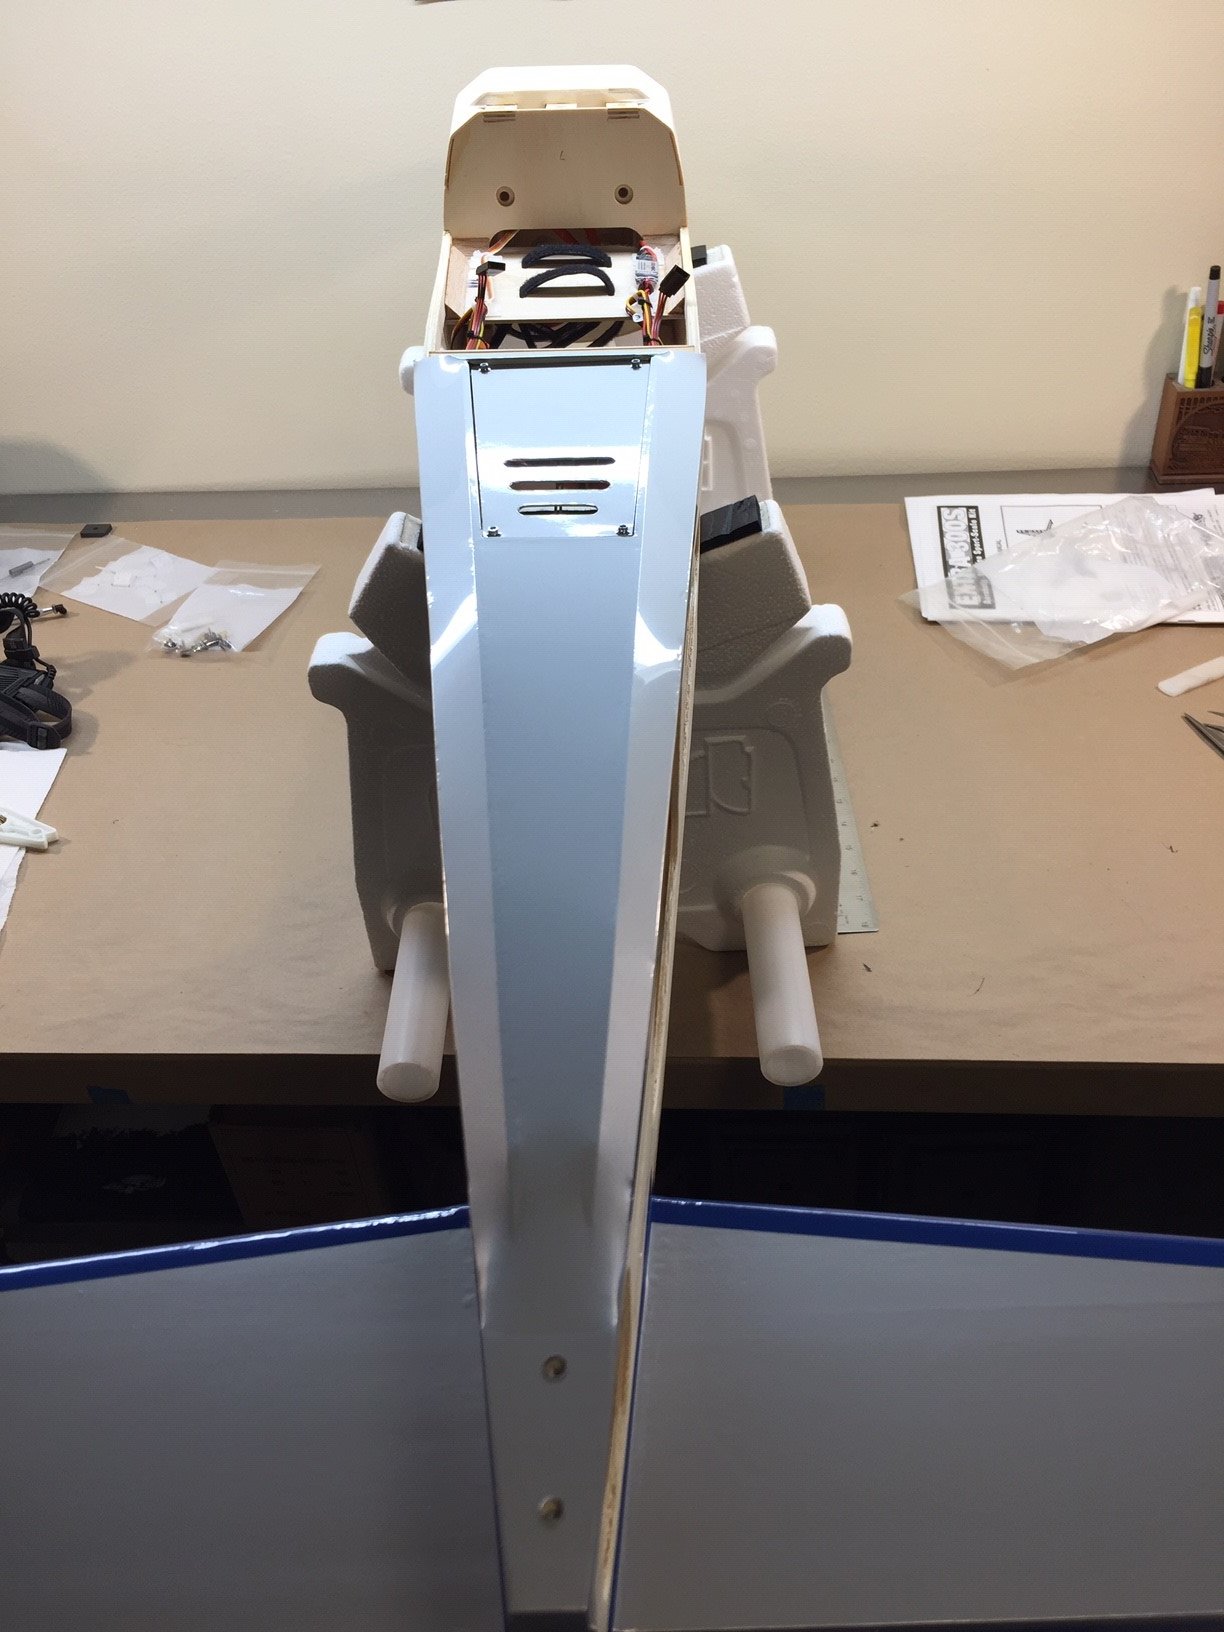
Got the radio access hatch cut in, cover covered and installed. I added this hatch earlier in the build to access the radio more easily and to also move some weight to the rear to balance the plane better and also added some cooling holes.
 

Attachments

  • hatch 1.jpg
    hatch 1.jpg
    244.7 KB · Views: 0
  • hatch.jpg
    hatch.jpg
    282.2 KB · Views: 0
  • sheet.jpg
    sheet.jpg
    264.7 KB · Views: 0

nhk750

Aviation Enthusiast
You cant get them too close to each other or they attract and repel each other, but as you can see you can get them fairly close to each other and still be affective. When using them to clamp pieces down, like in the picture, you need to figure out which way they go so it works, but that is really easy as they wont stick together if positioned wrong...There is a learning curve to using magnets, but once you get into using them you can really use your imagination for different applications. I really love building with magnets it is so much easier and fun.

Back to the build... I am making some progress on the fuse covering and am nearing the finish line. I found a good way to make the two tone covering job easier and that was to make templates out of paper, making sure they fit properly, then trace over them on the Ultracote backing, cutting and then applying to model. It works great and I have way less trimming to perform, plus a lot less mistakes. I plan on finishing, hinging, installing pushrods and all on the fuse before moving on to the wing.
IMG_1309.jpg IMG_1315.JPG
 

nhk750

Aviation Enthusiast
Once you get them on a steel board they behave much better. When building you will learn how close you can get them to each other. Sometimes I position to oppose each other or attract depending on the situation, but mostly I just plop them down and build away and occasionly they misbehave, but for the most part there are no worries.
 

nhk750

Aviation Enthusiast
The magnets you ordered should work fine, but the latch magnets are the ones that everyone uses, and you will need a lot, at least 100 to start with.
 

nhk750

Aviation Enthusiast
Jeeze this build thread is getting long...anyway, I soldered on the clevises for the dual elevator pushrods last night, got the pull pull wires installed on the bell crank, finished the covering on the fuse and just need to epoxy the hinges in now and finish tying the pull pull wires to the rudder. That will complete the fuse except for decals which I will apply after the wing is covered. The Sullivan gold clevis lock tab was sure a tight fit on the Hitec servo arms, I had a heck of time getting them to click on. I sure am loving my new solder station also, it makes soldering so much faster and easier!
 

Attachments

  • plll.jpg
    plll.jpg
    386.8 KB · Views: 0
  • pppll.jpg
    pppll.jpg
    415.3 KB · Views: 0
  • plann.jpg
    plann.jpg
    275.2 KB · Views: 0
  • plane.jpg
    plane.jpg
    363.8 KB · Views: 0

nhk750

Aviation Enthusiast
Alright, the tail feathers are all on and hinges epoxied in, now I just need to hook up the linkages, finish tying the pull pull cables, install the cowl, prop and spinner, install the tail wheel and the fuse will be complete. I was hoping to get it all done by today, but it looks like I'm out of time, so now I wont be able to work on it for a week as we have busy plans all week and weekend now...
 

Attachments

  • fuse.jpg
    fuse.jpg
    400.2 KB · Views: 0

nhk750

Aviation Enthusiast
Well, I found some time to get the fuse mostly done, just need to mount the canopy and decals which I will complete after the wing is covered.

The Pull Pull cables came out perfect and the program I found on line to figure out the geometry worked excellent. I have no slop in the cables and they hold their tension throughout the range of motion, it seems to be very precise with no cables touching anything in fuse. I need to install the spring for the tail gear so it can steer, but I will get that later. All the control surfaces move smoothly with no issues, very happy. The cowl paint is a little darker, but after decals I think it will look ok. The wheel pants in the rear will need some clear skid protector decals installed as they will ride on the grass during taxi, but I should be able to find some clear somewhere.
 

Attachments

  • IMG_1369.JPG
    IMG_1369.JPG
    500.4 KB · Views: 0
  • IMG_1349.JPG
    IMG_1349.JPG
    427.2 KB · Views: 0
  • IMG_1350.JPG
    IMG_1350.JPG
    592.8 KB · Views: 0
  • IMG_1351.JPG
    IMG_1351.JPG
    259.2 KB · Views: 0
  • IMG_1368.JPG
    IMG_1368.JPG
    371.5 KB · Views: 0
  • IMG_1347.JPG
    IMG_1347.JPG
    455.9 KB · Views: 0
  • IMG_1366.JPG
    IMG_1366.JPG
    366.9 KB · Views: 0
  • IMG_1360.JPG
    IMG_1360.JPG
    482.1 KB · Views: 0

rockyboy

Skill Collector
Mentor
Nicely done - especially the cables! Do you have a link to the program you used for the calculations?
 

nhk750

Aviation Enthusiast
Well, I'm back from vacation and I found the pull pull program/ excel program, but he changed it and now it is very different from before and also in Russian, so I don't know anything anymore...Hopefully I didn't get a virus messing with it...
 

nhk750

Aviation Enthusiast
The reason I have been so slow finishing this project is our new house requiring all kinds of work. First I had to chop 3 chords of wood by hand, with an 8 pound sledge hammer and splitting maul, that the previous owners left lying around from a large maple tree that was cut down, the rounds were about 4 feet in diameter! Now this weekend I have been working on a drainage ditch 30 feet long, x 3 feet wide x 20" deep, so I have 7 yards of 1 1/2" washed gravel coming today....argggg, what a workout....My F550 work truck really helped pulling a small stump out though...
 

Attachments

  • wood.jpg
    wood.jpg
    929.2 KB · Views: 0
  • ditch.jpg
    ditch.jpg
    868.9 KB · Views: 0