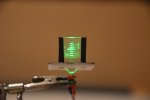
Would you build this thing?


  • Total voters
    13
Hi guys!
Today i primary wanted to build on at my Dc3 but then i got a great idea!
I had a transparent peace of a packaging and there was a scrape in it.
But when i went to the rubbish bin i saw that the scrape in the packaging cached the light from my lamp and reflected it.
This brought me to the idea to scrape some marks into it and illuminate it with a green LED.

Well, after i saw the result it didn´t took long for me to build a scale Head Up Display (HUD) :D.
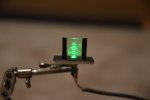
DSC_0720.JPG

DSC_0719.JPG

DSC_0722.JPG

DSC_0723.JPG

A video is comming soon!

Jetcrafter2000
 
Last edited:

Fluburtur

Cardboard Boy
Well you won't be actively displaying much useful info on there but it is definitely good for scale stuff!
Easy and effective!
 

PsyBorg

Wake up! Time to fly!
That is actually pretty detailed as well as VERY simple. Would look incredible with an in cockpit FPV system i would think.
 
Thank you guys!
I like it too and i´ll probably use it in my next project after the Dc3 the F -86 sabre.

incredible! you should make an article about it. perfect for a scale cockpit for fpv.

Would look incredible with an in cockpit FPV system i would think.

Well, you can use it for a scale cockpit but in FPV you wouldn´t see much of this HUD.
When you fly FPV you have to focus a point about 20 meters away from your plane.
You would onely see a fuzzy green light in front of you.
But it´s a good idea!

I might have to borrow that idea for detailing my Freewing A-10.

You are welcome!

Easy and effective!

This is beautiful.

That´s it!

You are welcome to post your progress in this thread if you build one of these!

See you!
Jetcrafter2000
 
Last edited:
Ok guys i have a little update for you!
This morning i decided to build a MIP (Main Instrument Panel) for the HUD.

WP_20180212_11_20_01_Pro.jpg

WP_20180212_11_20_08_Pro.jpg

I took a peace of cardboard and a holepuncher and made a few holes into it.
But i didn´t throw away the little paper peaces, drew a few gauges onto them.

WP_20180212_11_24_13_Pro.jpg

Next i glued a peace of the transparent packaging to the backside of the cardboardpeace.

WP_20180212_11_20_13_Pro.jpg

Then i layed out the gauges and fixed them with a peace of tape.

WP_20180212_11_27_10_Pro.jpg

When i was finished i turned the MIP around and i had a main instrument panel with glazed gauges (i know i´m crazy).

WP_20180212_11_31_27_Pro.jpg

WP_20180212_11_31_38_Pro.jpg

If you want you can take this and be happy but i wanted more!
Therefor i painted the backsides of the gauges in black and the frontside of the cardboard in grey.

WP_20180212_11_34_00_Pro.jpg

I just had to scrape the black color down to the gauges (just the backsides of the gauges were black) and glued in a little LED.
I sanded the LED so there was a flat surface on the top for the glue to hold on.

WP_20180212_12_14_27_Pro.jpg

Now it was time to mount everything together.

WP_20180212_13_01_40_Pro.jpg

WP_20180212_13_01_46_Pro.jpg

I used little Depron triangles to give the glue a better hold.
The little circuit board you can see carryes a resistor which is attached in serial to the LED.
The input is 5V (like a servo).

DSC_0724.JPG

DSC_0727.JPG

DSC_0732.JPG

DSC_0731.JPG

BAAAAM THAT`S A COCKPIT!!!!
This was my secound cockpit (the firstone was just a peace of cardboard with a few LEDs (DC3))

Cheers!
Jetcrafter2000
 
Last edited:

FoamyDM

Building Fool-Flying Noob
Moderator
That IS so GREAT!
I was planning to experiment with this kind of thing next month and now I know it how it works.

I'll be using this in my VF-9 build for the control panel... as I will have a camera in the cockpit. I think I will try and use the tiny bread board LED's and get it to line up on the edge...
attachment.php


I see a number of other uses too. hmm.

Thank you for the great documentation. :applause:
did you use a website to determine the resistor size, if so, can you link for all of us interested party.
 
I took a potentiometer and after i had found the right position i took my multimeter and measured out the resistance.
But here are a few websides:

1. https://www.leds-and-more.de/catalog/resistor.php

2. https://www.elektronik-kompendium.de/sites/bau/1109111.htm

3. https://www.leds24.com/Widerstandsrechner

The secound one is my favorite.

Or use: U=R*I
If you want to figure out the resistanse (R) you should use R=U/I
This is pretty simple maths!

For E-noobs:
U = voltage (batterie)
I = current (a value depense on your LED)
R = resistance (small, colorful and round thing with two cables)
 
Last edited:
Again a little update.
First i detailed my cockpit:

WP_20180212_18_30_00_Pro.jpg

WP_20180212_18_30_16_Pro.jpg

And then i build a HUD for a gunner.

WP_20180213_20_06_21_Pro.jpg

WP_20180213_20_07_10_Pro.jpg

WP_20180213_20_07_27_Pro.jpg

WP_20180213_20_59_00_Pro.jpg

This time i tryed out to place the LED under and not in the front

WP_20180213_20_08_14_Pro.jpg

The good thing about it is that you onely see the HUD, no LED in the front.
the bad thing is that it´s not that strong like the first one and vertical scrapes will nor come out verry good.
 
If i would build a plane for this...
In the moment i´m building my Dc3 and i just came on this by a random happen (first post).
But my next projekt (F86) will probably have one of these.
 
Thanks!

I already said, that i want more so today i started to experiment with a optical system which is supposed to projekt a picture onto the glas.

DSC_0745.JPG

I can project every picture i want and i chosed this one because i found nothing else.

DSC_0746.JPG

This is my setup for the projektion.

This is a totaly different technique (i was trying to upgrate it to FPV capability) so if you want to build one of these i strongly recoment the first version!
It´s simple and effectice!