
JohnRambozo
Posted a thousand or more times
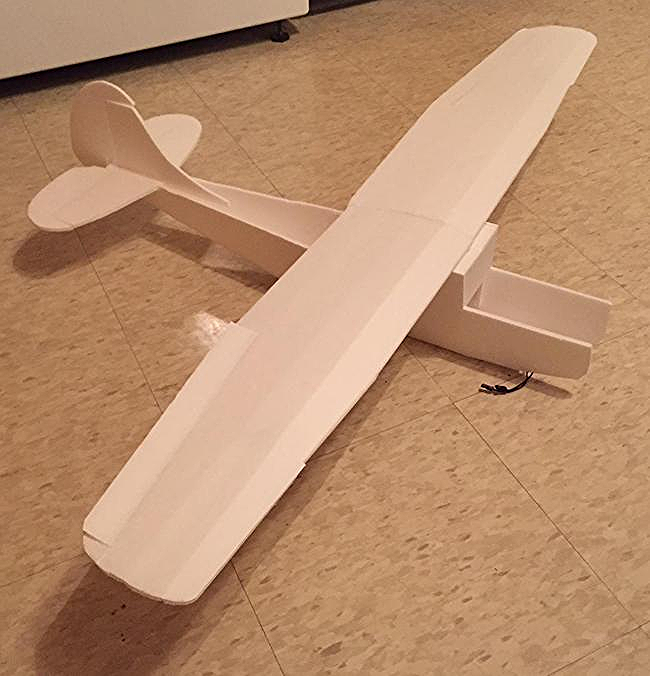
Its time to scratch build again!
This high-wing trainer is going to be easy to build (easy side of intermediate) and hopefully very easy to fly. I am designing and building it so that I can teach my dad (age 70) and my son (age 17) to fly R/C this spring and summer.
Neither one have any experience with R/C so I'm thinking the jrH-1 may be a little fast for them to handle. I'm expecting a nice, slow floater.
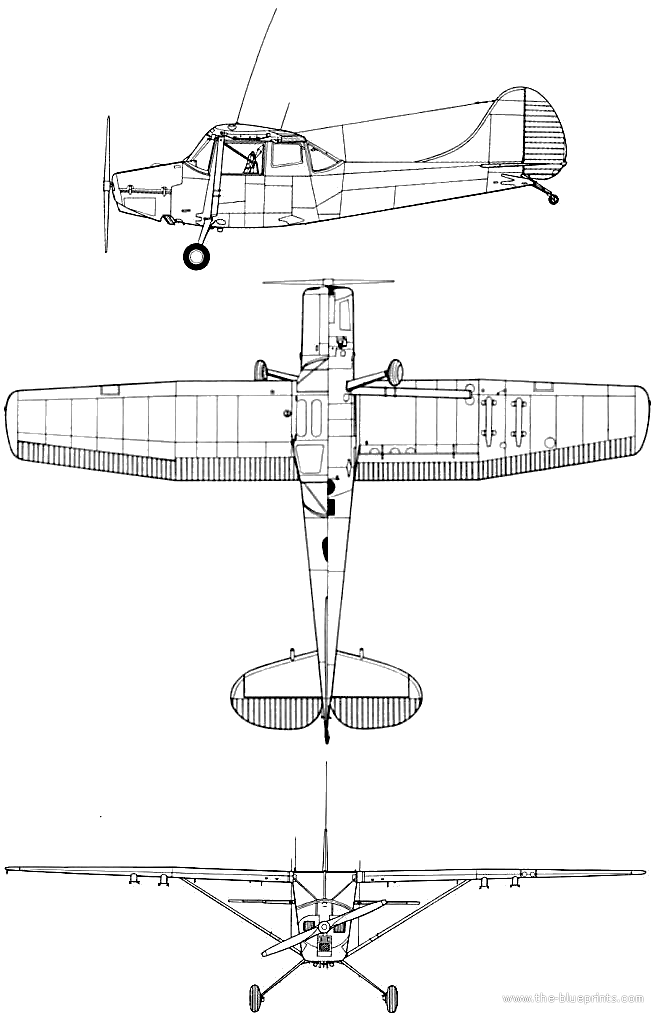
First a little background: Wikipedia entry on the Cessna O-1 Bird Dog.
3-View
Specs:
Fuselage: 29 inches
Wingspan: 42.5 inches
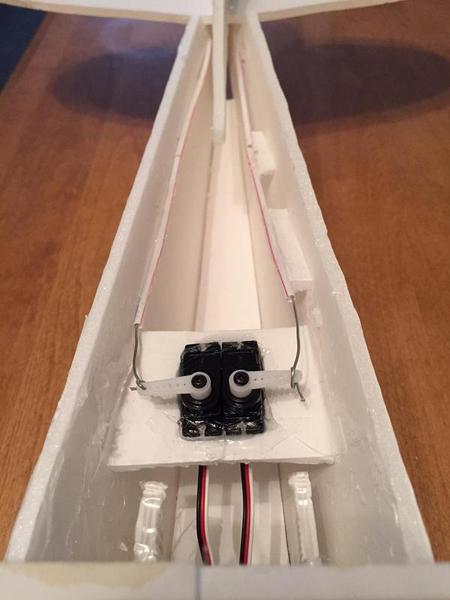
Electronics: 4 servos (5 for flaps)
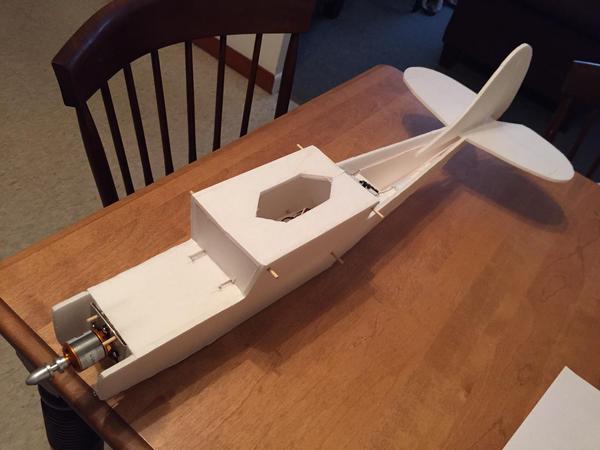
Motor: BEEF (Park 425 equiv)
Prop: 9x4.5 SF
Battery: 3S 2200 mAh
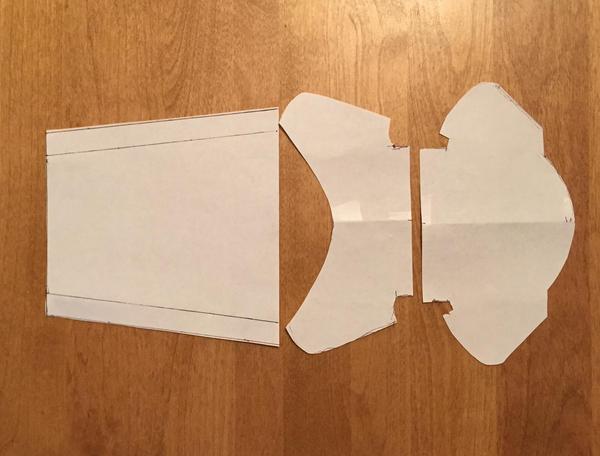
I was able to get the adjustments made to the wings. In order to fit everything on 2 sheets of foamboard, I split the wings with a center section that will have some paper overlap for added strength.
The updated plans are here. I will likely be waiting until I have some of the new water resistant foam before I begin building version 2.5.
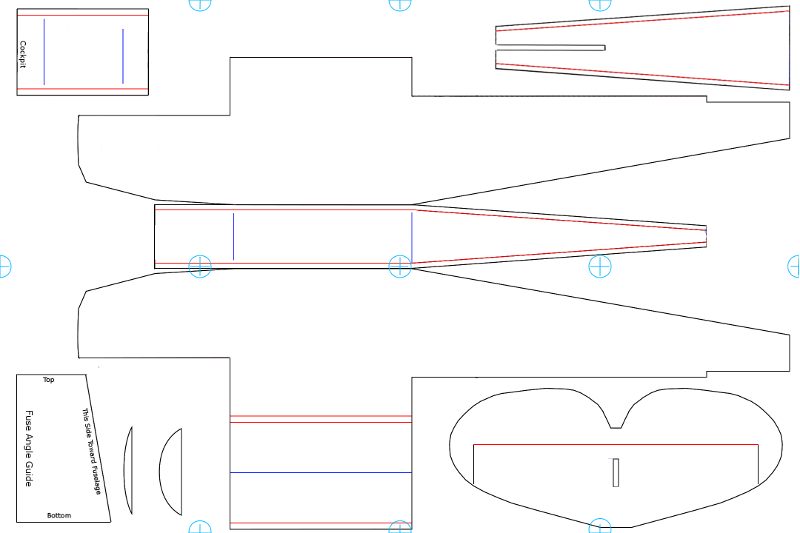
jrCessna O-1 Swappable Bird Dog v2.5 Plans (PDF):
jrCessna-O-1v2.5_1of2.pdf
jrCessna-O-1v2.5_2of2.pdf
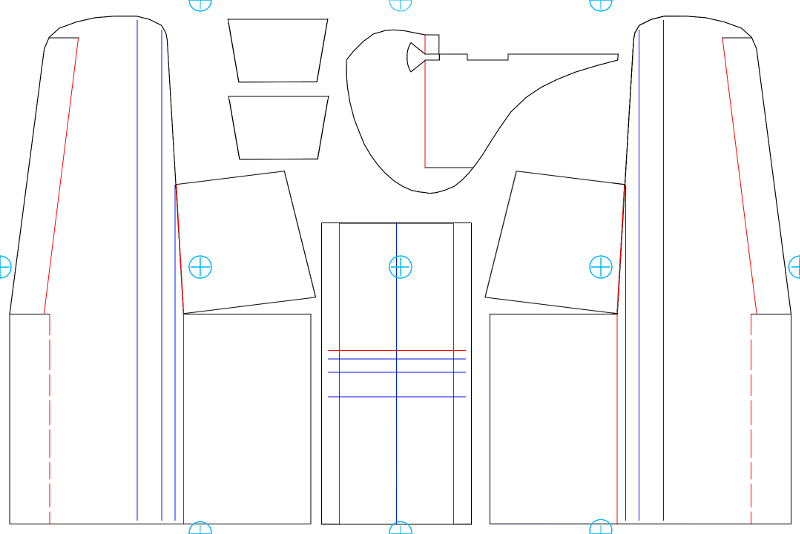
2.5 Plans Updated with the following:
Organized to fit on 2 - 20x30 DTFB Sheets
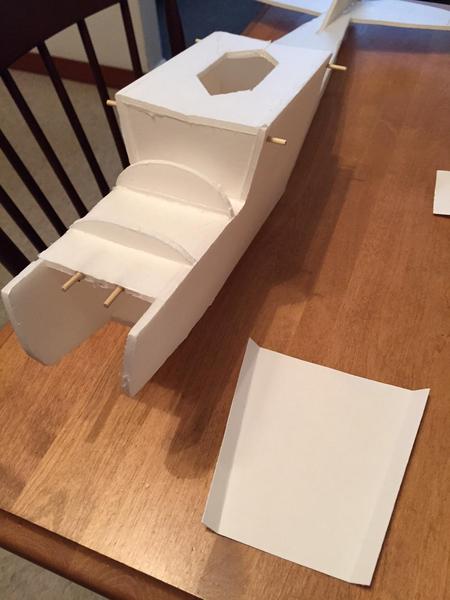
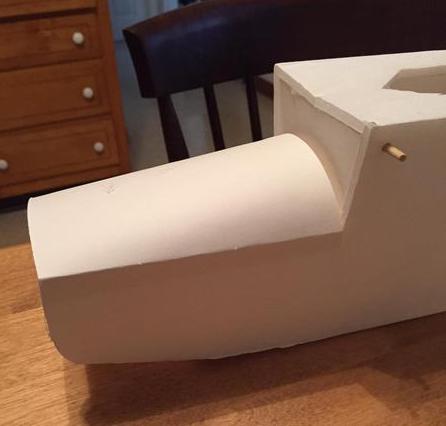
Added nose formers
Added duplicate of internal fuse former
Labeled that odd-shaped guide you were wondering about
Added Tile Marks for 7.5 x 10 tiling
Windshields and Nose Posterboard cover:
jrCessnaBirdDog_Windshields.pdf
jrCessnaBirdDog_Nose_Poster.pdf
If anyone attempts to build this before I do, please let me know and I'll be happy to help clarify since I didn't indicate what to do in some areas. (such as removing paper or foam)
Paxbot is doing a great job building v2 here. (2.5 is the same design, just update plans for ease of use)
Photos / text below are for v1.


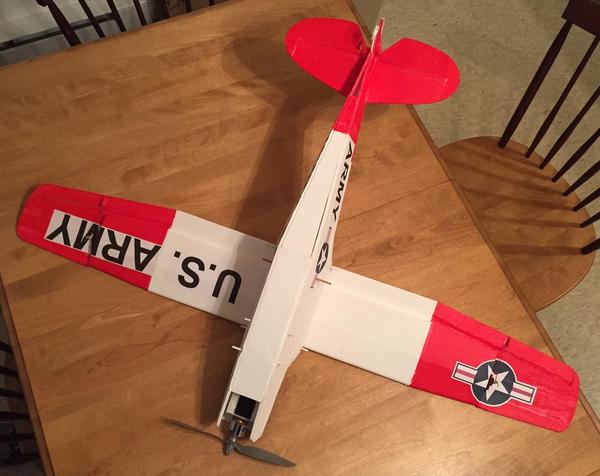
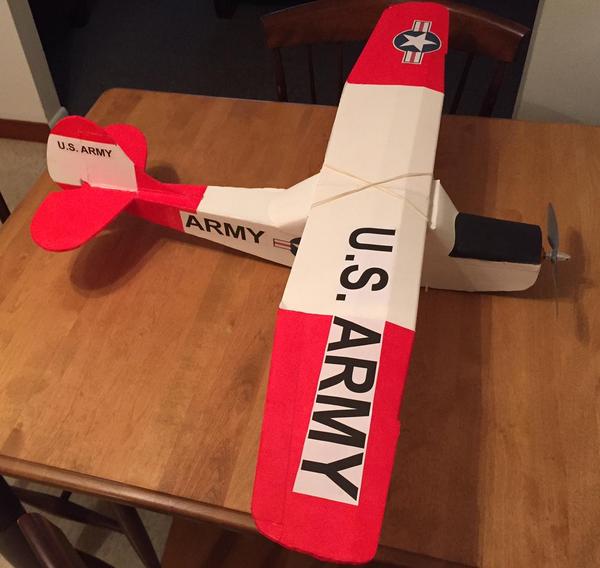
I've designed some nice ARMY emblems to go with this plane for those that want them. They are scaled to print on one page. You'll need 2 pages of lettering and one of the stars.
Links here:
ARMY Lettering for jrBirdDog.
ARMY Star Emblems for jrBirdDog.


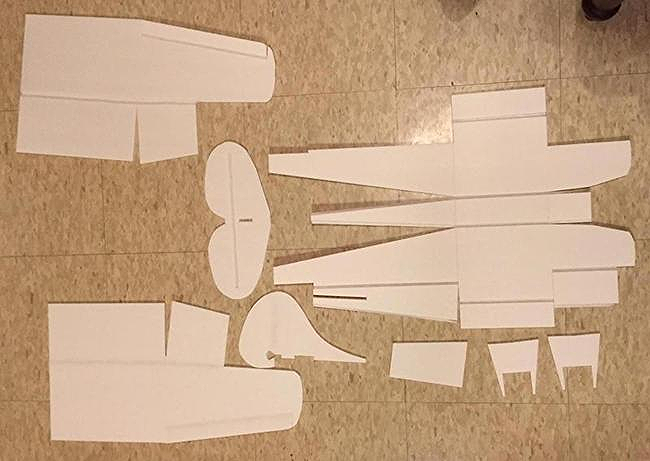
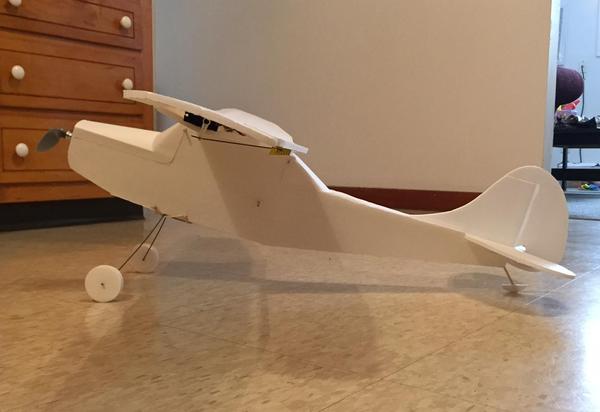
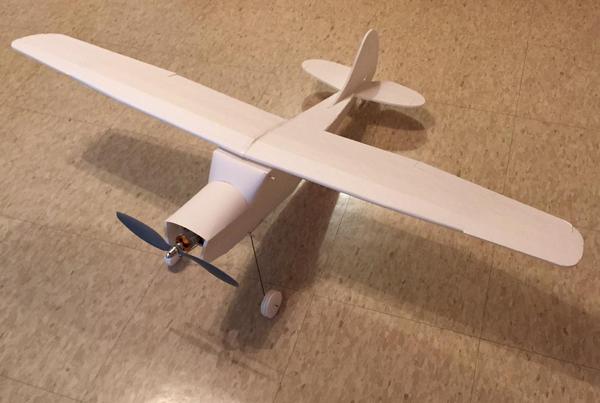
Latest Progress as of 3/12/15:
Final (without LG)

This high-wing trainer is going to be easy to build (easy side of intermediate) and hopefully very easy to fly. I am designing and building it so that I can teach my dad (age 70) and my son (age 17) to fly R/C this spring and summer.
Neither one have any experience with R/C so I'm thinking the jrH-1 may be a little fast for them to handle. I'm expecting a nice, slow floater.
First a little background: Wikipedia entry on the Cessna O-1 Bird Dog.
3-View
Specs:
Fuselage: 29 inches
Wingspan: 42.5 inches
Electronics: 4 servos (5 for flaps)
Motor: BEEF (Park 425 equiv)
Prop: 9x4.5 SF
Battery: 3S 2200 mAh
I was able to get the adjustments made to the wings. In order to fit everything on 2 sheets of foamboard, I split the wings with a center section that will have some paper overlap for added strength.
The updated plans are here. I will likely be waiting until I have some of the new water resistant foam before I begin building version 2.5.
jrCessna O-1 Swappable Bird Dog v2.5 Plans (PDF):
jrCessna-O-1v2.5_1of2.pdf
jrCessna-O-1v2.5_2of2.pdf
2.5 Plans Updated with the following:
Organized to fit on 2 - 20x30 DTFB Sheets
Added nose formers
Added duplicate of internal fuse former
Labeled that odd-shaped guide you were wondering about
Added Tile Marks for 7.5 x 10 tiling
Windshields and Nose Posterboard cover:
jrCessnaBirdDog_Windshields.pdf
jrCessnaBirdDog_Nose_Poster.pdf
If anyone attempts to build this before I do, please let me know and I'll be happy to help clarify since I didn't indicate what to do in some areas. (such as removing paper or foam)
Paxbot is doing a great job building v2 here. (2.5 is the same design, just update plans for ease of use)
Photos / text below are for v1.
I've designed some nice ARMY emblems to go with this plane for those that want them. They are scaled to print on one page. You'll need 2 pages of lettering and one of the stars.
Links here:
ARMY Lettering for jrBirdDog.
ARMY Star Emblems for jrBirdDog.
Latest Progress as of 3/12/15:
Final (without LG)
Last edited:
")