Making EPS serious strong on the cheap and revising the nutball/flying potato chip.

HappyRCFlyer

Active member
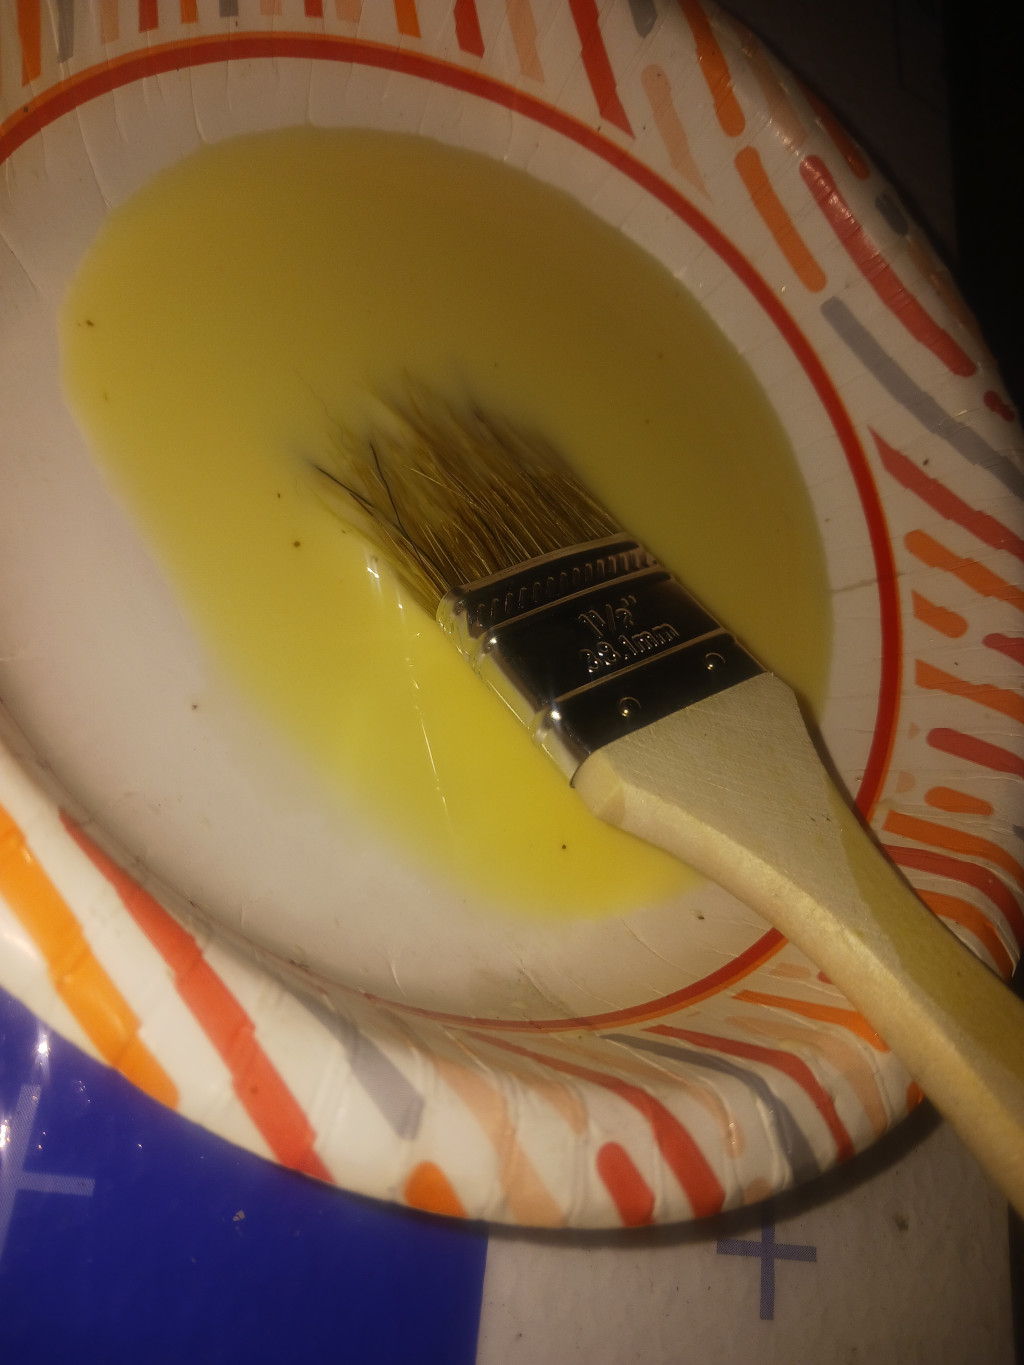
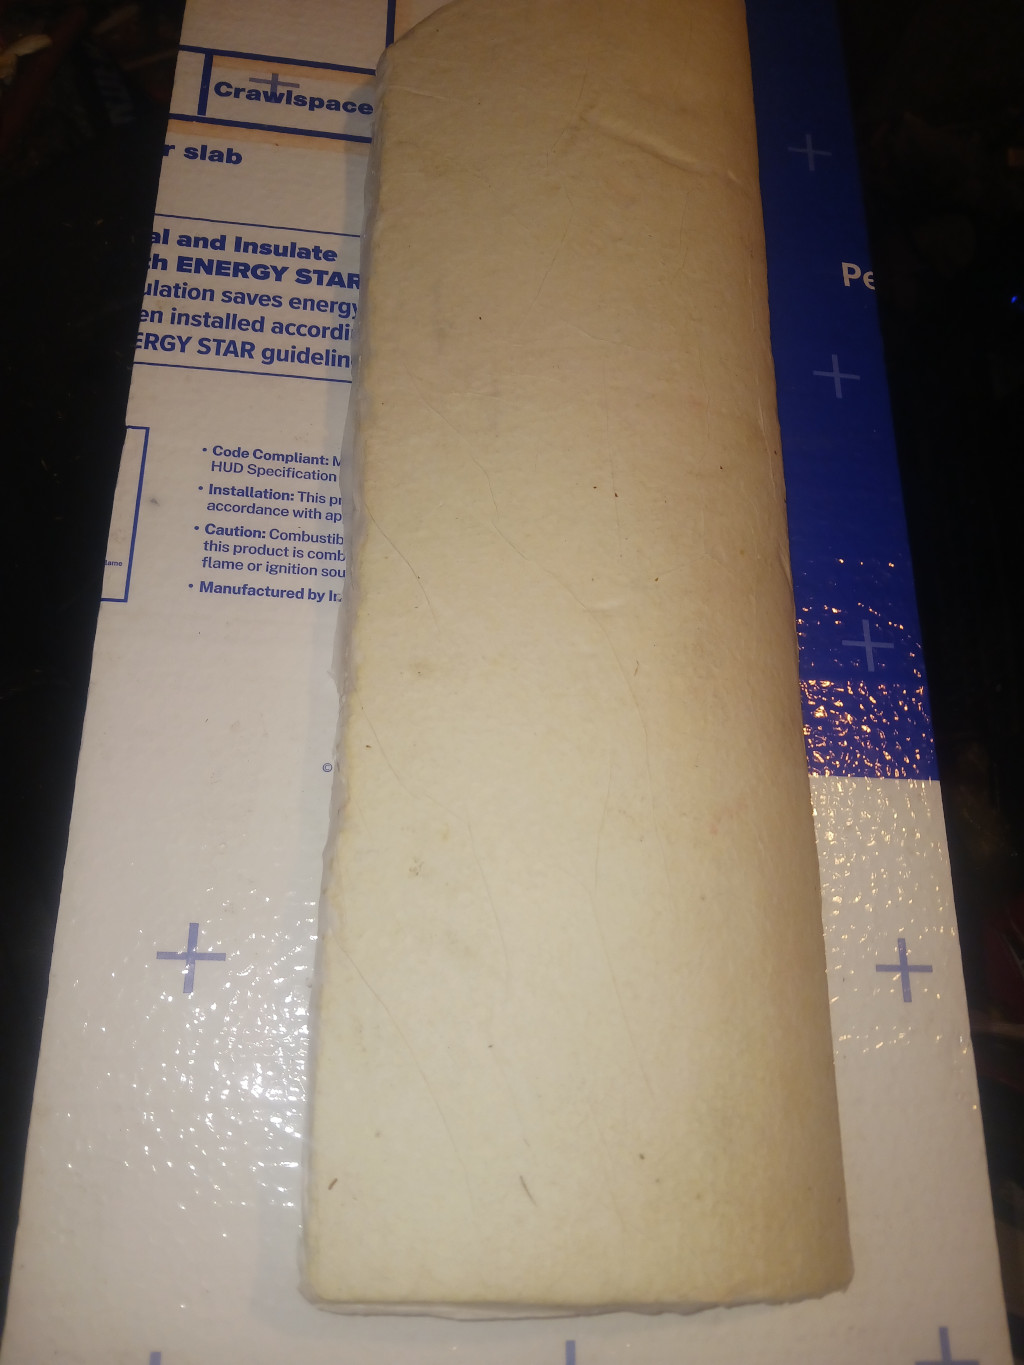
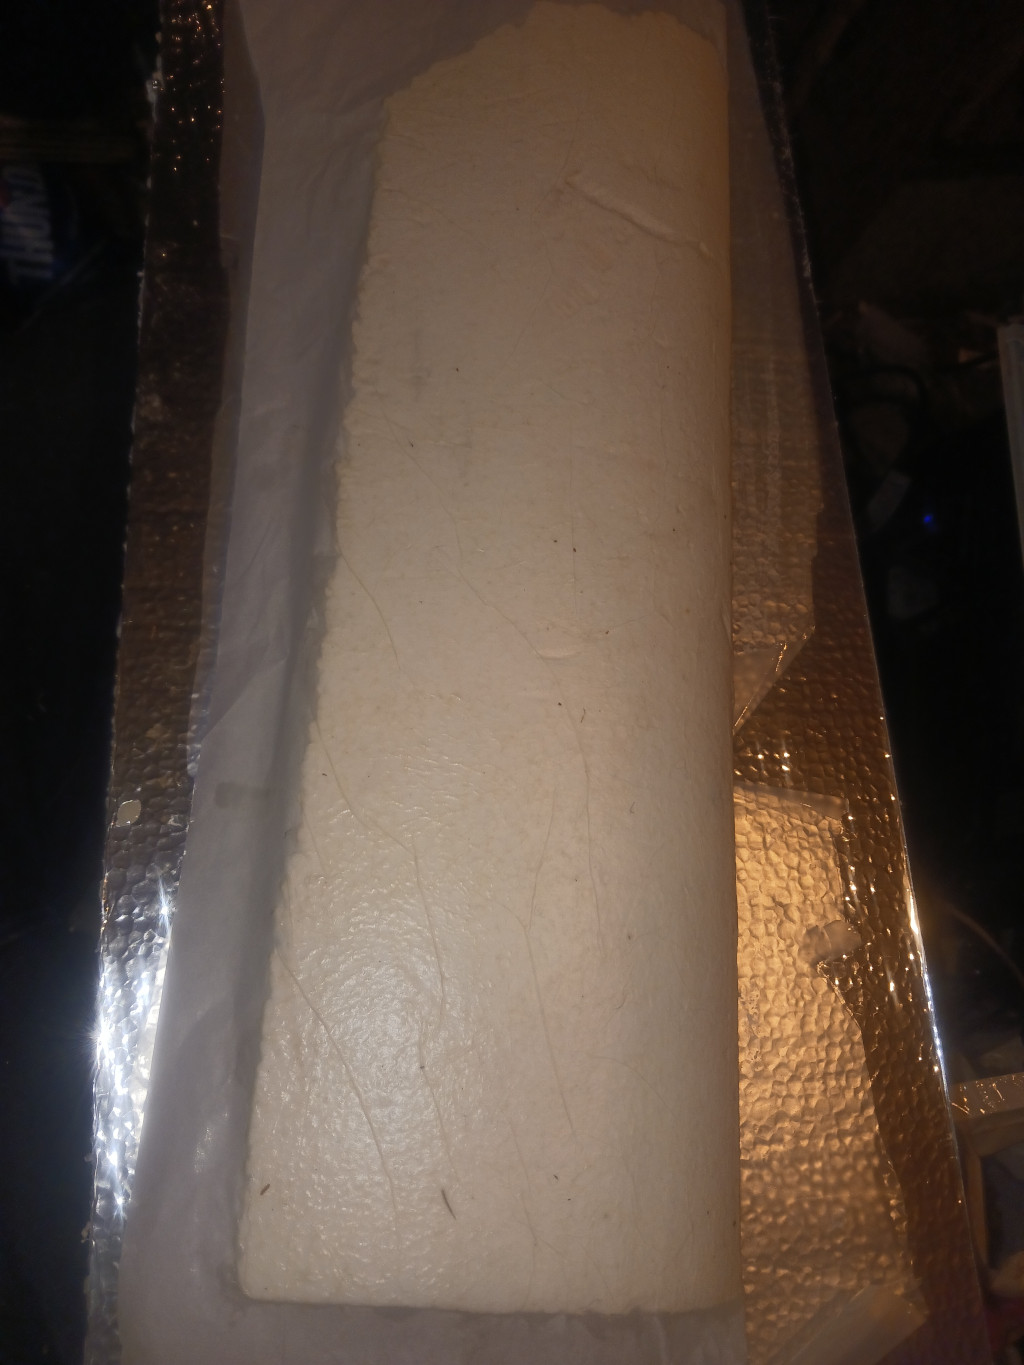
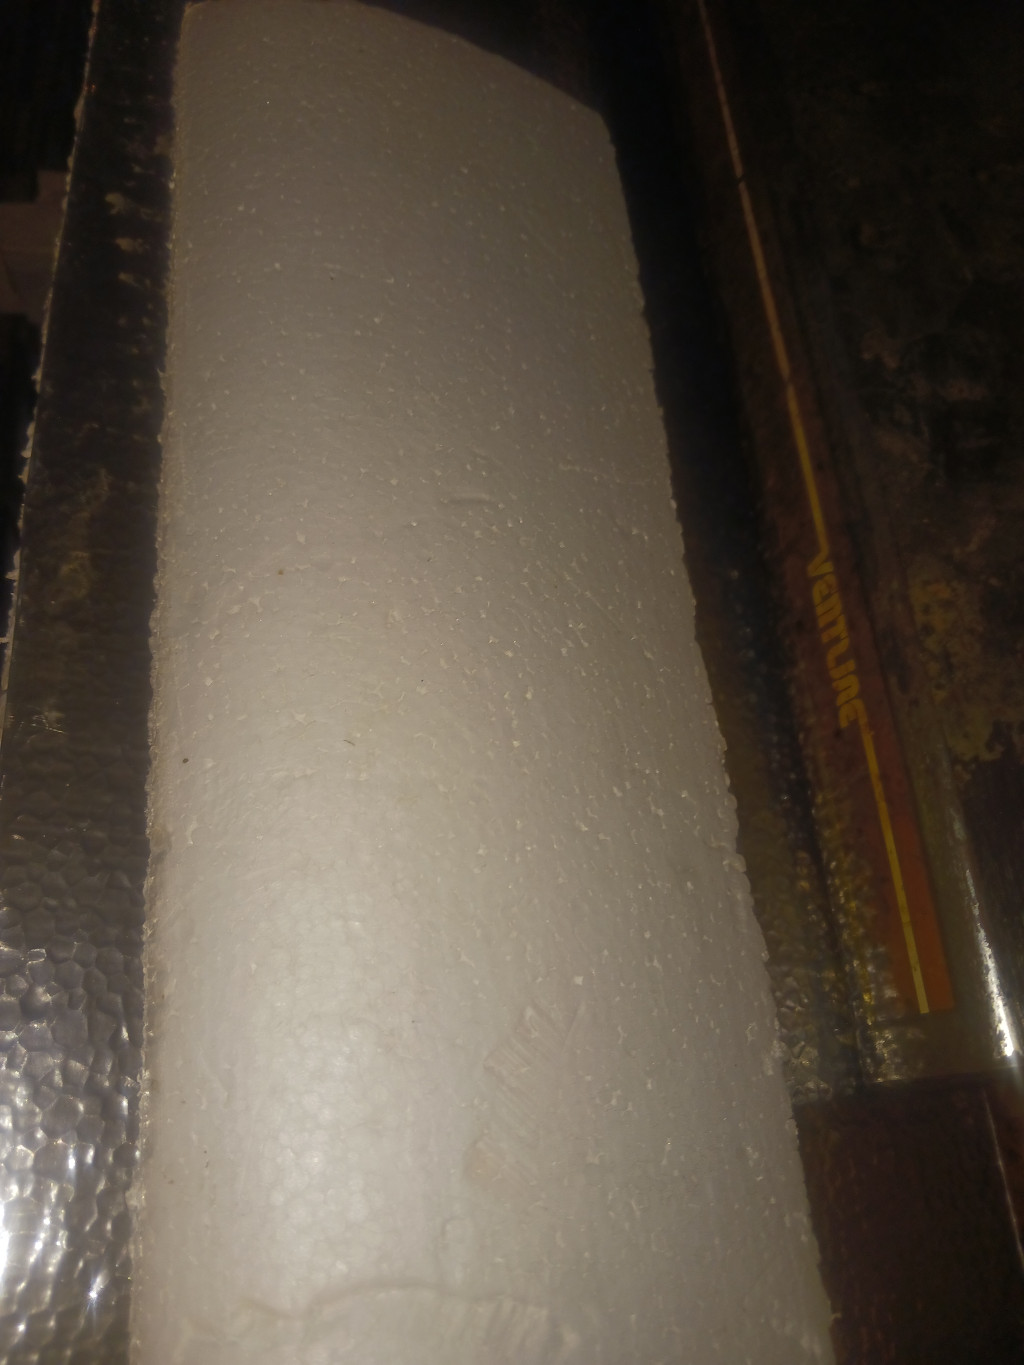
I've opted to try out covering a piece of scrap hot wire cut EPS with tissue using watered down pva/titebond to test it's strength and weight penalty for going this route. The piece came out far stronger then I could have imagined and the weight penalty was only 2 grams on this particular example, well within the tolerances to justify using on all of my EPS based planes. I'm going to be testing this with de-papered foam board next. You just brush on the glue and lay down the tissue, smoothing out the wrinkles and let it dry. I did both sides at once, I would recomend doing just one side at a time since it was a bit much to handle at the same time. This eliminates the need to add solid spars out of balsa/ply/carbon fiber, etc.,

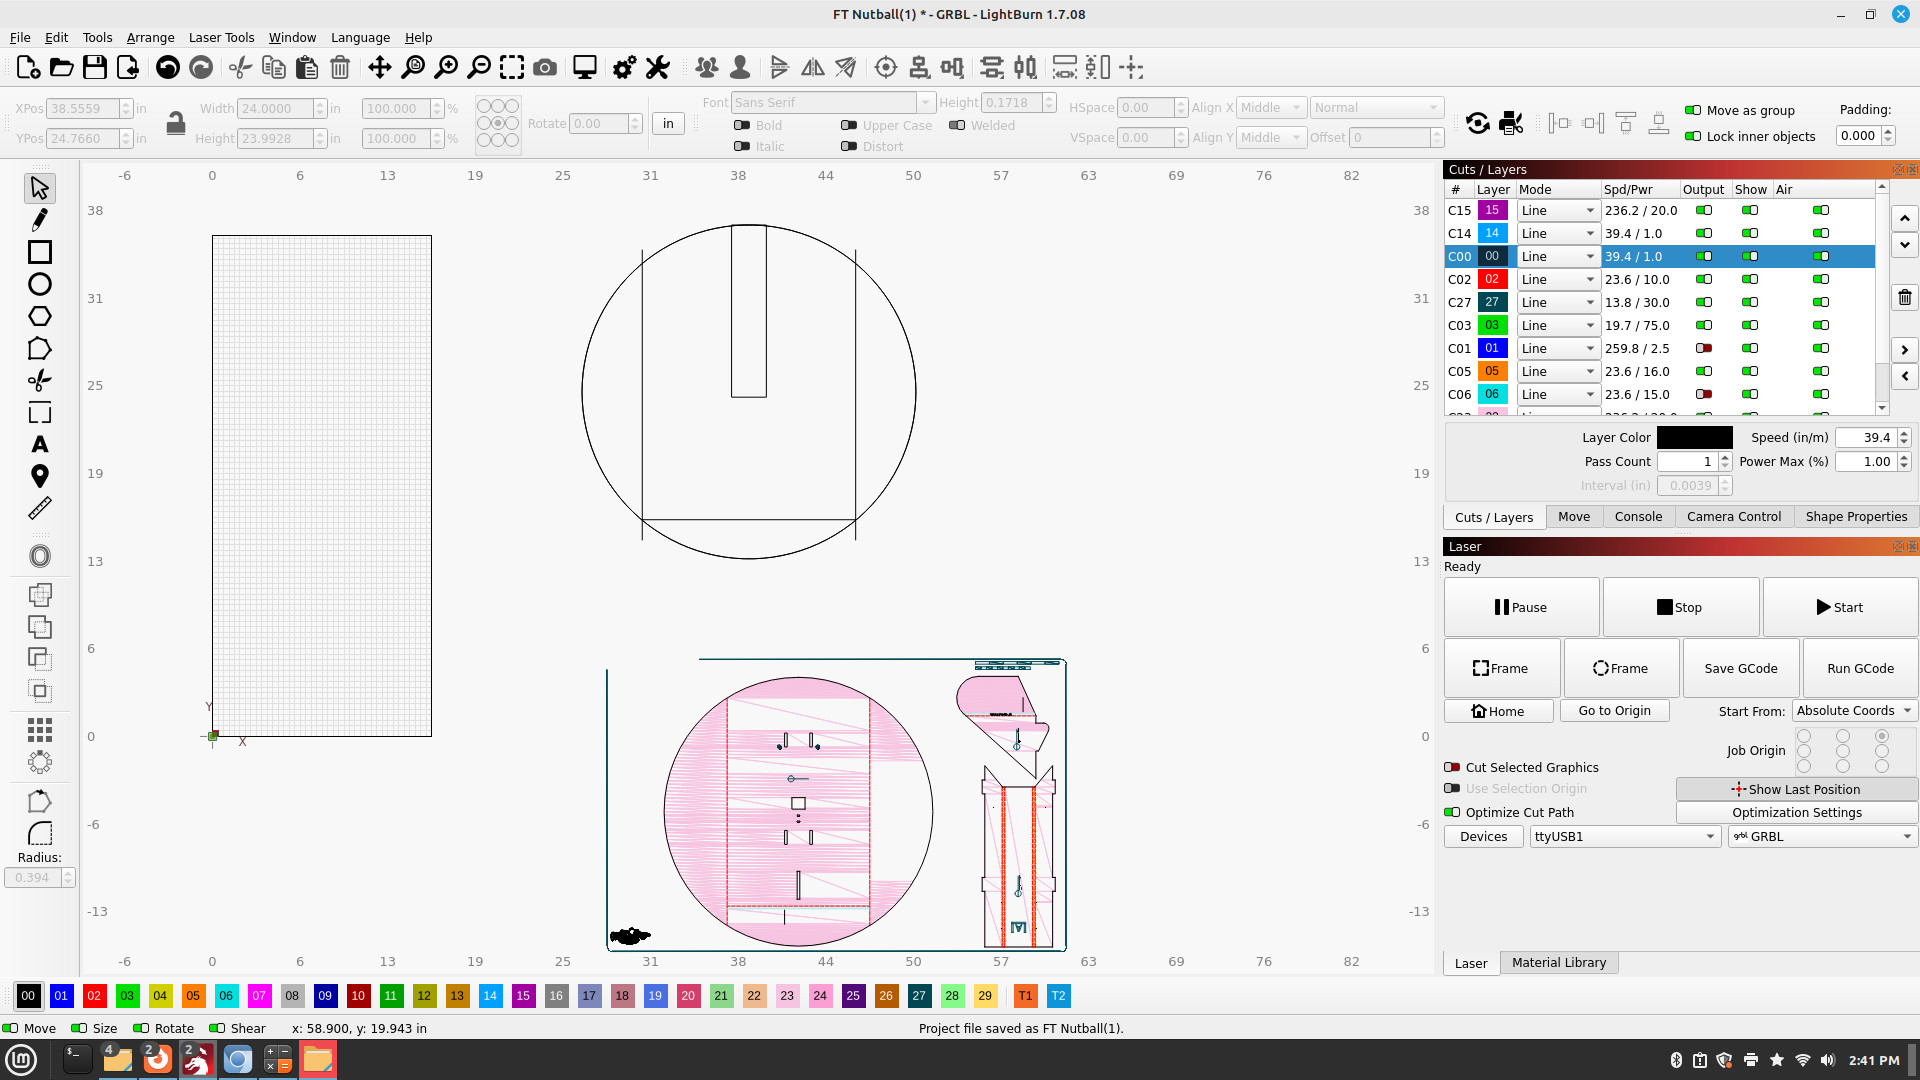
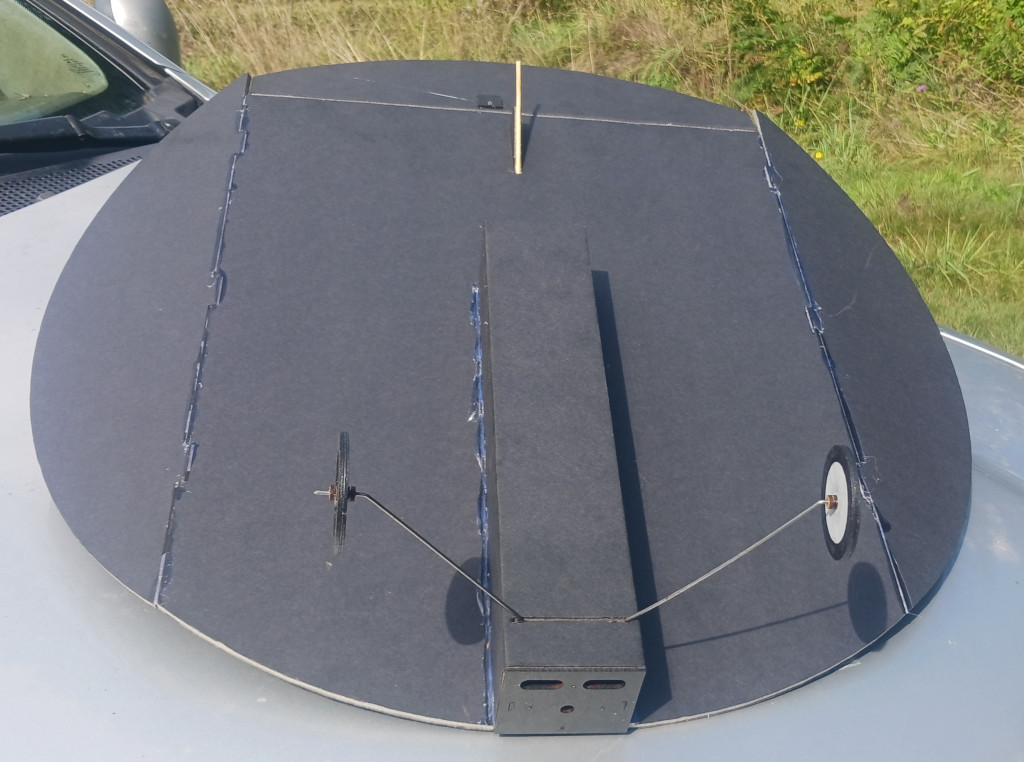
Second topic on this one. I found out my laser cutter can cut black foam board, it's just a low powered diod laser cutter which doesn't cut through white foam board but this new capacity means i'm able to start producing foam board based kits in addition to the balsa and eps ones I already produce. I'm starting with this one that goes back into being open source for the DIY crowd that I originally created in 2004 out of blue foam after testing it out in a smaller version via. electric free flight, the RC version was using old brushed and nimh gear and was underpowered so more of a foot note back in the day that later went on to my surprise with someone that copied it and converted to foam board, adding bl and lipo and it became a design with cult following. It was originally called the Flying Potato chip, named that by the admin in one of the minor forums and I shared it at Watt Flyer and RC Universe back then along with the Geo-Bat team, long story there, it was renamed Nutball by the guy that copied the design so it is what it is to this day called that.

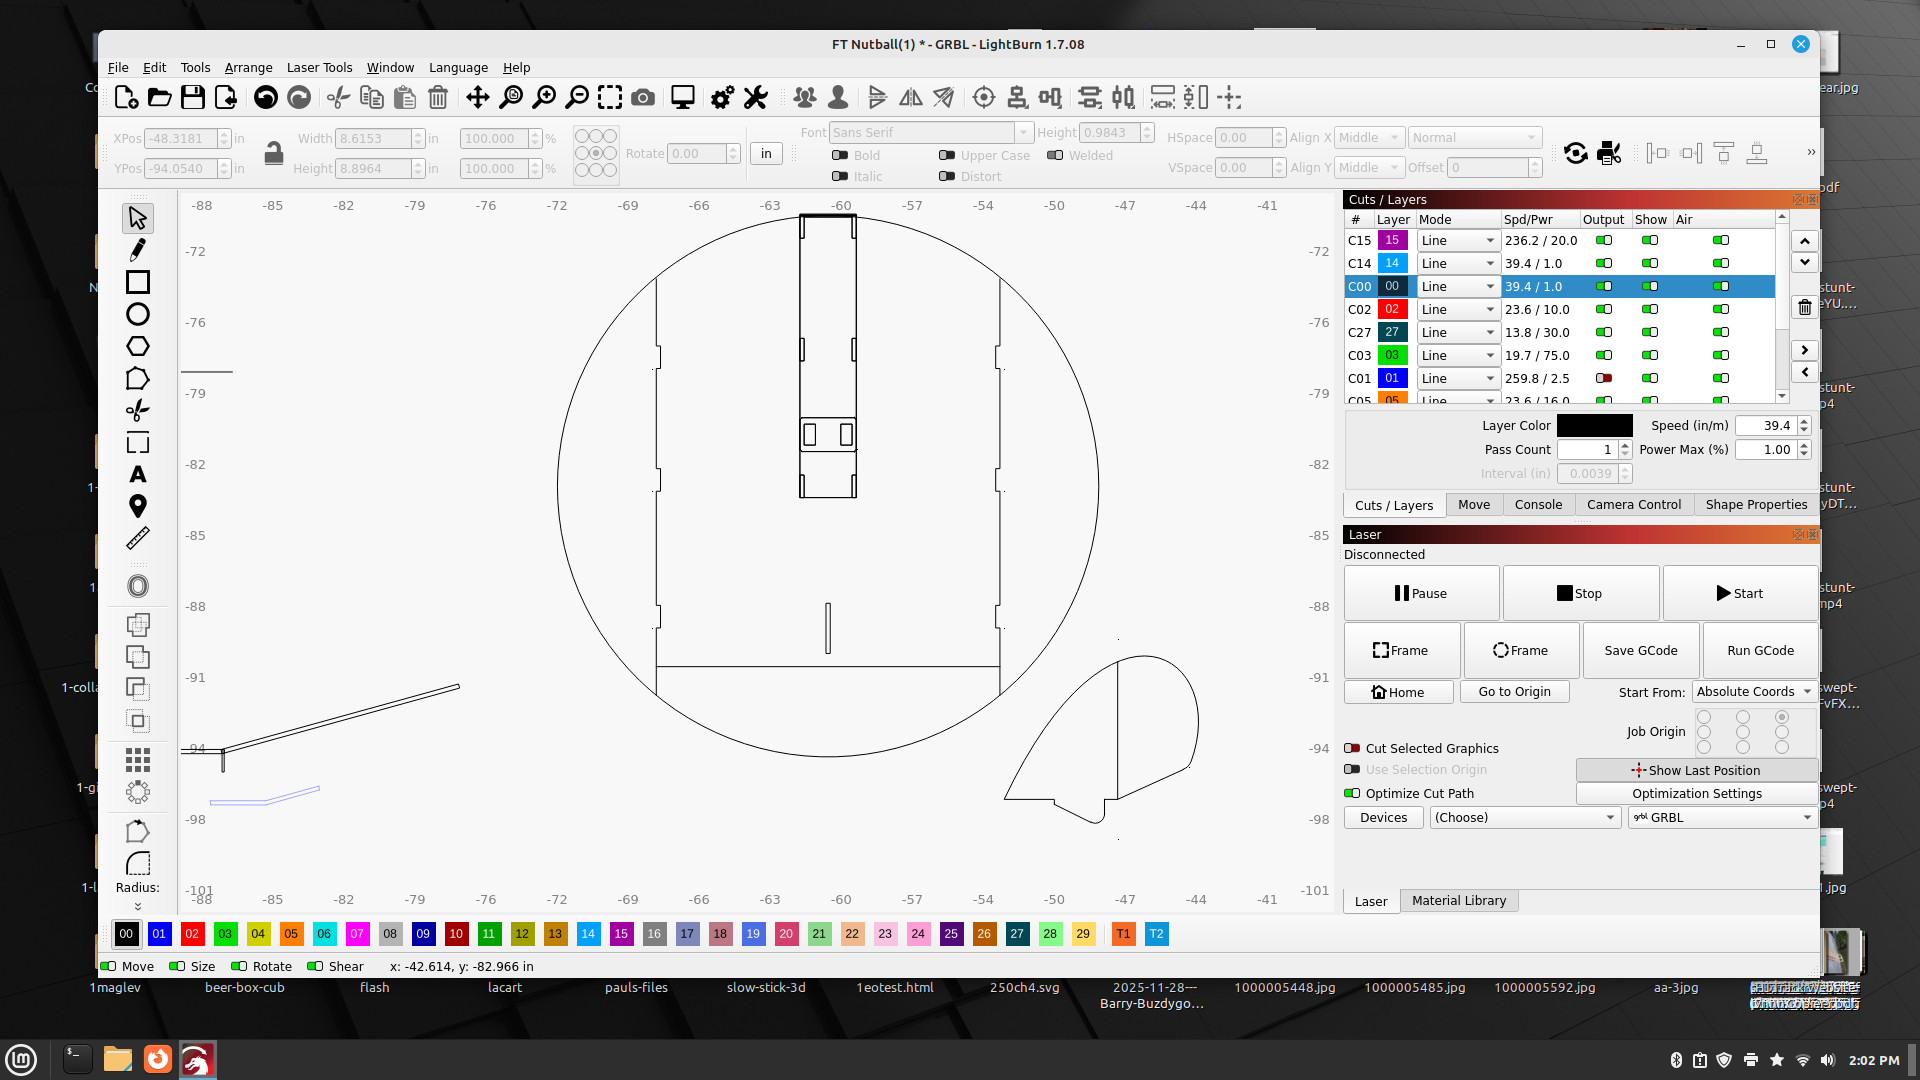
Going back to the original specs from memory, the saucerspan was around 27 inches. I opted to scale it back to 24" so it could be done up on the main sections of the middle taking up most of the width of a sheet of foam board and wing/dihedral sections taking up another sheet, they will be tab and slot connected. Take note, the winglets/dihedral sections being scaled closer to the original increases the center/flat lifting area, why the remake in 2008 had them wrong, he was going by just a photo I shared on the forums I suppose or creative liberty, it is actually counter productive since it reduced the lift area and overly done up dihedral is bad in cross winds. The rudder was close to the original, i modeled mine after a cub back then, I may revise it a bit to stand out from the rest there.

The reason it was tail feather control originally, I didn't have the gear for elevon mixing and I was just learning to fly. I went on with different shapes on the saucers including more complex dihedral patterns and to include aileron/elevator control which is what I used to learn how to fly with aileron control, still that solid body disc no matter how one goes about it traps air underneath and it has to flow out, one side or the other, like trying to stay balanced on a log that's floating in the water. Cutting a hole in the middle alieviates this problem which was explored in the 30's, and then, re-defined by the Geo-Bat team, of which I've been given endorsement and authorization to reproduce the Geo-bats for production on the kit lines. If you opt to go with the center cut out, you can increase it's glide ratio significantly by adding a lift, cambered airfoil on the h-stab section, it then functions as a tandem wing at that stage, it also reduces the amount of ballast needed in the nose.

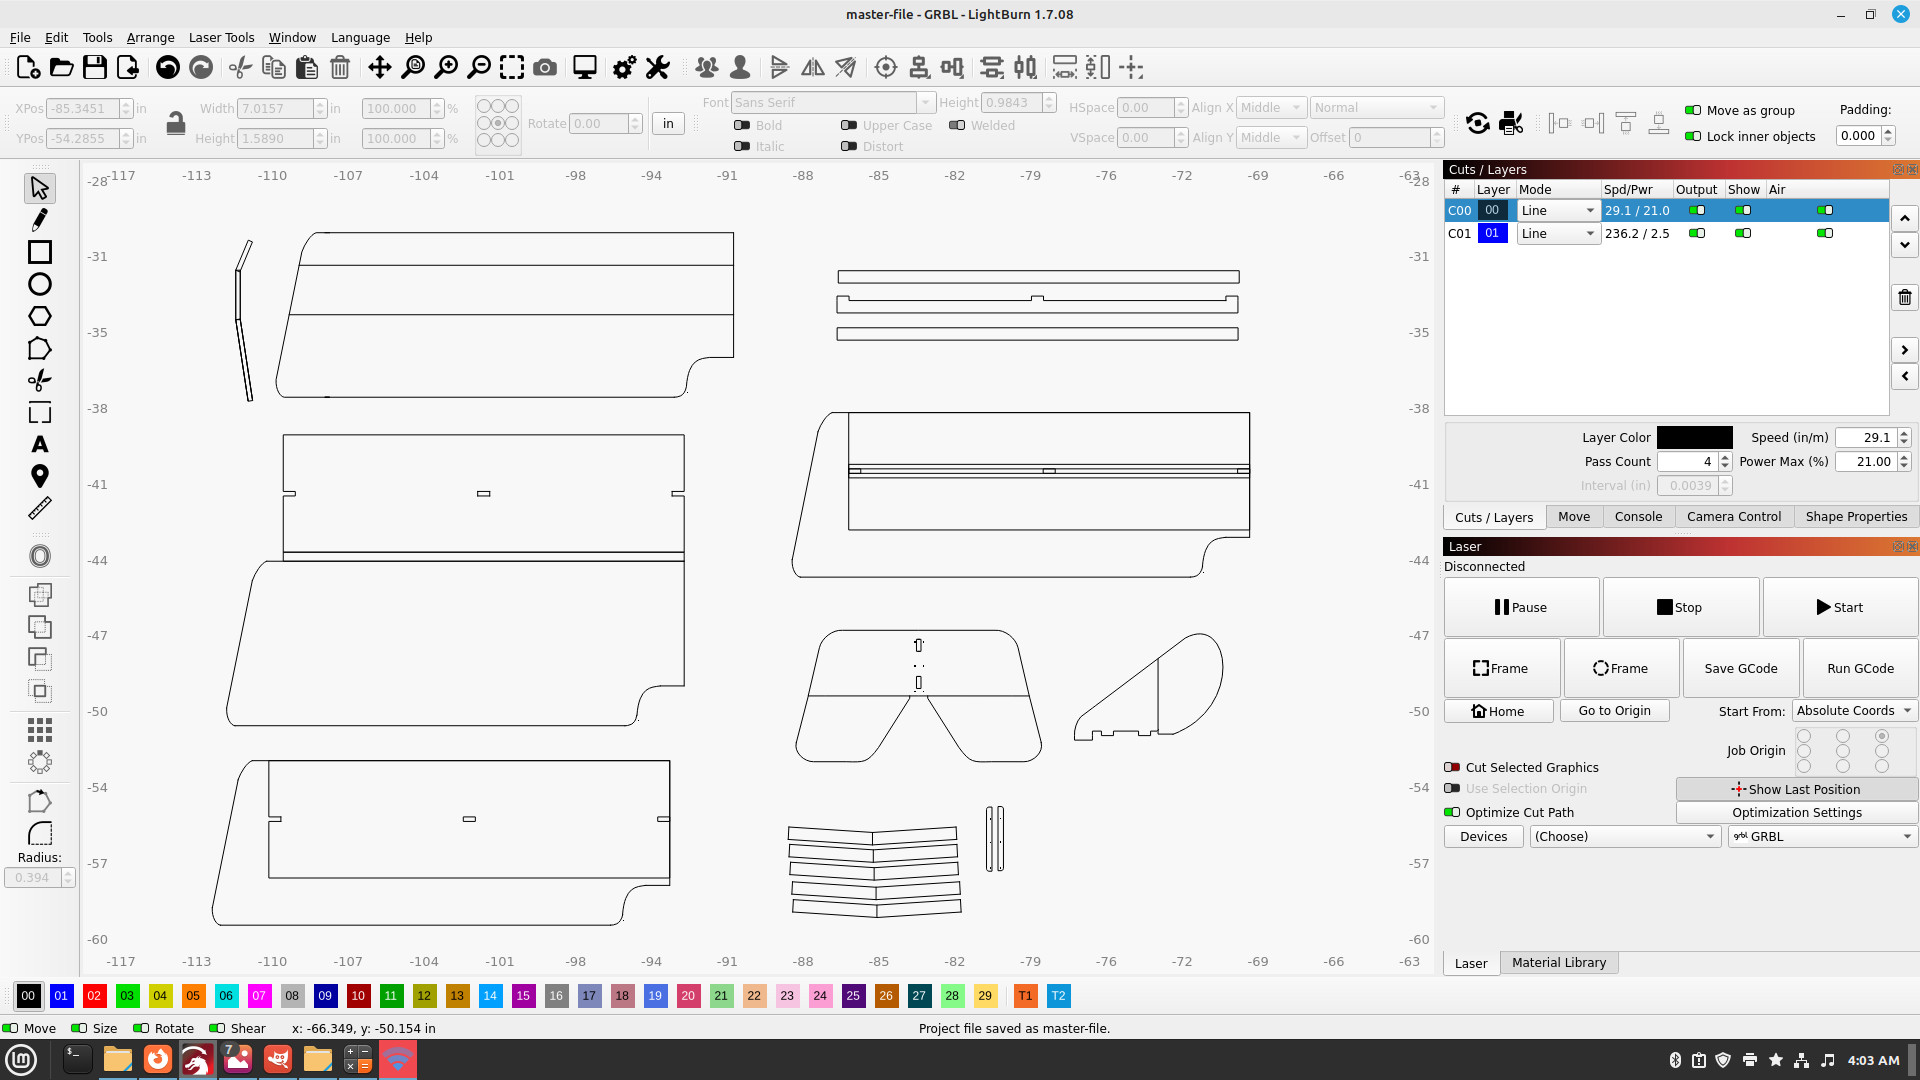
I'm showing it on the drawing board along side of the FT one which itself is just a copy of the copy done up in 2008 and reviewing all of the other ones, they all kept to that same format with little to no real deviation upon.
 

Attachments

  • tissue-foam-2.jpg
    tissue-foam-2.jpg
    176.4 KB · Views: 0
  • tissue-foam-1.jpg
    tissue-foam-1.jpg
    203.5 KB · Views: 0
  • new-nutball-1.jpg
    new-nutball-1.jpg
    308.1 KB · Views: 0
  • tissue-foam-4.jpg
    tissue-foam-4.jpg
    192.2 KB · Views: 0
  • tissue-foam-3.jpg
    tissue-foam-3.jpg
    196.1 KB · Views: 0

HappyRCFlyer

Active member
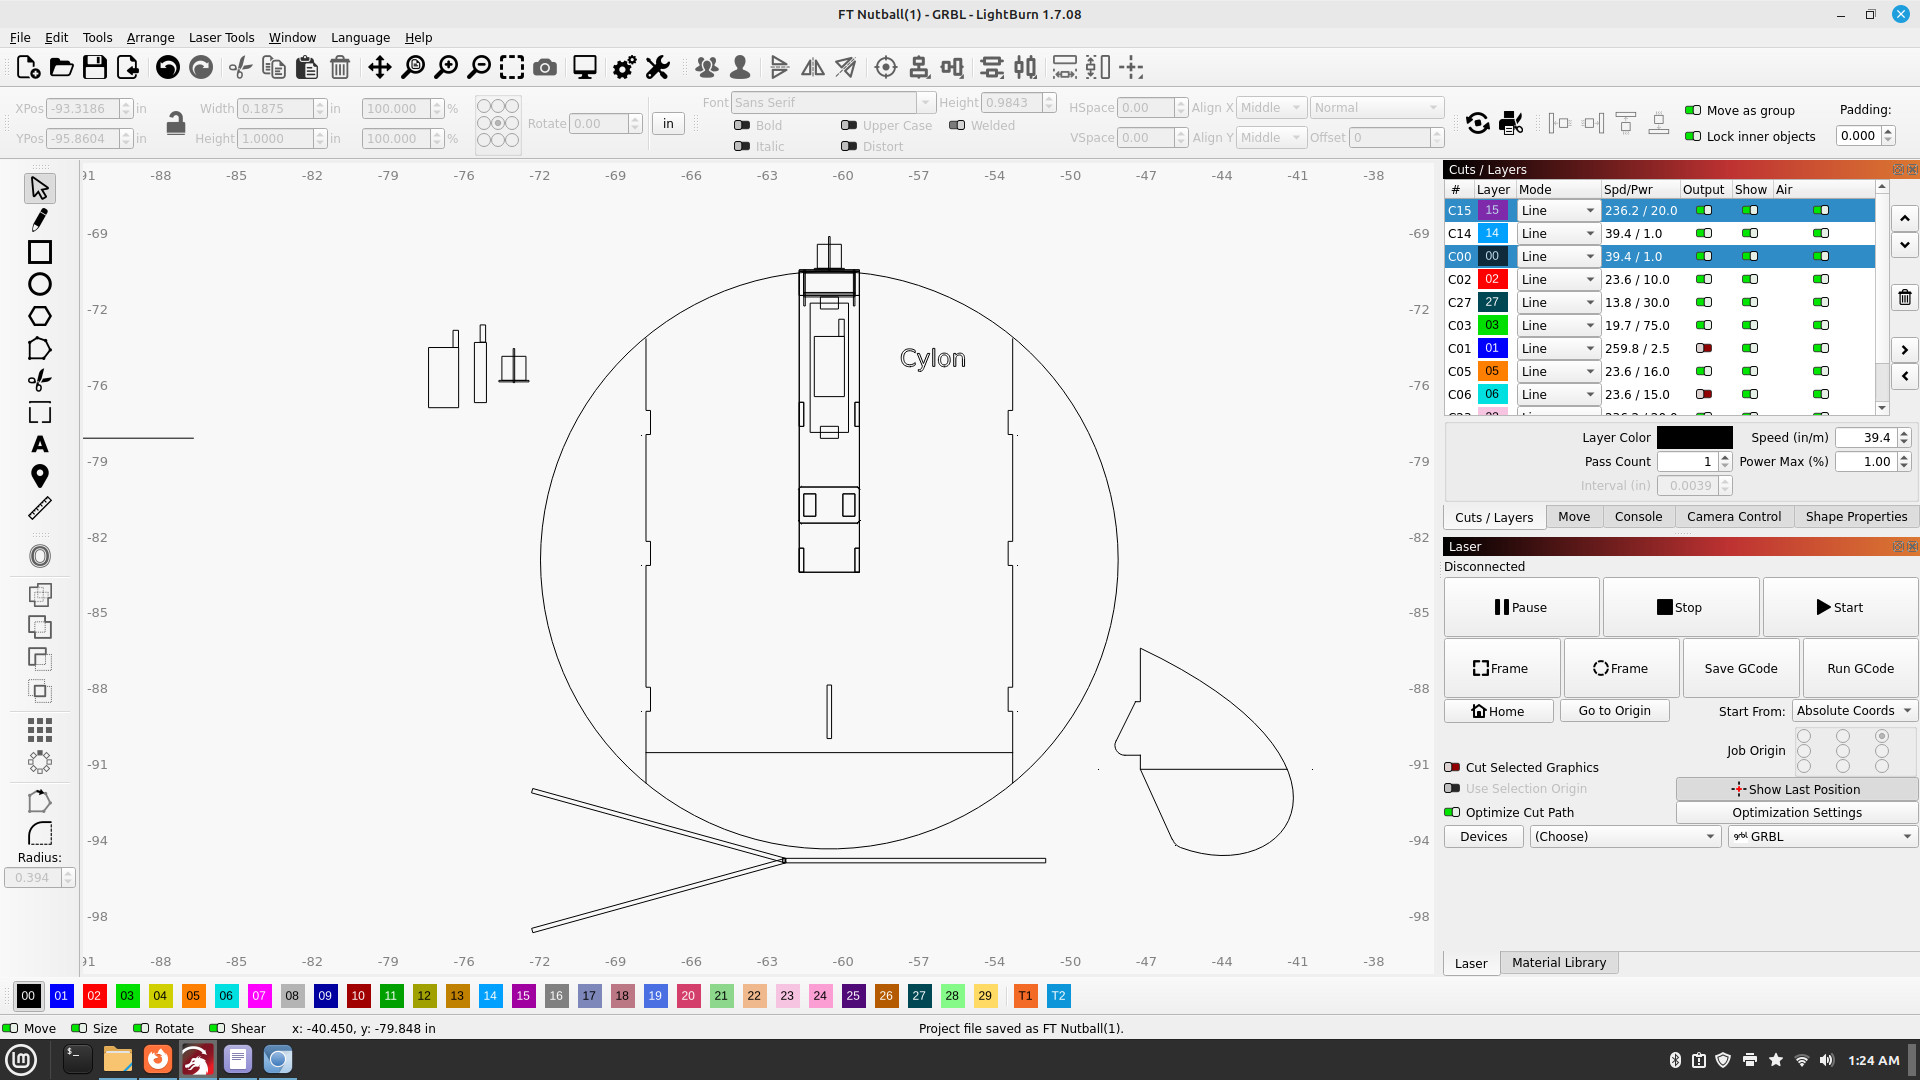
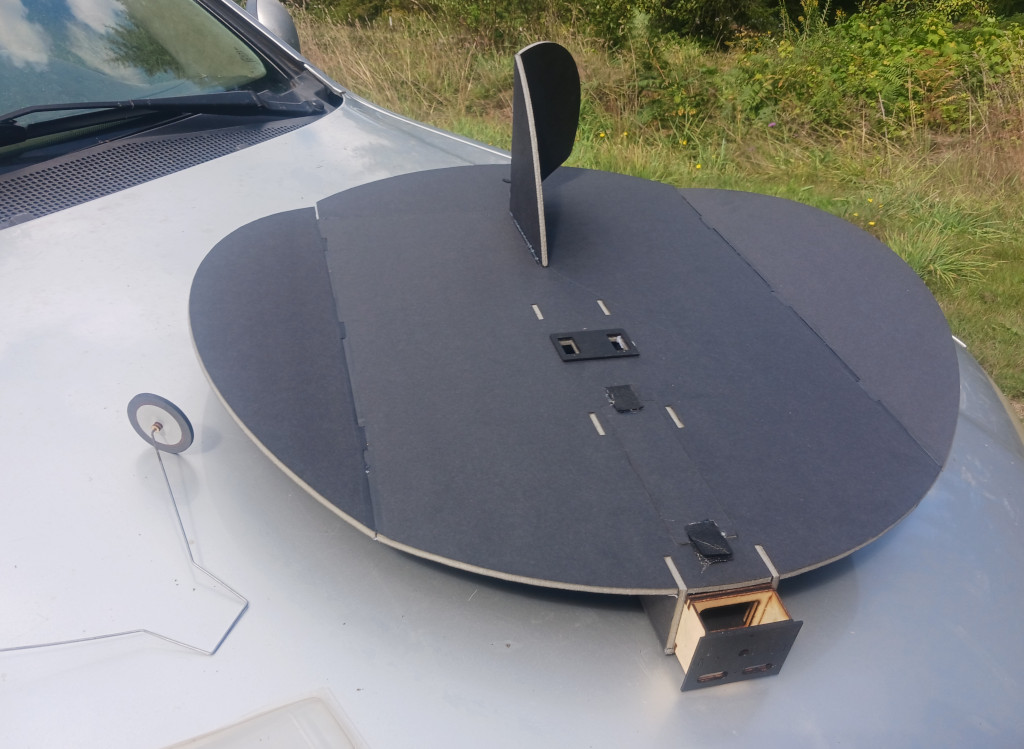
Further development. I had to increase the elevator to shorten the length of the main body so it's under a certain USPS shipping dimensional threshold to avoid inflated shipping rates and to avoid having to piece together from a flat sheet the main section, keeping it all in one piece there. The tail fin/rudder shaped to something closer to the original 2004 version. The fuse will not be removable, extra tabs in place there along with for greater strength and I'll be putting in an access panel so the battery can be placed within it and going to give myself some breathing room to adjust the position of the pack. This also allows for different sized within reason packs to be used along with.

The winglets are tab and slot connected, it gives more strength then bull nosed connection and due to the size, the disc can't be cut from just one piece of foam-board anyway, there will be a dihedral jig added to the foam cuts for setting that element. Amazingly, the standard servo tray I use for the Slow Stick lines is a perfect fit so no need to create anything new for that element.

What's next outside of setting the access panel. Establishing a spot for optional landing gear to be added, some kind of decorative canopy, also optional for use, control horn mounting plate to cover more surface area on the foam, I'll still be using my standard ASA 3d printed control horns. Also, it needs an additional side name to differentiate itself from the others that are out there along reference.

Beyond all of this, there will be areas that regular wood glue will be used, not just hot glue.
dev-1.jpg
 

HappyRCFlyer

Active member
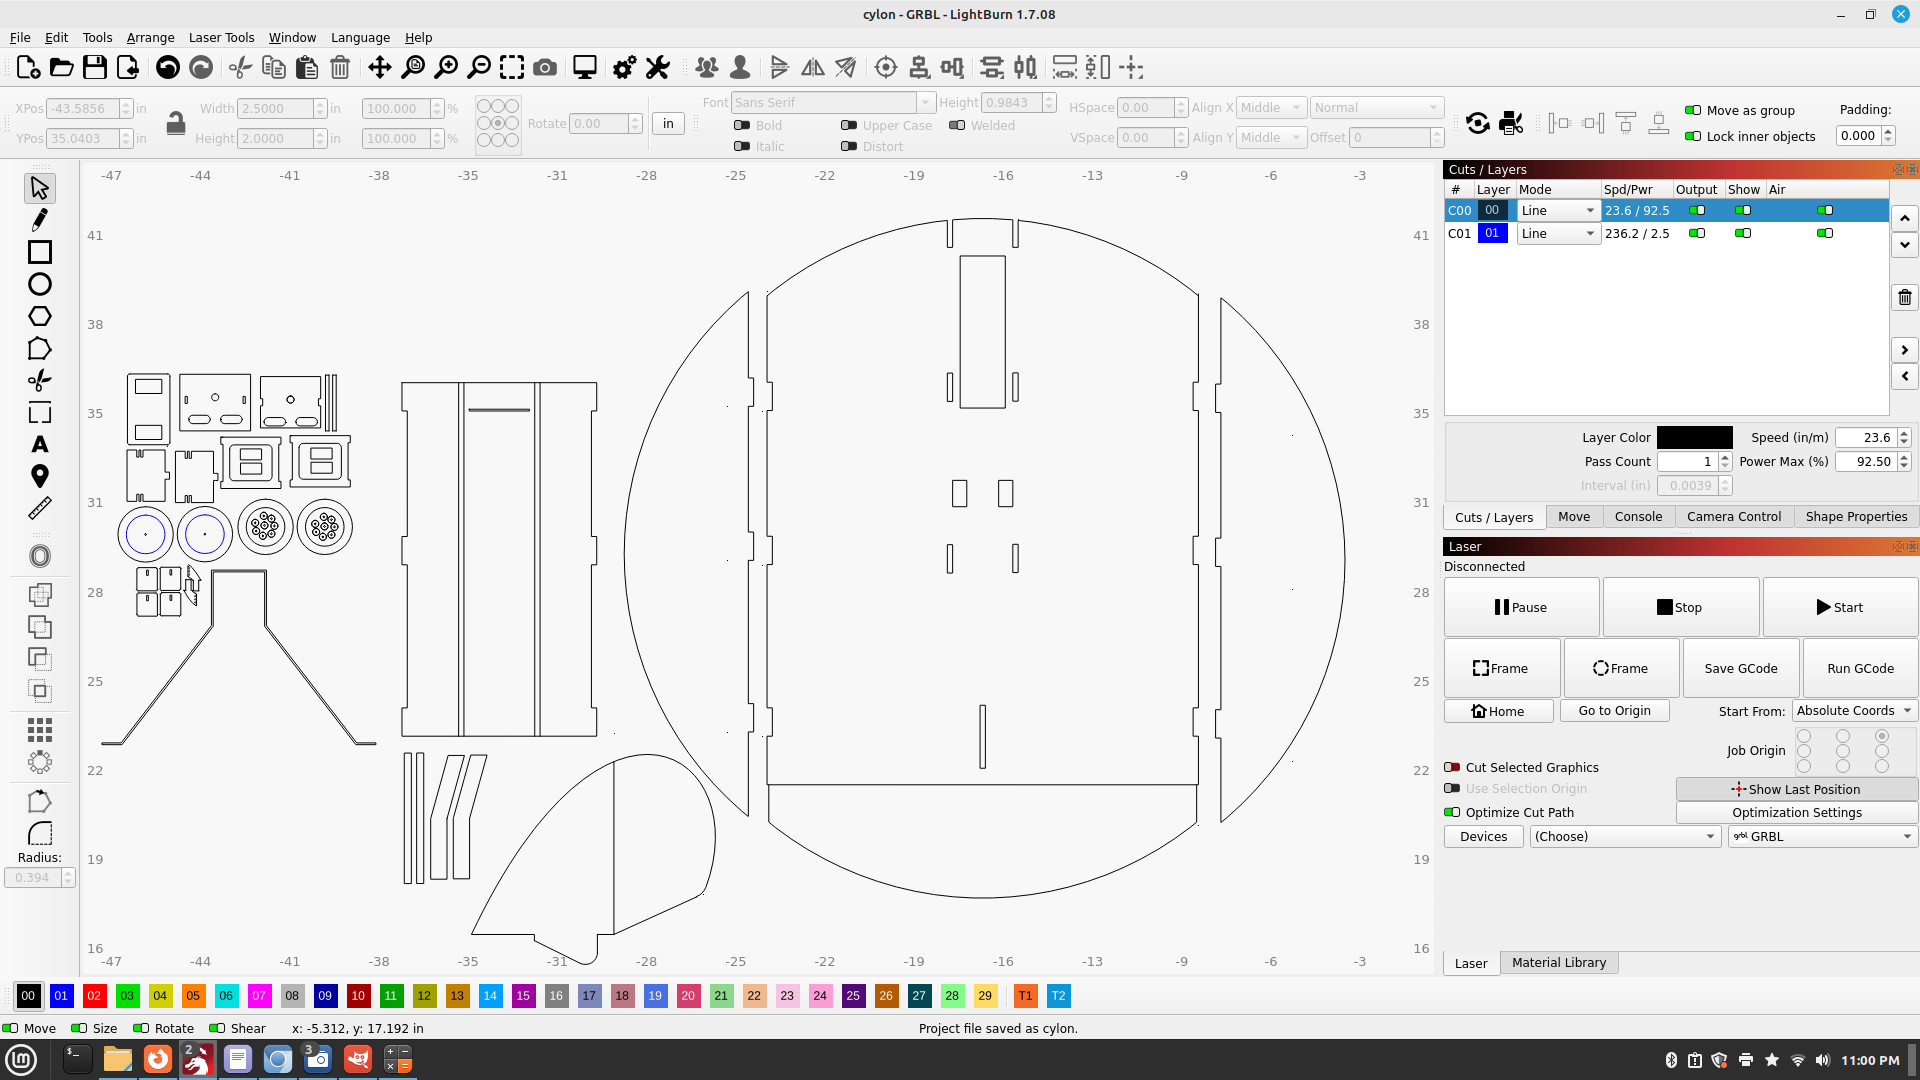
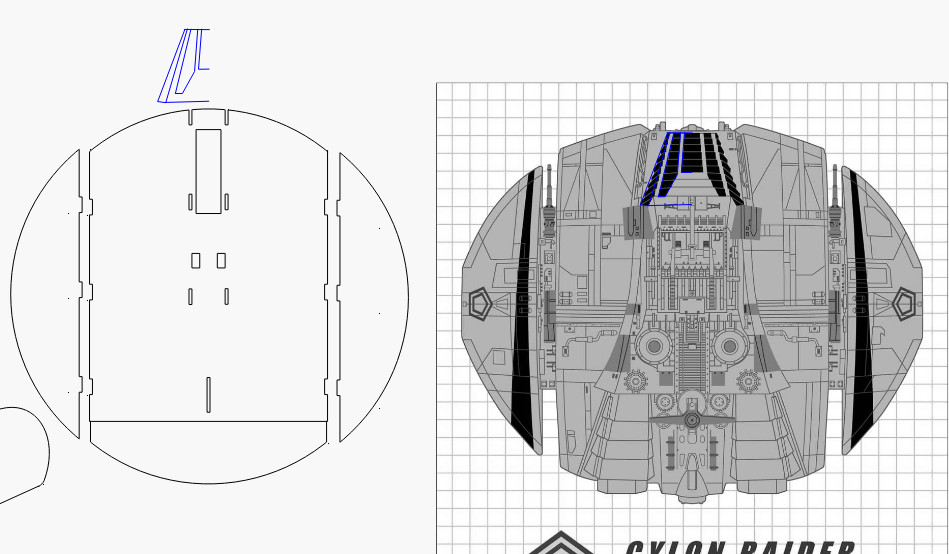
It's given the name, simply, Cylon, Battle Star Galactica fans or that have heard of them are familiar with the name already. It's been by default the shape or their fighters, it makes most sense to go this rout calling it them and leaving behind the stupid name dubbed in 2008, Nutball and better then mine in 2004, Flying Potato Chip. The winglets can be doubled up, how it's going to remain rudder only control on the banking, may or may not be doable going that route though so revision would be required for elevon type of control, for now, just the uppers in place it's regular rudder elevator control just fine.

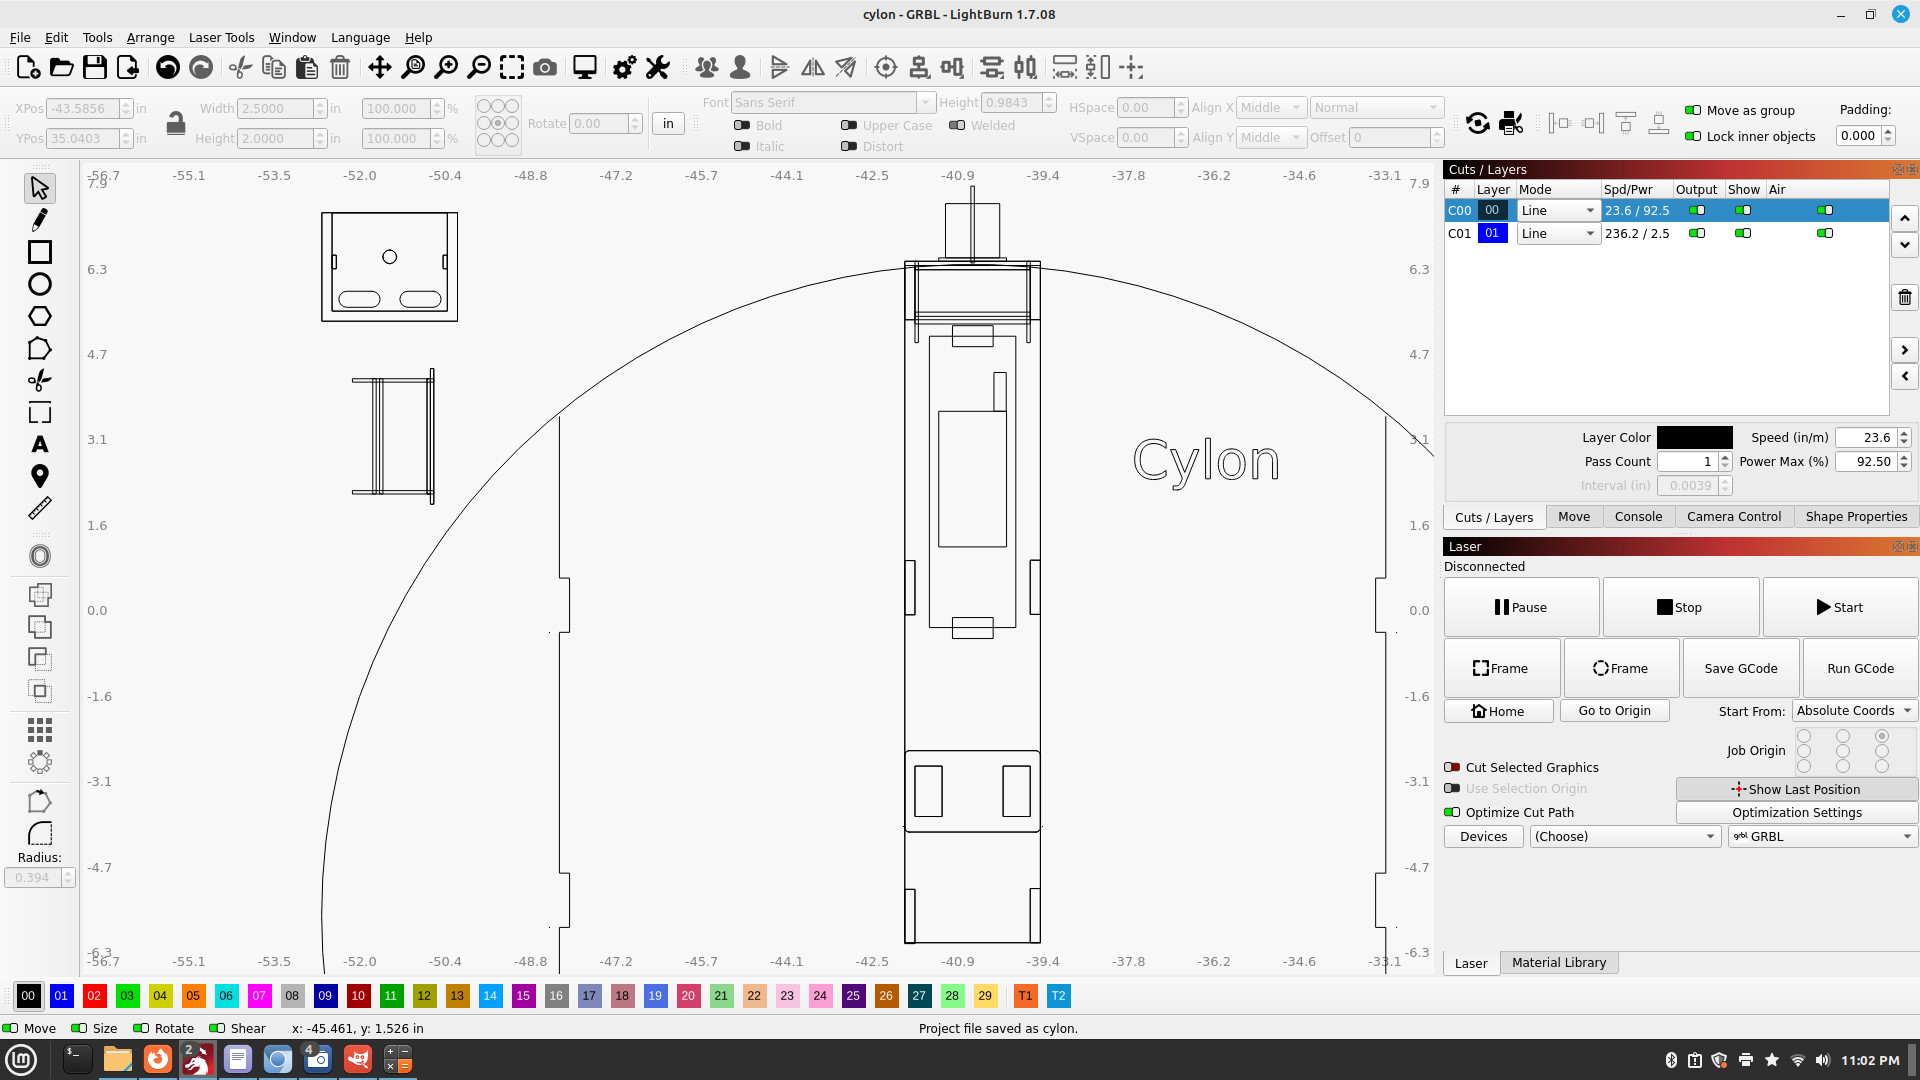
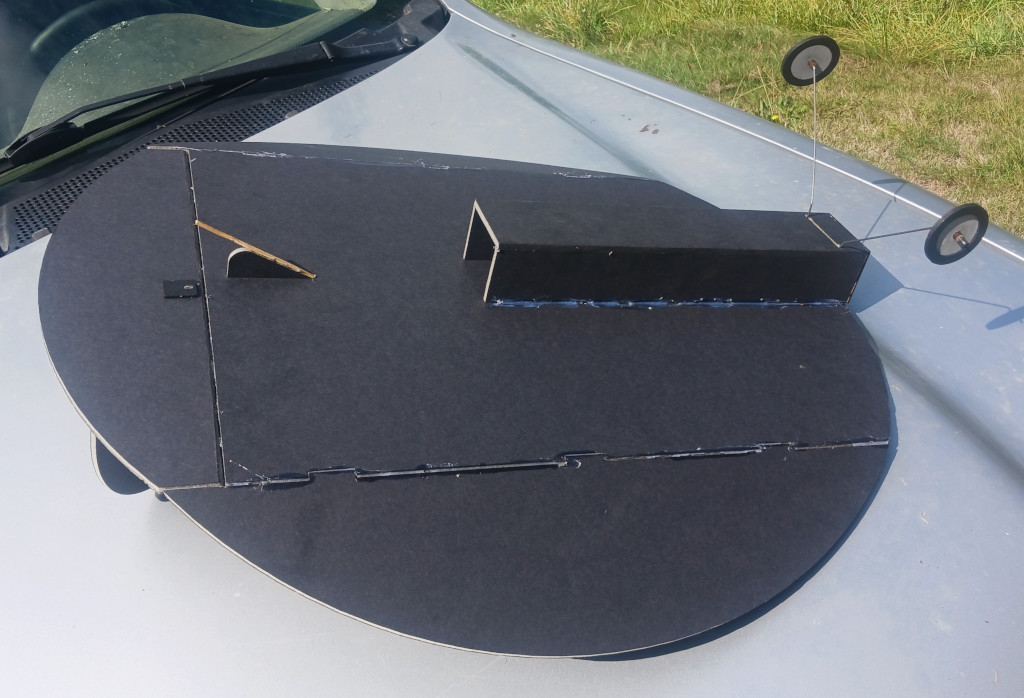
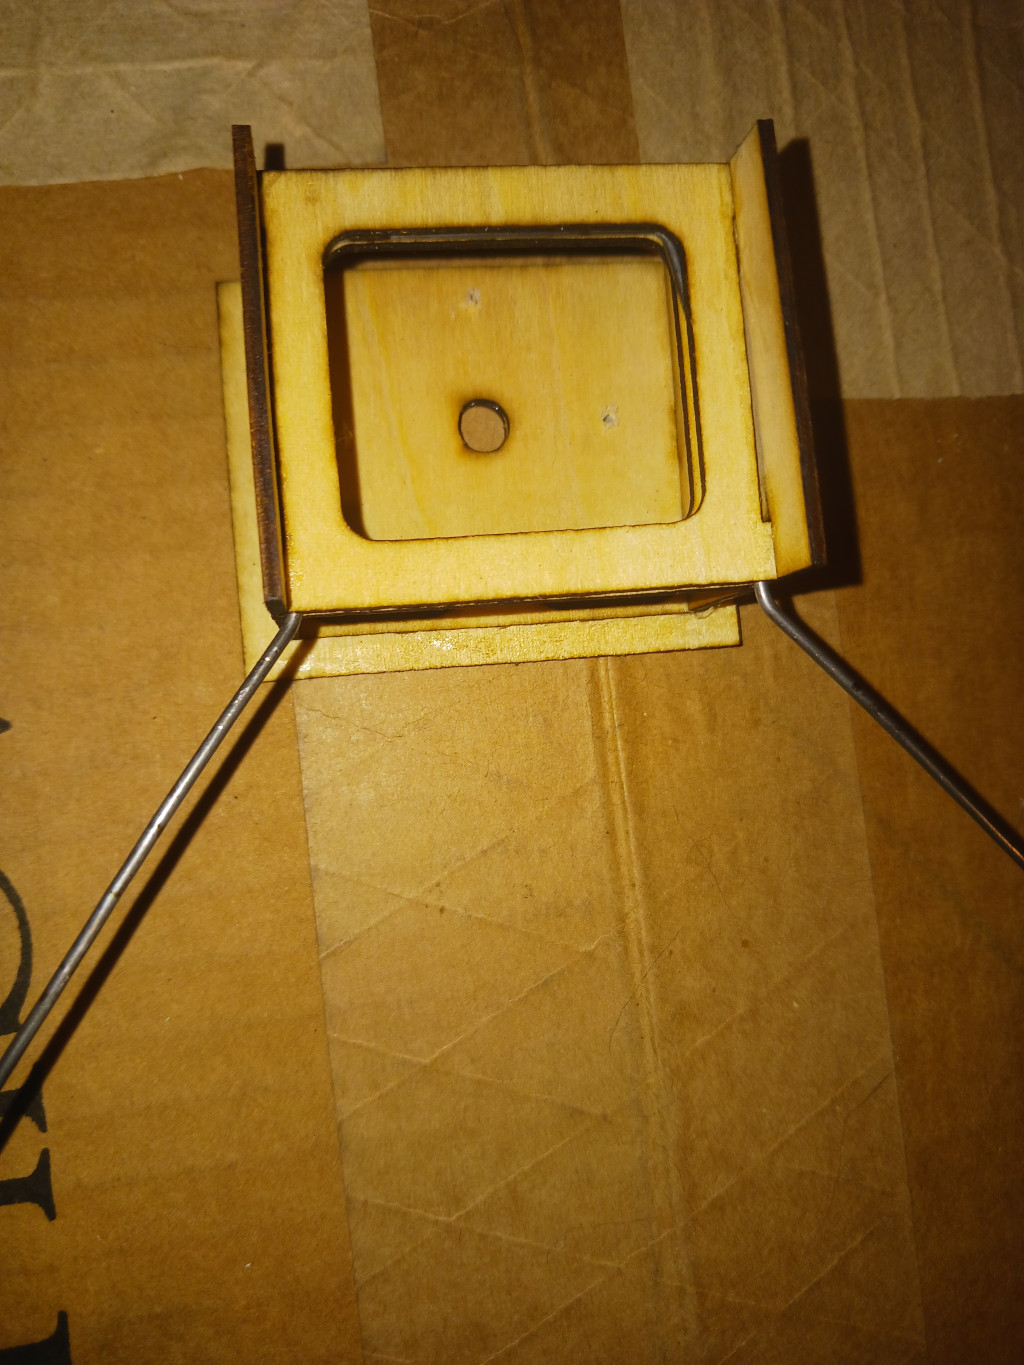
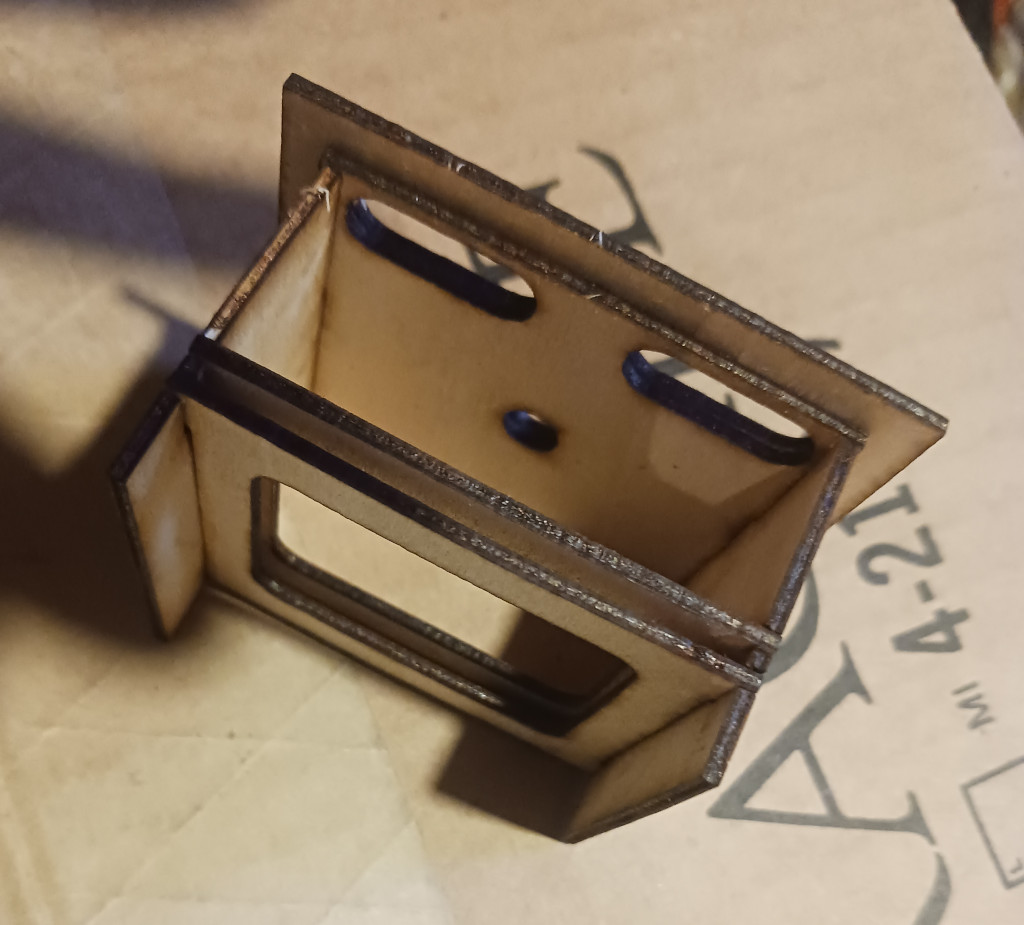
I went with a standard, cheap Park Flyer motor and my regular slow stick and 250 series kit planes for the pack, nothing special nor expensive planned for the 25-30 amp esc either. The access panel will be cut into the top of the center of the saucer/fuse section with some velcro hot glued in for holding the pack inside of the lower fuse/tube area along with the esc and wires. I also added some thin ply former stock for the capacity to slide in some removable landing gear piano wire. I'll be doing the front profile for all of those next.

I revised more along the motor mount system for a beefier set up, that was also needed for tying in the landing gear and given the looks of it all so far, there won't be a weight penalty, I may need a bit of ballast to get it's CG correct. That CG mark is in the middle of the center of the front tab at 25%, I may move it forward a degree or two anyway though for easier handling due to it's solid body lift body format.

I should be cutting this up within the day.
 

Attachments

  • cylon-1.jpg
    cylon-1.jpg
    260.4 KB · Views: 1

HappyRCFlyer

Active member
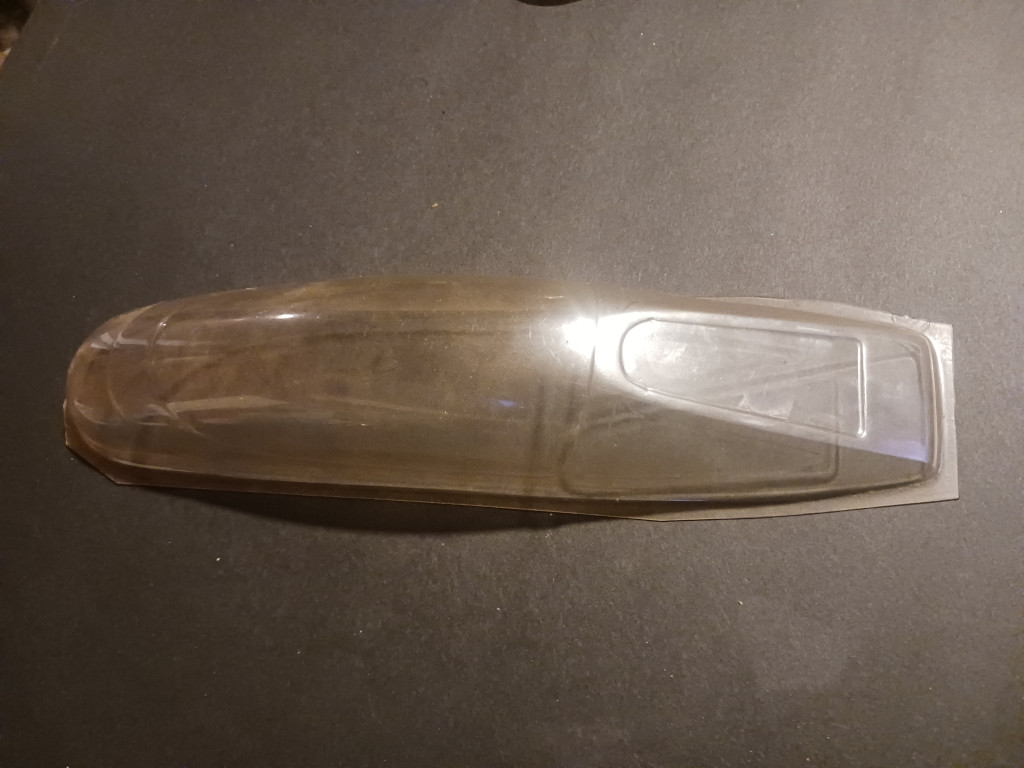
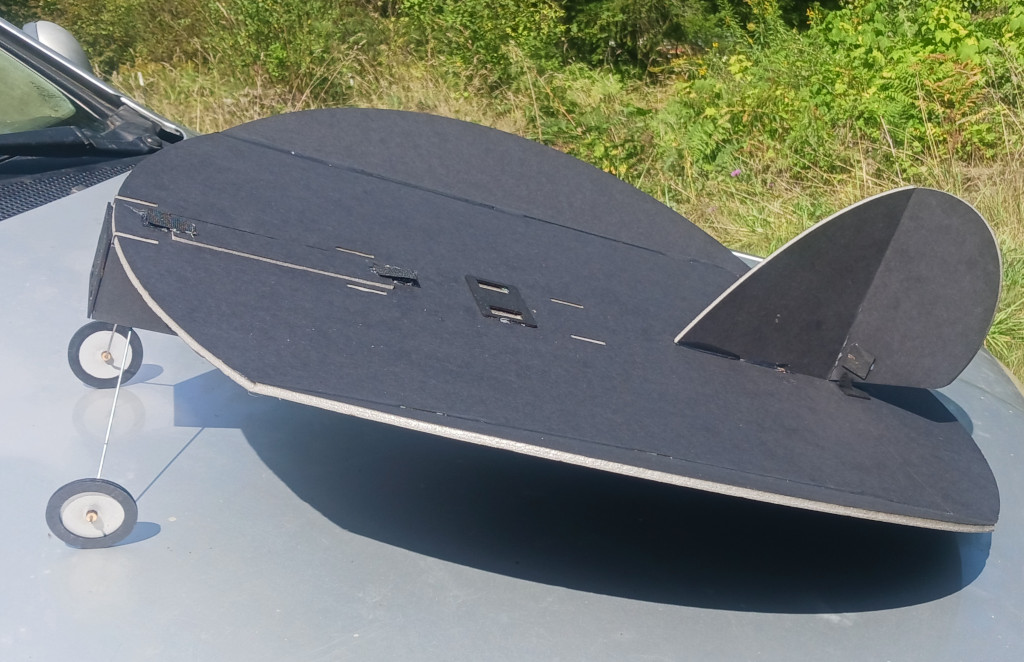
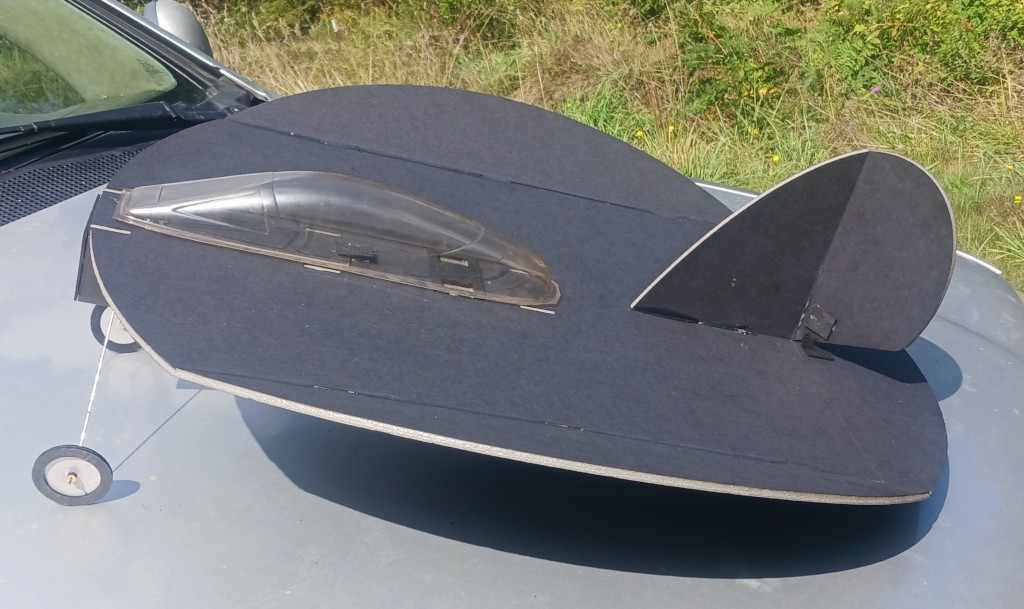
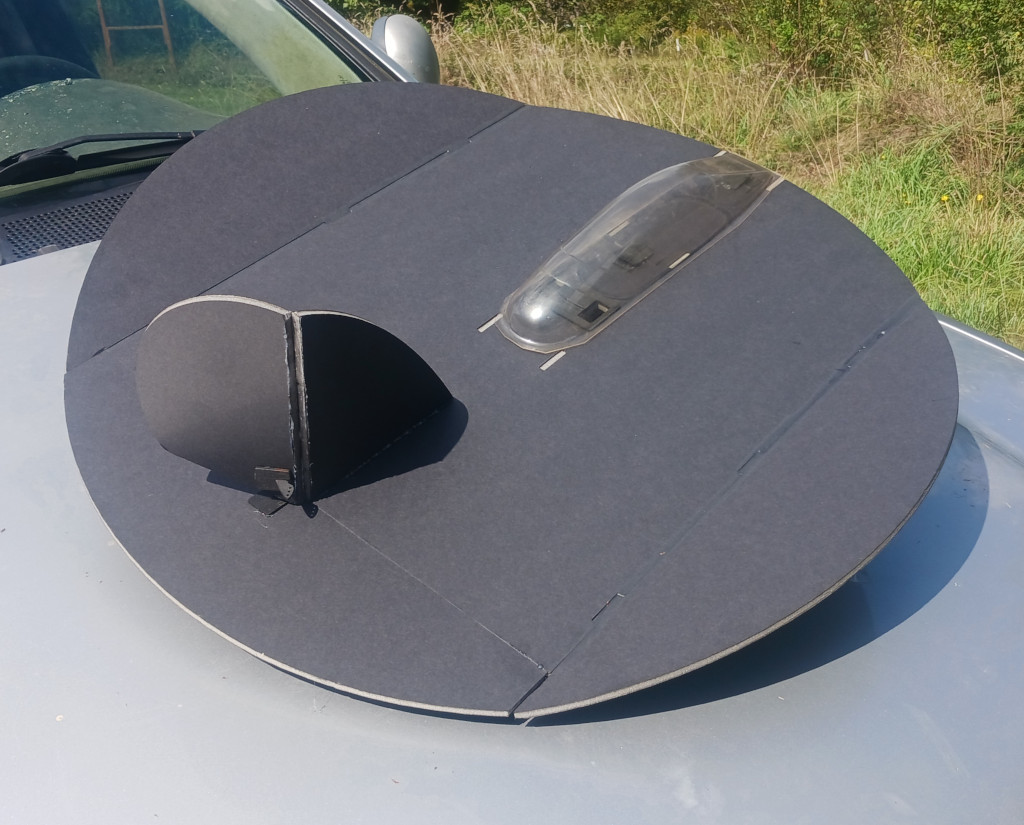
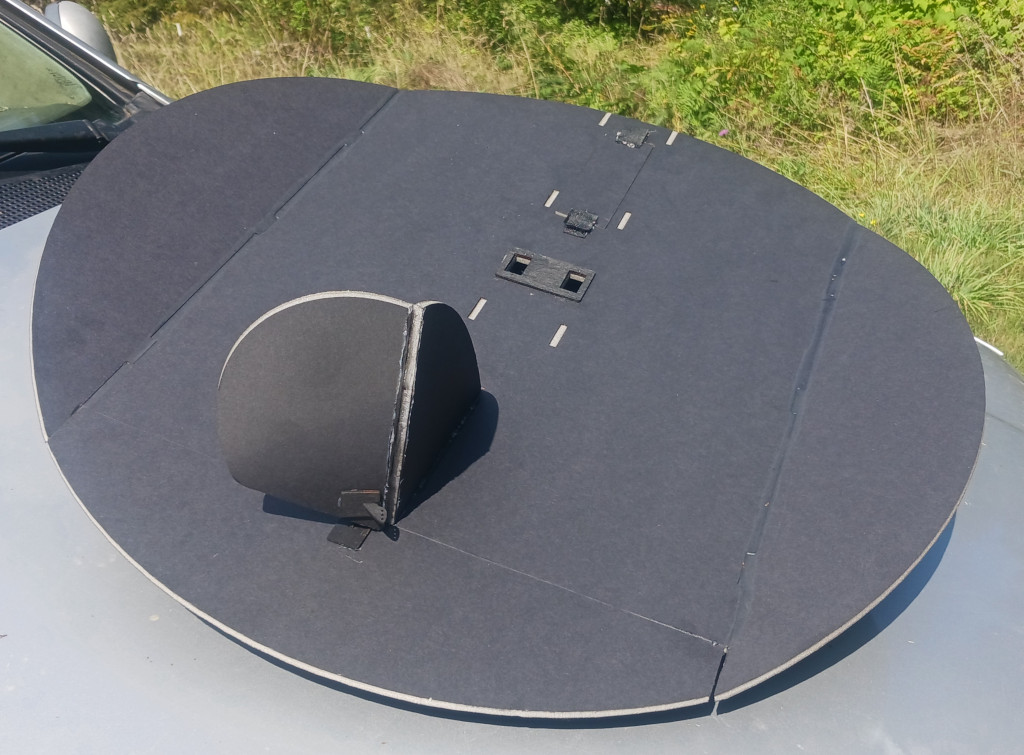
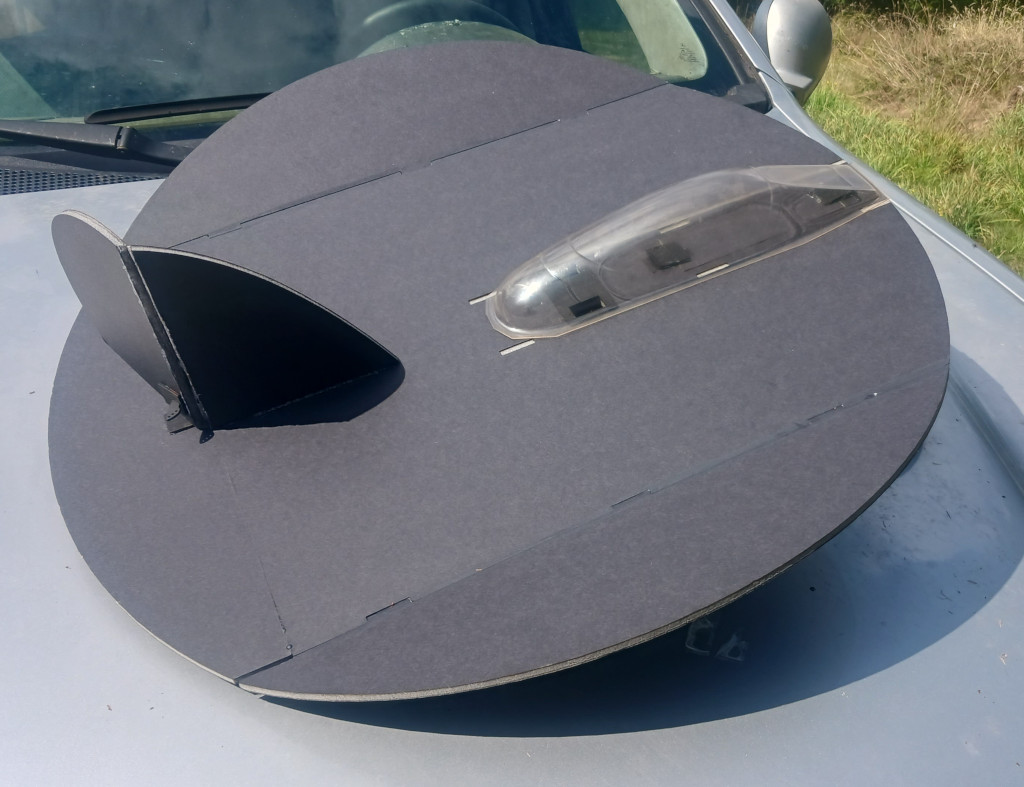
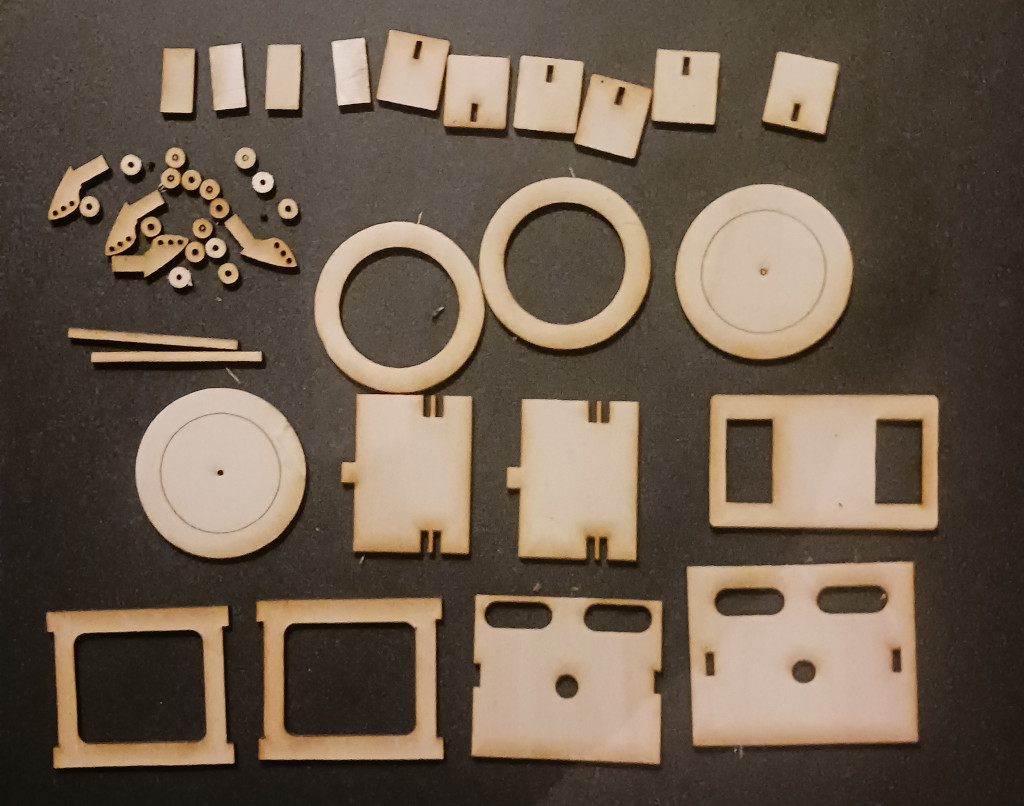
It's finished and ready to lay down to the cut sheets, cut and assemble. I did not include a canopy/cockpit, nor did I cut the slots for the control horns, leaving those up to the preference of the builder. I do have an old canopy from a SIG kit that I have on hand, will see how it looks and decide if I want to use it on this, I suppose even hacking apart a soda bottle would work just as well.
 

Attachments

  • cylon-3.jpg
    cylon-3.jpg
    256.9 KB · Views: 0
  • cylon-4.jpg
    cylon-4.jpg
    237.7 KB · Views: 0
  • sig-canopy.jpg
    sig-canopy.jpg
    120.9 KB · Views: 0

HappyRCFlyer

Active member
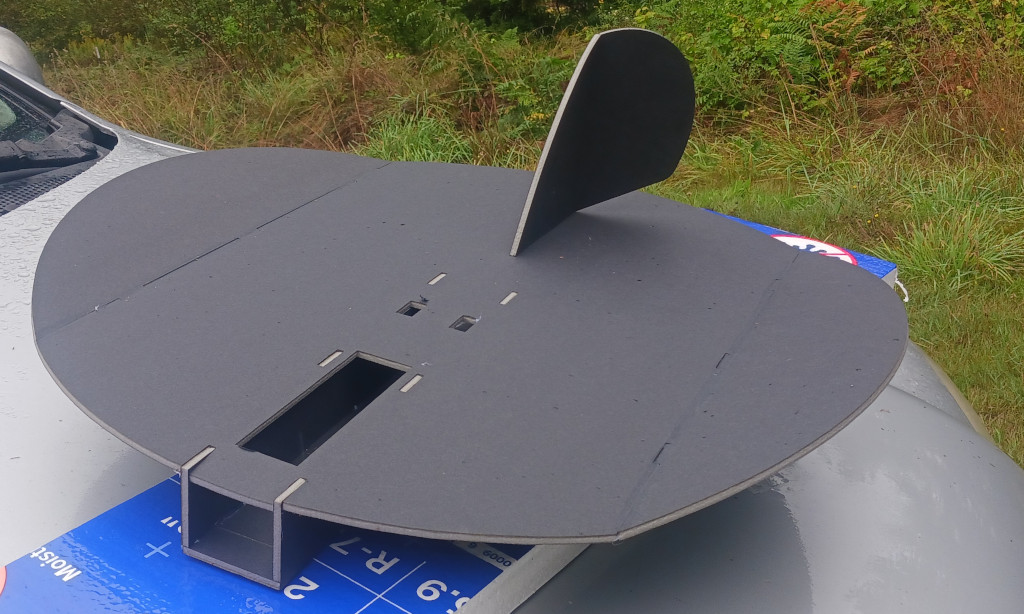
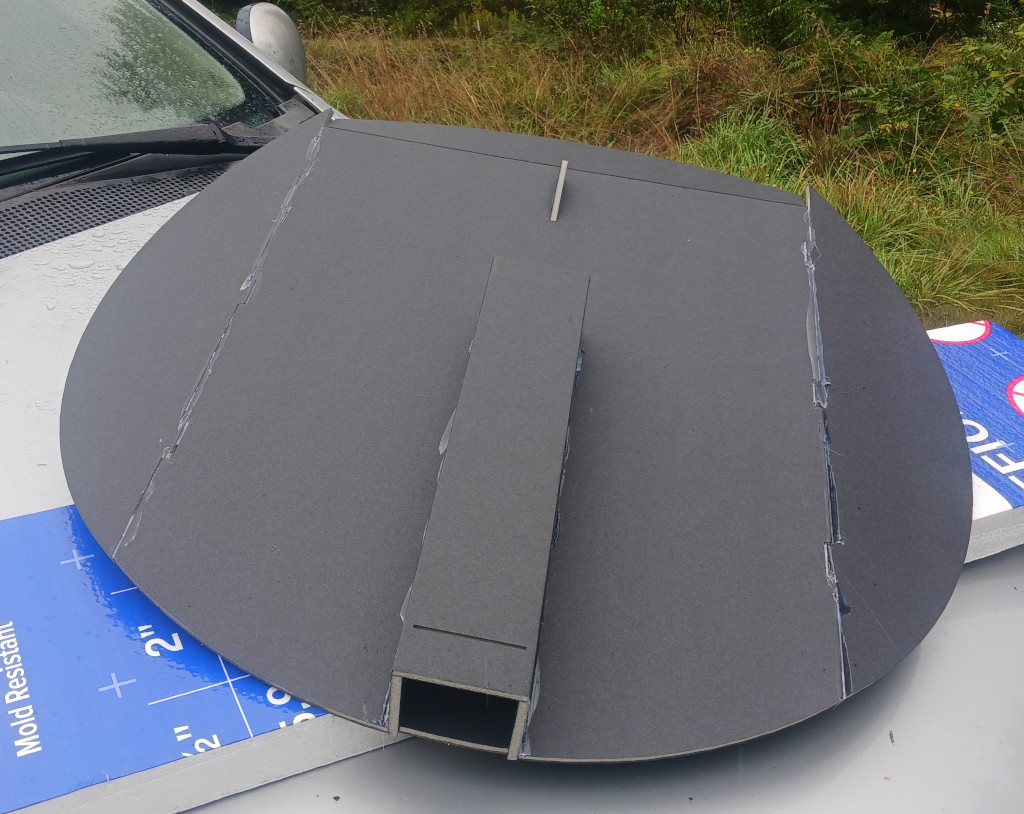
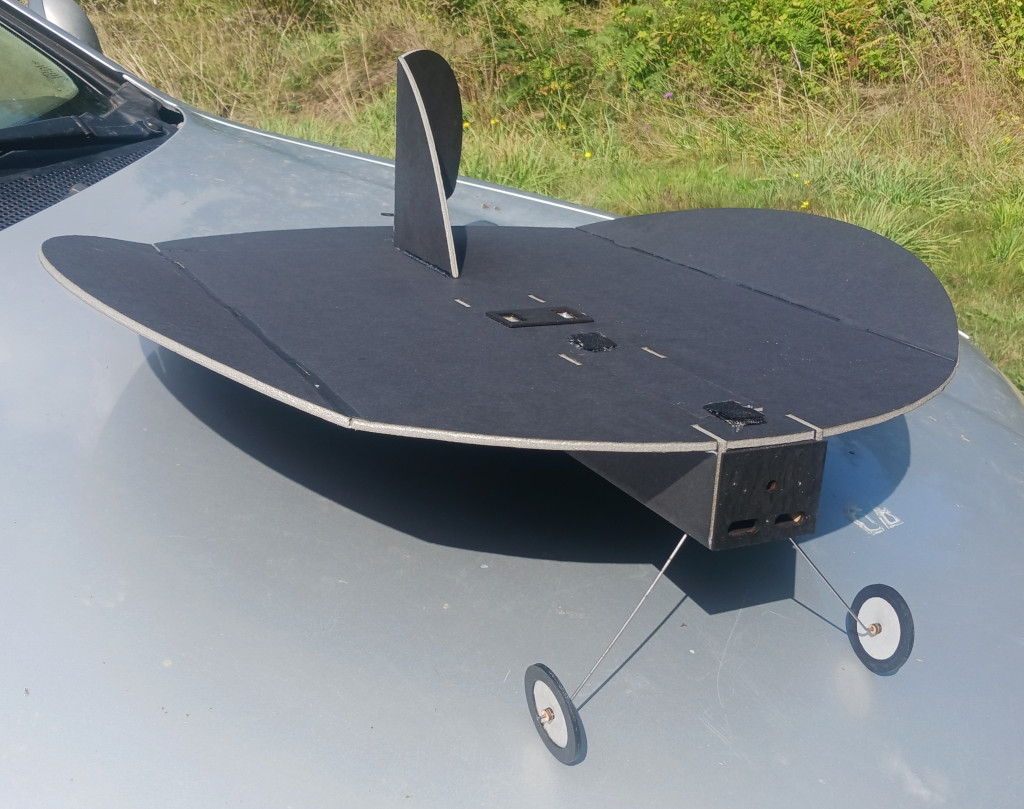
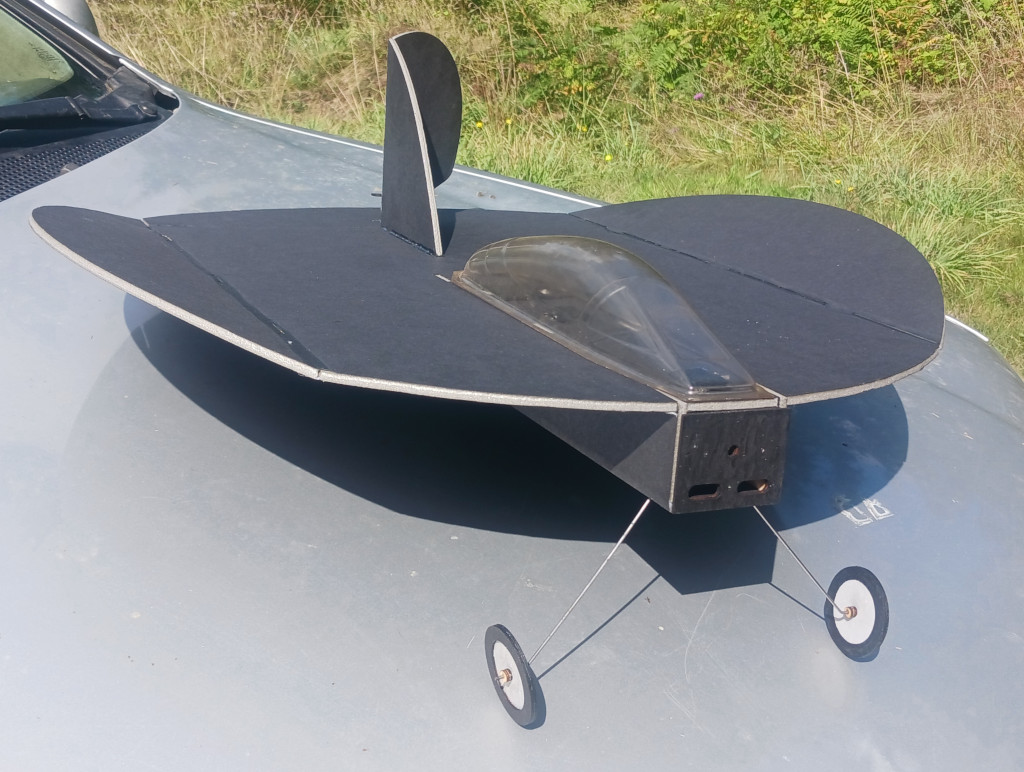
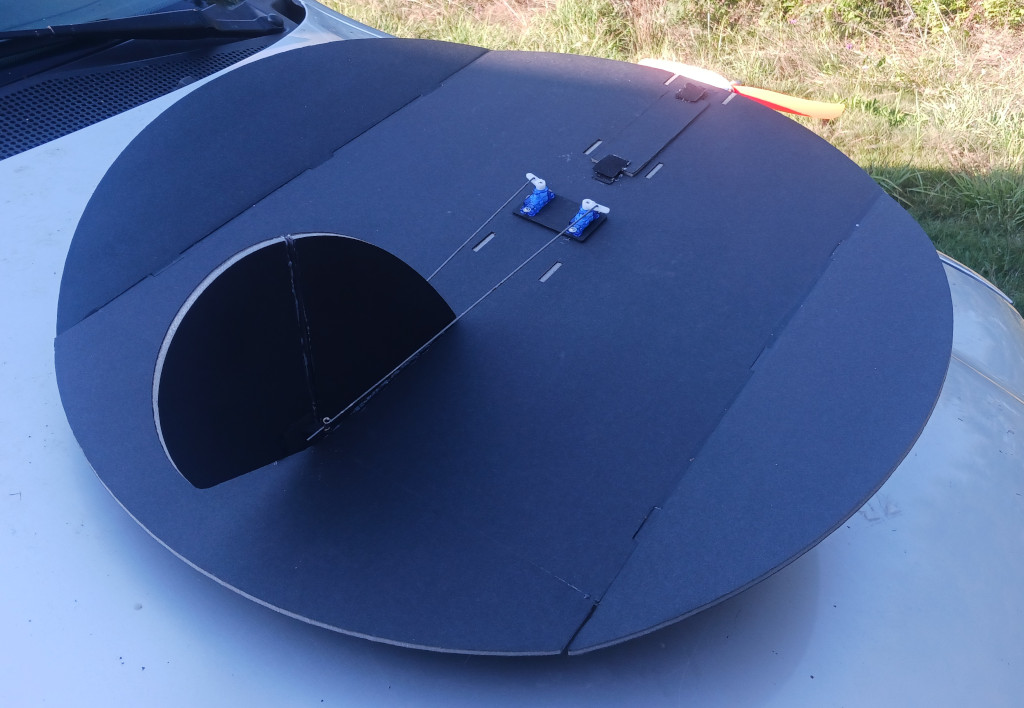
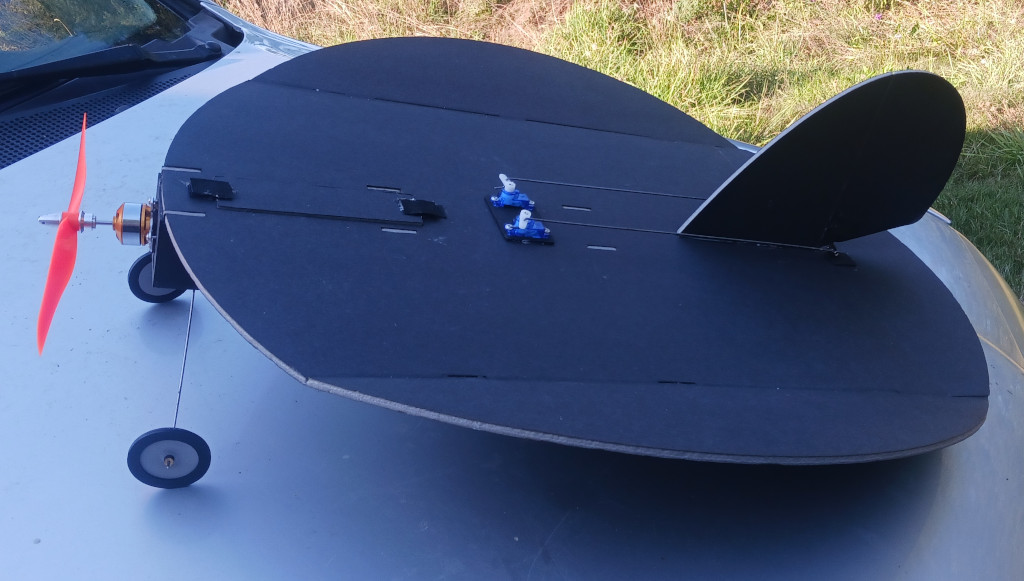
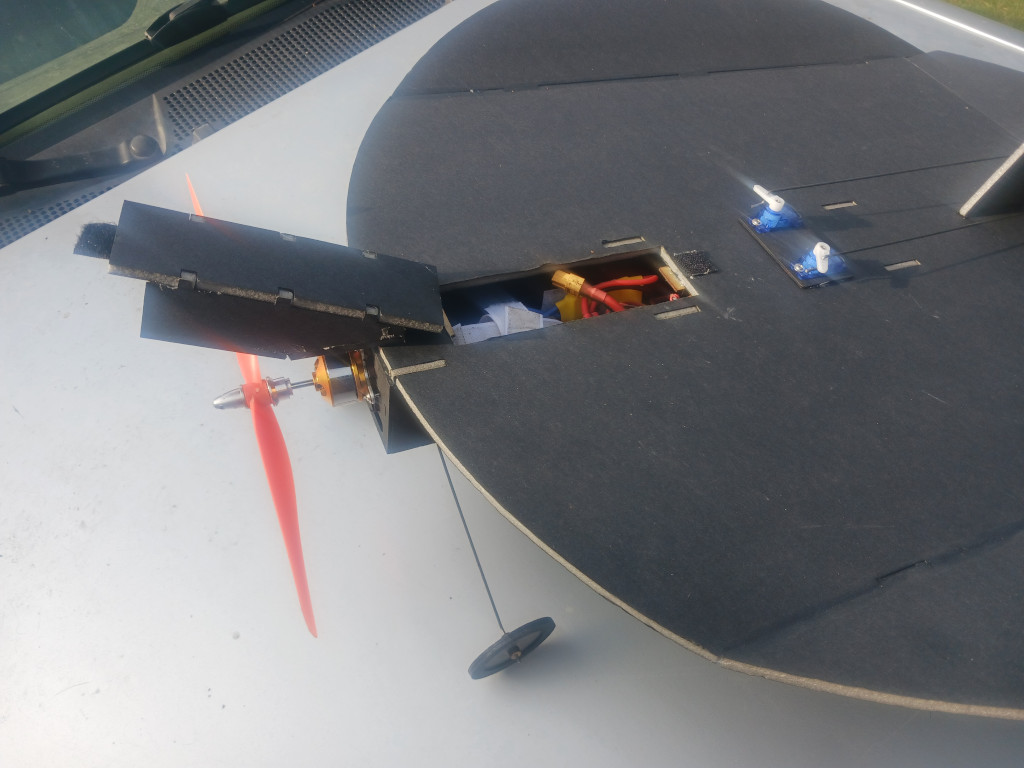
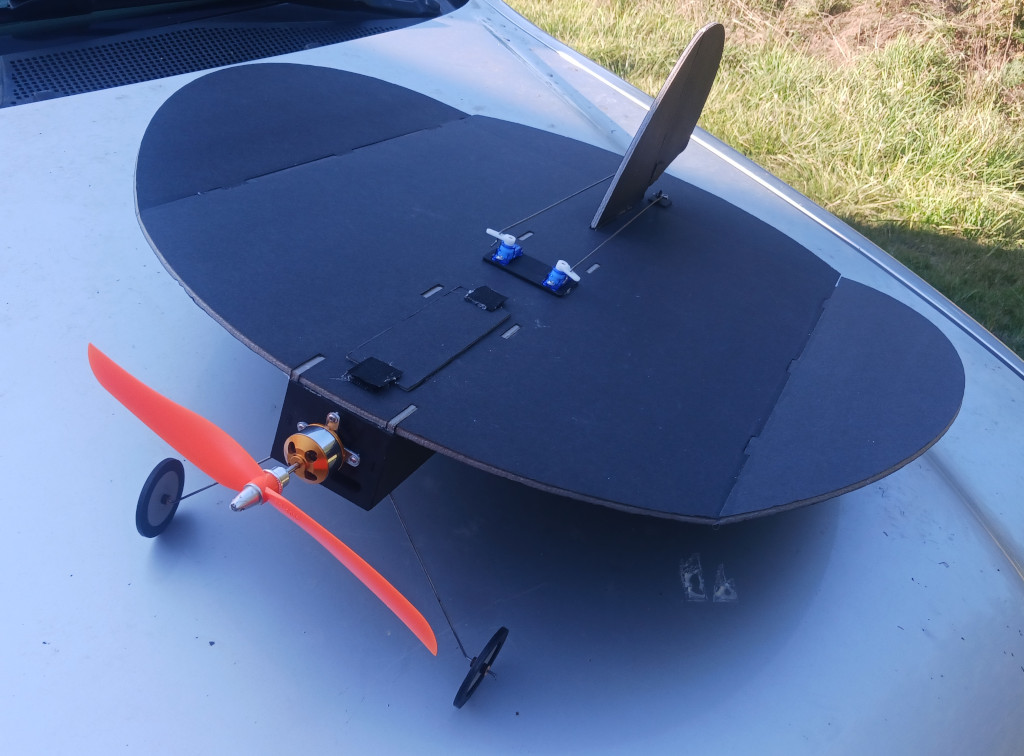
It's severely simple along the assembly, the dihedral gauges were certainly helpful when setting the winglets into place. I tacked the underside in three spots setting it, then went back over with hot glue, again bottom only, and went over the top with just regular wood glue for a cleaner appearance. The dihedral can be adjusted based upon the builder and flyers taste, this is pretty much as shallow as you are going to want to go while still keeping it tail feather control only. It can easily be converted over to EDF along the fuse which has so much room there is a lot of extra gear and options you could stuff in there.

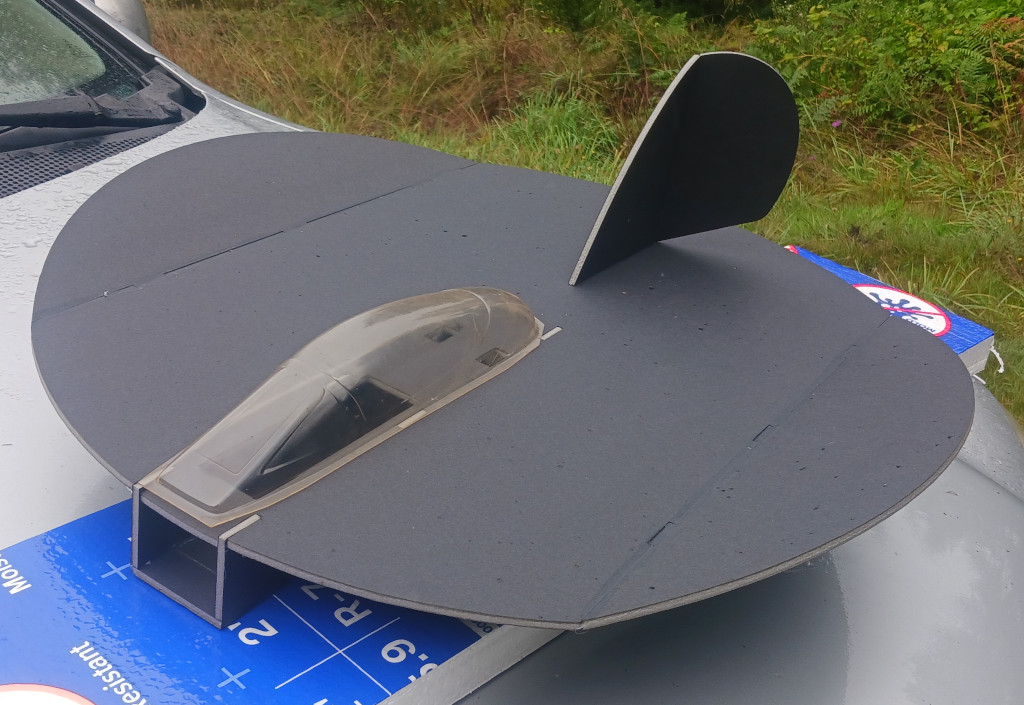
The canopy certainly looks cool on it, it serves no practical purpose though unless I eliminate the fuse and just stuff the gear inside of it instead though. After reviewing the SIG website, I see it was originally sold for $10.00, but as typical for them, it's out of stock. I may design up a foamboard version for a optional useless add on and certainly I can use it as a plug to make a mold to create fiberglass/carbon fiber versions of it but that's not anything I want to be doing for regular kit production upon.
cylon-5.jpg
 

Attachments

  • cylon-6.jpg
    cylon-6.jpg
    174.5 KB · Views: 0
  • cylon-7.jpg
    cylon-7.jpg
    210.8 KB · Views: 0

HappyRCFlyer

Active member
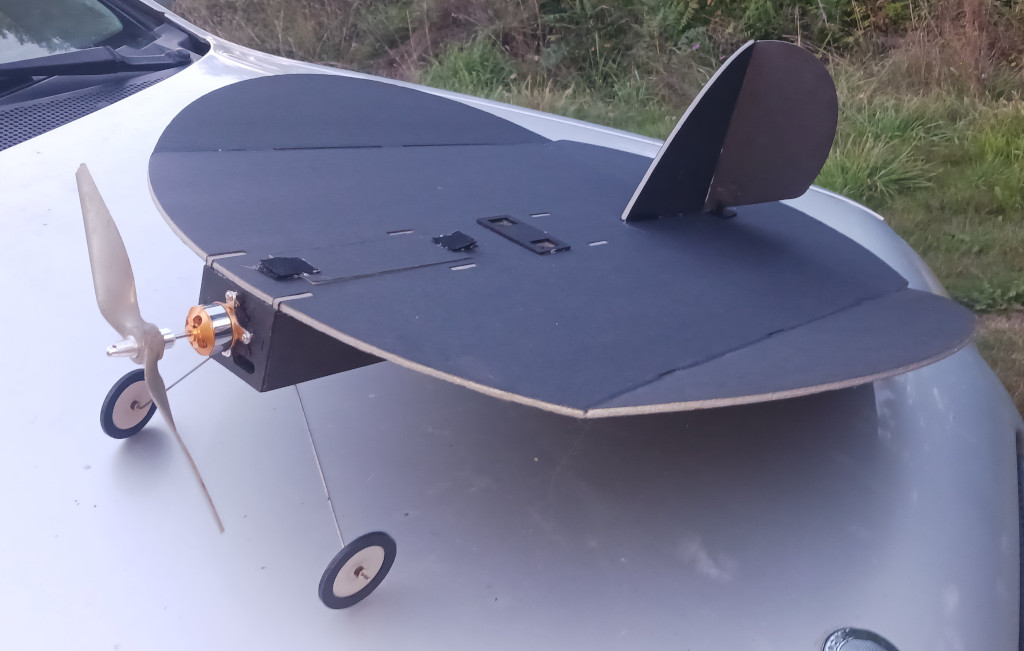
It's ready to gear out. I was amused that the motor mount/slide in assembly once placed inside of the tube, sliding in the landing gear automatically locked it into place, preventing it from coming back out again. I'm going to add 4 holes in the foam up front to complete an optional removable assembly, it's own removable powerpod. I'm still just going to glue it into place since it's easy enough to cut up more stock and assemble more and the glued system adds additional structure in case of a mishap/crash. I went with a simple velcro system for the access panel connection and there is plenty of space for a range of packs, gear, etc. inside of the fuse that are easy to get at. The CG mark is built into the system by centering the center, of the center tab where the fuse connects into the disc so no guess work there.
 

Attachments

  • cylon-8.jpg
    cylon-8.jpg
    173.9 KB · Views: 0
  • cylon-9.jpg
    cylon-9.jpg
    154.5 KB · Views: 0
  • cylon-10.jpg
    cylon-10.jpg
    188.5 KB · Views: 0
  • cylon-11.jpg
    cylon-11.jpg
    189.5 KB · Views: 0
  • cylon-13.jpg
    cylon-13.jpg
    176.6 KB · Views: 0
  • cylon-12.jpg
    cylon-12.jpg
    179.3 KB · Views: 0
  • cylon-14.jpg
    cylon-14.jpg
    144.6 KB · Views: 0
  • cylon-15.jpg
    cylon-15.jpg
    150.3 KB · Views: 0
  • cylon-16.jpg
    cylon-16.jpg
    160.8 KB · Views: 0
  • cylon-17.jpg
    cylon-17.jpg
    156.9 KB · Views: 0
  • cylon-18.jpg
    cylon-18.jpg
    298 KB · Views: 0
  • cylon-19.jpg
    cylon-19.jpg
    133.9 KB · Views: 0
  • cylon-20.jpg
    cylon-20.jpg
    165.8 KB · Views: 0

HappyRCFlyer

Active member
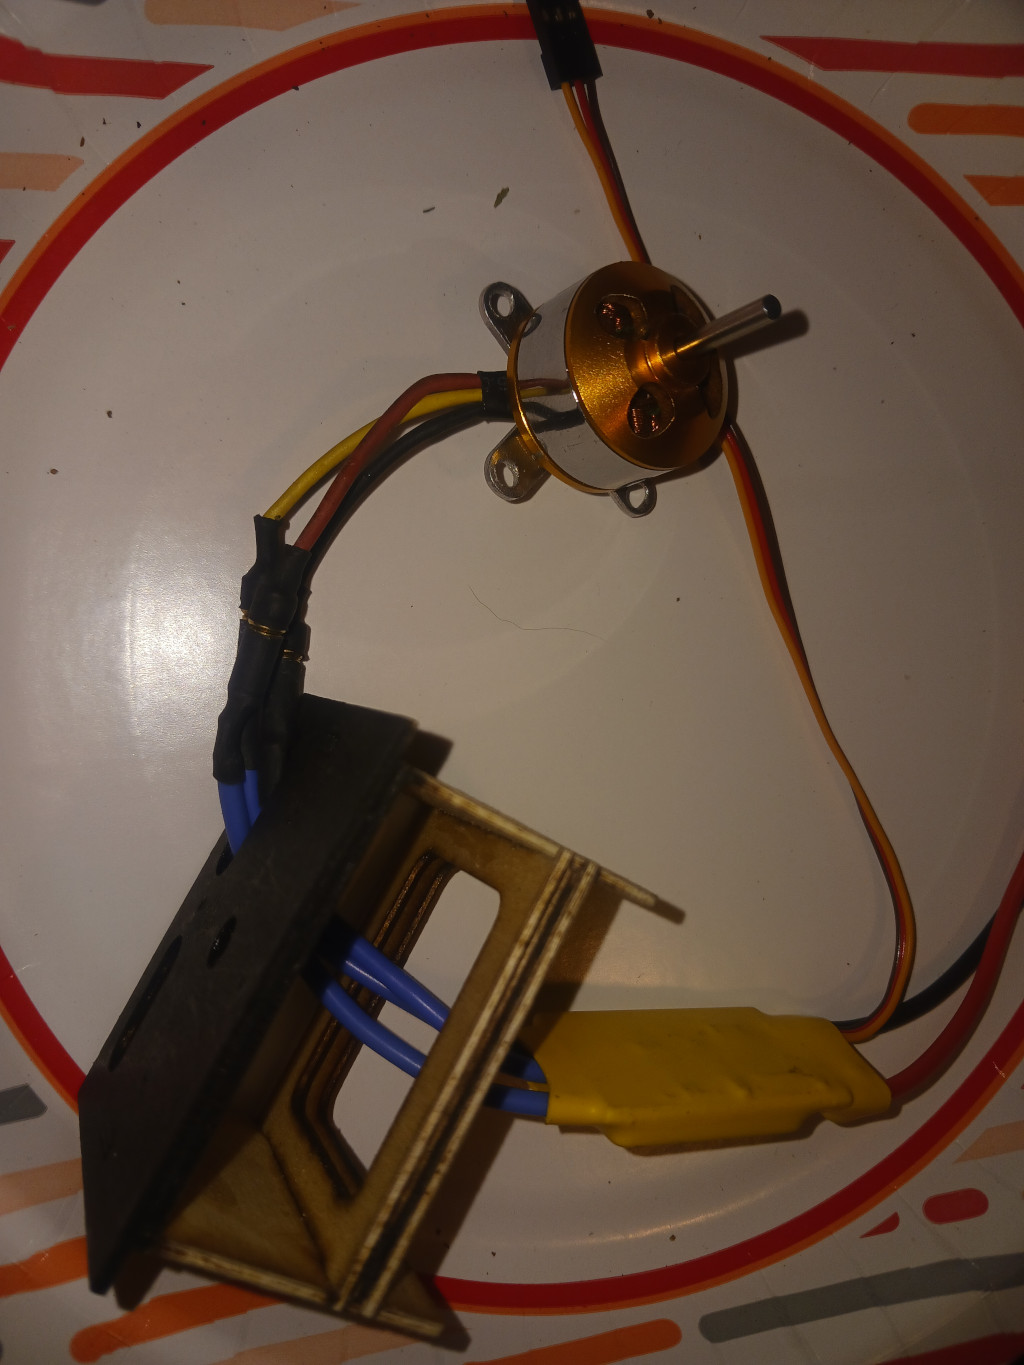
I have some new servo's to pick up at the post office so I can finish gearing it up and maiden. I'm showing the ease of install along the motor and esc into the nose assembly before it was glued into place. It doesn't need to be removable but will do the revision for the file for those that want to go that route regardless. You may notice the shaft is a bit long, it's due to buying replacement shafts that the only ones out there are made for the longer can. I can dremmel it back to length if i want, just for the record, you can never get them perfectly straight after they get bent and it's easy and cheap to just replace them all together.

I also designed up a foam board version of the Slow Stick Jenny last night. I'm using some laminated strips of foam board for the spars with some laminated light ply joiner pieces to connect the halves together.
 

Attachments

  • cylon-22.jpg
    cylon-22.jpg
    205.3 KB · Views: 0
  • jenny-fb-1.jpg
    jenny-fb-1.jpg
    244.6 KB · Views: 0
  • cylon-21.jpg
    cylon-21.jpg
    105 KB · Views: 0

HappyRCFlyer

Active member
I'm always alone when flying and most of my life and I've not figured out how to get my cat to take video, but here it is on this round, using a strap on system to put your cell phone onto your head.
I don't have the fancy Flight test team on board to have that second person to pull out their cell phones on these, so go blame them for being all rich and that. lol.

I'm severely impressed with the layout, specs and the rest, for ease along gear install and to include needed to switch around two of the bl motor leads, the performance and handling, like putting on a glove. Getting the right scale to weight and also, the common cheap gear to go along with is a challenge, the going back to my original design, now with more refinements even better. I'm going to be putting this onto a dual use, basic trainer for those first time flyers and also, just fun to fly around for more advanced pilots.
 

Attachments

  • cylon-23.jpg
    cylon-23.jpg
    155.2 KB · Views: 0
  • cylon-24.jpg
    cylon-24.jpg
    140.2 KB · Views: 0
  • cylon-25.jpg
    cylon-25.jpg
    125.3 KB · Views: 0

HappyRCFlyer

Active member
Thanks, slated for that when i get around for adding a cockpit I suppose. Bringing back the correct, original dihedral and wing area is a major improvement over the guy's design that hacked mine back in the day. I actually did one based upon his, it wasn't nearly as enjoyable, nor stable to fly.
 

Bricks

Legendary member
For your canopy make a wood plug take a clear plastic bottle cut it so you have a big enough piece, take a heat gun to shrink it down over the plug. Cut it off and your good to go.

For color we would use colored tissue paper that was used for wrapping gifts no paint involved and free..
 

HappyRCFlyer

Active member
For your canopy make a wood plug take a clear plastic bottle cut it so you have a big enough piece, take a heat gun to shrink it down over the plug. Cut it off and your good to go.

For color we would use colored tissue paper that was used for wrapping gifts no paint involved and free..
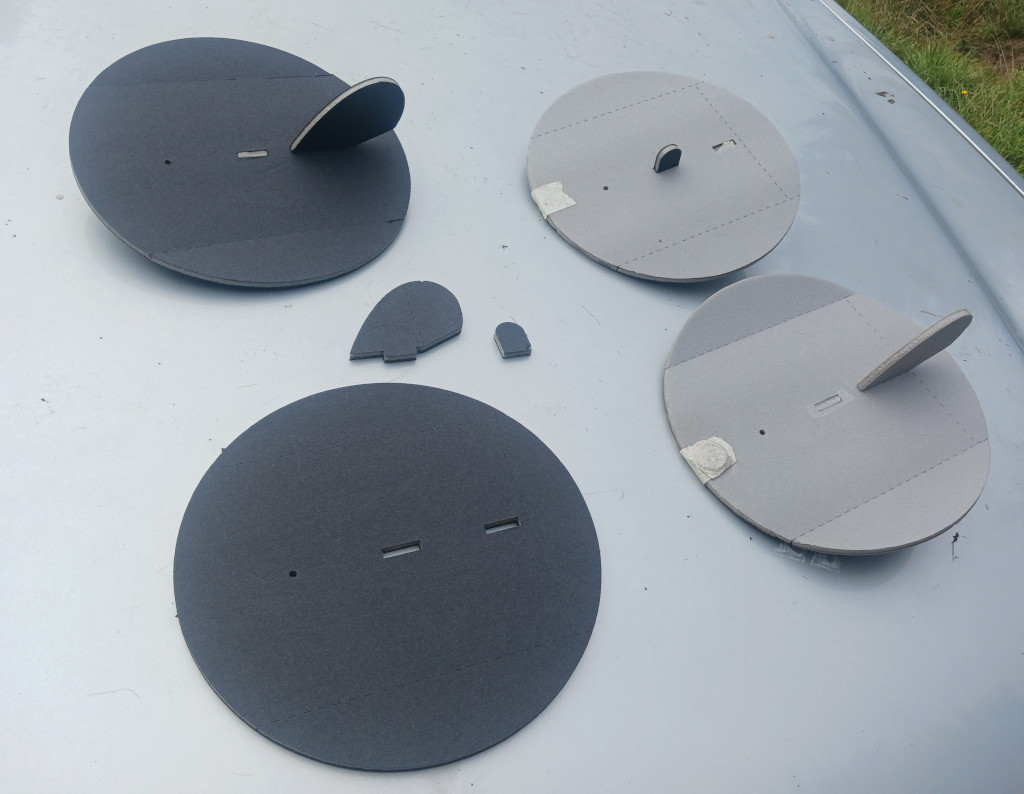
Printing on tissue is also a cool option people do for that matter. I've also done the canopy style with the plug and heating up plastic, it takes some practice but it's doable. I'm going with a simple folded foam thing for this one just to keep it as an easy step that's entirely optional. I'll be experimenting with the smaller, chuck glider version of this in anhedral format when the winds die down this eve.
 

Attachments

  • dev-canopy.jpg
    dev-canopy.jpg
    95.7 KB · Views: 0
  • gliders.jpg
    gliders.jpg
    115.9 KB · Views: 0

HappyRCFlyer

Active member
I just figured out a killer solution for this one. https://help.airdroid.com/hc/en-us/...-camera-from-another-phone-with-AirMirror-App Basically it lets you project the the screen on your main cell phone you are taking the video with, onto another so that you can see exactly where it's pointed to. They both need to be on the same wifi network though. I have a portable hotspot I use from time to time which is doable when i want to shell out for another month of service for it though.
 

HappyRCFlyer

Active member
The Anhedral version is certainly a go! The glide ratio even improved.


Attachments

  • glider-anhedral.jpg
    glider-anhedral.jpg
    120 KB · Views: 0

Bricks

Legendary member
I just figured out a killer solution for this one. https://help.airdroid.com/hc/en-us/...-camera-from-another-phone-with-AirMirror-App Basically it lets you project the the screen on your main cell phone you are taking the video with, onto another so that you can see exactly where it's pointed to. They both need to be on the same wifi network though. I have a portable hotspot I use from time to time which is doable when i want to shell out for another month of service for it though.


I am not a techy by any means can you use Blue Tooth to connect the phones?
 

HappyRCFlyer

Active member
I spent some time today trying to get them to cast, talk to each other, etc. without being on a wifi-connected to the internet and absolutely nothing out there exists, nor is it possible at current. Bluetooth doesn't handle video/camera sharing like that, it's too slow and limited, it's only able to do small packets of information and music. I've been computing since 1983 so am savvy along the tech world few people are, if I can't make something work it's doubtful others would be able to manage like that.

I took more test flights out on the glider with both the regular dihedral and the anhedral, it only further cemented things along the vastly superior glide ratio and stability with the anhedral. I'm RTFing another rc/kit version of it for a friend and doing it with the anhedral. I think what's going on, the air is being directed to stay underside of the disc rather then dissipate outwards and giving the surface area, it's taking better advantage of that for lift along with stability where that type of dihedral with other formats of plans loses stability going that route since it's something more desirable in a fighter or larger aircraft that aren't wanting to fight the dihedral for directional control..
 

HappyRCFlyer

Active member
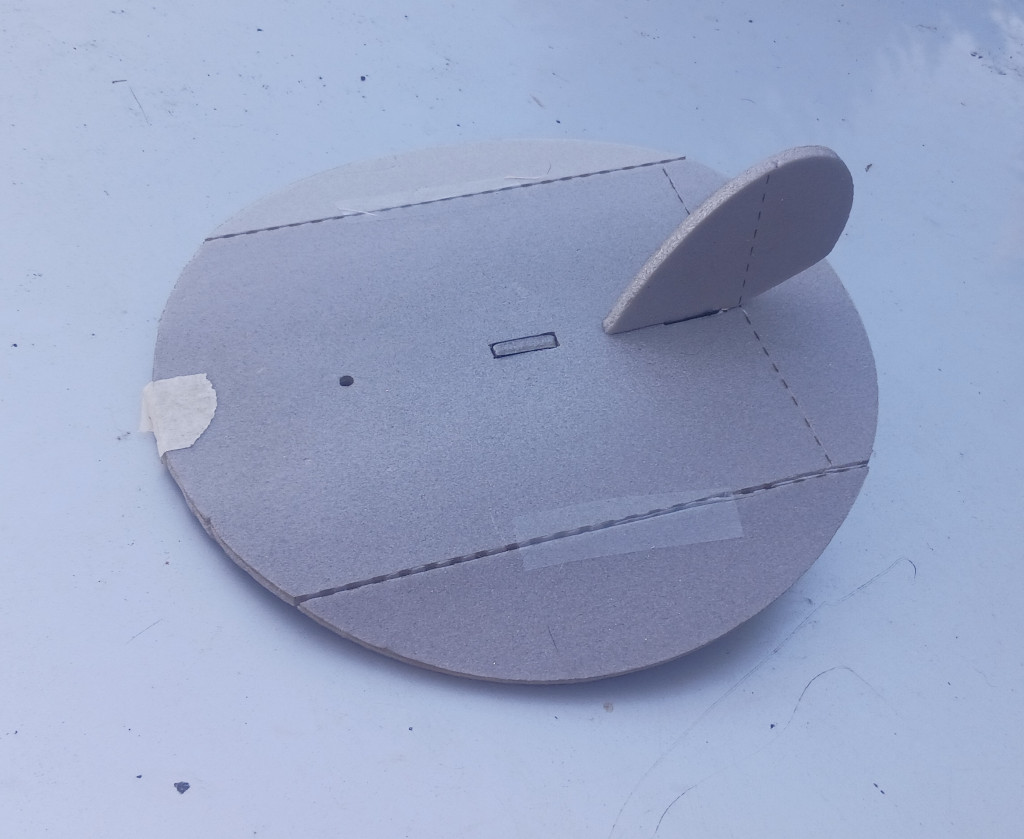
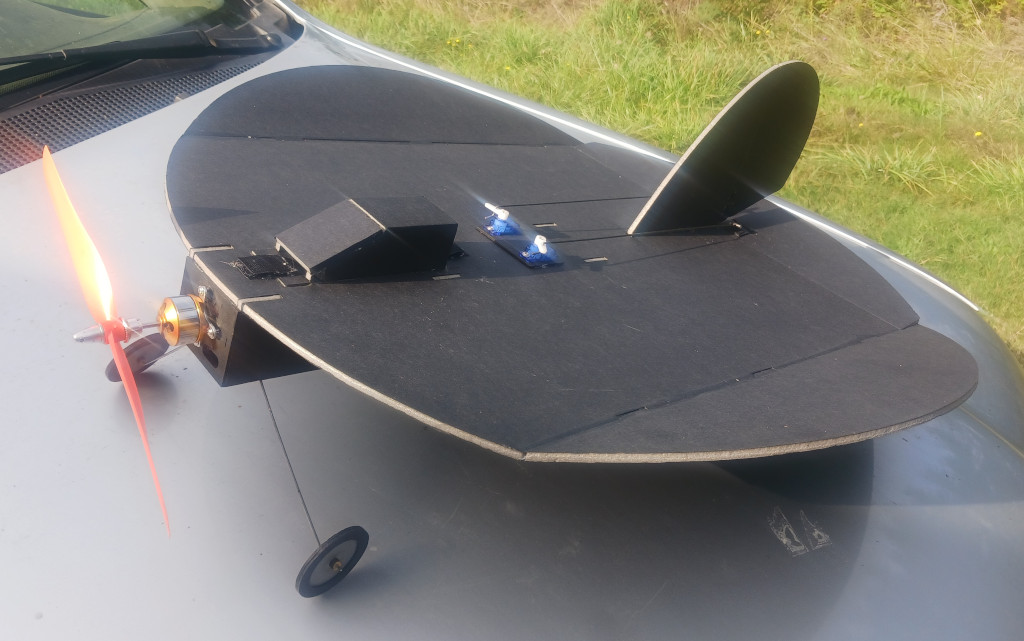
I came up with the canopy design and format and a revised access panel system for it to attach to. The gap on the bend can be covered with some extra black paper scrap, I'll be revising it to be automatically attached for the production version. An additional vent hole can be integrated through it in addition.
 

Attachments

  • cylon-26.jpg
    cylon-26.jpg
    133 KB · Views: 0
  • cylon-27.jpg
    cylon-27.jpg
    122.2 KB · Views: 0