Mighty Mini Vampire (Fighter Jet)

FishHawk

Well-known member
So..I finished scratch building my mini vampire and placed it in a shelf while waiting for the weather to get better so I can maiden it.

Somehow it felt from that shelf and now the tail booms are bent although I had them reinforced with a barbeque skewer. I think I need to rebuild the entire thing.

Can you show me how you reinforced the tail?

Thanks!
Did you put on the balsa doublers or just use the skewers? I had the same question, whether it needs doublers and skewers, or just doublers, or just skewers. If it is just the booms that are bent, you can cut out the bent section and splice in new foam. I also remember seeing a post about using rubbing alcohol to remove hot glue, but I haven't tried that yet.
 

FTBRibeiro

New member
Did you put on the balsa doublers or just use the skewers? I had the same question, whether it needs doublers and skewers, or just doublers, or just skewers. If it is just the booms that are bent, you can cut out the bent section and splice in new foam. I also remember seeing a post about using rubbing alcohol to remove hot glue, but I haven't tried that yet.

I just used the skewers. I couldn't find balsa nearby so I just went with it. I guess I got what I deserved.

I think I will try to remove the tail booms completely (maybe try the alcohol. I've seen it in one of the FT videos) and cut new ones. The extra effort compared to splicing a new bit is worth it, I think.
 

ColoFlyer

Active member
The first one of these I built I built using the regular size plans posted here. I put in a tiny receiver and at one point got out to far and lost reception then crash, it was ugly. It really flew so nice that I wondered what it would fly like if it was larger.

So I Just built the Mighty Mini Vampire again and this time up-scaled it to 120% and WOW. This thing really does fly sweet. I designed and 3D printed a motor mount, a canopy, and also a battery hatch cover that also acts as a skid plate. I reinforced the booms starting by embedding BBQ Skewers the full length into them then gluing 3/4"x 1/8" balsa wood strips over them. I also put BBQ skewers, one in each wing, that follows one of the fold lines inside the wing out to the tip for strength. The wings build just like any other Flitetest model.
I am using a BR2205 Motor with a 3 blade prop (6x4.2x3) and 20A ESC. I upgraded the receiver in this one to an orange 6 Channel with Satellite.
This thing fly's so well that I am now thinking of building a 200% version, maybe with landing gear. We shall see.
Here are some pics of the 120% version. I will try to put up the maiden video soon.
This is a very nice design jameswhom.
 

Attachments

  • 20210403_101303.jpg
    20210403_101303.jpg
    3.7 MB · Views: 0
  • 20210403_101345.jpg
    20210403_101345.jpg
    3.8 MB · Views: 0
  • 20210403_101433.jpg
    20210403_101433.jpg
    1.4 MB · Views: 0
  • 20210403_101450.jpg
    20210403_101450.jpg
    1.6 MB · Views: 0
Last edited:

glider2

New member
Introduction:
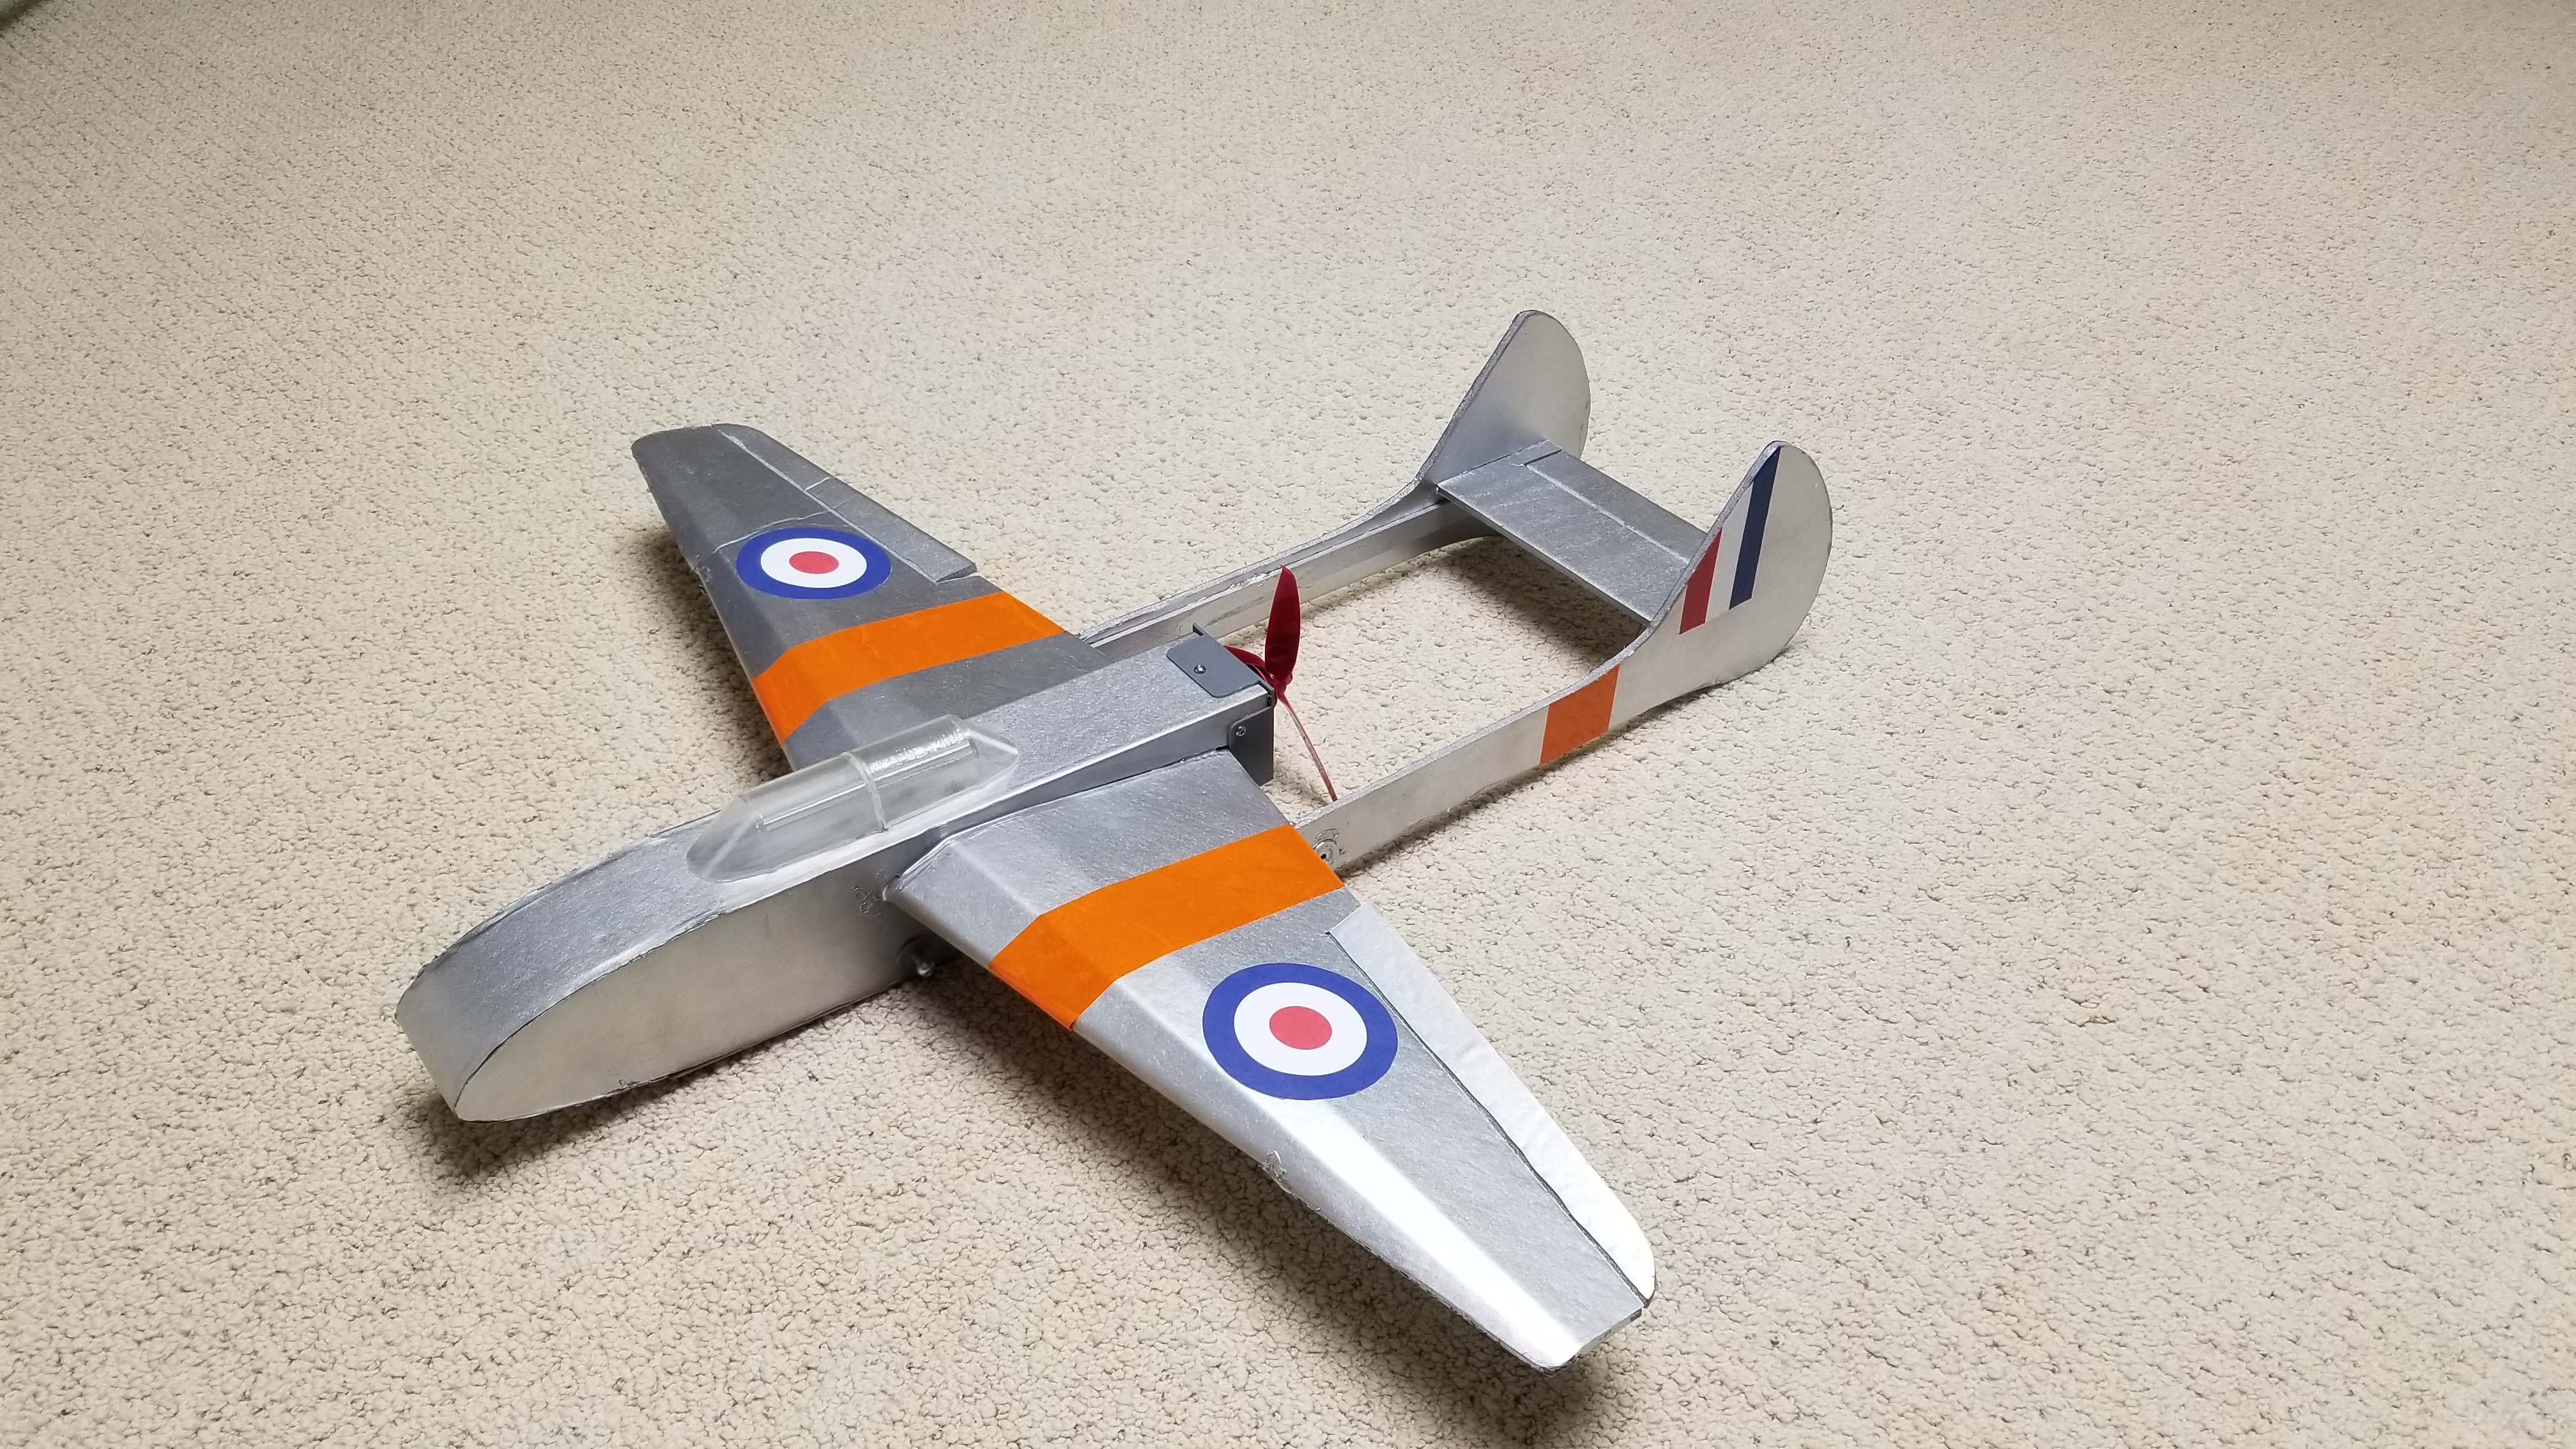
Cheers for checking out this post! This forum thread is dedicated to my Mighty Mini styled deHaviland Vampire design that you can build yourself. It's small, quick to build and only uses 1 sheet of foamboard.

View attachment 126238

FREE PLANS
https://drive.google.com/drive/folders/1r94efzJRkwjw9tPLo3BF4oyK1GnqiaFc
Note: These plans are still undergoing some work so you may find a few things a little off.

SPEC
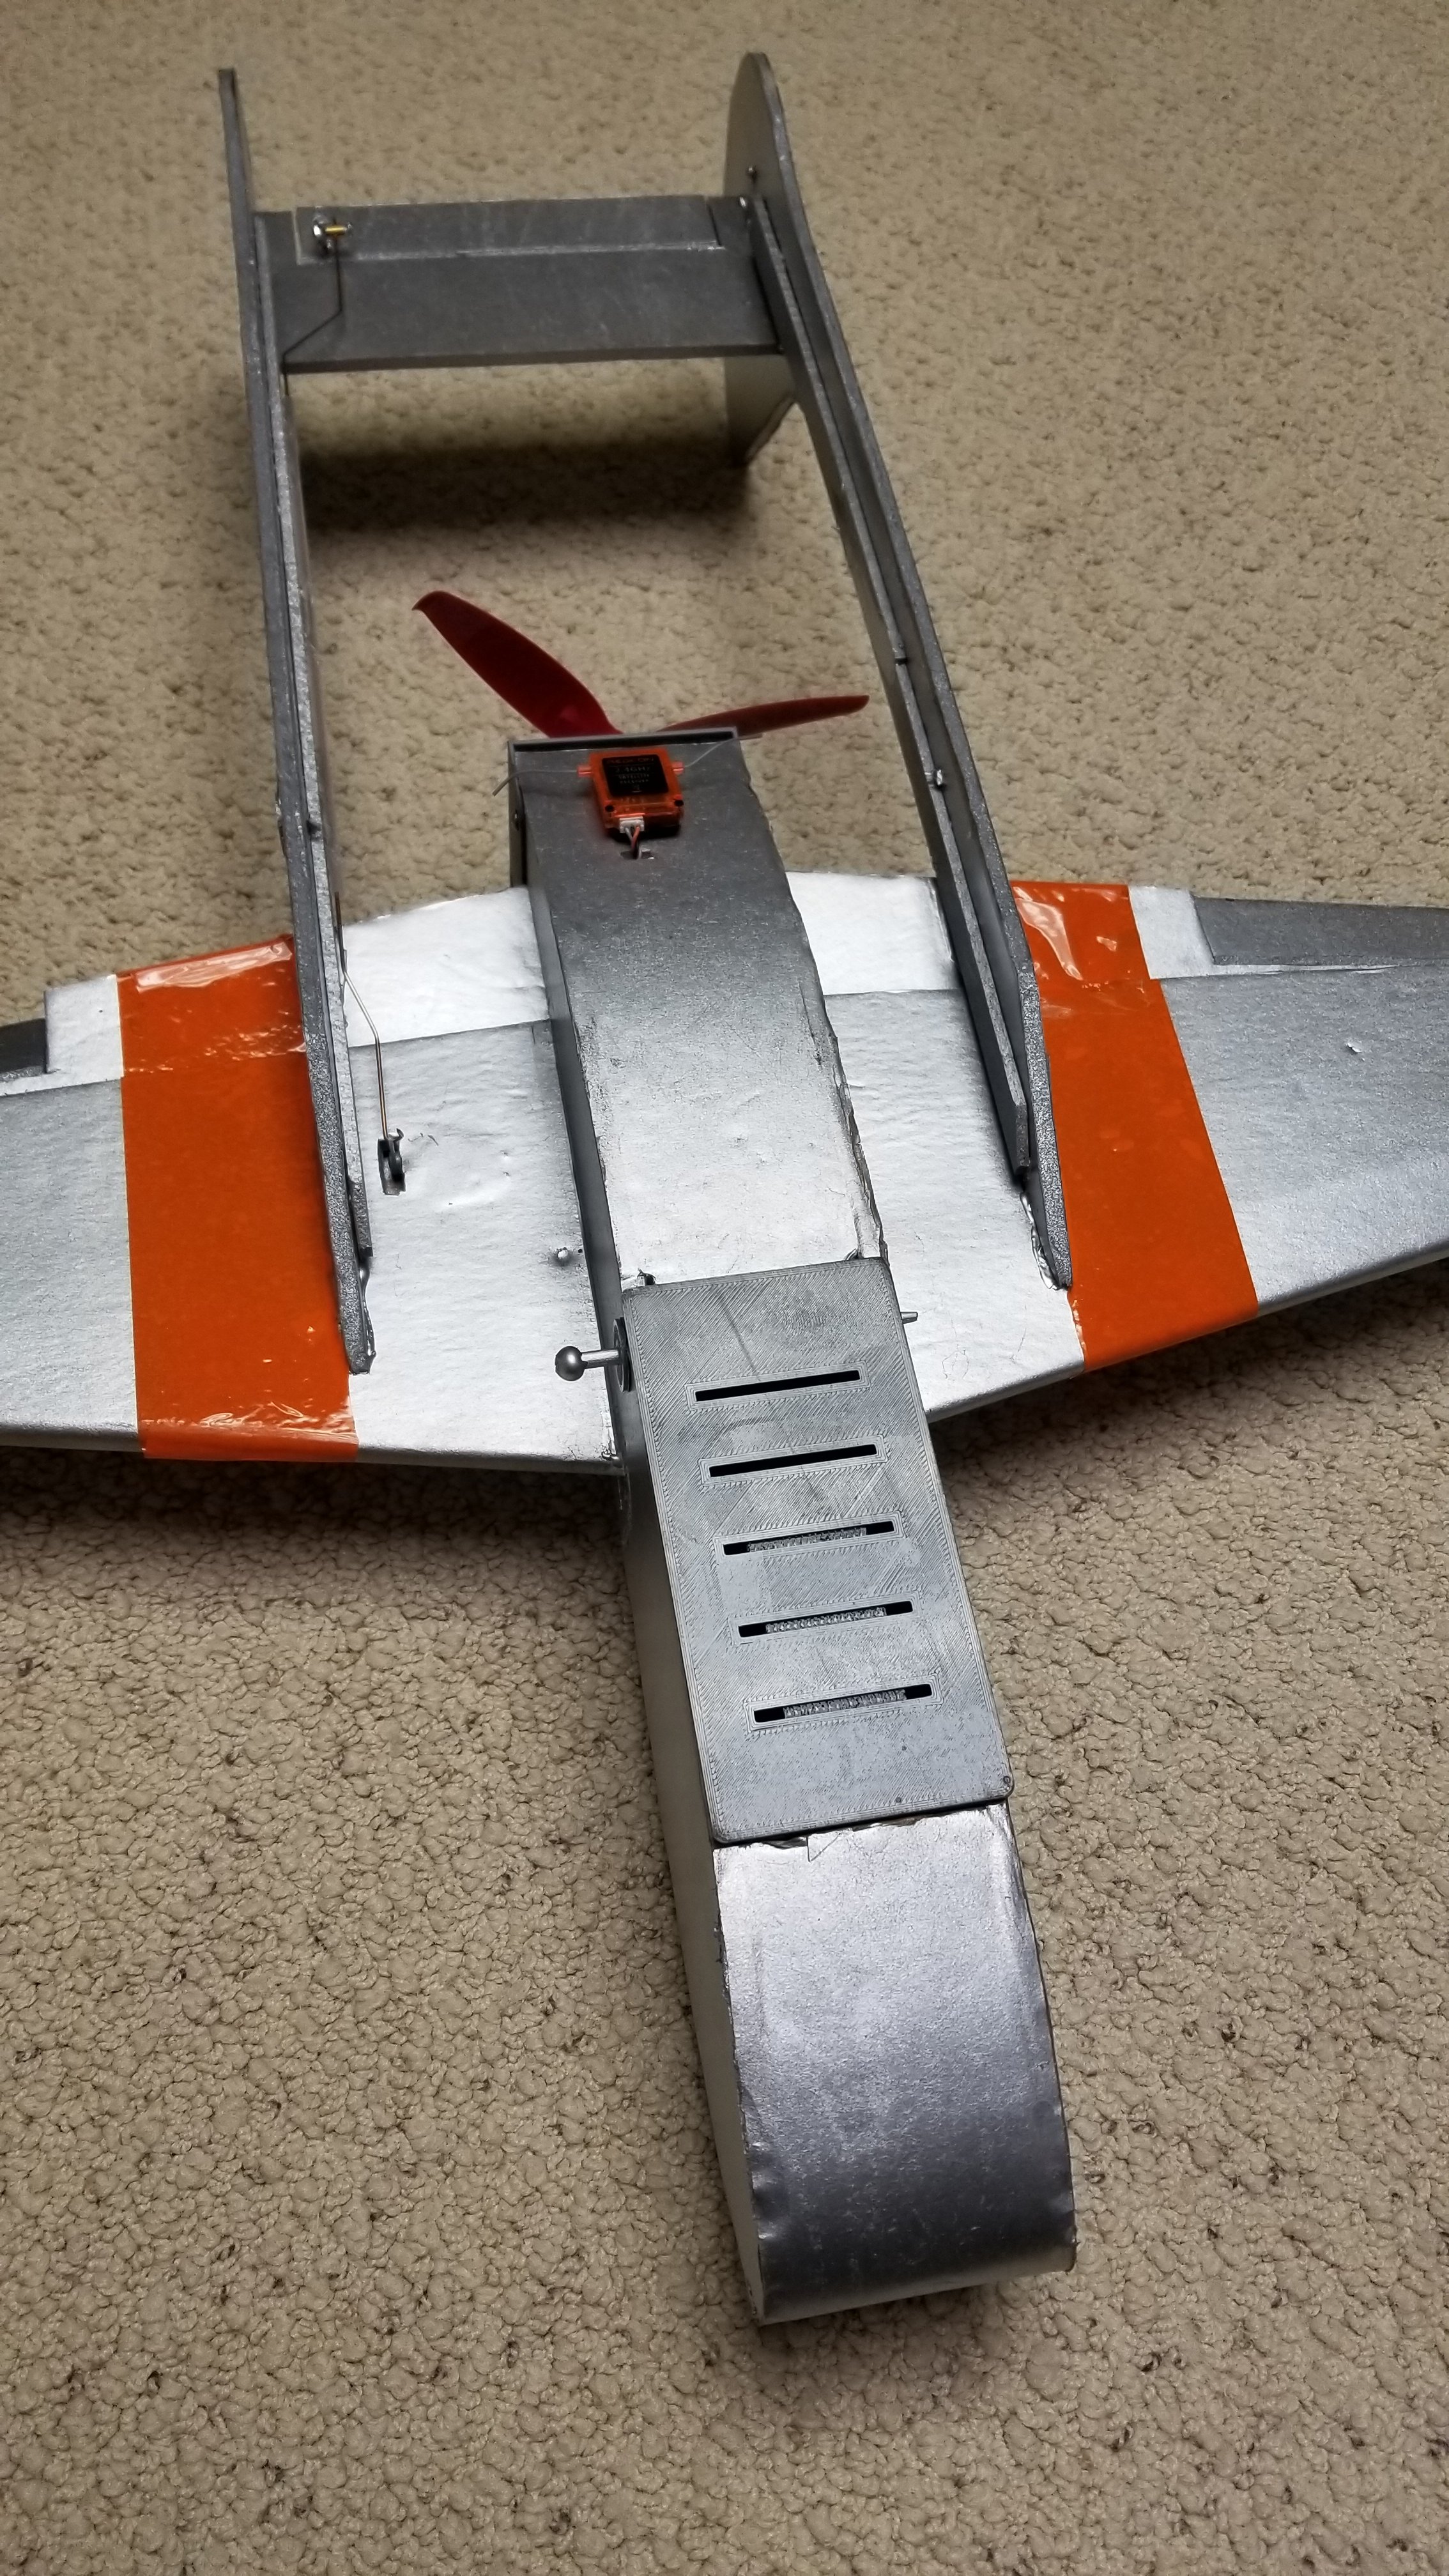
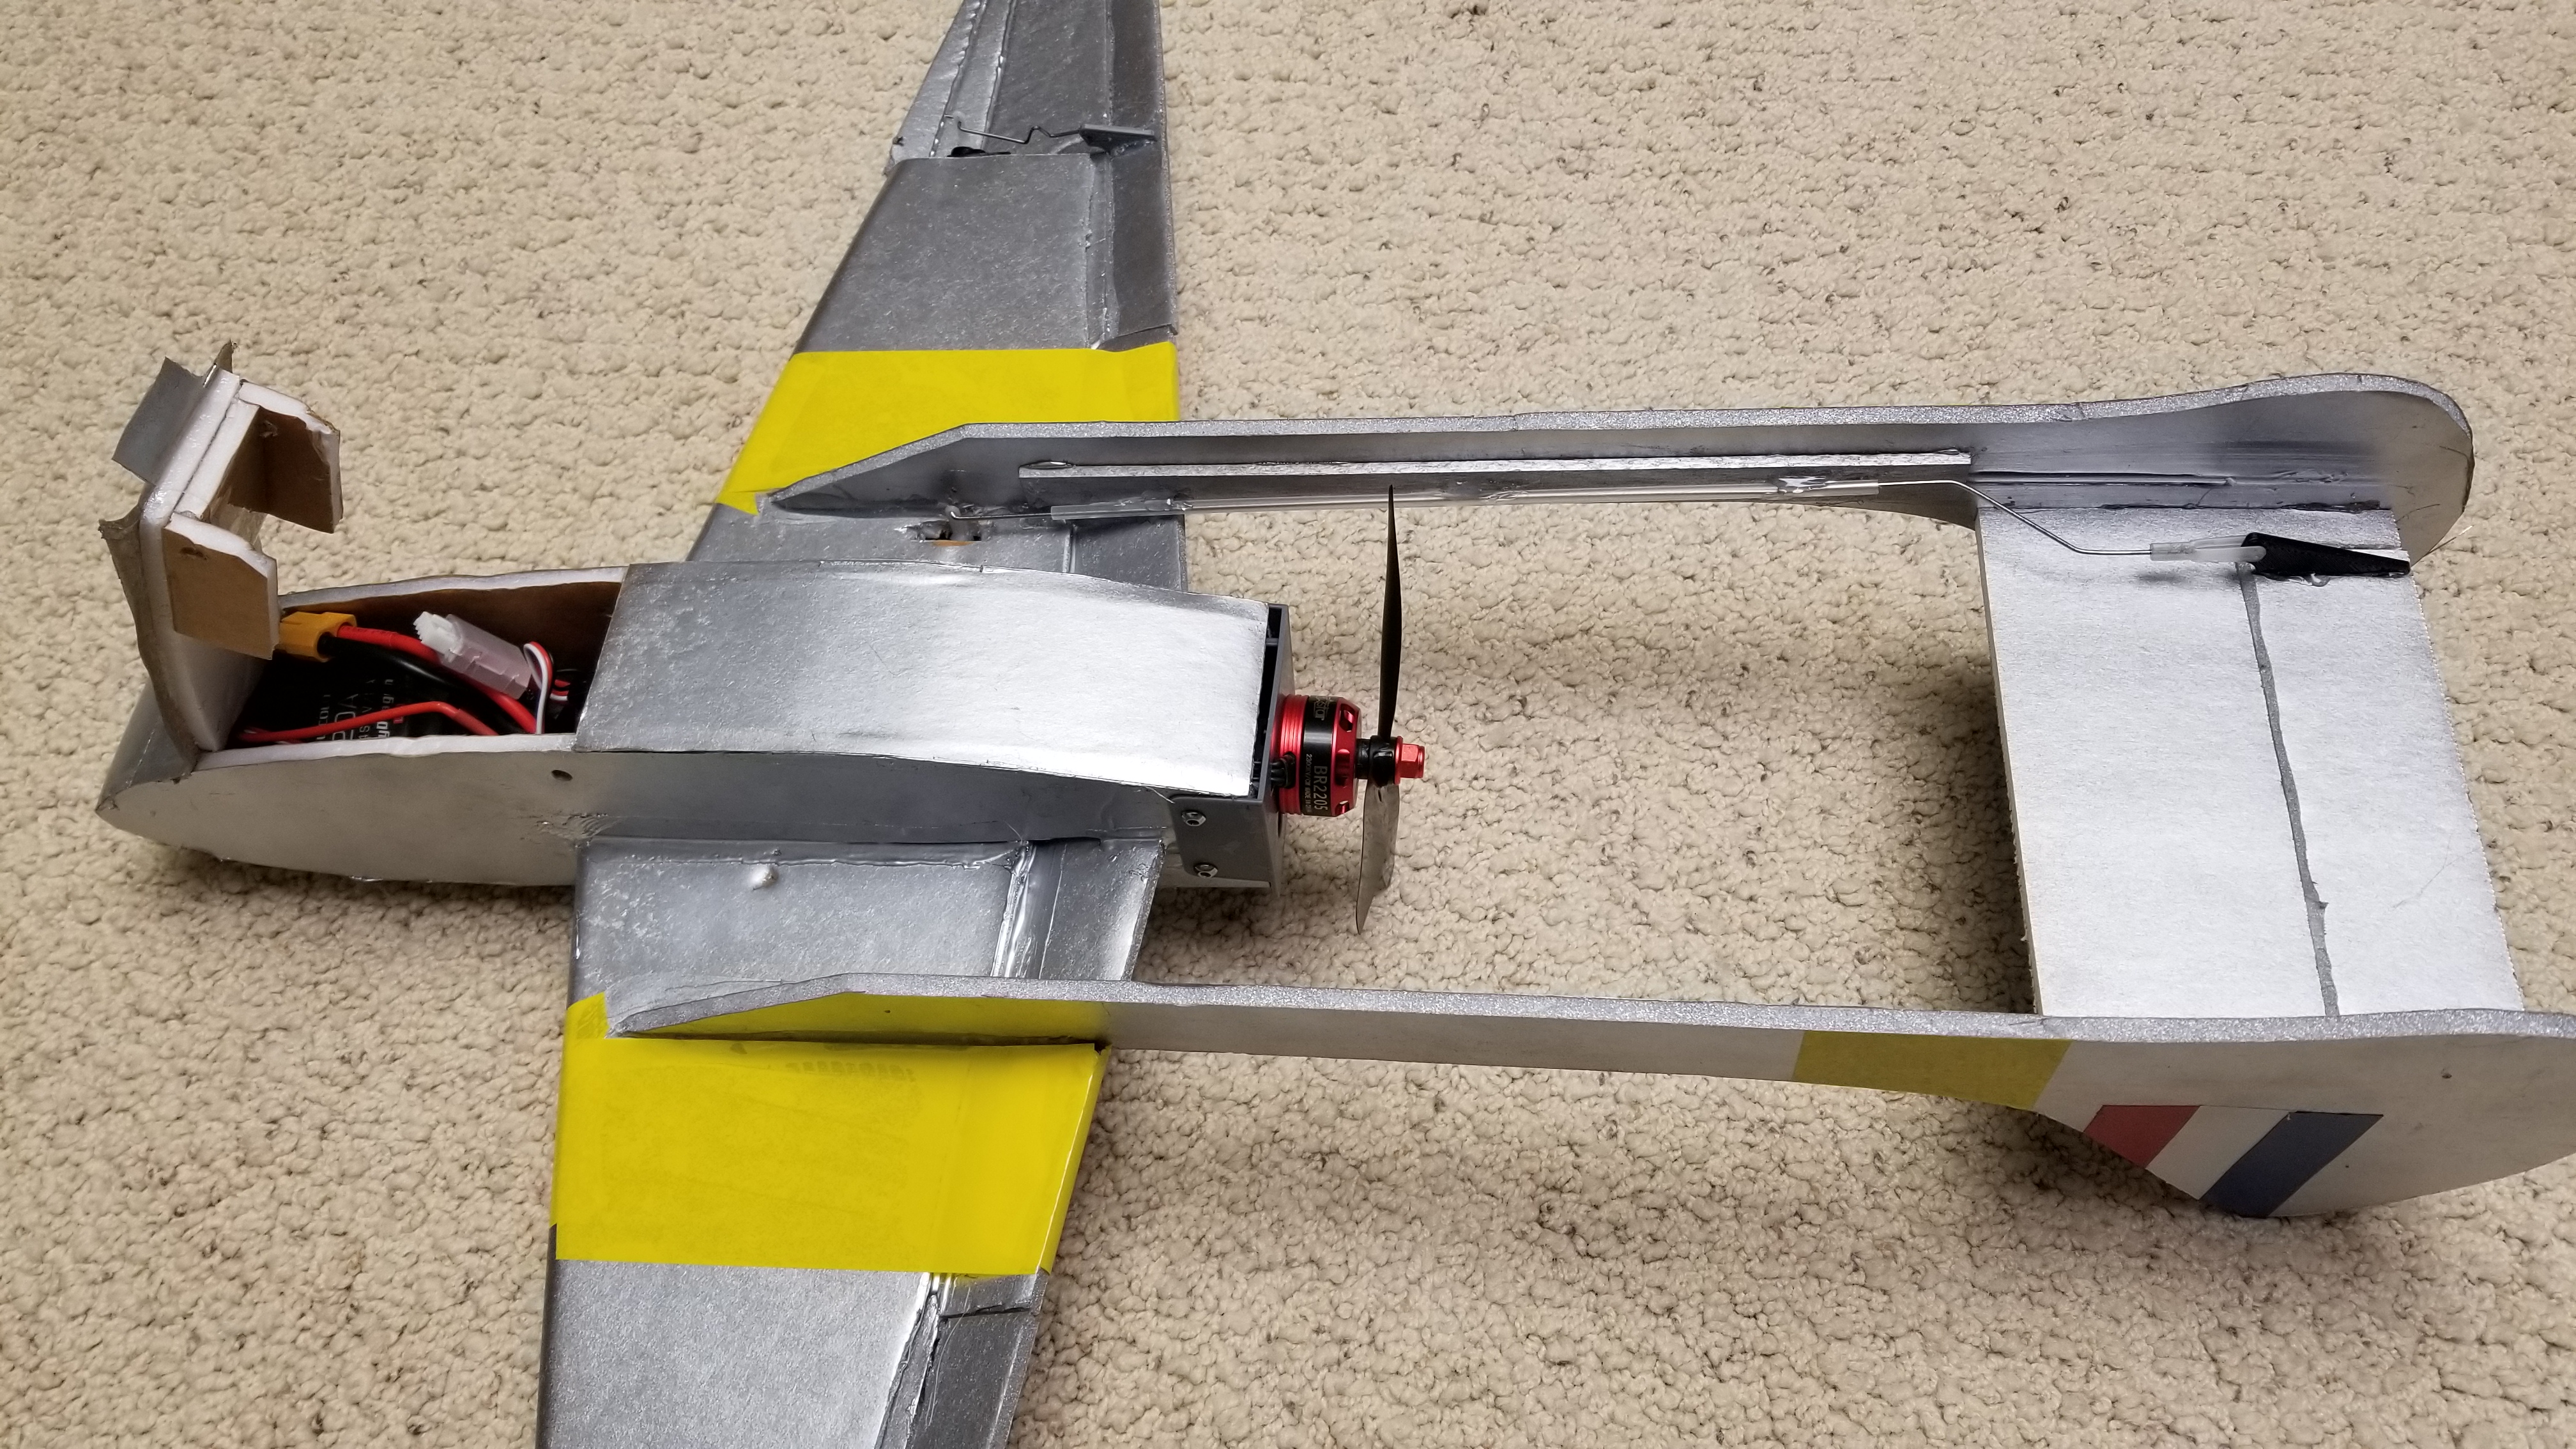
- Standard pusher race quad motor power such as a 2205 (with possibility to mod with 50mm ducted fan)
- 2s-4s battery
- 3ch (bank and yank)
- 24" wingspan
- 1x sheet of foam board to build
- 6-7 foam board pieces to cut out and glue
- 100mph+ with 4s

PREVIOUS VERSION HISTORY
V0.1
- Large 1000mm version (Summer 2014). Link to Article: https://www.flitetest.com/articles/whomz-vampire-free-plans

V0.2 - Large 1000mm non-scale sport version for max speed.

V1.0 - Mini 610mm version (Winter 2017). Link to article: https://www.flitetest.com/articles/mighty-mini-vampire-free-plans

V1.1 - Updated mini version for better performance and durability (Early 2019).

View attachment 126239
How do you attach the tail booms to the wing?
 

glider2

New member
The wings have two slots on the underside, the booms have corresponding tags to fit in, then a good helping of glue
thanks but I am making the small version and it does not have tabs. I think I am going to stick bbq skewers through the booms sticking out a little bit and make little holes in the wing.
 

ColoFlyer

Active member
thanks but I am making the small version and it does not have tabs. I think I am going to stick bbq skewers through the booms sticking out a little bit and make little holes in the wing.

Hi Glider2, As mentioned by Caroline, there are 2 slots that you cut out on the underside of the wing, and the Booms have a tabs that fits into those slots. Then you just hot glue the tabs into the slots. See Attachment. Make sure you are using the most recent design plans for this plane (v1.1) that has all the markings, it is on page one of this thread. These plans are for the small version, All I did was enlarge the plans to make mine bigger.
 

Attachments

  • Vampire Boom Attachment.jpg
    Vampire Boom Attachment.jpg
    154 KB · Views: 0
  • Vampire Boom Tabs.jpg
    Vampire Boom Tabs.jpg
    47.2 KB · Views: 0
  • Vampire Boom Slots.jpg
    Vampire Boom Slots.jpg
    131 KB · Views: 0

glider2

New member
Hi Glider2, As mentioned by Caroline, there are 2 slots that you cut out on the underside of the wing, and the Booms have a tabs that fits into those slots. Then you just hot glue the tabs into the slots. See Attachment. Make sure you are using the most recent design plans for this plane (v1.1) that has all the markings, it is on page one of this thread. These plans are for the small version, All I did was enlarge the plans to make mine bigger.
ahhh thank you!

where do i get the newer plans?
 

ColoFlyer

Active member

Attachments

  • Mighty Mini Vampire v1.1.jpg
    4.8 MB · Views: 0
  • Mighty Mini Vampire v1_1.pdf
    779.1 KB · Views: 0

ColoFlyer

Active member
One other thing that i have found after building 3 of these. They always seem to come out tail heavy, so you have a choice you can either add some weight to the nose, or you can do what I do and extend the nose. I have found on the Mini Vampire, that I need to extend the nose about 1.25" to 1.5". By doing that I can move the battery forward and balance the plane. It's just a suggestion though. Anyway, Here is an attachment that kinda explains my process, and what I do to the plans before I cut out the foam board. It is not to scale, but will give you an idea of what I do.
Also, FYI the CG on all the vampires I have built comes out almost exactly 1/3 of the way back from the leading edge near the fuselage.
 

Attachments

  • Mighty Mini Vampire Extended nose2.jpg
    Mighty Mini Vampire Extended nose2.jpg
    488.2 KB · Views: 0
Last edited: