Mini H Quad First Build Log

Greg2B

Senior Member
So two motor mount breaking crashes with the Turnigy Micro Quad and I'm ready to build something a bit stronger. The frame I'm using is Super Simple Mini H-Quad from polakiumengineering which feels a lot stronger then what broke.

IMG_20140310_143309_50p_50p.jpg IMG_20140310_143237_50p_50p.jpg

I actually ordered two different frames but this one came in first which makes the decision easy on which to use. The second frame will now go to my second build if this one turns out all right.

IMG_20140309_190721_50p.jpg

I “think” I have all of the stuff I need except some longer m2 screws, ordered though I just saw a build of someone using zip ties to mount the motor which I should have thought of. And some heat shrink just to be tidy. I was just going to use some electrical tape. The rest will be salvaged from my broken quads. If you think I'm missing something please let me know.

I'm trying to take it as slow as possible as was recommended by some members to me and work on just a bit each day after work if I have time and finish it off on the weekend.

I have realized that doing a micro quad for my first build seems a bit harder then I originally thought. Using a 1/6 Allen wrench to get the motors off the frame is somewhat hard, it took me close to 20min on the first motor. The second 15min, so some progress but not much...

But I got the motors and ESC off without any real issues from the board frame and even took a stab at soldering the bullet connections onto the motors.
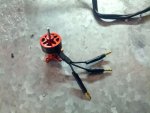
IMG_20140310_142222_50p.jpg

Protected with electrical tape for now but the solder feels pretty decent for only the third time soldering ever. I'm going to continue working on getting the rest of the motors off and soldering the bullet connection for the motors first.

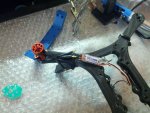
IMG_20140310_144313_50p.jpg IMG_20140310_144555_50p.jpg

The only thing I'm really wondering about is how I'm going to lay everything out on the quad since there is only so much room on the frame. Also my ESC's don't have a lot of wire on one end, I might have to extend it by add more wire and soldering it together or just solder on new wire to the ESC's which I wasn't expecting.
 

4props

Junior Member
Nice build :)

If you extend the ESC wires, you should always extend the motor wires (which are your shortest anyway), extending the battery wires can require adding additional capacitors.
 

jhitesma

Some guy in the desert
Mentor
I'd suggest taking a look at how the wires coming off the motors are supported. If they're like the 24g blue wonders and DT750's (which I suspect they are) then the wires are totally unsupported and you'll likely end up breaking them in a few crashes.

The solution is to put a little bit of 5 minute epoxy on them being careful not to glue the motor itself so it can't turn.

David demonstrates how to do it in this video:

Don't make the mistake I did and assume this step is optional! Otherwise you'll either be ordering new motors and/or learning how to rewind motors before you know it!
 

xuzme720

Dedicated foam bender
Mentor
And for more homework, just so you don't have any cold solder joints, check out this video on soldering. It will have you soldering like a pro in no time!
 

Greg2B

Senior Member
Just a quick update from what I completed last night. I got all the motors off my old frames. One motor didn't survive and I ripped the wires connecting to motor. So I guess I can make a my second build a tri or order another motor when the time comes. Guess I should be sure to use the 5 minute epoxy on the motor connections;)
IMG_1901_25p.JPG


IMG_1915_25p.JPG
Just another image of me laying it all out.


IMG_1921_25p.JPG

Soldering some more bullet connectors on the motors. I may redo these...
 

Greg2B

Senior Member
I'd suggest taking a look at how the wires coming off the motors are supported. If they're like the 24g blue wonders and DT750's (which I suspect they are) then the wires are totally unsupported and you'll likely end up breaking them in a few crashes.

The solution is to put a little bit of 5 minute epoxy on them being careful not to glue the motor itself so it can't turn.

David demonstrates how to do it in this video:

Don't make the mistake I did and assume this step is optional! Otherwise you'll either be ordering new motors and/or learning how to rewind motors before you know it!

So yeah...I did as exactly as you said not to and put the glue on the motor so it couldn't turn. I was so sure I was clear of the motor part. Luckily I had some more motors but that's 2 motors I've had to scrap due to messing up. Hopefully in my next build I can do with out the screw ups
 

Greg2B

Senior Member
So this is as far as I've gotten so far. I have heat shrinked all the motor gold connectors and mounted them on to the frame with zip ties. I also put on the KK Board as well.

IMG_20140316_001252_50p.jpg IMG_20140316_001313_50p.jpg

I did have the screws that were supposed to fit but they were not long enough even though they where recommended. If I would have looked a bit harder on the rcgroups thread I might have seen this before and saved a bit of money but oh well. I drilled some holes and zip tied it up.

I also re-soldered one more ESC, these seem to take a me a while to do and I'm not 100% sure there soldered correctly but the connections look good to me. So tomorrow/today I will do the final soldering on the esc and lay it all out on the frame before doing the final gold connections. I may just have something to test fly tomorrow.
 

Greg2B

Senior Member
So I laid it all out on the frame. It took me a while to figure out how I wanted to lay it all out. I couldn't put the ESC's on top with out cutting the motor wire, which I didn't want to do. I also couldn't push the ESC's so far back to make enough room on the top. So my plan is to put the ESC under neath and wire the motor wires back up through the middle of the frame and connect them on top. This should also give me some wiggle room before I tie every thing down.

I don't really like the idea of wrapping the wires back around but looks like the best way to go without cutting wires and doing some more soldering. So with this decided tomorrow I will begin soldering more gold connectors on the ESC's. I also need to add some glue the the landing feet so they stop sliding around. Just got to figure out which glue, 5 min epoxy, some CA glue, or good ol' hot glue.

IMG_20140316_232419.jpg IMG_20140316_232544.jpg
 

jhitesma

Some guy in the desert
Mentor
So yeah...I did as exactly as you said not to and put the glue on the motor so it couldn't turn. I was so sure I was clear of the motor part. Luckily I had some more motors but that's 2 motors I've had to scrap due to messing up. Hopefully in my next build I can do with out the screw ups

I actually went ahead and took the bell off on mine when I glued them just in case.

You may be able to loosen up the epoxy with some heat...but it would be tricky at best.

Looking like progress otherwise!
 

Greg2B

Senior Member
IT WORKS!!!! IT FLIES!!! Thank you everyone for your help.

I really expected it to not work at all with all my crummy soldering but it work. Or at least the props would be on wrong since I still put them on the wrong way sometimes. I was really surprised and a bit over excited as you can tell in the beginning of the video...

I pretty much spent the whole later part of the day working on the quad and it fly's with almost flawlessly with the stock settings in stabilization mode. I did flip to acro and it was a bit twitchy so I'll have to tune that but besides that it fly's great. A lot better the the quad these parts came with. I shot through four battery pack testing it. The flight times are a bit low even with 1320mAh one I have, which is only rated at 13C, so I should fine some better batteries. I'll have to scope out the max mAh's I can get on a 2 cell with JST since 3 cell would probably kill it.

So now I just need to make every thing neat and move stuff around before really doing some tests. Shakedown tests I think is what I've seen them called.

Here some still pictures of the my quad as of right now.
top1_50p.JPG top2_50p.JPG bottom.JPG