Modified Guinea Pig into a C-82a

60Buick

New member
This is a complete departure from the stuff I usually build. Most of it is made of wood/fiberglass/foam and very scale. This is my first airplane from foam board and it is not a bad material for construction.

So far my wife is not very fond of my new plane. She calls it the derp plane and doesn't think it will fly. What do you think?

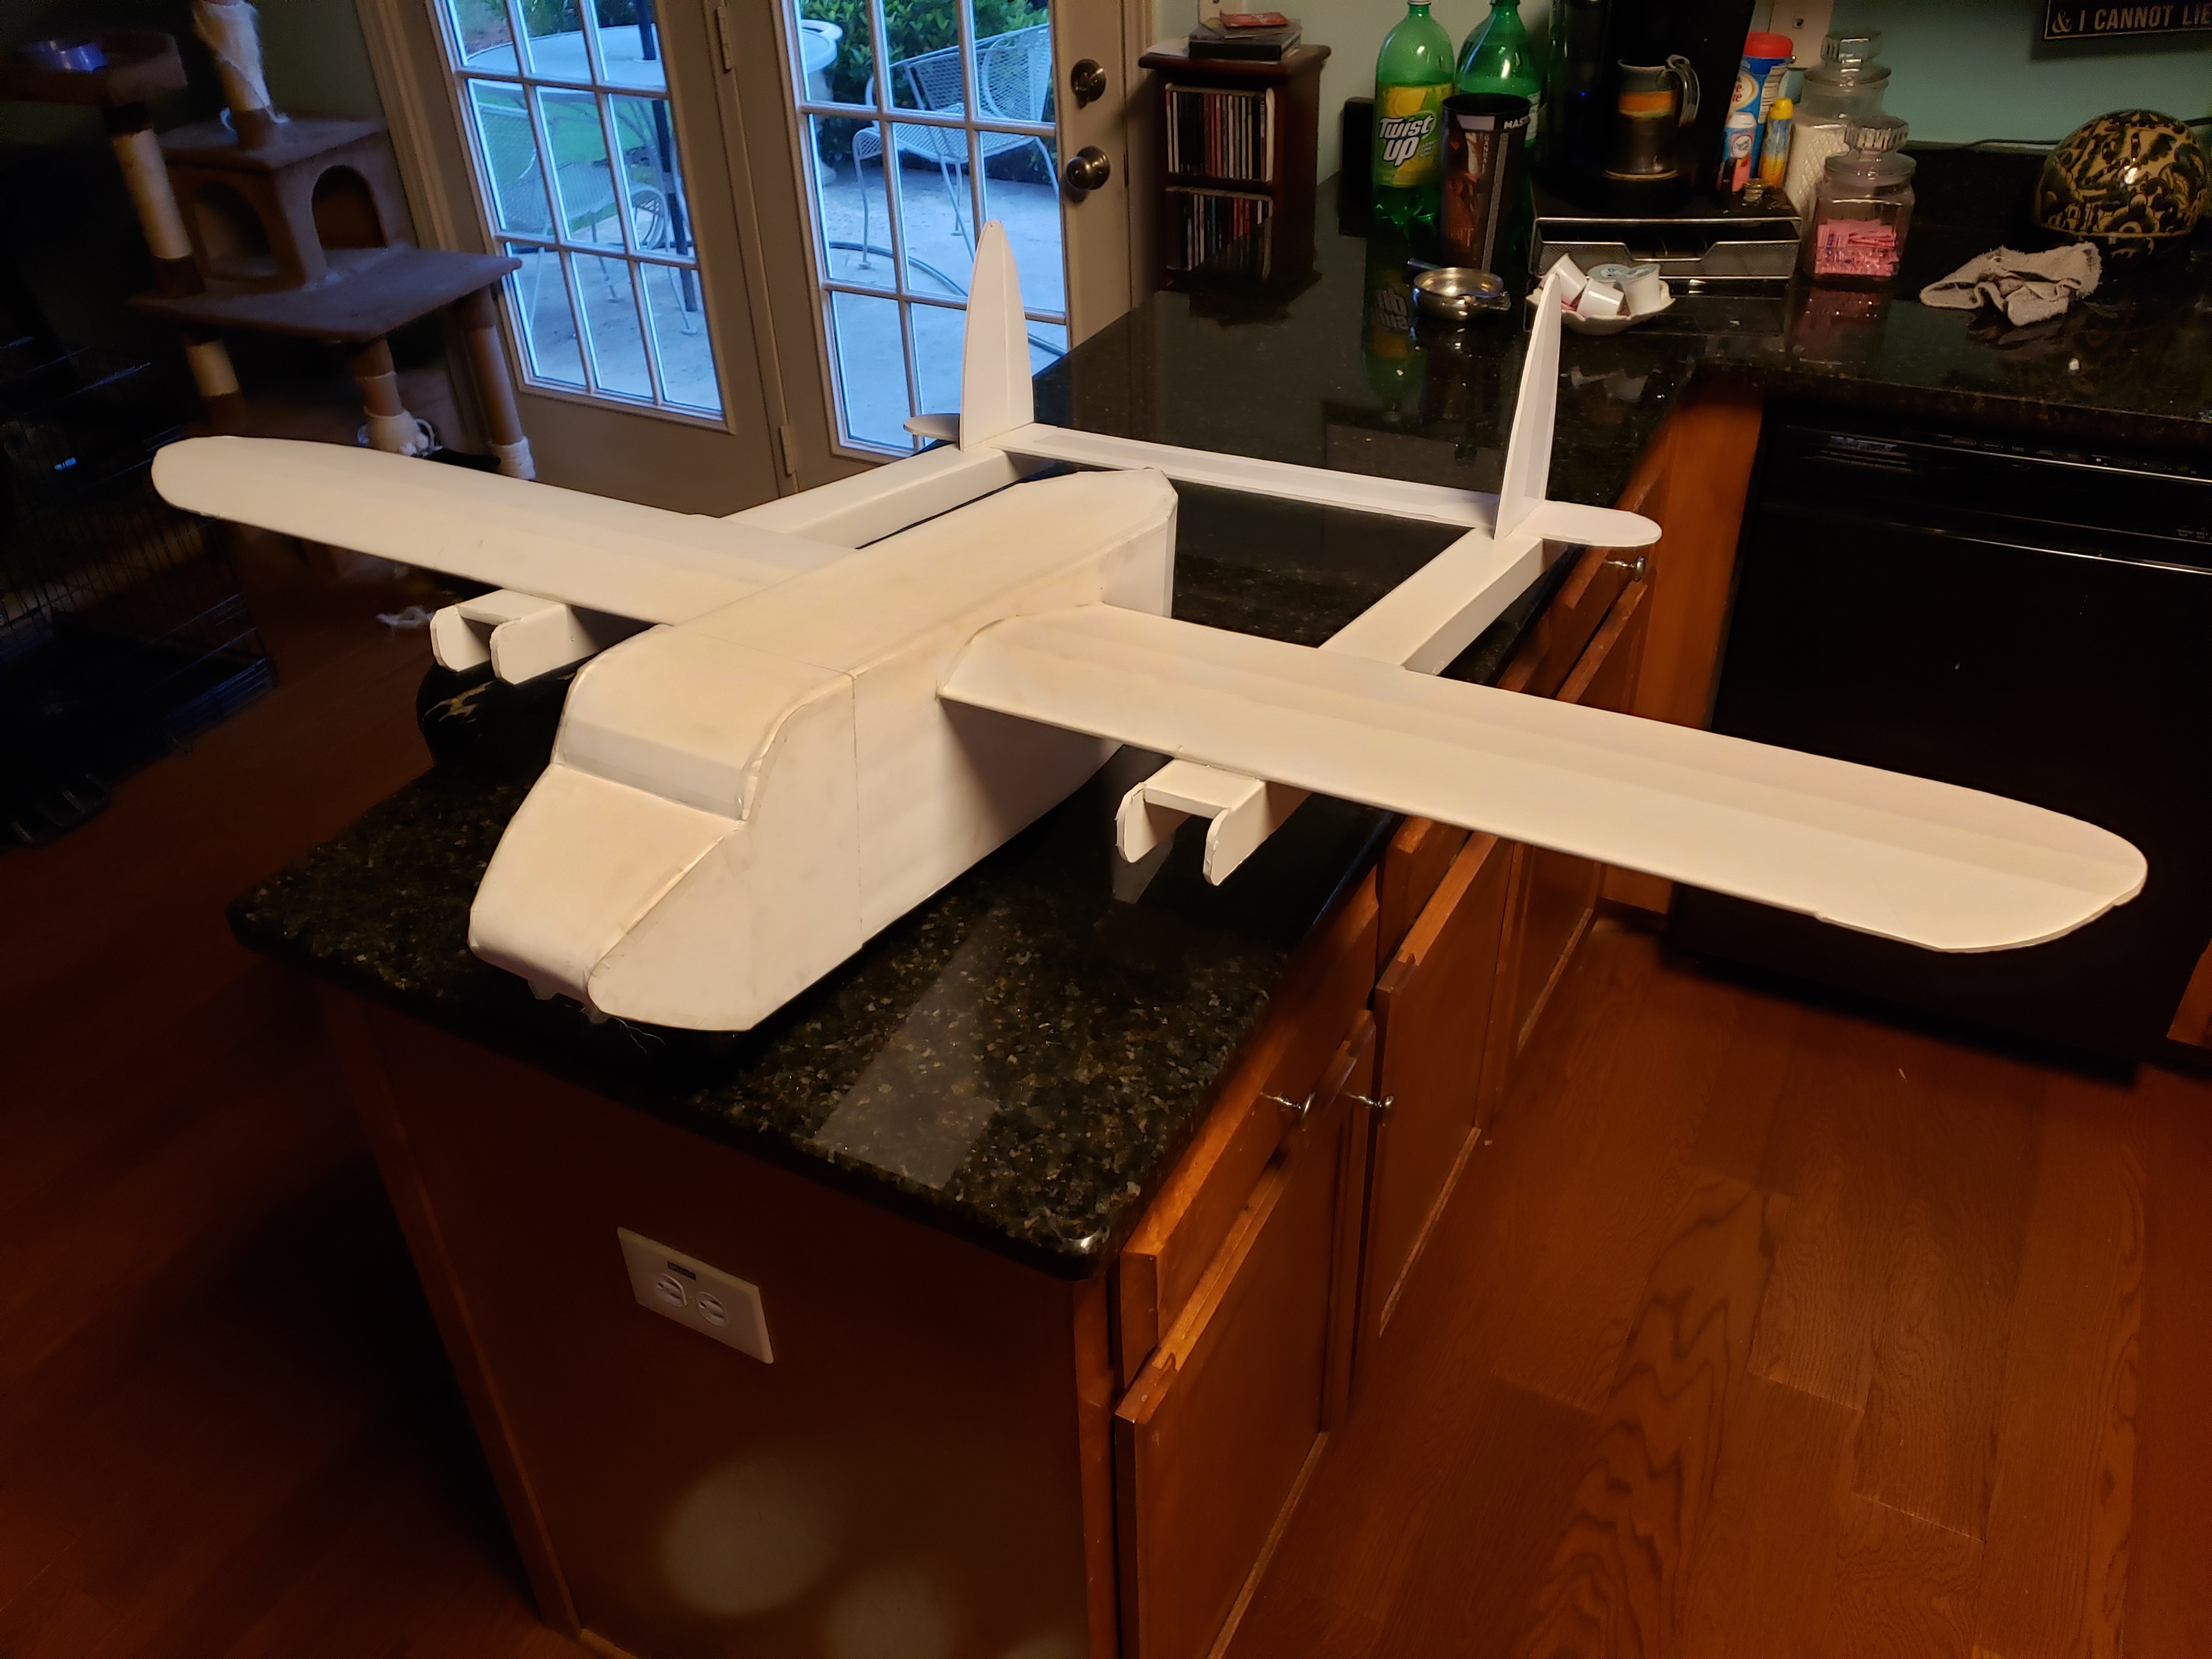
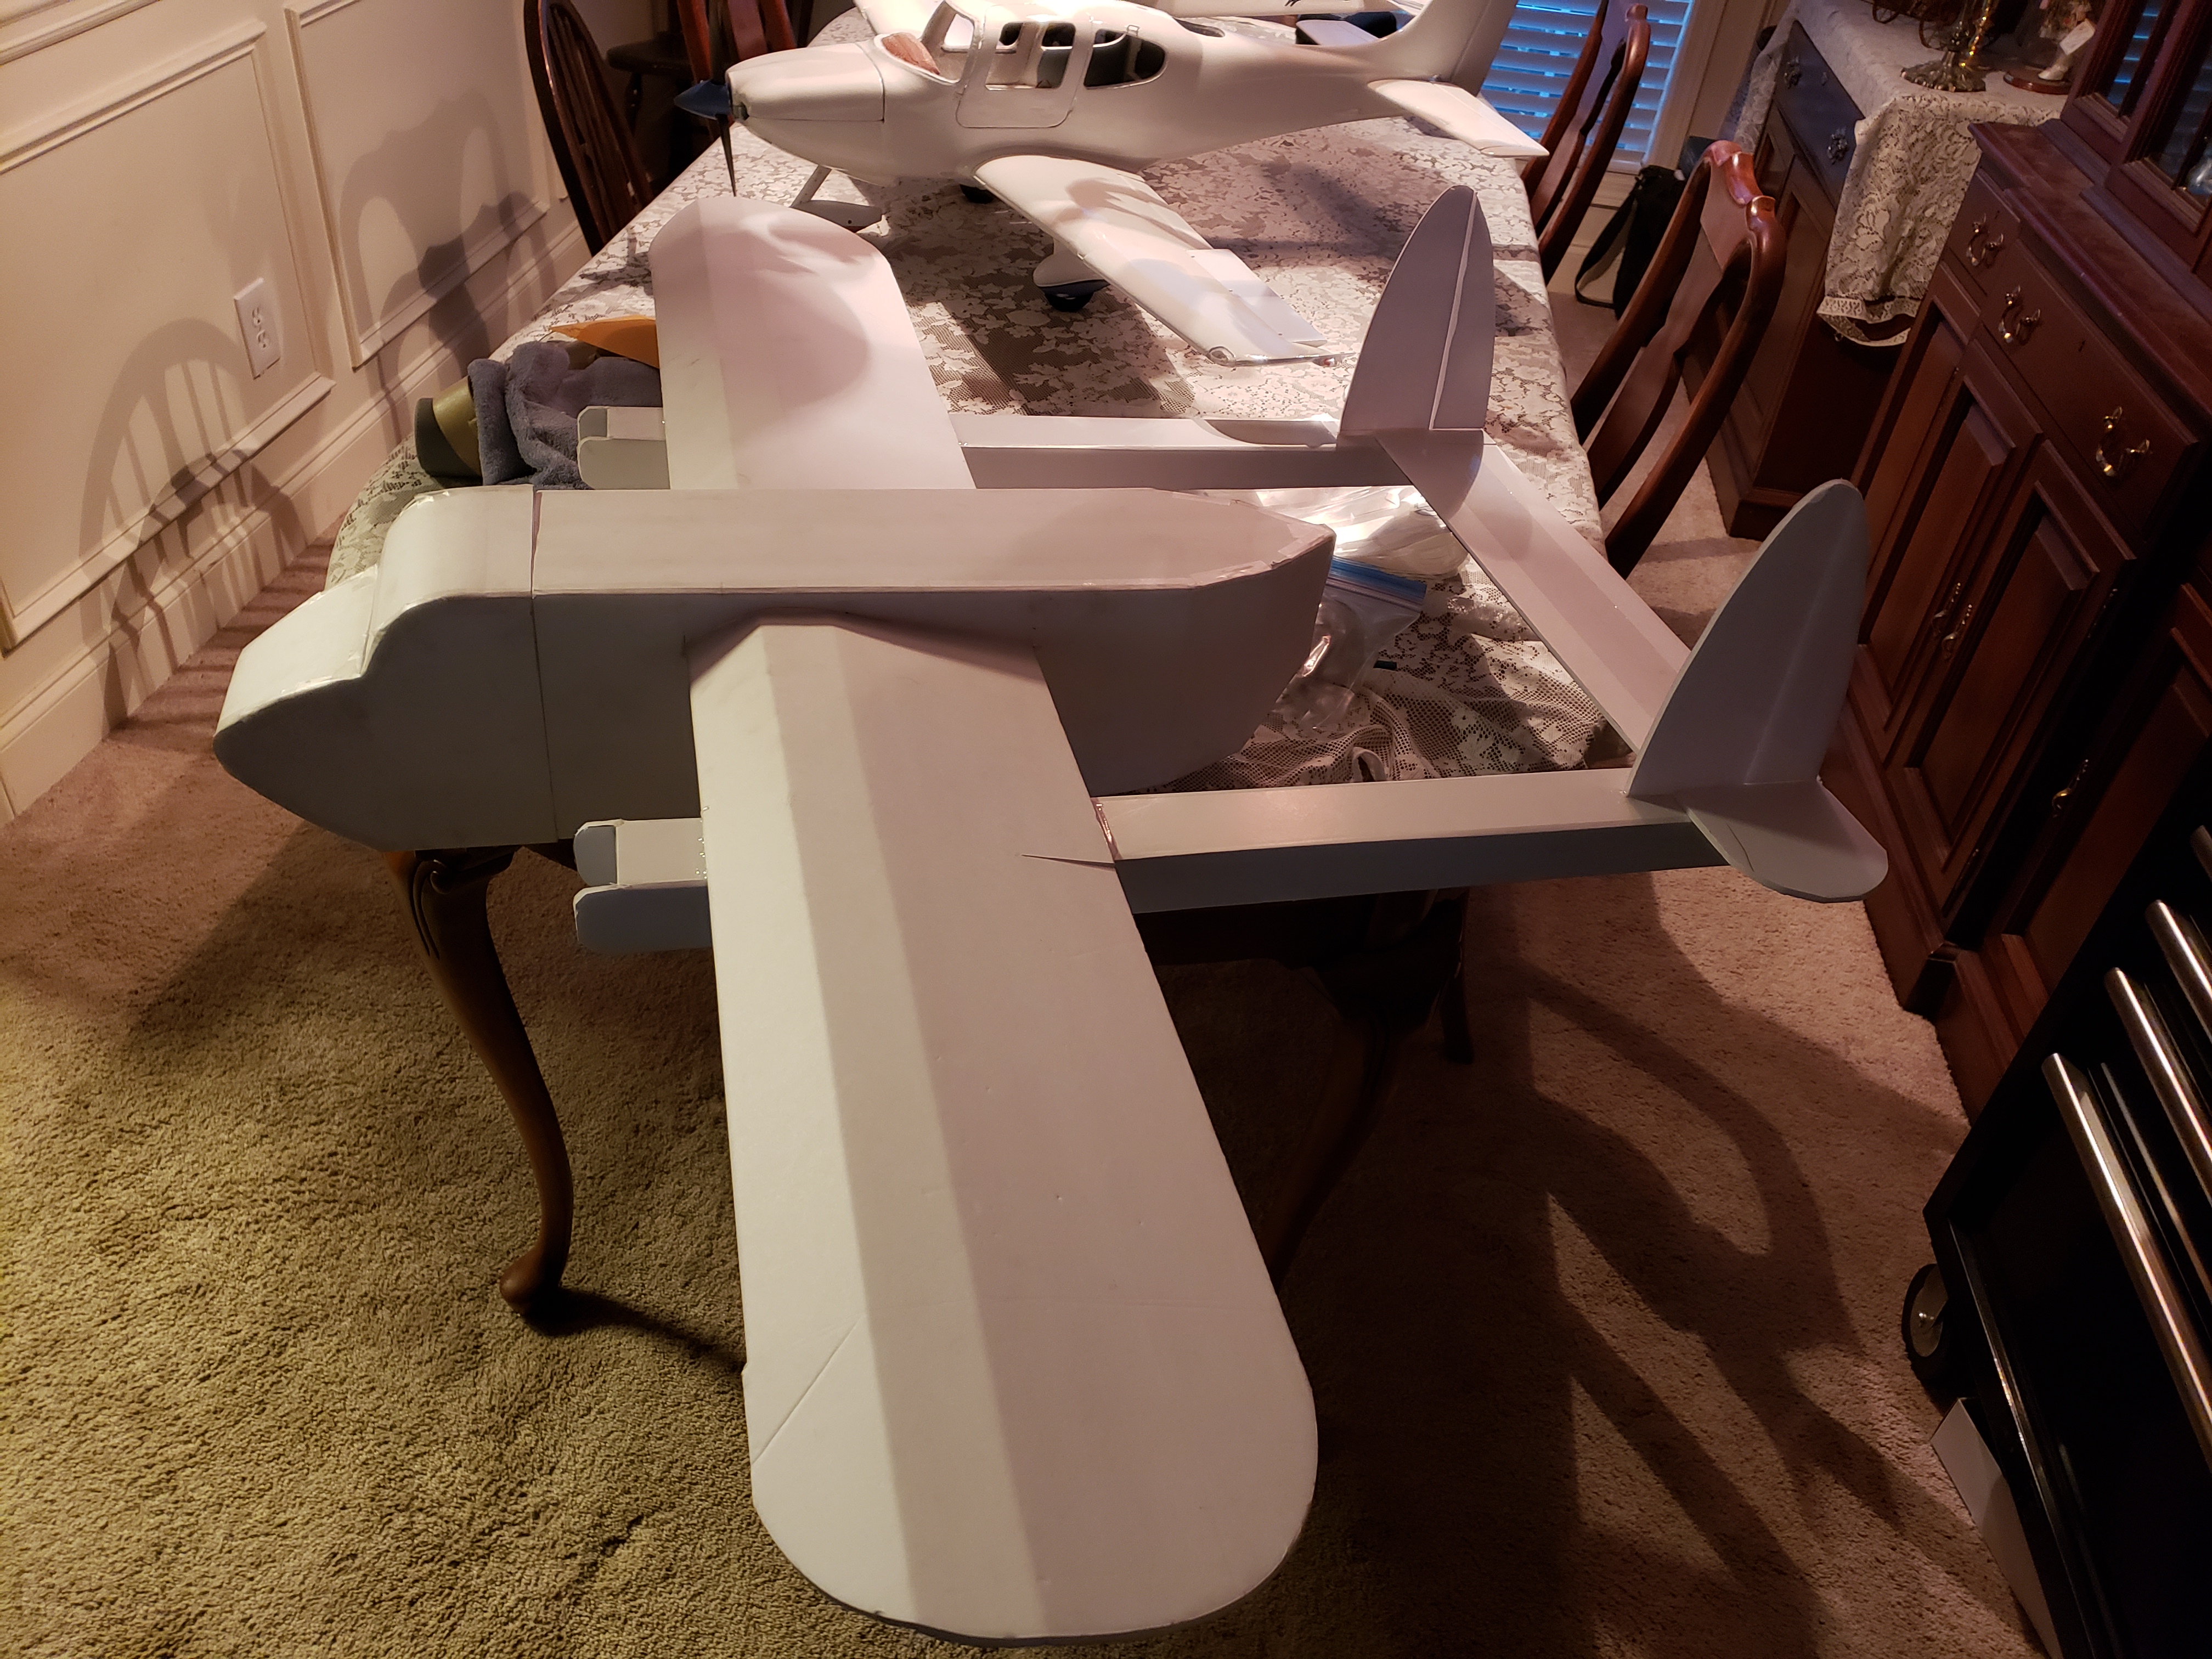
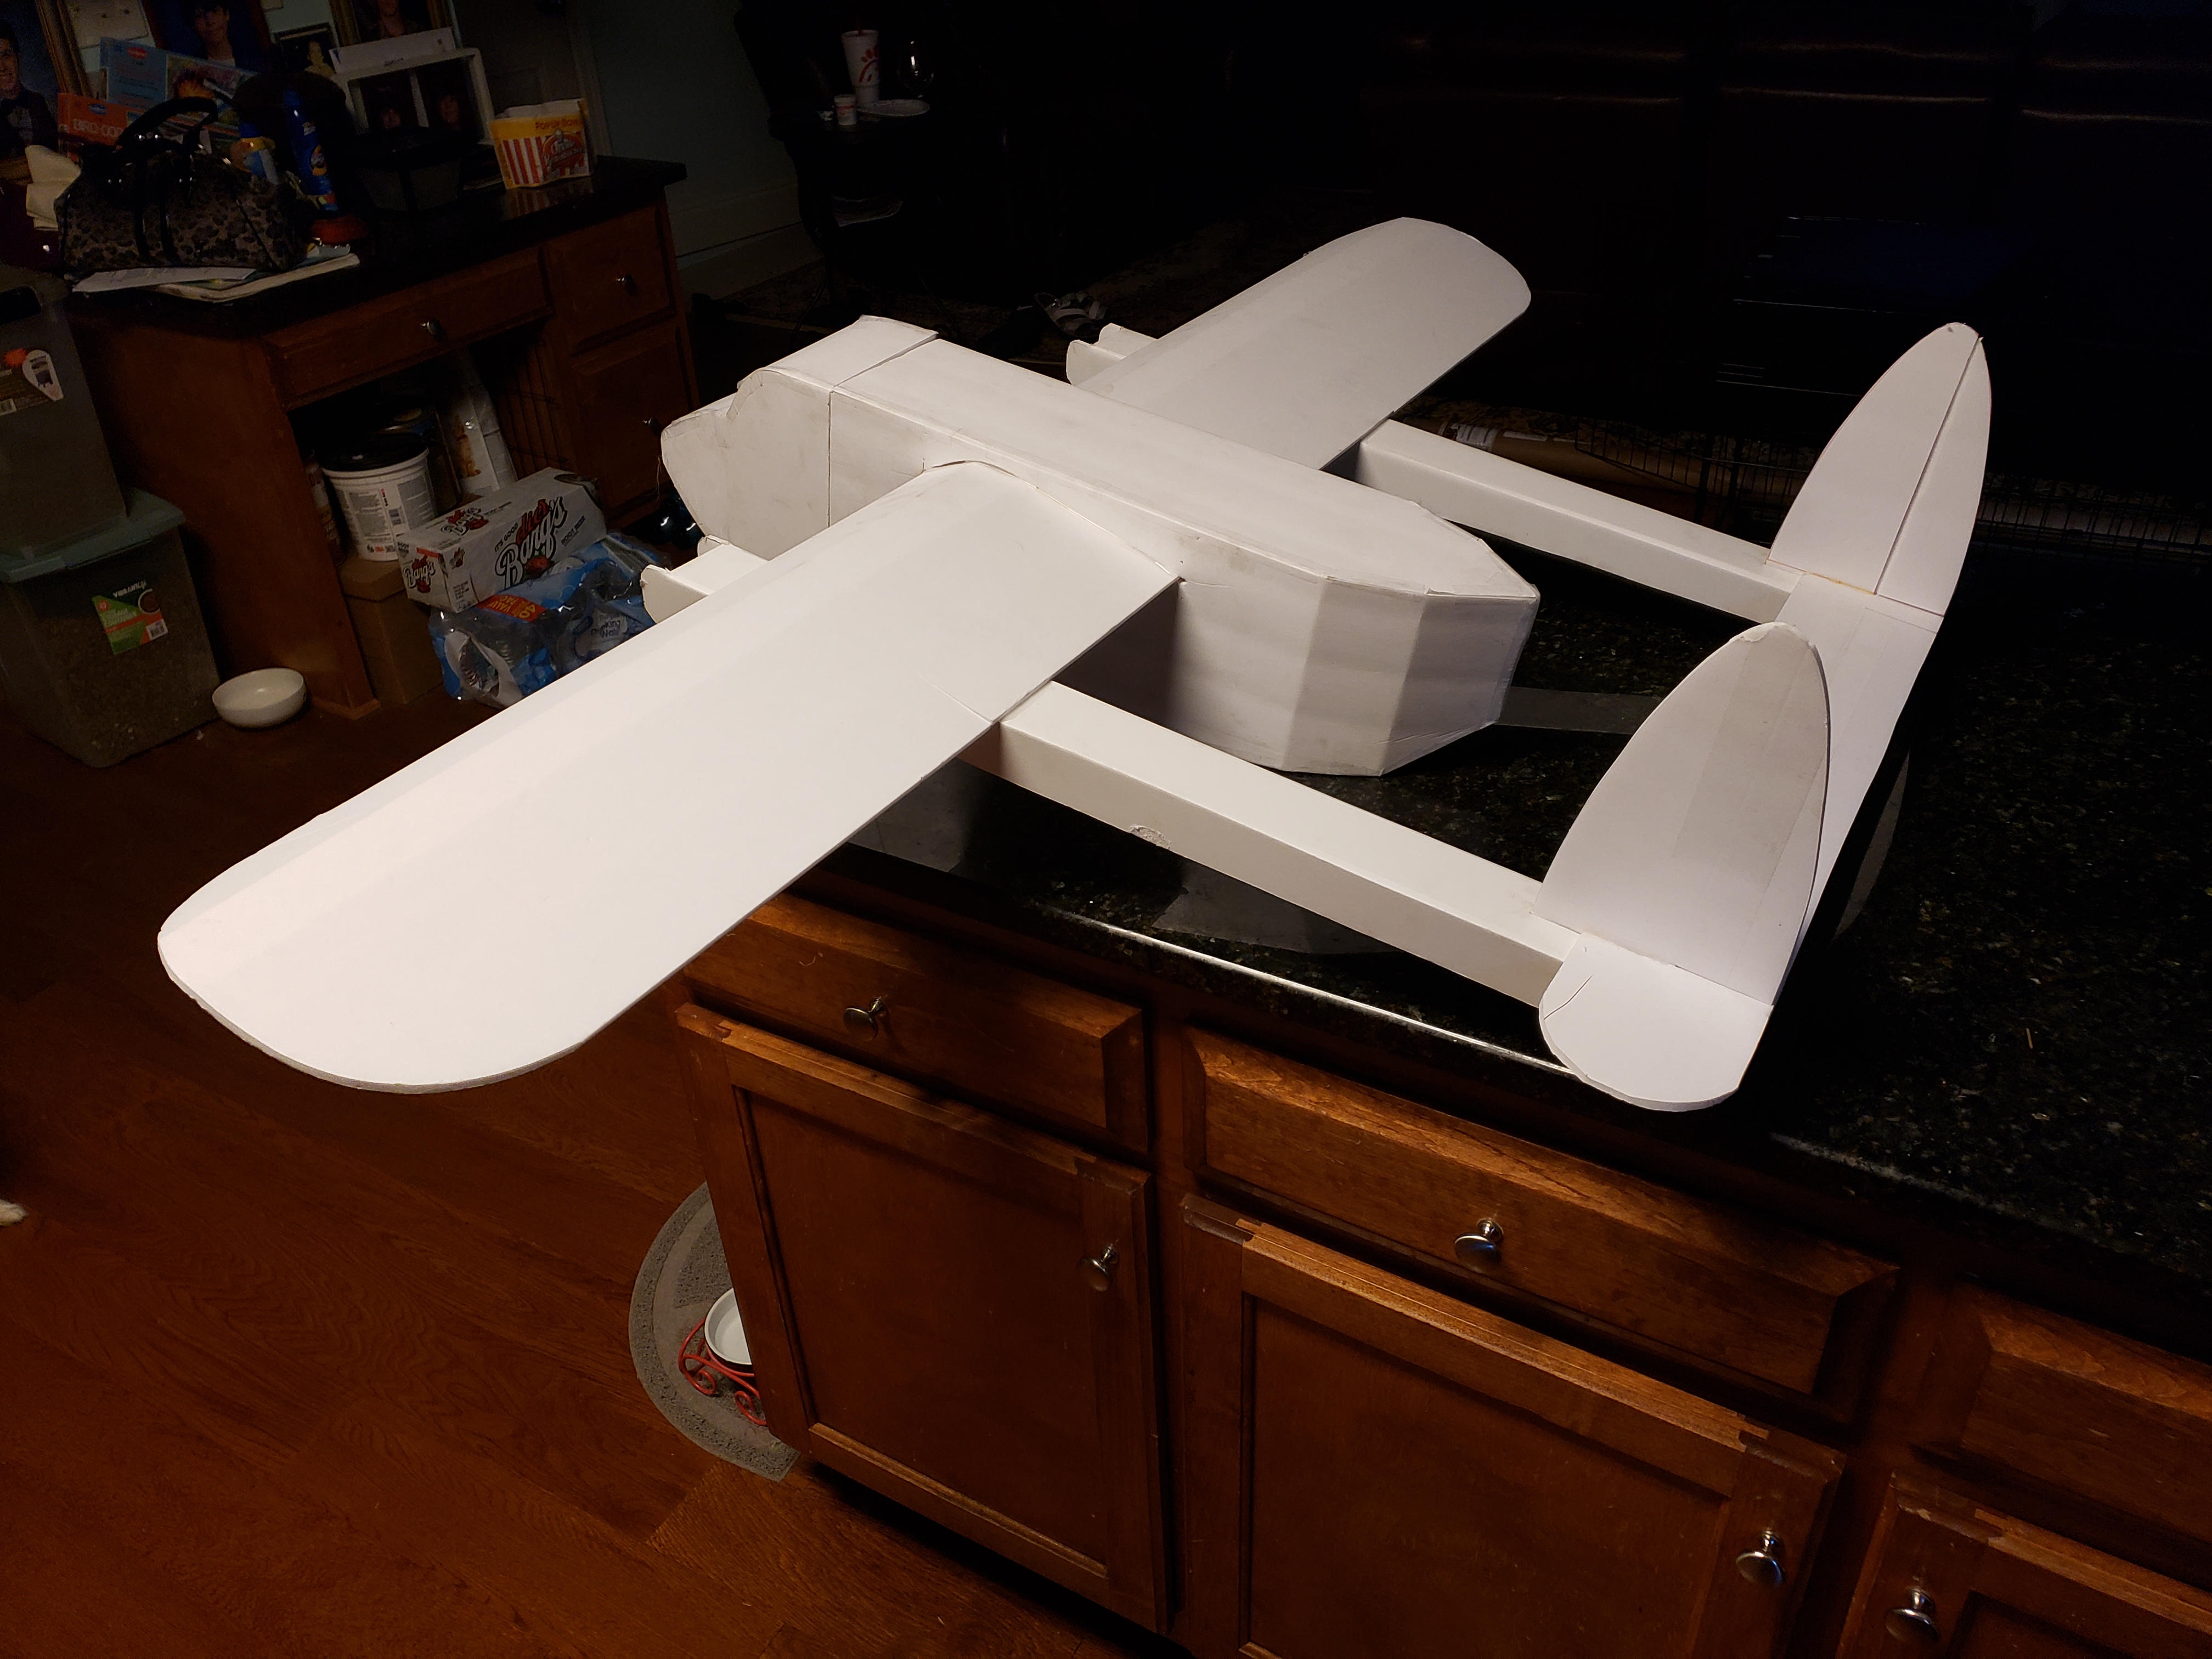
I stumbled onto the flite test videos and liked the Guinea pig. I bought the Guinea Pig kit and used it as a template. I wanted to make some changes to better represent one of my favorite aircraft, a C-82a Packet, the precursor of the well known C119 flying boxcar. It's a relatively unknown aircraft of which only a few exist today, none are flyable. I used 2 types of foam board, initially I bought it a Hobby Lobby. I built the first Fuselage and it was entirely too heavy. I found a Dollar Tree and went that route for foam. The Hobby Lobby stuff, I used for the struts and wing spars for strength the rest is dollar tree. I shortened the nose, clipped the back of the fuse, lowered the wings into the fuse, rounded the wings, extended the booms and changed the tail. I stil have a lot to do. I will have to open up the rear to haul cargo. The C-82 had duel clamshell doors which were removable so drops with be very easy without a door getting in the way. They often flew without doors and the back of the fuselage wide open. The C-82 had the landing gear in the wings so I used a 1/2 hardwood spar in my wings and some 1/16 ply reinforcements where the gear will mount. I still need to make the gear. I used white gorilla glue throughout and plan to cover the plane in monokote. More to come later as the plane nears completion.
 

Attachments

  • 20190621_063551.jpg
    20190621_063551.jpg
    3.8 MB · Views: 0
  • 20190621_063622.jpg
    20190621_063622.jpg
    2.9 MB · Views: 0
  • 20190621_063627.jpg
    20190621_063627.jpg
    2.7 MB · Views: 0
  • 9fafcaa5419551d83c4d17c9289b2ad4.jpg
    9fafcaa5419551d83c4d17c9289b2ad4.jpg
    18.4 KB · Views: 0
  • 150914-F-DW547-002.JPG
    150914-F-DW547-002.JPG
    568.8 KB · Views: 0
  • 20190621_063551.jpg
    20190621_063551.jpg
    3.8 MB · Views: 0
  • 20190621_063622.jpg
    20190621_063622.jpg
    2.9 MB · Views: 0
  • 20190621_063627.jpg
    20190621_063627.jpg
    2.7 MB · Views: 0

60Buick

New member
Ok, do you think I should extend the tail or give it a test flight and see how it does? There was no science to the tail, the length was determined by the length of the foamboard, I could not extend it any more using a single sheet. I layed the Guinea fuse and tail over my plane and it is about an inch shorter.
 

Attachments

  • 20190621_114936.jpg
    20190621_114936.jpg
    5.1 MB · Views: 0
  • 20190621_114943.jpg
    20190621_114943.jpg
    2.7 MB · Views: 0

FastCrash45

Elite member
Is just send it being prepared to go light on the elevator. That's just me though since I found out about building with foam. Crashing don't hurt like spending 6 months on balsa only to make kindling. Lol
 

60Buick

New member
I have not had much free time to tinker but I made some progress. I thinned the booms down which helps the appearance immensely, it's still ugly but its supposed to be. The rudders are oversized but I think that will stay.

I needed cowlings and I usually get lucky with plastic food containers. This time was no different, the cowling came from the bottoms of baby food "puffs". Its a cereal for infants. My wife thinks I'm nuts, but I paid for them so I'm going to eat them. There pretty good!

The landing gear is in. The base is 1/16 ply and the wire is 1/8" steel wire I bent and welded in a few places. The nose wheel is steerable. I don't use differential thrust so that was a must.

I'm looking forward to dropping stuff from this plane. I don't think I will have any problems getting the cargo out when the nose pitches up. I still need to figure out the rear clamshell doors so they are removable. For power I used the recommended stuff. "C pack" I believe. I ordered some 3 blade props because my wing is 2 inches lower and I didn't have the clearance I wanted with the supplied 2 blades. The C-82 had 3 blades so it will look a little better as well.

All that lacks is the rudder and elevator servos, the reciever and covering/finishing/painting.
 

Attachments

  • 20190627_110831.jpg
    20190627_110831.jpg
    4.8 MB · Views: 0
  • 20190627_110955.jpg
    20190627_110955.jpg
    4.9 MB · Views: 0
  • 20190627_110925.jpg
    20190627_110925.jpg
    2.7 MB · Views: 0
  • 20190627_105612.jpg
    20190627_105612.jpg
    5.4 MB · Views: 0
  • N74127(03) (1).jpg
    N74127(03) (1).jpg
    132.1 KB · Views: 0

ThatsALotOfPlanes

Active member
Cool plane! I've always loved the C119 and C82. If you're ever in Ohio, go the Wright Patterson Air Force Museum, I believe you can walk into the back of their C82.
Are you sure about the Monokote covering? I think it would add unneeded weight, especially since you said the wings are made of the heavier foam. Is the Monokote to create a base for paint?
 

60Buick

New member
Thank you for the kind words. I would love to see the C-82 in person. I'm down in Ga, might be hard to get my wife onboard with the drive!

As for the Monokote, I can compensate for added weight by removing unnecessary foam and not painting at all. The only heavy foam board used was the tail booms and the wing spar, everything else is the delicate stuff. It will give it a lot of protection from hanger rash and prevent delamination from the Georgia humidity. It also hides some really ugly joints in my construction and makes the control surfaces fail proof. The only downside is the cost. The last time I used the stuff it was $8 a roll, those days are long gone.

I swiss cheesed the tail booms for weight savings and added the lower rudder portion. They were flimsy and I didn't want to brace them externally like the Guinea pig kit suggest. So I added some carbon fiber dowels inside the rudders and elevator to keep them rigid. If you file the dowel end sharp as a razor then chuck it into drill and slowly push it into the foamboard while spinning slowly it will go in straight.

I covered the plane in Monokote. My covering job leaves a lot to be desired, but it works. I don't think it added much weight at all.
I tend to go nuts with paint so it might be lighter than had I sprayed multiple coats of paint.

The radio is in, the only thing left is to brace the firewalls, mount the cowls and hook up the rudder and elevator linkages.
 

Attachments

  • 20190629_191052.jpg
    20190629_191052.jpg
    5 MB · Views: 0
  • 20190629_191022.jpg
    20190629_191022.jpg
    5.8 MB · Views: 0
  • 20190629_191009.jpg
    20190629_191009.jpg
    4.8 MB · Views: 0
  • 20190629_193057.jpg
    20190629_193057.jpg
    3.5 MB · Views: 0
  • 20190629_190437.jpg
    20190629_190437.jpg
    4.1 MB · Views: 0
  • 20190629_190552.jpg
    20190629_190552.jpg
    7.7 MB · Views: 0
  • 20190629_190524.jpg
    20190629_190524.jpg
    4.3 MB · Views: 0
Last edited:

60Buick

New member
I did a quick 4 minute maiden. It flew very well. I did a few laps while my audience was waiting for the crash. This is the first plane I built that was not a kit, plus it looks like "a potato with wings" so they were not expecting much of a flight. There is plenty of power, I never went past 50% throttle and she will maintain level flight around 40%. It doesn't fly as slow as a trainer but it is no rocketship either. Its extremely touchy but I have not dialed in any expo or end points for the control surfaces. It took a bit of down trim to fly level and it felt a little tail heavy so I am going to move the battery forward a touch. This plane likes a lot of rudder input to keep the turns pretty. Everything was very solid, I didn't notice any flex in the wings. The landing was uneventful, just point and shoot.
 

Attachments

  • IMG_3513 (2).PNG
    IMG_3513 (2).PNG
    5.6 MB · Views: 0
  • IMG_3540.PNG
    IMG_3540.PNG
    3.9 MB · Views: 0
  • IMG_3533 (1).PNG
    IMG_3533 (1).PNG
    4.3 MB · Views: 0
  • IMG_3529.PNG
    IMG_3529.PNG
    1.6 MB · Views: 0
  • IMG_3537.PNG
    IMG_3537.PNG
    2 MB · Views: 0