MPCNC-inspired CoreXY laser engraver

dkj4linux

Elite member
I debated whether I should put this in my needle-cutter thread but the forum title settled it for me...

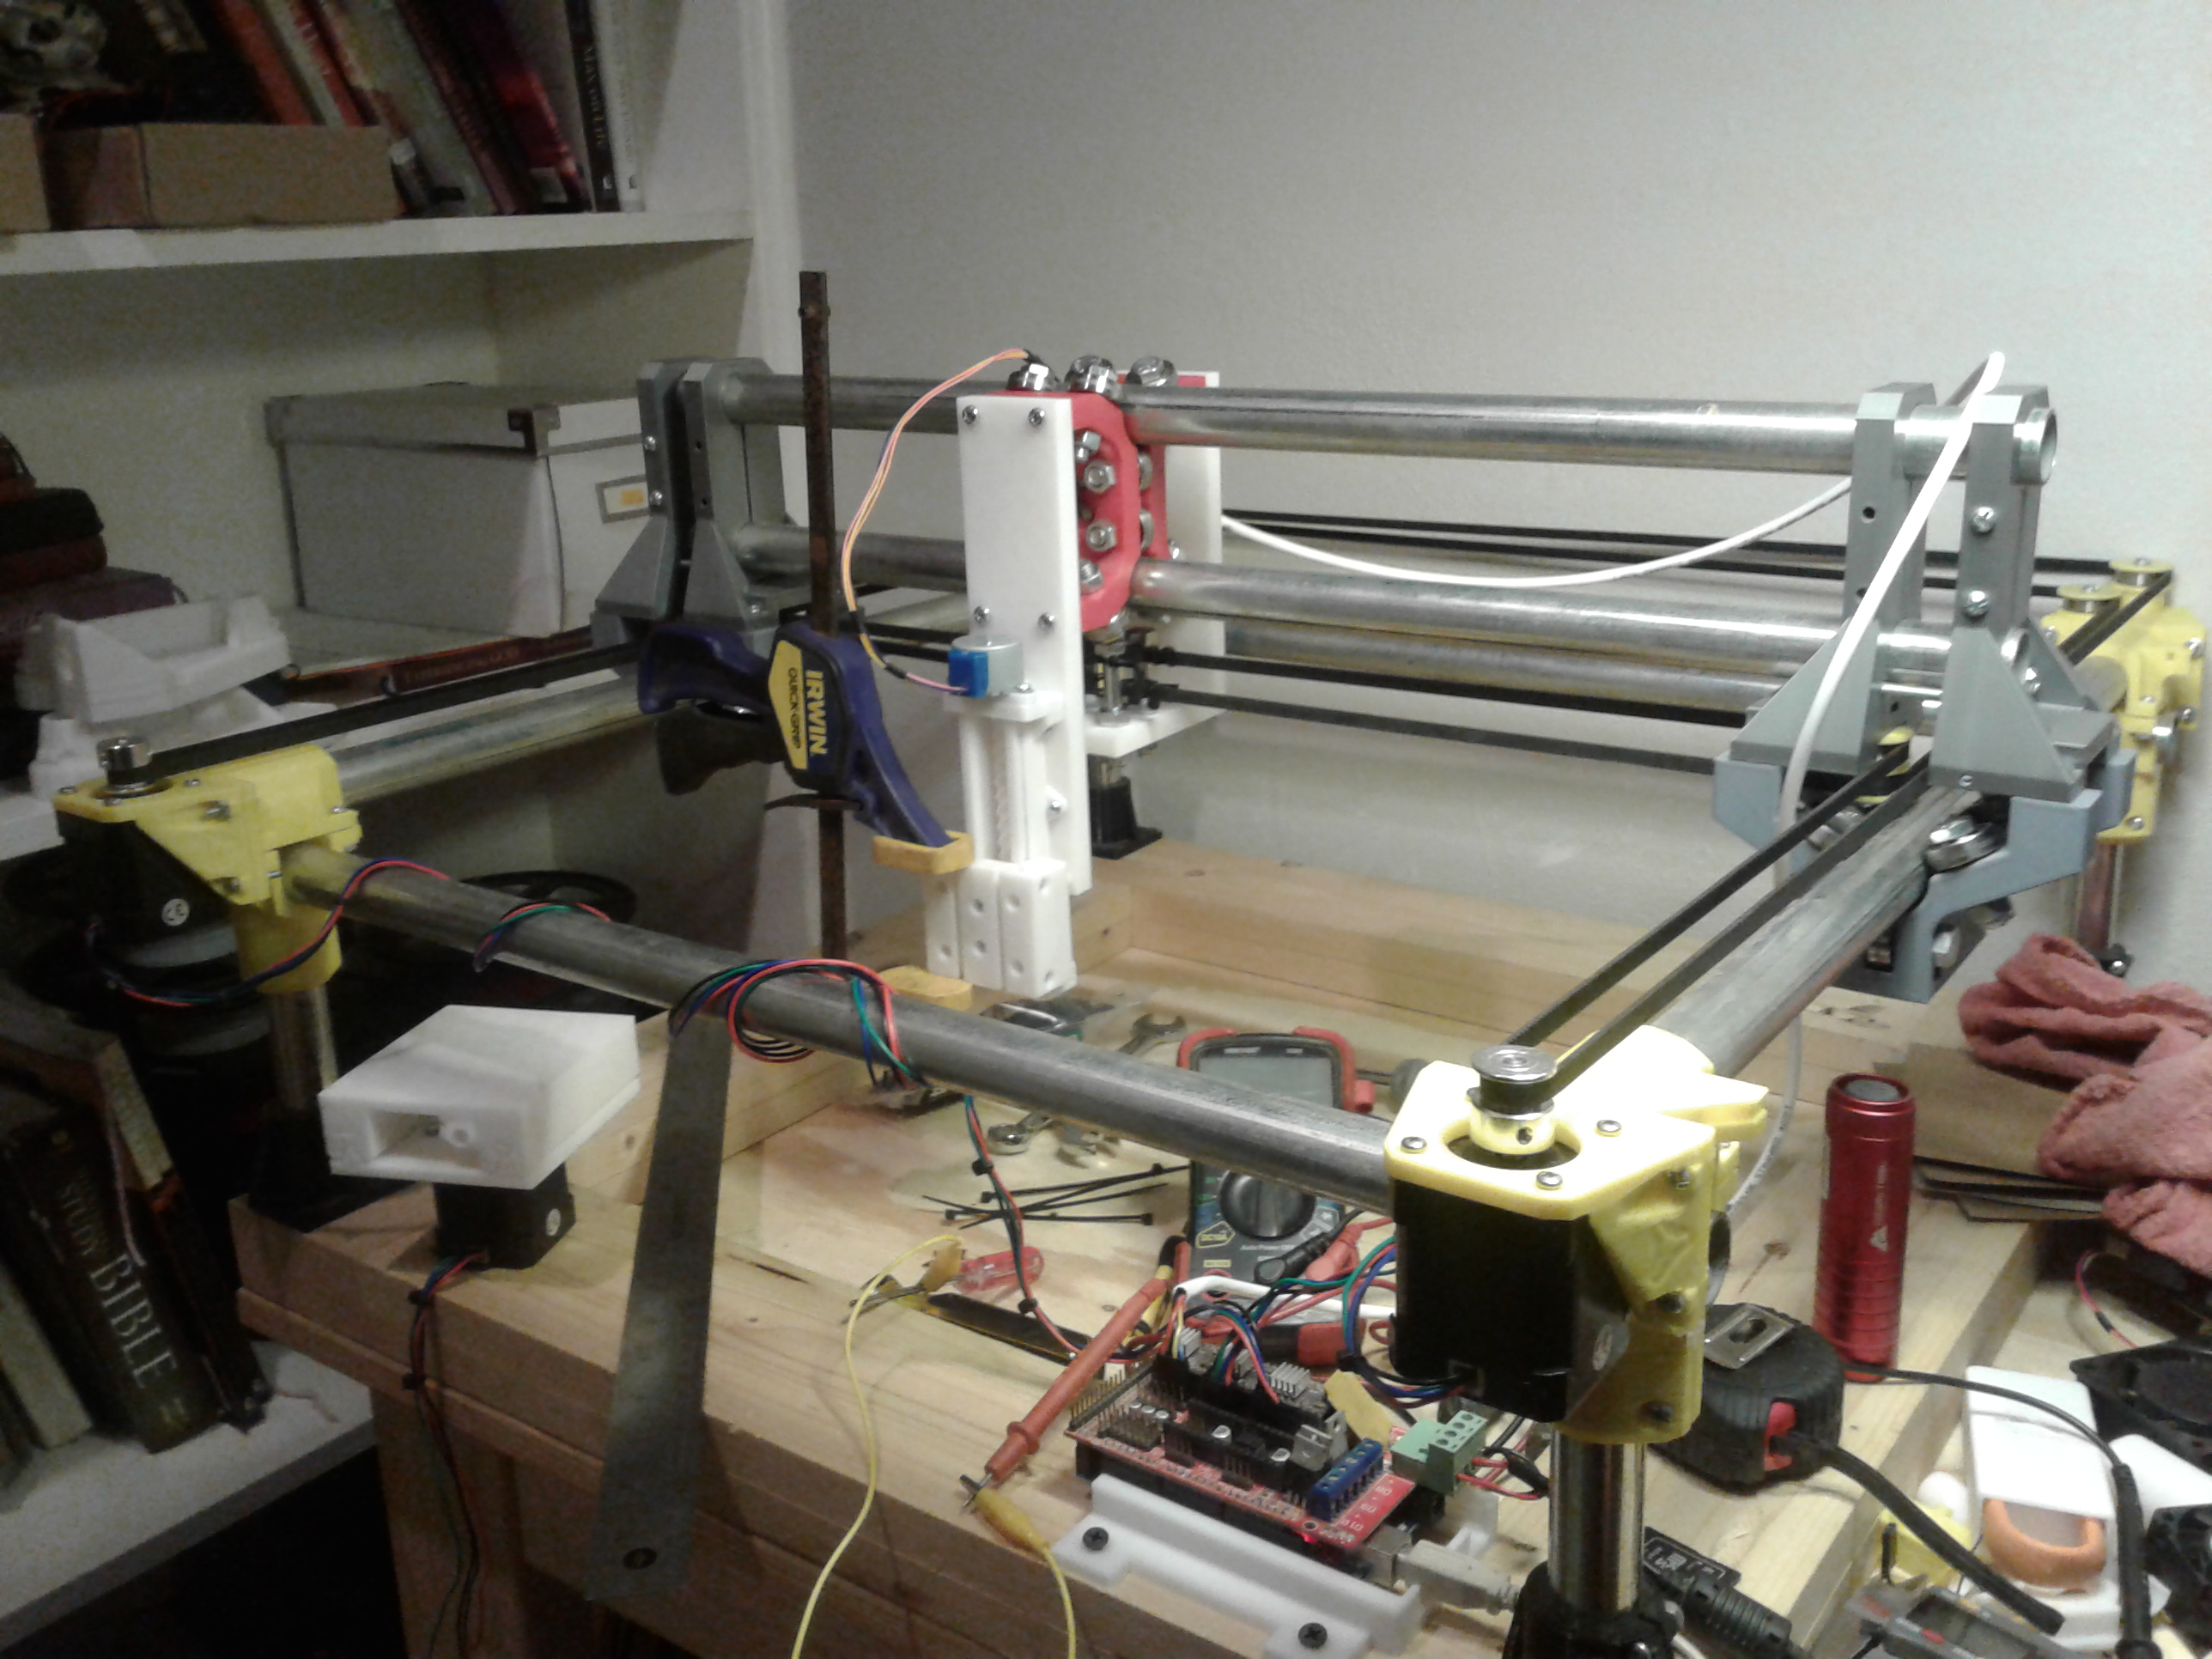
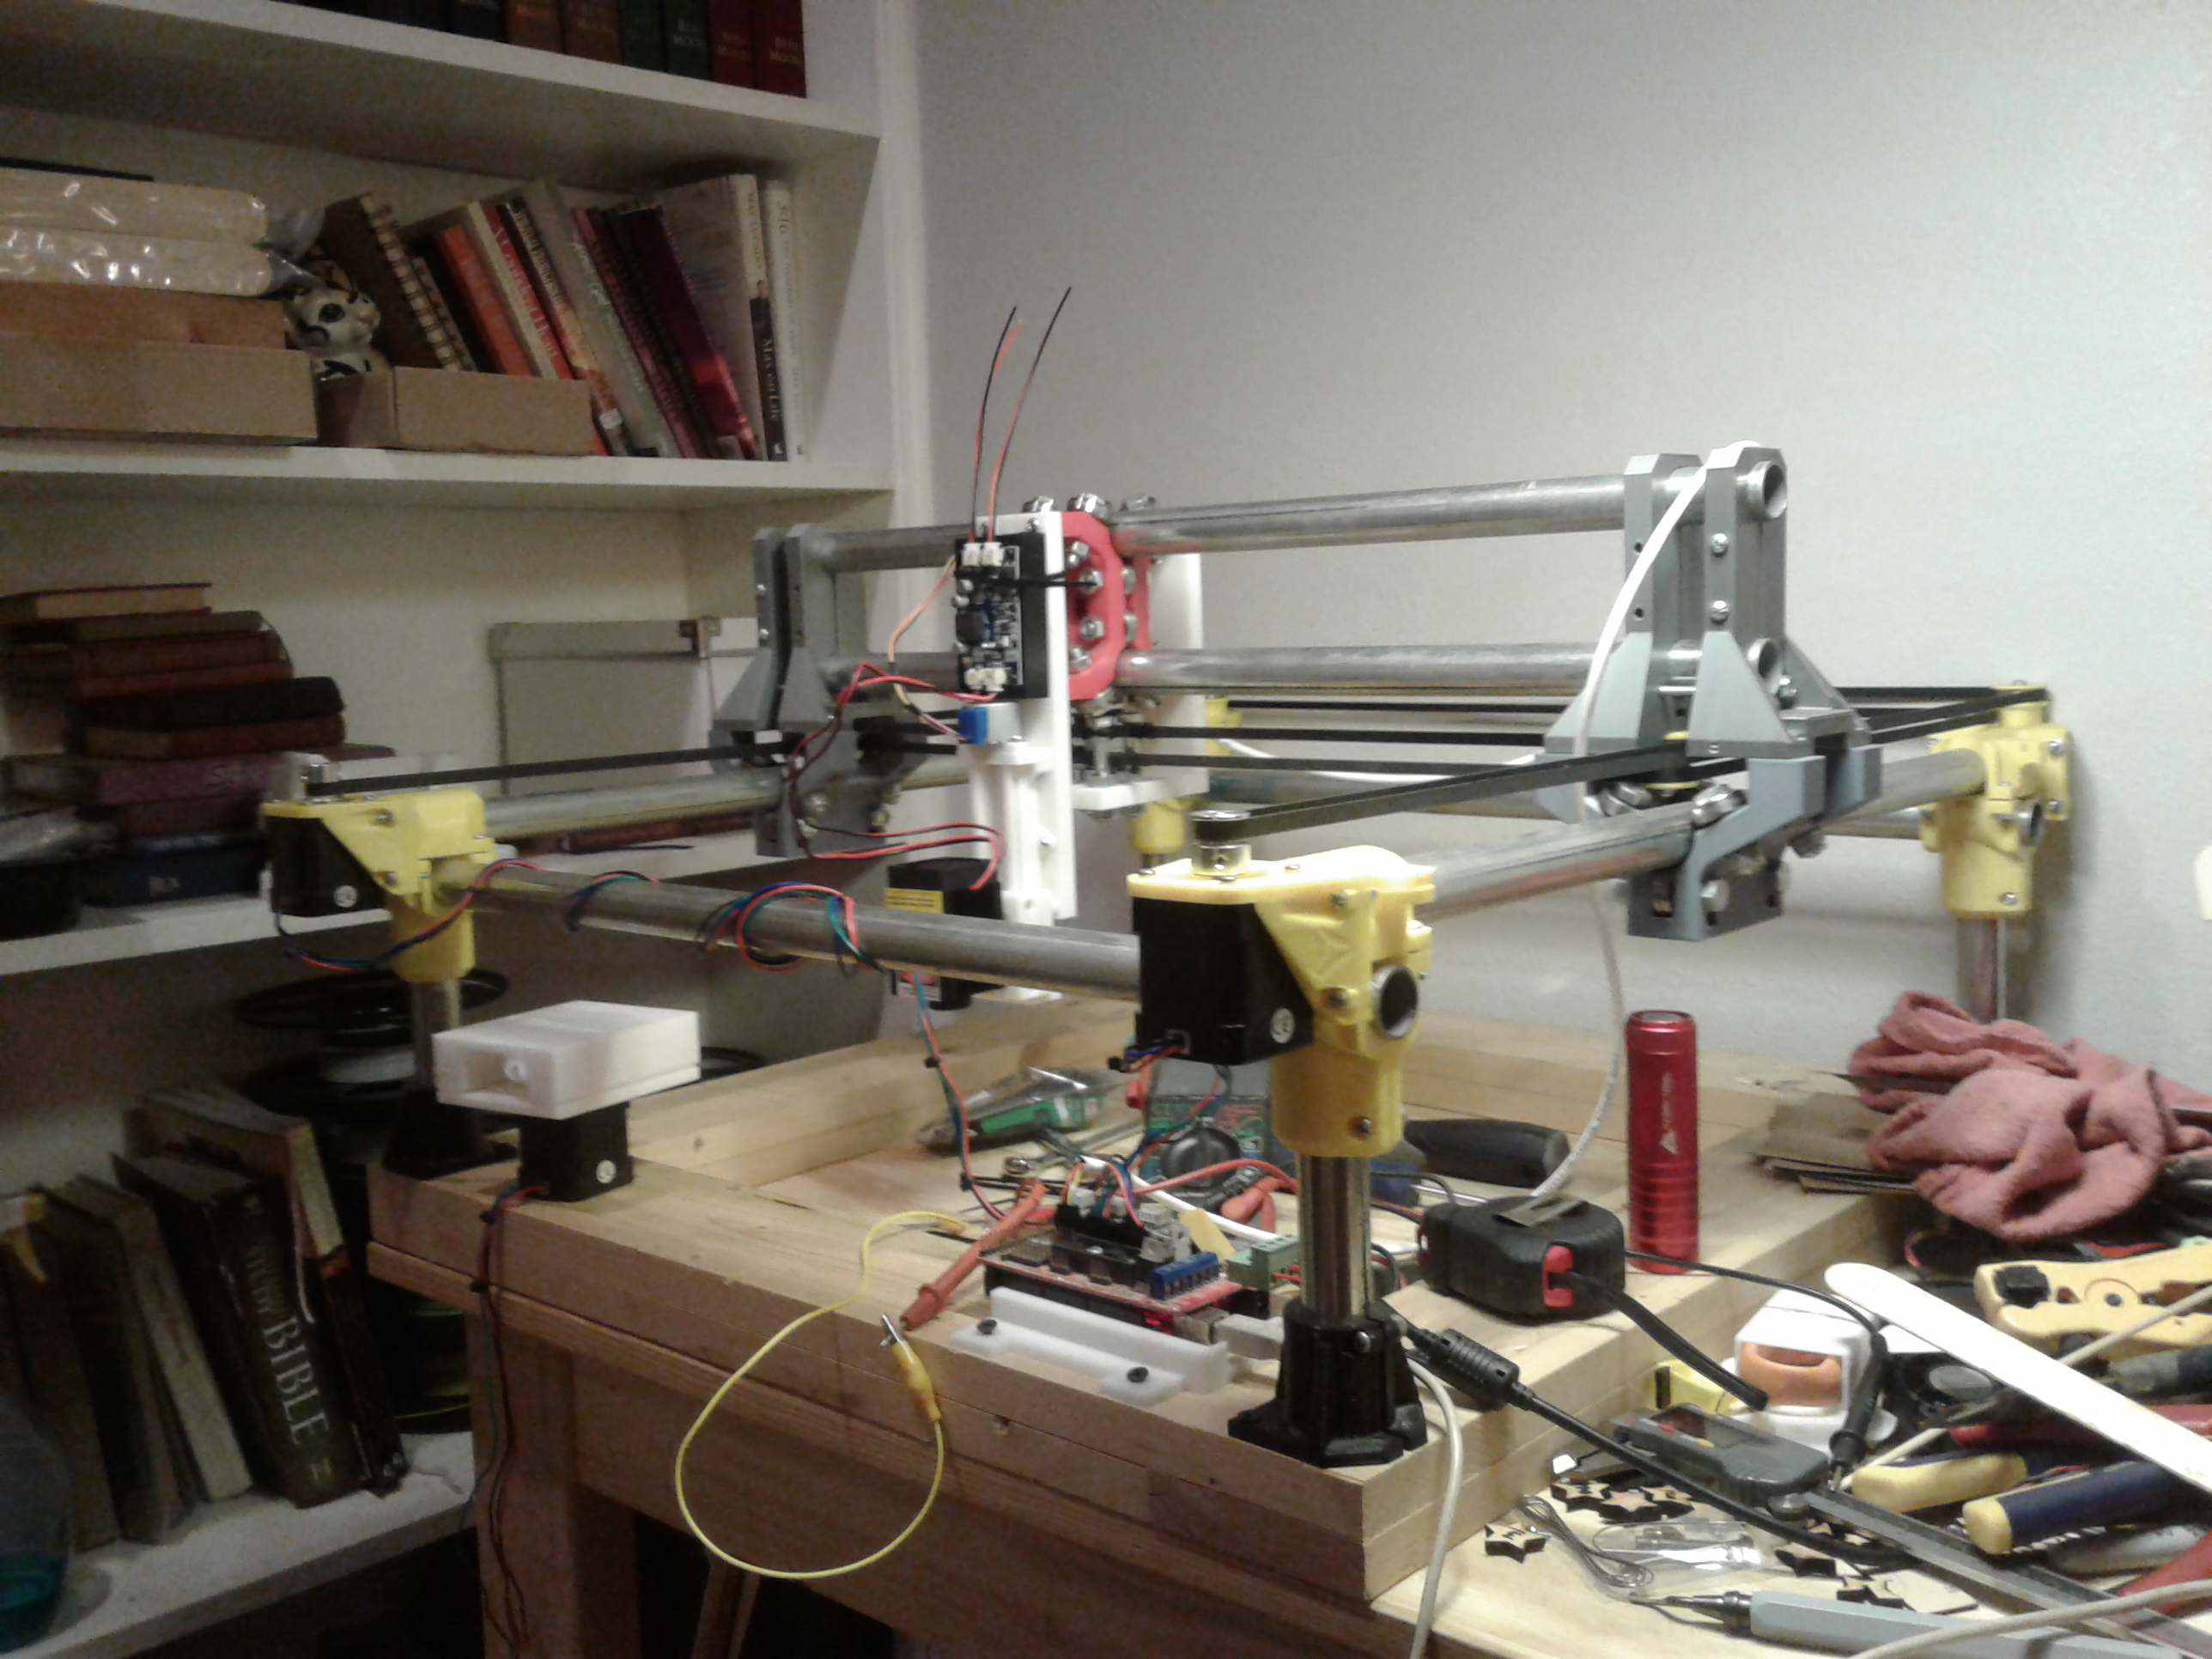
In part, trying to justify purchase of my new Prusa I3 MK2S printer and also to satisfy my rather new-found interest/curiosity with "corexy" technology... here's a MPCNC-inspired CoreXY-variant laser engraver/cutter I've recently built for fun.


20170617_122844.jpg


20170617_124039.jpg

This is in the spirit of my CamSlider (https://www.thingiverse.com/thing:1984162), detailed over in the needle cutter thread, where I've repurposed/reused/modified MPCNC (and other) parts, and combined them with a few of my own, to cobble together a brand new machine. Similarly, I had recently completely rebuilt/redesigned/converted a small, and very flimsy, Makeblock pen-plotter to use CoreXY technology (also detailed in my other thread)... and was very pleased with the simplicity and operation of the little laser engraver that resulted.

So, when a friend no longer had room for the early-version 2'x2' MPCNC I had previously built for him -- and I really didn't just want to do yet another MPCNC rebuild/update -- I wondered if I could marry the MPCNC with the CoreXY technology that had so fascinated me with the little Makeblock machine. I tore the old MPCNC all the way down to the feet/base, reclaimed all the hardware and the L-cheapo 2.1-watt laser my buddy had purchased/installed, and then started looking for "building block" parts I might use to build the new machine I envisioned. In addition to Ryan Zellars' MPCNC, I've borrowed ideas/parts from his LowRider and also a novel, snap-together printed 3d-printer, Snappy (https://www.thingiverse.com/thing:1828359).

I realize this machine is too large/heavy/clunky for corexy and a general-purpose CNC -- I'm just a seat-of-the-pants mechanical "engineer", after all -- but as a dedicated laser-toting machine, with no real tool-forces to deal with, this machine seems to operate quite well. It's been a fun project... and I'm quite pleased with the result.

20170617_081914.jpg

20170617_082307.jpg

20170617_082243.jpg

20170606_115502.jpg

20170606_115515.jpg

20170606_113753.jpg

20170606_113740.jpg

20170606_101329.jpg

20170606_093558.jpg

20170606_114015.jpg

20170606_114006.jpg

-- David
 
Last edited:

Vicious1

New member
David,

I absolutely love it. You continually inspire me, and make me think creatively about my own parts!

I think this is a great build. For anyone with a 3D printer (or an MPCNC) This could very easily add another dimension to others home micro manufacturing for very little cost. I think around here it would be one of your MPCNC foam cutters and one of these to cut out the wood parts and hopefully decorate them. Makes for quick turnaround after a nasty crash and some nice looking builds with a little flair.

Love the CoreXY use, I haven't built one myself but from my point of view it looks ideal. Now I have to try it.

As always David, thanks for all you do!
 

dkj4linux

Elite member
David,

I absolutely love it. You continually inspire me, and make me think creatively about my own parts!

I think this is a great build. For anyone with a 3D printer (or an MPCNC) This could very easily add another dimension to others home micro manufacturing for very little cost. I think around here it would be one of your MPCNC foam cutters and one of these to cut out the wood parts and hopefully decorate them. Makes for quick turnaround after a nasty crash and some nice looking builds with a little flair.

Love the CoreXY use, I haven't built one myself but from my point of view it looks ideal. Now I have to try it.

As always David, thanks for all you do!

Thank you, Ryan, for the kind words... and great, *FUN* machine! I have a blast playing with this stuff...

I decided the Snappy-inspired Z-motor/pinion would be better located at the bottom of the X-carriage for my need, so flipped it this morning. I had to add a couple of holes... I guess I should just mirror the hole pattern on the printed rail part so that you can take your pick.

20170606_115502 (2).jpg

20170619_102526.jpg

The Z-axis consists of 3 pieces in a simple parallel rail and rack/pinion setup... and it's all printed; i.e. rail assembly, sled, and pinion. There's no additional heavy hardware, other than the motor. The rails and motor/pinion are fixed to the X-carriage and the Z-axis sled carries the rack that engages the pinion. Seems perfect in this application... sufficiently light-weight, smooth-operating, and accurate enough to position and hold the laser for good focus.

20170619_111050.jpg

20170619_103933.jpg

Testing -- 100mm of travel...


-- David
 

jhitesma

Some guy in the desert
Mentor
Very cool, and you got Ryan to stop in over here with it too :D

I really want to try a CoreXY setup for something...but don't really have the time or space to pull it off right now :( Not to mention a lack of spare parts and justification for yet another machine ;)

I still want to try to adapt Ryan's designs to a Delta...I still have this mental picture of how to use his roller assemblies and some conduit as the main frame and motion platform...and I really want to build a Delta just because I like watching them print :D

I should put this in the needle thread...but...it's not quite ready to go there yet:

Screen Shot 2017-06-18 at 10.18.44 PM.png

Link:
https://cad.onshape.com/documents/b...ba6f37764b78a0464a/e/359c102244a60c2d31d9828a

I keep having fun with onshape and looking for excuses to draw things in it. I went ahead and draw a basic needle cutter to experient with a few different approaches to drawing things. It only took me a few minutes to draw up the basic cutter...re-creating the hicwic mount was the hardest part since the dimensions on it are kind of goofy. Then I did a little bit of "tweaking" to try and make it a bit more like I envision it should look ;)

I'm not entirely happy with it yet...I don't like the way I did the top section and the overall look is still a bit blocky for me. I have a few ideas on how to make it more "organic" looking and will probably start from scratch once more. I also want to add in some bits for bearings or shoes against the needle but haven't decided what I want to do there yet.

I really need to finish a new extruder for my upgraded X axis on my printer...but...this was quicker and a nice way to relax this weekend :D
 

dkj4linux

Elite member
Very cool, and you got Ryan to stop in over here with it too :D

I really want to try a CoreXY setup for something...but don't really have the time or space to pull it off right now :( Not to mention a lack of spare parts and justification for yet another machine ;)

I still want to try to adapt Ryan's designs to a Delta...I still have this mental picture of how to use his roller assemblies and some conduit as the main frame and motion platform...and I really want to build a Delta just because I like watching them print :D

I should put this in the needle thread...but...it's not quite ready to go there yet:

View attachment 89535

Link:
https://cad.onshape.com/documents/b...ba6f37764b78a0464a/e/359c102244a60c2d31d9828a

I keep having fun with onshape and looking for excuses to draw things in it. I went ahead and draw a basic needle cutter to experient with a few different approaches to drawing things. It only took me a few minutes to draw up the basic cutter...re-creating the hicwic mount was the hardest part since the dimensions on it are kind of goofy. Then I did a little bit of "tweaking" to try and make it a bit more like I envision it should look ;)

I'm not entirely happy with it yet...I don't like the way I did the top section and the overall look is still a bit blocky for me. I have a few ideas on how to make it more "organic" looking and will probably start from scratch once more. I also want to add in some bits for bearings or shoes against the needle but haven't decided what I want to do there yet.

I really need to finish a new extruder for my upgraded X axis on my printer...but...this was quicker and a nice way to relax this weekend :D

Hey, Jason! Thanks... yeah, it was neat to catch Ryan's eye so quickly. I hope you're able to stay out of the extreme heat you guys are having out there... news was the airlines won't even fly in/out of there at the moment :(

I still can't quite get into Delta printers. I'm okay moving in straight lines in XYZ but it just isn't intuitive to me what needs to move where to keep things square... when the machine just isn't square. They are fun to watch though...

The corexy stuff is really neat and clean... I like the stationary X/Y motors, much simpler/shorter wiring, and relatively light-weight gantry. You may remember Jaochiim built a CNC machine over in my other thread that used a unique belting system that anchored one end of the belts (I think it was a form of Hbot)-... he got it to work pretty well IIRC but I never did. I kept seeing gantry flex/skew and it wasn't until I went full corexy that I was able to get everything to move and stay together.

I wanted to do something different with that returned early-version MPCNC and also use (justify?) my new Prusa printer. I find it great fun to mashup, design, and piece together parts until I get something I like. This project was perfect for that. I used a couple of unaltered MPCNC rollers for my X-carriage... added spacers and a new wrap-under toolplate that also terminates the four belt ends

20170606_101329.jpg

20170606_114015.jpg

All of the legs are identical to the MPCNC until you get up to the top corners, where I merged an adapter plate to receive the motor and idler mounts. An stock LowRider motor mount was used for the motors and a quick mashup produced the idler mounts.

20170606_115502 (2).jpg

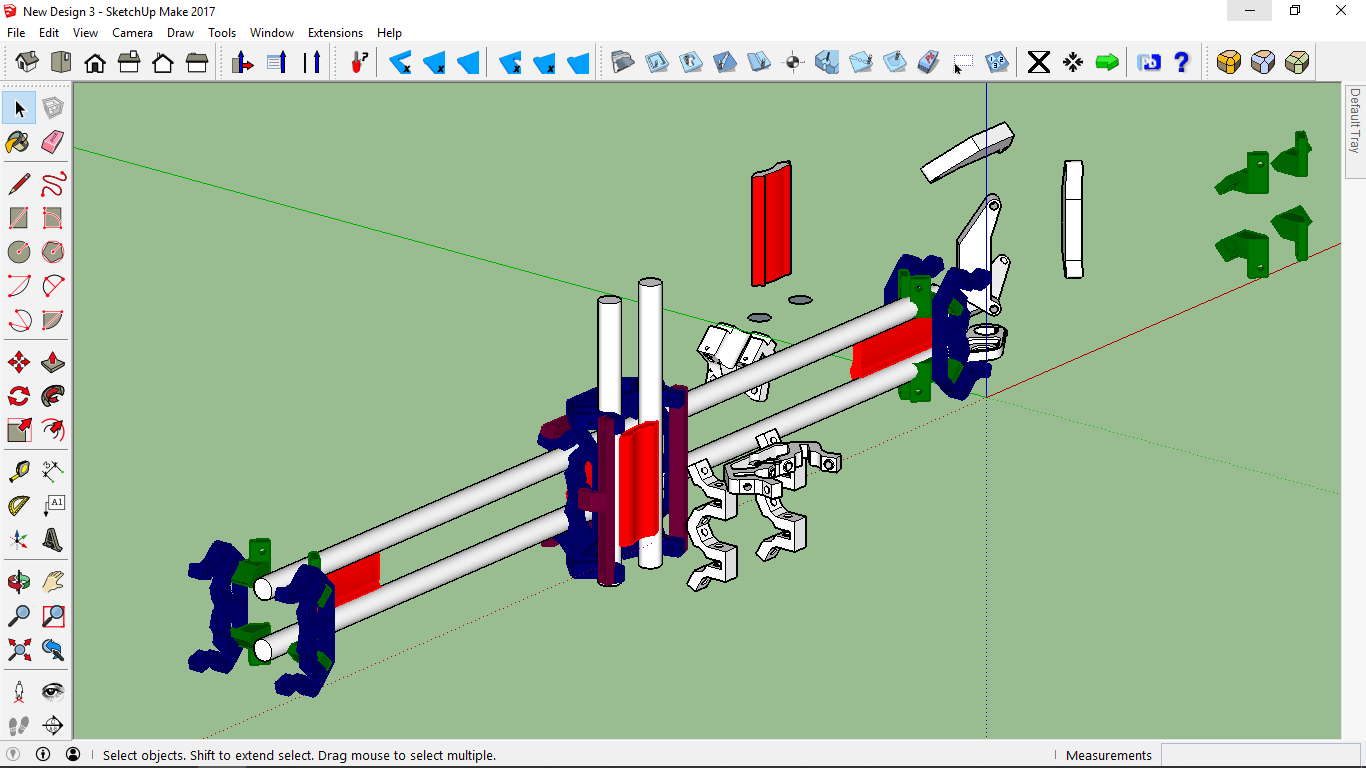
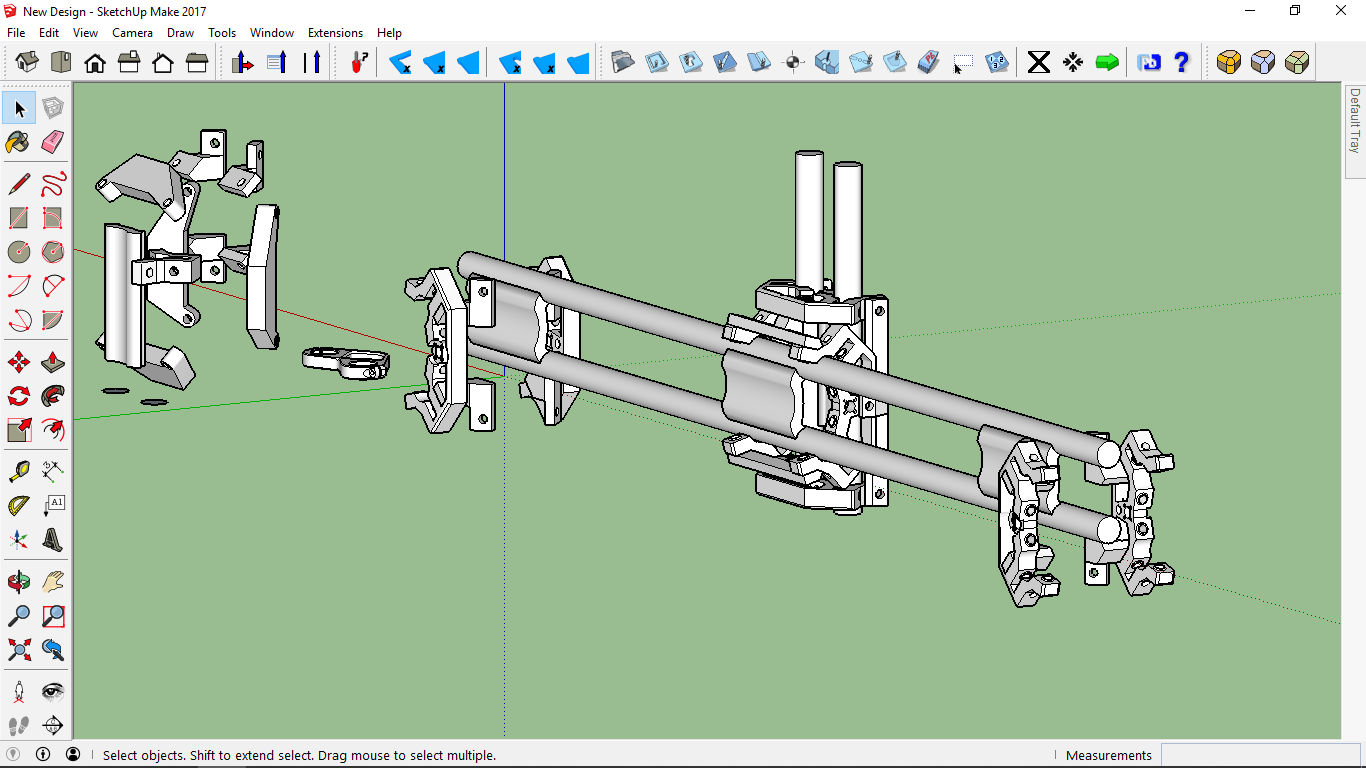
The gantry ends were the most challenging part... I'm still not entirely happy with those. I'm thinking Ryan's rollers can again be modified and used for strength and to reduce the parts count on the lower part but what I have works for now. I'm actually quite pleased with the 4 silver gantry uprights... they are MPCNC gantry motor mounts with a tower extension on top. And, as a gantry-end assembly, it turns out there's plenty of adjustment for roller tension, even though I've misused the rollers by turning them upside-down.

Two 7-foot belts -- upper and lower -- and a bunch of idlers complete the machine... getting them aligned everywhere is the big deal with those. I found that a brightly-colored boot lace makes a wonderful belt alignment aid

20170531_133455.jpg

20170531_151942.jpg

20170531_152625.jpg

20170531_164655.jpg

20170531_174447.jpg

Finally, go into Marlin and enable CoreXY and you should be off and running. I had to adjust for 20-tooth pulleys (vs 16-tooth) but other than that everything was spot on.

-- David
 
Last edited:

jhitesma

Some guy in the desert
Mentor
Hey, Jason! Thanks... yeah, it was neat to catch Ryan's eye so quickly. I hope you're able to stay out of the extreme heat you guys are having out there... news was the airlines won't even fly in/out of there at the moment :(

Yeah, it's crazy hot this week. Last Friday I was trying to degrease a few cheap bearings for a fidget spinner for my daughter....had them soaking in acetone and thought I'd put it outside in the sun to see if it could dissolve the grease any faster when warm.

When I got home from work it was no longer in the sun, and wasn't hot to the touch so I opened the jar...and...was greeted by a shower of hot acetone and that which stayed in the jar proceeded to boil for the next few minutes :eek: BP on that stuff is like 137F....so...not like scalding hot water but still reminded me that it's full summer here :D

As for the canceled flights....not all flights. Just some of the regional flights on smaller planes that have a 118f operational ceiling. The bigger planes and military planes are still flying ;) But yeah...it's stupid hot right now!


The corexy stuff is really neat and clean... I like the stationary X/Y motors, much simpler/shorter wiring, and relatively light-weight gantry. You may remember Jaochiim built a CNC machine over in my other thread that used a unique belting system that anchored one end of the belts (I think it was a form of Hbot)-... he got it to work pretty well IIRC but I never did. I kept seeing gantry flex/skew and it wasn't until I went full corexy that I was able to get everything to move and stay together.

I REALLY want to try corexy....if I had more spare steppers laying around I'd probably do a dedicated laser machine for sure. Something a little smaller so I could fully enclose it. But I don't have spare steppers and MPCNC style construction would be tough to make small enough to enclose. When I'm done with the upgrades on my printer I should have 4 spare smooth rods and LMU's to go with them....maybe I'll finally scrap this big laser printer to find some steppers and see what I can come up with....

I still need to design a new laser mount anyway...been putting that off too long and keep forgetting about it.

I printed the new needle mount last night just to verify the design - fit the quick change beautifully, and I really like the smooth edges - may move my hardware over to it and use it....though I'd like to add a bit more height and shoes or bearings still...

I did finally get my shop cleaned up enough I can use the MPCNC without knocking stuff over again...so maybe I'll make more progress on some projects soon ;)
 
Last edited:

Michael9865

Elite member
Very cool, and you got Ryan to stop in over here with it too :D

I really want to try a CoreXY setup for something...but don't really have the time or space to pull it off right now :( Not to mention a lack of spare parts and justification for yet another machine ;)

I still want to try to adapt Ryan's designs to a Delta...I still have this mental picture of how to use his roller assemblies and some conduit as the main frame and motion platform...and I really want to build a Delta just because I like watching them print :D

I should put this in the needle thread...but...it's not quite ready to go there yet:

View attachment 89535

Link:
https://cad.onshape.com/documents/b...ba6f37764b78a0464a/e/359c102244a60c2d31d9828a

I keep having fun with onshape and looking for excuses to draw things in it. I went ahead and draw a basic needle cutter to experient with a few different approaches to drawing things. It only took me a few minutes to draw up the basic cutter...re-creating the hicwic mount was the hardest part since the dimensions on it are kind of goofy. Then I did a little bit of "tweaking" to try and make it a bit more like I envision it should look ;)

I'm not entirely happy with it yet...I don't like the way I did the top section and the overall look is still a bit blocky for me. I have a few ideas on how to make it more "organic" looking and will probably start from scratch once more. I also want to add in some bits for bearings or shoes against the needle but haven't decided what I want to do there yet.

I really need to finish a new extruder for my upgraded X axis on my printer...but...this was quicker and a nice way to relax this weekend :D

I like your rounded edge updated needle tool. I also like how you put a support behind the upper motor mounting holes. I have had two mounts crack either just below the holes or from hole to hole, a little white gorilla glue strengthened them right up. My last mount I just cut down an FT plywood motor mount and glue it in place to strengthen it and prevent cracks.
 

jhitesma

Some guy in the desert
Mentor
I like your rounded edge updated needle tool. I also like how you put a support behind the upper motor mounting holes. I have had two mounts crack either just below the holes or from hole to hole, a little white gorilla glue strengthened them right up. My last mount I just cut down an FT plywood motor mount and glue it in place to strengthen it and prevent cracks.

Thanks. That's the one thing I really don't like about openSCAD - it's a real pain to do fillets and rounded edges. And I love fillets and rounded edges :D Super easy to do them in Onshape or Fusion360!

I'm still not sure about the support all the way up the back. I haven't tried moving my parts to this yet so I'm not sure if I left enough room to actually hold a nut while tightening it back there...but if I make the access much larger then there isn't much support left. I may redo it to create nut traps instead - but then it gets fiddly if someone has nuts that are slightly larger/smaller than they should be. And I like to use nylocs due to motor vibration and they don't work as well in traps since they're taller...

I also forgot that I was going to make the area where the needle passes through slightly conical (wider at the base than the top) so it would tend to keep a wad of cotton from coming out the top. I haven't had an issue with that (other than when my cotton wore out and disintegrated) but have heard others having that problem so thought that may be a nice solution.

I've yet to have mine crack in that area. I did have one crack but it happened much lower down and was due to an issue with my print:

20160812_205014.jpg

I actually super glued that one back together and used it some more...but have switched to a taller one since.

The issue on that one was that this MakerGeeks PLA doesn't like my all metal hot end and would sometimes bind and underextrude. I've since solved that by adding a paper towel with a few drops of vegetable oil on it clipped to the filament before it goes into the extruder - but when I printed that one was still struggling to figure out why I sometimes got random underextrusion in my prints!

My current tool still has a real short mount - but I wanted to try making it full length so I could use all four screws to hold it in since I found that actually using the screws made such a big difference in cut quality :) (I was lazy and left them out a few times - seemed stiff enough...but wasn't.)

I also want to work on adding the new style default MPCNC mounts...but really need to reprint my Z axis first.
 

dkj4linux

Elite member
Underway again...

Now that I've got a Moebeast-style X-carriage, with Z-lift capability, in work... I'm eye-balling a mockup gantry before retro-fitting my current MPCNC-inspired CoreXY with it...

Screenshot_2017-08-15_09-38-25.png

20170815_102138.jpg

As I hovered over the target machine a few minutes ago to begin thinking about the transition... I spotted this "relic" in the background and thought...

20170815_112009.jpg

I could do the mock-up on that now-defunct camera slider (an advantage of re-purposing MPCNC parts) and... you know what???

Could that be the basis for a new Phlatprinter-style CNC machine??? Hmm..mm...

Let's see... replace the fence-slat base with a roller/gripper foam-mover assembly/thingy and...

:D
 

moebeast

Member
Now that I've got a Moebeast-style X-carriage, with Z-lift capability, in work... I'm eye-balling a mockup gantry before retro-fitting my current MPCNC-inspired CoreXY with it...

View attachment 93083

View attachment 93082

As I hovered over the target machine a few minutes ago to begin thinking about the transition... I spotted this "relic" in the background and thought...

View attachment 93081

I could do the mock-up on that now-defunct camera slider (an advantage of re-purposing MPCNC parts) and... you know what???

Could that be the basis for a new Phlatprinter-style CNC machine??? Hmm..mm...

Let's see... replace the fence-slat base with a roller/gripper foam-mover assembly/thingy and...

:D

Nice job David. You are getting ahead of me. I have some work to do today, and tomorrow I am taking my daughter off to school in New Orleans, then it's back to work on the night shift. So, my progress will be delayed :(
 

dkj4linux

Elite member
Nice job David. You are getting ahead of me. I have some work to do today, and tomorrow I am taking my daughter off to school in New Orleans, then it's back to work on the night shift. So, my progress will be delayed :(

Thanks, Mark. It's not a race, of course... and you've done all the hard part already making such a nice compact design. I really do like what you've done and want to see it work... I think it opens up a lot of new possibilities.

Yeah, I have the advantage of having so many machines laying around that I can use for testing. But my big problem now is that there are just too many options. Conduit is so cheap and I have so many extra MPCNC printed parts laying around that I'm starting to lean toward another machine entirely that incorporates this carriage design... a relatively low-profile/weight, conventionally-driven, dedicated laser/needle machine... or, a Phlatprinter-inspired design that moves the workpiece under a stationary X-gantry, Z-lift on carriage... etc.

No pressure, Mark... there's still plenty to do and it will all still be here, waiting for you, when you get the chance to get back on it.

Take care, friend, taking your daughter to school.

-- David
 

dkj4linux

Elite member
Finally, an update...

Interesting that I should see our own Jason (jhitesma) has been playing with the little, very cheap, 28BYJ-48 stepper motor to build a automated fish feeder... https://www.thingiverse.com/thing:2959685:)

I, too, have been playing with the same motor -- though hacked to be bipolar (vs unipolar) -- to fashion a new Z-axis actuator for this MPCNC-inspired CoreXY laser engraver. I was never happy with the rather large and clunky printed actuator I started with... so have reworked it to use the narrow X-carriage I'd developed for my Phlatprinter-inspired foam cutter and a neat little linear, BB-bearing, stepper slide mechanism I found out on Thingiverse (https://www.thingiverse.com/thing:2813896). There is quite a bit of backlash in the actuator, with printed screw and nut, but with a load (here a clamp) gravity is our friend, so it shouldn't be problematic in this application...


20180616_201114.jpg
 
Last edited:

TEAJR66

Flite is good
Mentor
Wow!!! You guys are killen it!

I need to be careful, or this tool (my MPCNC), used in support of a hobby, will become its own hobby. Mash ups are awesome. Now I have interest in this CoreXY that you speak of.

I had some ideas that I tinkered with and lost steam. They were kind of clunky. I might revisit this given my new CoreXY perspective.
Mash Up Stuff.png


Mash Up Stuff II.png
 

dkj4linux

Elite member
Wow!!! You guys are killen it!

I need to be careful, or this tool (my MPCNC), used in support of a hobby, will become its own hobby. Mash ups are awesome. Now I have interest in this CoreXY that you speak of.

I had some ideas that I tinkered with and lost steam. They were kind of clunky. I might revisit this given my new CoreXY perspective.
View attachment 108915

View attachment 108916
Thanks, Tommy. I created a Thingiverse page for this machine way back when but was largely unhappy with several aspects of the gantry design so never made it public. Then I moved into my other house and my design/development activities slowed greatly for a few months for fear of cluttering up my "new" living spaces... so beautifully remodeled by my daughter and her husband when they lived here. I've since updated most of the gantry parts and have something I'm far more pleased with so am now trying to gather up -- as best I can -- all the STL's for all the current parts. I'll post a link to the Thingiverse page as soon as I can get the STL's uploaded and include more current pictures of the build.

I started this project in Tinkercad and have since moved to Onshape. I'm still terribly disorganized however and it's reflected in my Onshape models... and my difficulty in locating all the STL's for this project. I used Sketchup/Sketchucam almost exclusively back when I was doing needle cutter development and actually cutting RC planes from foam but I'm pretty certain Onshape will meet my needs for the remainder of my "career" :)

Looks like you were off to a good start on your machine. I've had great fun with my CoreXY machine(s) and I hope it'll help get your creative juices going again. Yeah, this CNC stuff can become a hobby in itself -- and for me, at this late date, it's just what I need -- but I'm sure you can find a "balance". I'd also love to hear more about all the neat planes and stuff you guys are building with the aid of all this automation so keep us up to date with your progress.

-- David
 

dkj4linux

Elite member
I rounded up most of the parts needed to build this CoreXY laser engraver but it still needs a bit of work... hence still a work in progress.

https://www.thingiverse.com/thing:2375050

I think there's a spacer missing yet and it's possible that a part or two may need reorienting to print properly but most of the parts are there. I've included pictures that show the assemblies... it's actually IMHO simpler (not better!) than a MPCNC; i.e. fewer motors, belts and less wiring. The videos are showing the original configuration but operation hasn't changed. I actually download current firmware from the MPCNC website and changed only a few lines in the configuration.h file to get CoreXY operation and proper steps per mm on each axis.

The linear Z-axis linear slide assembly is found at https://www.thingiverse.com/thing:2813896... thanks to John Mulac (3DPRINTINGWORLD) for a really nifty mechanism!

-- David
 

adamsss

New member
The system seems too heavy for me even though it’s a brilliant piece of work. I personally prefer home laser engraver since it always helps to carve things to detail. But in my spare time, I plan to test your project, it with some minor tweak.