This is my first multirotor build and I want to start by saying thank you to cranialrectosis, Foam Addict, mmeyer and xuzme720 for your posts to my thread where I asked for multirotor advice. I read every word and soaked up every piece of information you guys offered.
I want to give a special thank you to e_lm_70 and jhitesma for sticking with me and answering all my questions until I finally had an idea of what direction this build was headed and what parts I would need to get it there.
I have some experience with wood working so I decided to add some little tips here and there as we go for those who may read this and want to build a wood frame multirotor and not have experience. Please don't think I'm taking my first multirotor build and getting a big head about it. In this realm I am very much a beginner and I would love any advice anyone may have to offer!
Anyway, I finally got my order in from RTFQ and started building.
My big plan is to take all this stuff.....

.... and this stuff. And make it fly!

So here we go!
First off I cut the frame. 12" booms and 10" cross sections. 12" booms rather than 10" because I'm going to mount my motors straight to the booms not on motor mounts on the ends of the booms.
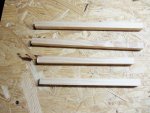
Next I decided flat black spray paint would look good. In hind site I should of waited for final assembly before painting anything. Black makes it hard to see my marks.

Then I marked my holes to drill and gave them a little tap with a hammer and drill bit. This will help keep the drill bit from wandering when I first start the hole since I don't have a drill press and vice. I decided to drill the holes 2" apart to start but have since realized I'm going to need a couple more holes. I'll add them later.
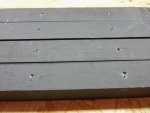
Holes drilled. Time to cut my top and bottom plates.
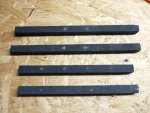
Top and bottom plates are cut and some dowel for spacers since I discovered my batteries are thicker than the dowel.

Now it's time to drill holes in the plates so the screws can pass through and hold everything together. If you line everything up and drill the first hole then hold it in place with a screw and nut it will help with lining up the second hole.

Screw and nut on, flip over and drill second hole. This doesn't guarantee the plate will line up but it does guarantee the holes in the plate will match the holes in the dowel.

It's always a good idea to have a scrap piece of wood laying around to sit your piece on while your drilling if you don't want your work bench full of holes.
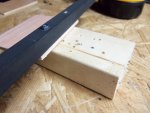
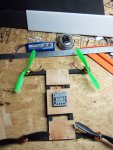
The AC in my shop/shed/hanger isn't working and it's a nice hot muggy Florida evening so I've decided to call it quits for tonight. But here's a couple pics of what it may look like when finished.


UPDATE: 5/20/2014
I'm off today and have been spending some time in the shop. I have the frame fully assembled and am taking a break before setting to work with soldering and electronics and I wanted to give an update with some pictures. I fully intend to have the flight controller in and blades spinning today. Whether or not it will actually fly is yet to be seen!


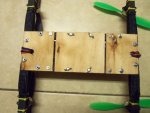
Top. Rather than using those pieces of dowel to raise the center plate so the battery will fit like I originally intended I found that by just using a couple pieces of ply along the booms made the height just about perfect.
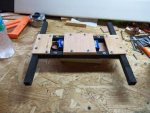
Bottom. I put wing nuts on the bottom center plate so I have a way to easily access and replace the battery. I'll cut those long bolts down after tear down, paint and final build.

I got everything put together last night. Here are some pictures of it assembled and ready for a test flight.
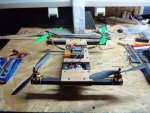
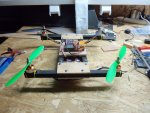


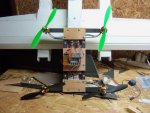

I maidended it last night also! The thing flew great! I was absolutely amazed. I thought for sure it was going to have problems but everything was perfect!
Below are some videos of my quads first flights. It was dark and the video was shot under a street light but I think you can see and hear enough to tell whats going on.
The Maiden. Short because I really thought things were going to go wrong!
Second flight. A little longer and trying to get a feel for it.
Third flight. Flight aborted due to other air traffic! An owl decided to do a fly by and check things out. I put it on the ground as quick as I could. I didn't want to hurt the owl or my freshly built quad! You can just catch a glimpse of the owl on the left side of the screen a little over half way up right around the 27 second mark. You can also hear the pitch of the motors change right before that which is when I first saw the owl and was trying to get my quad down before he got there. I obviously didn't get it down in time and lucky for me the owl didn't think the quad should be his next meal!
Last flight. Nothing eventful here and the battery was getting low. But you can see I'm getting a little more confident in my quads ability to stay in the air!
Next up will be some pictures of my final build with all the wires tucked away and I'll get some video of some flights during the day.
Here it is! The final product! Everything wrapped up and tucked away. I don't know the AUW because I don't have a scale but I'm getting about 5 mins on a 25C 3S 2200 and about 8 mins on a 20C 3S 2650.




Here's a quick little daytime flight. In my defense the wind was gusting. You can see it in the trees behind the quad. The thing fly's great and I love it!
So what do you guys think??? Please share comments, suggestions, advice and I'll even take drunken opinions! Let me know what you guys think!
I want to give a special thank you to e_lm_70 and jhitesma for sticking with me and answering all my questions until I finally had an idea of what direction this build was headed and what parts I would need to get it there.
I have some experience with wood working so I decided to add some little tips here and there as we go for those who may read this and want to build a wood frame multirotor and not have experience. Please don't think I'm taking my first multirotor build and getting a big head about it. In this realm I am very much a beginner and I would love any advice anyone may have to offer!
Anyway, I finally got my order in from RTFQ and started building.
My big plan is to take all this stuff.....

.... and this stuff. And make it fly!

So here we go!
First off I cut the frame. 12" booms and 10" cross sections. 12" booms rather than 10" because I'm going to mount my motors straight to the booms not on motor mounts on the ends of the booms.

Next I decided flat black spray paint would look good. In hind site I should of waited for final assembly before painting anything. Black makes it hard to see my marks.

Then I marked my holes to drill and gave them a little tap with a hammer and drill bit. This will help keep the drill bit from wandering when I first start the hole since I don't have a drill press and vice. I decided to drill the holes 2" apart to start but have since realized I'm going to need a couple more holes. I'll add them later.

Holes drilled. Time to cut my top and bottom plates.

Top and bottom plates are cut and some dowel for spacers since I discovered my batteries are thicker than the dowel.

Now it's time to drill holes in the plates so the screws can pass through and hold everything together. If you line everything up and drill the first hole then hold it in place with a screw and nut it will help with lining up the second hole.

Screw and nut on, flip over and drill second hole. This doesn't guarantee the plate will line up but it does guarantee the holes in the plate will match the holes in the dowel.

It's always a good idea to have a scrap piece of wood laying around to sit your piece on while your drilling if you don't want your work bench full of holes.

The AC in my shop/shed/hanger isn't working and it's a nice hot muggy Florida evening so I've decided to call it quits for tonight. But here's a couple pics of what it may look like when finished.


UPDATE: 5/20/2014
I'm off today and have been spending some time in the shop. I have the frame fully assembled and am taking a break before setting to work with soldering and electronics and I wanted to give an update with some pictures. I fully intend to have the flight controller in and blades spinning today. Whether or not it will actually fly is yet to be seen!


Top. Rather than using those pieces of dowel to raise the center plate so the battery will fit like I originally intended I found that by just using a couple pieces of ply along the booms made the height just about perfect.

Bottom. I put wing nuts on the bottom center plate so I have a way to easily access and replace the battery. I'll cut those long bolts down after tear down, paint and final build.

I got everything put together last night. Here are some pictures of it assembled and ready for a test flight.


I maidended it last night also! The thing flew great! I was absolutely amazed. I thought for sure it was going to have problems but everything was perfect!
Below are some videos of my quads first flights. It was dark and the video was shot under a street light but I think you can see and hear enough to tell whats going on.
The Maiden. Short because I really thought things were going to go wrong!
Second flight. A little longer and trying to get a feel for it.
Third flight. Flight aborted due to other air traffic! An owl decided to do a fly by and check things out. I put it on the ground as quick as I could. I didn't want to hurt the owl or my freshly built quad! You can just catch a glimpse of the owl on the left side of the screen a little over half way up right around the 27 second mark. You can also hear the pitch of the motors change right before that which is when I first saw the owl and was trying to get my quad down before he got there. I obviously didn't get it down in time and lucky for me the owl didn't think the quad should be his next meal!
Last flight. Nothing eventful here and the battery was getting low. But you can see I'm getting a little more confident in my quads ability to stay in the air!
Next up will be some pictures of my final build with all the wires tucked away and I'll get some video of some flights during the day.
Here it is! The final product! Everything wrapped up and tucked away. I don't know the AUW because I don't have a scale but I'm getting about 5 mins on a 25C 3S 2200 and about 8 mins on a 20C 3S 2650.


Here's a quick little daytime flight. In my defense the wind was gusting. You can see it in the trees behind the quad. The thing fly's great and I love it!
So what do you guys think??? Please share comments, suggestions, advice and I'll even take drunken opinions! Let me know what you guys think!
Last edited:


