You are using an out of date browser. It may not display this or other websites correctly.
You should upgrade or use an alternative browser.
You should upgrade or use an alternative browser.
NEXT LEVEL P-40 Group Build
- Thread starter BATTLEAXE
- Start date
Marty72
Elite member
Looks about perfect to me. Very clean!ocd/perfectionist here as well ...ironing the hinges/wing tips on my wing /tail surfaces went well ,getting the heat right is important for a good result ...a little less heat is better ...and taking it slow removes the need for cutting on rounded surfaces...these are for the p40 build View attachment 149272 View attachment 149273
mach1 rc
Master member
Looks greatocd/perfectionist here as well ...ironing the hinges/wing tips on my wing /tail surfaces went well ,getting the heat right is important for a good result ...a little less heat is better ...and taking it slow removes the need for cutting on rounded surfaces...these are for the p40 build View attachment 149272 View attachment 149273
👍👌
PoorManRC
Master member
Definitely VERY clean!!ocd/perfectionist here as well ...ironing the hinges/wing tips on my wing /tail surfaces went well ,getting the heat right is important for a good result ...a little less heat is better ...and taking it slow removes the need for cutting on rounded surfaces...these are for the p40 build View attachment 149272 View attachment 149273
I hope to get an Iron, and trying that. The results are so worth it.
Zetoyoc
Elite member
Thanks for all the input. I don't want to mess with the tail since it is already perfectly square. But I may attack the wing. If I don't just decide to leave it alone and just fly it. I am considering cutting the wing out from the bottom and converting it to a removable wing. And at that time I can shim for parallel fairly easy.
I’ve started running the tip of my glue gun down exposed seams. It doesn’t make it looks pretty like the ironed edges but it is super fast and helps keep the paper from peeling back from the foam.
Zetoyoc
Elite member
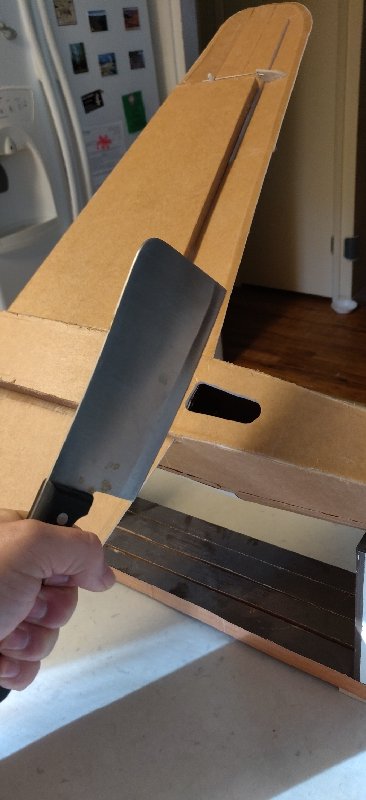
Earlier I stated I wasn't ready to go off book on this build. I guess I am over that now . With my wing not parralel to the stabilizer I could fly it as is but I am taking the opportunity to do a little experiment. First step.. off with the wing I will update as I go to the health of my subject.


buzzbomb
I know nothing!
Good Luck!Earlier I stated I wasn't ready to go off book on this build. I guess I am over that now . With my wing not parralel to the stabilizer I could fly it as is but I am taking the opportunity to do a little experiment. First step.. off with the wing I will update as I go to the health of my subject.
View attachment 149442
PoorManRC
Master member
Earlier I stated I wasn't ready to go off book on this build. I guess I am over that now . With my wing not parralel to the stabilizer I could fly it as is but I am taking the opportunity to do a little experiment. First step.. off with the wing I will update as I go to the health of my subject.
View attachment 149442
....... Instead of CHOPPING with a Cleaver - an old FT Video shows a cool trick.
Denatured Alcohol wicks into Hot Glue joints, and easily RELEASES the Hot Glue!!
That way you can easily adjust and reset the Wing, to better match the Tail Feathers!!
Zetoyoc
Elite member
Ha ha. No. Not actually using a cleaver. But I did use a razor blade. I plan to make this a removable wing without the use of rubber bands.
Separation was a success.

Than some reinforcement and hiding the shim I needed to make the wings level. In my excitement I nearly forgot to level the wings, the whole reason I am doing this.


Next step is to permanently mount the "chin to the wing and a peg and receiver for the trailing edge

Separation was a success.

Than some reinforcement and hiding the shim I needed to make the wings level. In my excitement I nearly forgot to level the wings, the whole reason I am doing this.


Next step is to permanently mount the "chin to the wing and a peg and receiver for the trailing edge

Zetoyoc
Elite member
I think my patient will recover fully. and now be much easier to transport. I have some finish work to do to make it pretty and get rid of some glue dribbles. I think i may also make some sort of retaining clip for the dowels. but in all I am quite happy with the removal and shimming of my wing. I may have to attempt something like this on my next plane bt on purpose from the beginning. it would certainly be a lot cleaner if done in one go i think. after looking at the wide open space i have now I may also add a foam support to keep the sides at the proper width over time. Of course it hasnt flown yet so who knows how much time this plane has 
BATTLEAXE
Legendary member
Nice, your first monologue tutorial of sorts. I hope we get to see more of those. That's one thing I like to do with my planes is introduce them at either the beginning of the videos or make an intro vid on it's own. Most will tell you they made a new plane and when it comes to the maiden vid they start recording and just toss it in the air. You don't get to see the plane except for a small dot in the sky for the whole thing, and maybe catch a fleeting glimpse of it up close on a low pass or landing if that.I think my patient will recover fully. and now be much easier to transport. I have some finish work to do to make it pretty and get rid of some glue dribbles. I think i may also make some sort of retaining clip for the dowels. but in all I am quite happy with the removal and shimming of my wing. I may have to attempt something like this on my next plane bt on purpose from the beginning. it would certainly be a lot cleaner if done in one go i think. after looking at the wide open space i have now I may also add a foam support to keep the sides at the proper width over time. Of course it hasnt flown yet so who knows how much time this plane has
Awesome, cant wait to see it fly
Zetoyoc
Elite member
thanks. It was easier than trying to take a bunch of photos to show what I did. I don't think I am experienced enough for any real instructional videos yet, really I am just waiting for someone to point out that i put the wing on upside down or something. I certainly tried a few times while i was at it.Nice, your first monologue tutorial of sorts. I hope we get to see more of those. That's one thing I like to do with my planes is introduce them at either the beginning of the videos or make an intro vid on it's own. Most will tell you they made a new plane and when it comes to the maiden vid they start recording and just toss it in the air. You don't get to see the plane except for a small dot in the sky for the whole thing, and maybe catch a fleeting glimpse of it up close on a low pass or landing if that.
Awesome, cant wait to see it fly
BATTLEAXE
Legendary member
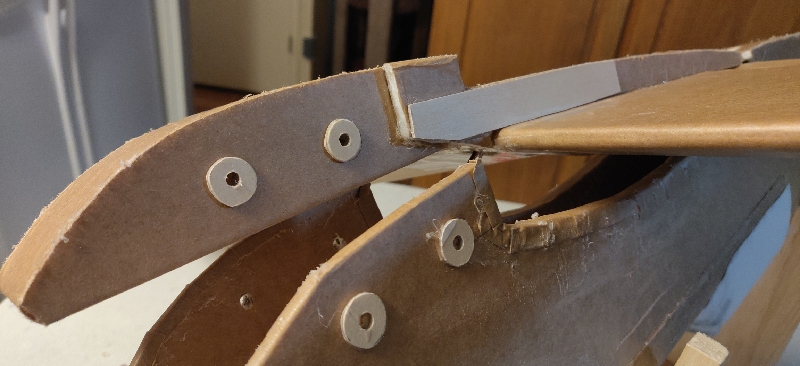
Looks good. Hey a pro tip if you want to clean up the excess glue on the seams and the corners... rub some scrap FB over the seams to knock the glue of and sand it down with some 220 wrapped around a kitchen sponge or a drywall sanding block of the same grit. Helps clean it up before paint. You probably do that already, just thought I would mention it if you didn't.I decided to add some rings on the inside and thin ply to the weakest part of the foam. Added a bit of weight but I think the rigidity will be worth it. View attachment 149492
You are going to love how this bird flies, so smooth and sleek, penetrates the wind a lot better then the mini's
mach1 rc
Master member
Looks great a removable wing on the p-40 would be super nice.I decided to add some rings on the inside and thin ply to the weakest part of the foam. Added a bit of weight but I think the rigidity will be worth it. View attachment 149492
PoorManRC
Master member
I think my patient will recover fully. And now be much easier to transport. I have some finish work to do to make it pretty and get rid of some glue dribbles. I think i may also make some sort of retaining clip for the dowels. but in all I am quite happy with the removal and shimming of my wing. I may have to attempt something like this on my next plane but on purpose from the beginning. it would certainly be a lot cleaner if done in one go I think. After looking at the wide open space i have now I may also add a foam support to keep the sides at the proper width over time. Of course it hasn't flown yet so who knows how much time this plane has
VERY CLEVER Brother!! 👍👍😎
I'm almost CERTAIN I'm doing the same to my P-40. Unless I can get a Van (or a Dodge HEMI Magnum!! 😊), I need removable Wings.
I'll have to do different mounting points, because my Chin Scoop is permanent, and functions as an ESC cooler...
But you made that look quite doable!! 😃
Similar threads
- Replies
- 1
- Views
- 506
- Replies
- 0
- Views
- 316
- Replies
- 2
- Views
- 405


