"Nothin' Extra", by Northern Model Aircraft Co.

Joker 53150

Mmmmmmm, balsa.
Mentor
My Balsa USA 1/4 scale Cub is as far as I'm going to take it for a while - it needs to be flown and work on the cowl is just taking so long I'm getting bored.

In the meantime I'm looking at other "quick" projects that need to be finished, and the Nothin' Extra falls into that category. This plane was found at a swap meet near Green Bay late last year. The owner just wanted it gone and had a price of $100 OBO on it. It didn't sell by the end of the swap meet so he had it auctioned off by the guys running the show. Nobody bid on it except me, and I ended up with the airframe for $20. Completely built with no electronics.

It's a strange design that I've never seen online or at flying events, although a buddy who lives a mile away picked up the same plane a couple years ago with a massive gas engine on it. For mine I decided to go electric, with a 10 cell 5,000mAh pack (made from two 5 cell 5,000mAh batteries). I picked up an E-Flite 1.60 size motor and am going to "borrow" servos from some of my other projects. All I'll need is a proper ESC, and maybe different landing gear as the one that came with the plane is pretty darn narrow where it mounts to the fuselage.

Wingspan is 88". It calls for a 1.8 to 5.0 CI gas engine (32cc to around 100cc - that's a LOT of range!), or 1.2 to 2.1 CI glow, so my 1.6 should work just fine without getting too crazy.

Here's my starting point as purchased (along with the motor I picked up separately).

thumbnail_IMG_8333.jpg


The first bit of construction on the plane was mounting the motor on some stand-offs I've had for a while. New hex head screws to mount he motor are needed as these are about 1/4" too long. The prop is a 20x10, although I'll probably switch to a nylon style prop for the first flights.

thumbnail_IMG_0447.jpg
 

Joker 53150

Mmmmmmm, balsa.
Mentor
That airframe looked like a steal at $20!

It's possibly the most plane I've gotten for the least amount of money. :) Construction is very good, and covering was also done pretty well, no complaints from me!

The ESC has been ordered, my largest one to date at 120A rating. With a 20" prop the motor should draw around 100A. If I'm happy with the power I get from this motor on 10 cells I may do the same setup on a Sig 1/4 scale Cub I picked up at an estate sale about 6 months ago. It's got the clipped wing and is almost ready for electronics to be installed. The only real fabricating I'd need to do is to build the rudder, which was MIA when I got the plane.
 
  • Like
Reactions: FDS

Joker 53150

Mmmmmmm, balsa.
Mentor
My balsa usa 1/4 cub has been pulled down again as I wanted somthing more scale and the more I built the cub the worse it looked. I've dismantled most of the fuse and am now making a proper tubular frame and making a L4 grasshopper instead. It's one of the few kit planes I've bought and i regret it. Its been sat there 5 years already lol.

Changing from the J-3 to the L-4 configuration is no small task, and is something I've wanted to do for a while. All those extra windows look great, but also show off the (potential) scale detail inside. Good luck with your build!
 

rockyboy

Skill Collector
Mentor
I keep seeing these big planes go for super cheap to anyone with the storage space to put them - good to see this one headed towards the sky, not the dump! :D
 

Joker 53150

Mmmmmmm, balsa.
Mentor
I keep seeing these big planes go for super cheap to anyone with the storage space to put them - good to see this one headed towards the sky, not the dump! :D

It's amazing how cheap they can get! This one costs less than just buying the covering for it.
 

Joker 53150

Mmmmmmm, balsa.
Mentor
Servos! The plane won't fly worth a darn without 'em, so let's see what I've got on hand...

My plan was to use as many parts out of my stash as possible to get this plane in the air. Well, except for the motor I had to buy. And the ESC. But I've got servos! Plenty of 'em, both new and in planes that will eventually (maybe?) one day be rescued. One such plane is an aerobatic plane I got a couple years ago, which came with a half-dozen Futaba S-3003 and S-3004 servos. This plane is far down the list of projects so it would be a good candidate to strip parts from. A little time to remove them and they look promising. Dirty, but promising. It also had the Tower TS-51 servo pictured for the throttle.

thumbnail_IMG_0471.jpg


With the servos all removed from the airframe I put them on the servo tester one-by-one to make sure they functioned properly. All except the two aileron servos worked great. Both aileron servos had a "dead" spot where the motor would just run, with no output to the servo arm. These are serviceable servos, so I pulled the tops off and found both had stripped gears (which you can see in the pic), most likely from the last flight of the plane I stripped them from. :( I can still buy this servo new for $15 or I can simply replace the gears for $5. I found no issues with the rest of the servos so I ordered replacement gears.

thumbnail_IMG_0470.jpg


However, before ordering the gears I did a little more digging into these servos. They're rated for around 60 oz-in at 6v, and the instructions I was lucky enough to find for this plane recommend at least 75 oz-in, with a preferred rating of around 110 oz-in. Basically, these would probably work OK, but they really don't have as much power as I'd want so I'll clean them up and put them in my stash of servos and servo parts. I then pirated a few other servos I had on hand for a different project, the Hobby King HX12K, which have approximately 150 oz-in of power at 6v, more than enough. I only have 3, so I ordered 3 more to cover what I'll need. For $10/ea they've been very solid performers for me. Lifers in the hobby knock anything that's not HiTec, Futaba, etc., but the HexTronik stuff has been great for me so far and I'll continue to use them.

hxt12k.jpg
 

Joker 53150

Mmmmmmm, balsa.
Mentor
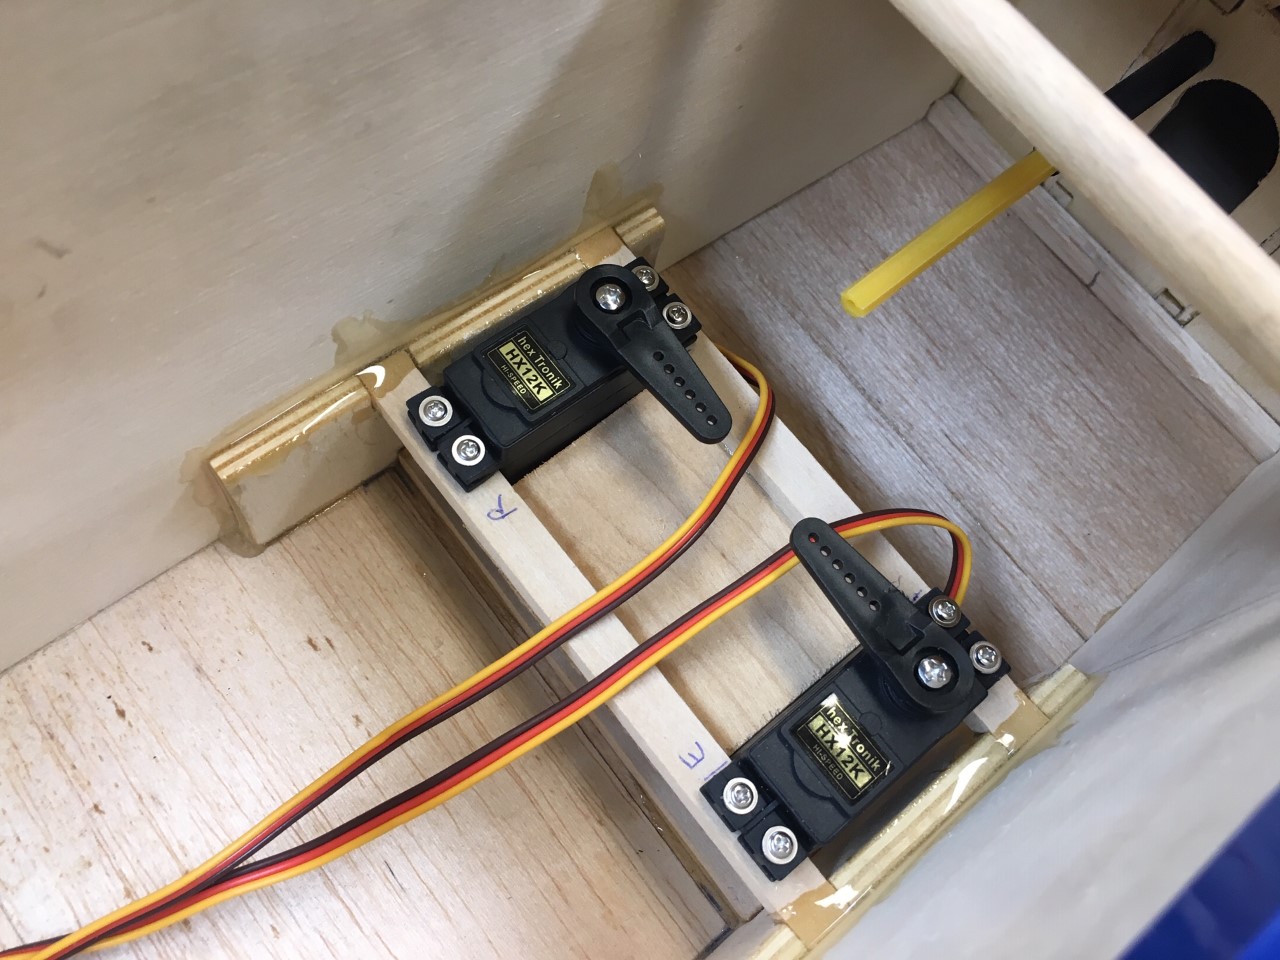
Yet another rainy day in Wisconsin, so no after-work flights. Instead I took a little time and built a tray for the elevator and rudder servos. I'd much rather do this while the fuselage is being built so it could be recessed better into the fuselage sides, but this'll still work - although it won't be as pretty. A liberal amount of epoxy was added around the perimeter of the pieces to help lock it all in place.

Next up, more stuff. Not sure what, yet... :)

thumbnail_IMG_0472.jpg
 

rockyboy

Skill Collector
Mentor
Such a simple idea to put a letter next to the servo so it's obvious where the control rod goes. I think I'll be marking a bunch of my servo trays up now :D
 

Joker 53150

Mmmmmmm, balsa.
Mentor
Such a simple idea to put a letter next to the servo so it's obvious where the control rod goes. I think I'll be marking a bunch of my servo trays up now :D

I'm 84% genius. Not sure what the other 23% is though...

I really really really wanted to use one of the many injection molded servo trays I picked up at an estate sale, but all were designed for 3 servos instead of 2, and none really gave me the layout I really wanted based on where the pushrods had to go. I think they'd be perfect for a scratch-build in the future and I'll keep looking for a bird to test one on.
 

rockyboy

Skill Collector
Mentor
Hehe - I've got a couple of those injection molded servo trays too and haven't found a use for 'em yet either. :D
 

Joker 53150

Mmmmmmm, balsa.
Mentor
IT LIVES !!!

My 120A ESC arrived today, and luckily I had enough big connectors to spend an hour soldering up a Y-harness. As mentioned previously I'm using a pair of 5 cell 5,000mAh batteries wired in series to give me a 10 cell 5,000mAh flight pack. I'll also need a smaller 2 cell LiPo for a receiver battery, but that's an easy job.

In building the Y-harness I wanted it to be as fool-proof as possible, so I went with an XT-90 for the main plug, and two HXT style plugs that connect directly to the batteries. I'll connect the batteries together first, then install them into the fuselage and secure them down. Once ready to fly the XT-90 can be plugged in and the power switch for the receiver turned on. On goes the hatch and it's ready to go.

With all the pieces built I'm not ashamed to say I was very nervous plugging it all in. It was all double-checked first, but I've done dumb things in the past, so you never know. A fire extinguisher and clean underwear were handy, just in case. No sparks or fire, so I took the next step and plugged the battery brick into the ESC and was greeted by 10 beeps and no smoke! It was only run up about 1/3 throttle as it's indoors and I want to keep all my stuff on the shelves, plus the motor still needs proper length bolts to secure it. It ran up nice and smooth, no excess vibration or noise, a successful first test. I think it's going to end up with a LOT of power! :)
 

Joker 53150

Mmmmmmm, balsa.
Mentor
I forgot to add, my servo gears also arrived today. The first one worked perfectly with the replacement parts, but the second was displaying some weird chattering that wasn’t noticed previously. To be safe I scrapped that servo instead of spending more time on it.

I figure this work was a break even venture, but it kept me from throwing away some usable gear. Good enough for me! :)
 

Joker 53150

Mmmmmmm, balsa.
Mentor
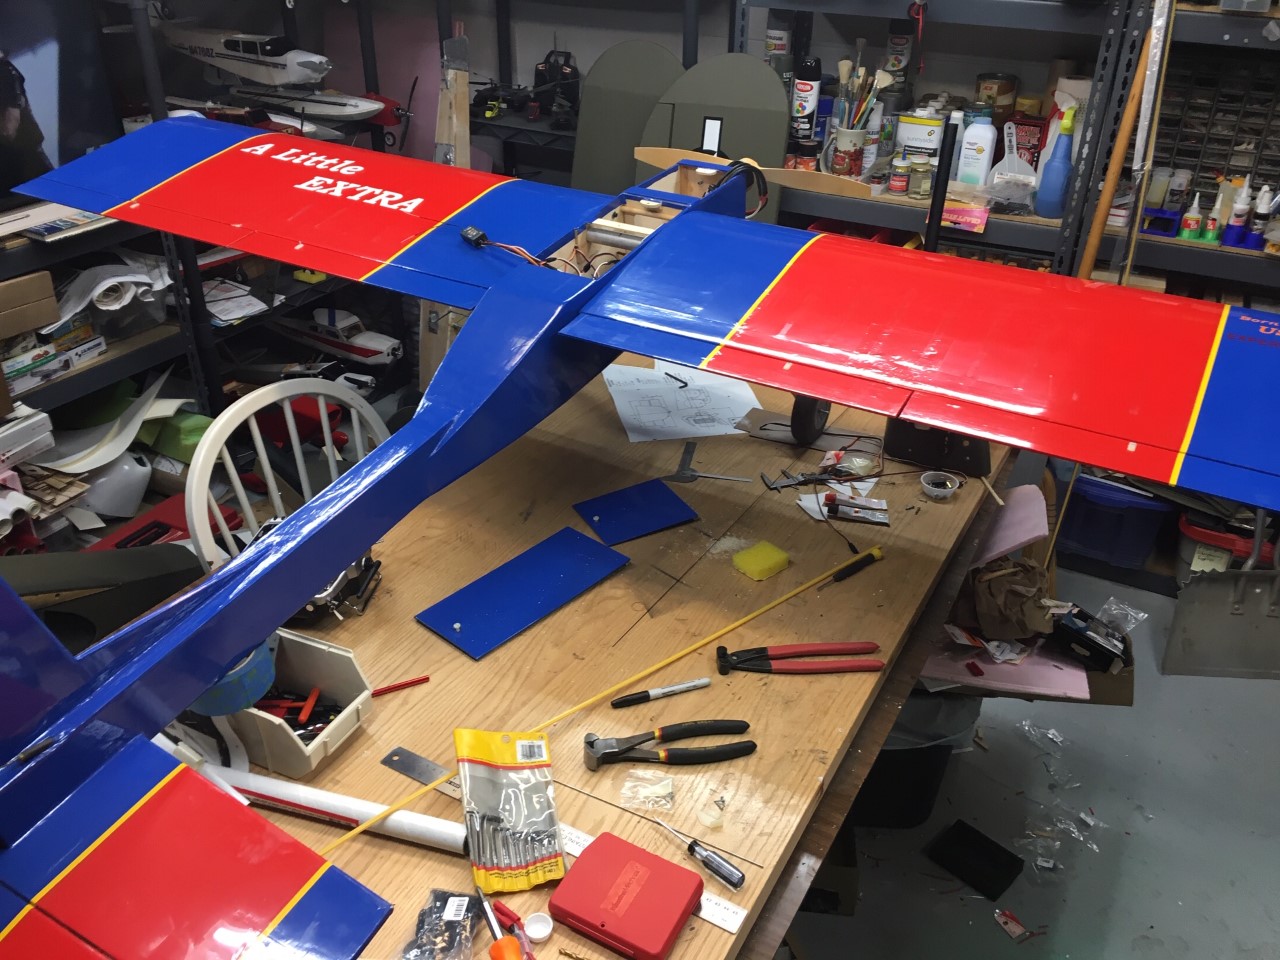
Wing servos arrived Friday and are going in easily. Whoever built the plane set things up a little different than I'd prefer, but it'll work. Servo bays were set up for a servo mounted as shown below, with the servo mounted in the center. This will require two cover hatches, one for each side of the servo. Better would have been to mount the servo to one side of the bay which would let me use one cover. I could modify it, but the time required isn't really going to pay off.

I also noticed that there are plywood hardpoints hidden in the ailerons and flaps for the control horns. The different wood was barely noticeable under the covering. If all goes well, both wings will be done by Sunday night and MAYBE I'll get the elevator and rudder servos hooked up as well. The biggest remaining project is making a battery tray.

thumbnail_IMG_0475.jpg
 

Joker 53150

Mmmmmmm, balsa.
Mentor
More progress. All four servos in the wings are in, adjusted, and programmed to my Taranis. The rudder servo and pushrod are also finished - next up is the elevator servo & pushrod. The guy who built the plane did a decent overall job, but some stuff confuses me. Example: the elevator and rudder pushrods have to go through a long tail boom with no easy access after it's built. The rudder pushrod tube had holes drilled through the boom formers and is held in place nicely. The elevator pushrod should have had the same treatment, but was never mounted and never had holes drilled for it. Because of this I'll have to simply run it down the center of the boom and then secure the ends. Not very elegant, but it'll work. I doubt I'll get to the battery tray today, and the next 4 days I'm on the road, so it may be finished up next weekend.

thumbnail_IMG_0477.jpg
 

Joker 53150

Mmmmmmm, balsa.
Mentor
No real updates on this plane for the past few weeks, other than it's now ready to fly! :) I've spent a little time here and there finishing up the battery tray and pushrods, nothing too interesting. Today I gave it the first full-power run, and this beast has POWER! :eek: I'm fairly certain that it's more than enough to give unlimited vertical (until power runs out). Sunday I'm planning a trip to my dad's place for the maiden flight. The motor is running in the pic below, which is why the prop looks like a boomerang. :)

thumbnail_IMG_0520.jpg
 

Joker 53150

Mmmmmmm, balsa.
Mentor
SUCCESSFUL MAIDEN ALERT!

I packed up my gear last night and hit the road early today for a 3 hour drive to my dad's local field, and as usual we were the only ones there. Just how I like it for a maiden flight of a big plane! :) After setting up the canopy for shade and unloading the planes I assembled the Nothin' Extra and did a pre-flight check. Everything looked proper so I aimed it down the runway to do a quick test-hop. Well, the "hop" turned into a quick 2 minute flight. I wanted to do a quick heat-check on the harness, motor, and ESC as I haven't run an electric setup this big before. Everything looked good and nothing was melting, so I sent her back up to finish the 6 minute flight.

The plane is FAR more docile of a flyer than I expected, and it handled extremely well after trimming it out. With power off it's got a very manageable glide-slope which makes soft landings a breeze. All three landings were darn near perfect.

Now that I know it flies I have a couple things to change/finish on it. The pockets for the wing servos need hatches to finish them off, the covering needs a little re-sealing in a few spots, the top hatches need some reinforcements where the hold-down screws are located, and the transmitter programming needs tweaking. The biggest fix will be re-building my "Y" harness with heavier wire - it was made with what I had on-hand, and it's a little lighter than I'd prefer. I may also program the flaps to act as ailerons when I'm in high-rate mode, which would double the size of the ailerons, although that's a low priority.

The electric motor and 10 cell setup proved to be extremely powerful, so I may duplicate it on a 1/4 scale Clipped Wing Cub I picked up from an estate sale last year. That would go nicely with my other big cub running a gas engine. To me this electric setup feels far stronger than the 26cc gasser I've got in another plane.

thumbnail_IMG_0523.jpg
 

nhk750

Aviation Enthusiast
Thats the same setup I'm using in my 1/4 clipped wing Cub build, except I'm going to use a 19" prop. Good to know it works well and nice job on the plane.