Scale Build-Off – RQ-7 Shadow

HilldaFlyer

Well-known member
Maiden Fail

Long story shortened... I got a prototype into shape and tried to fly the thing.

The good news - it looks like it will fly.
The Bad news - it didn't.
The good news - I have a video.

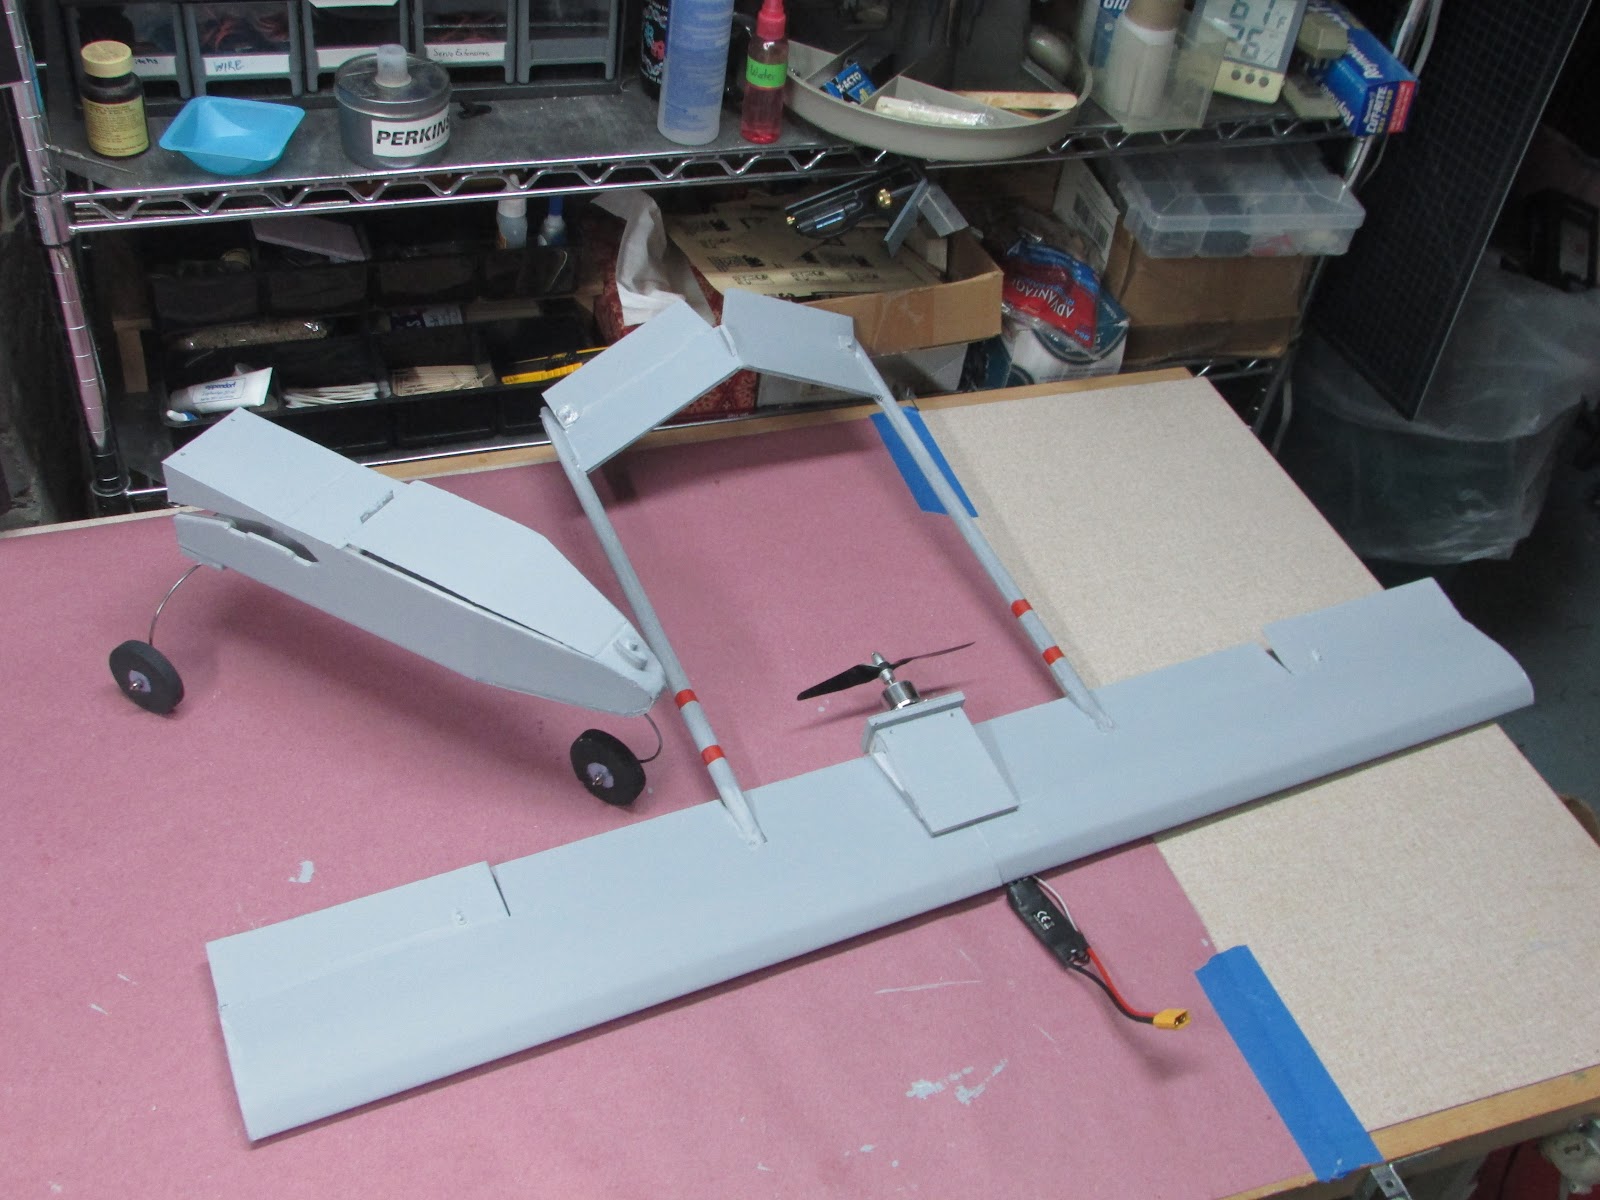
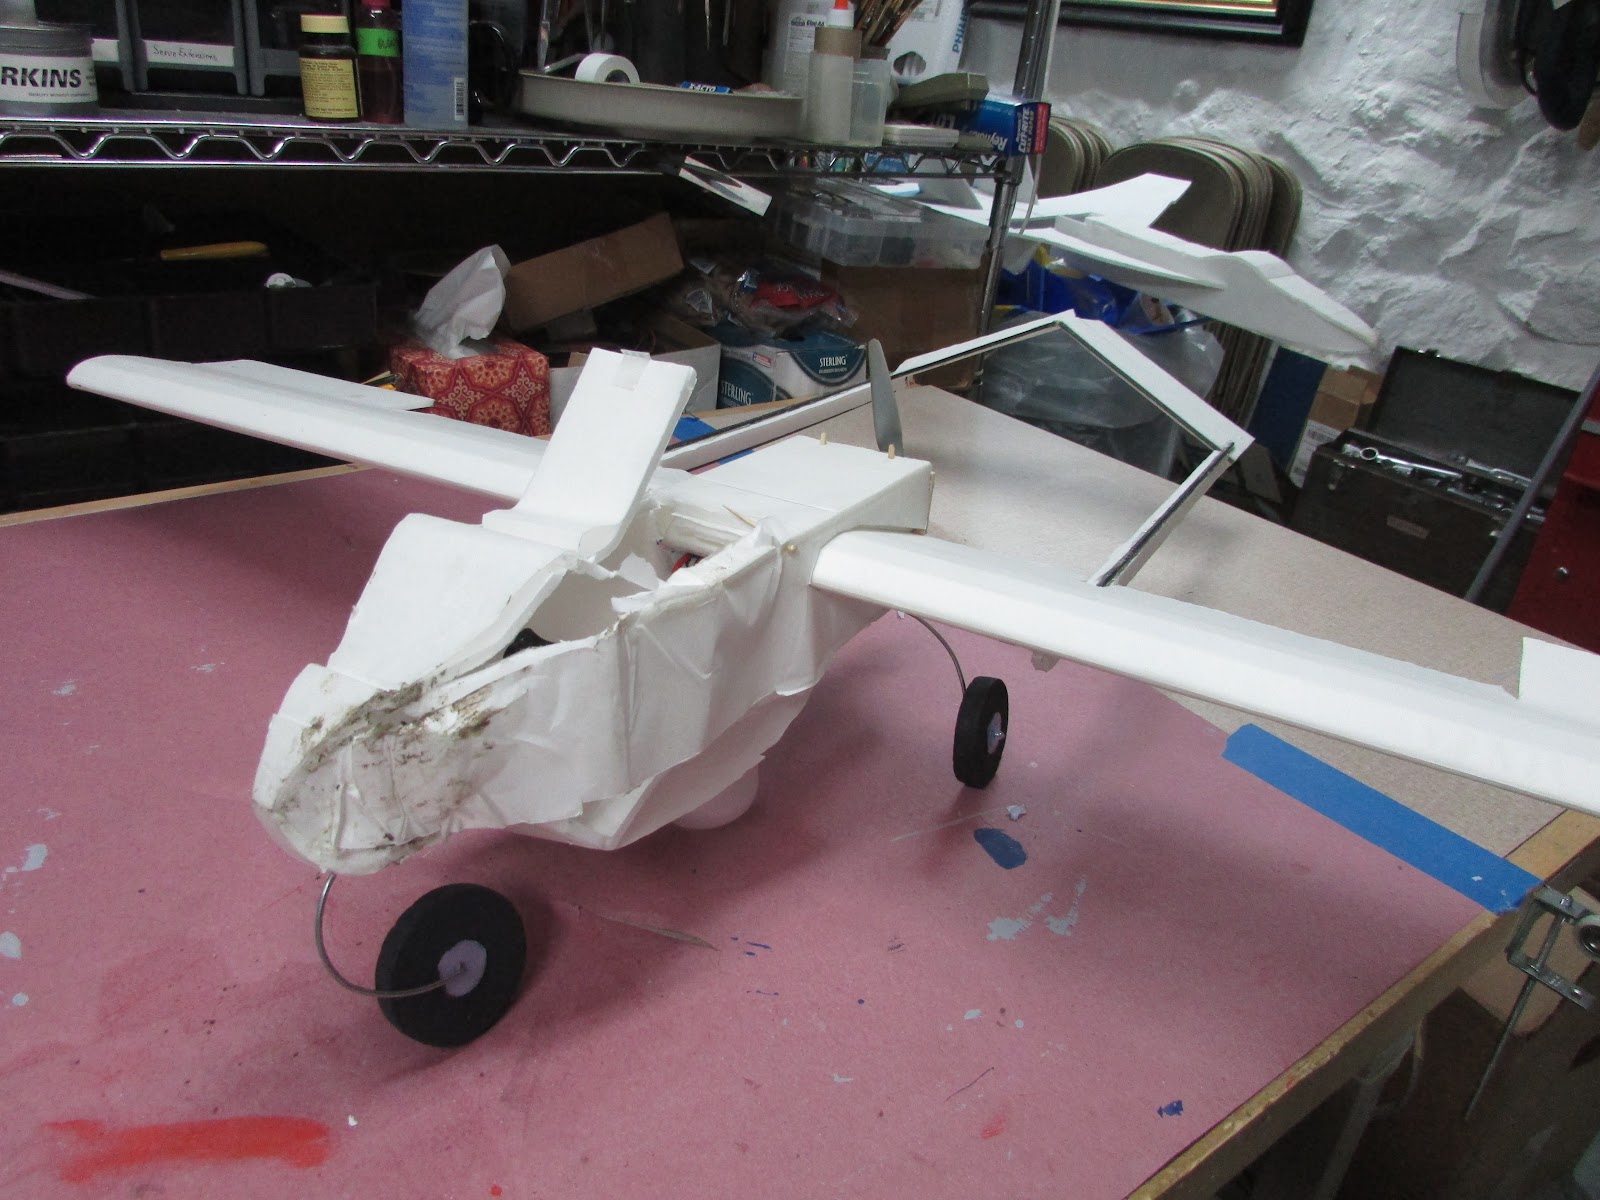
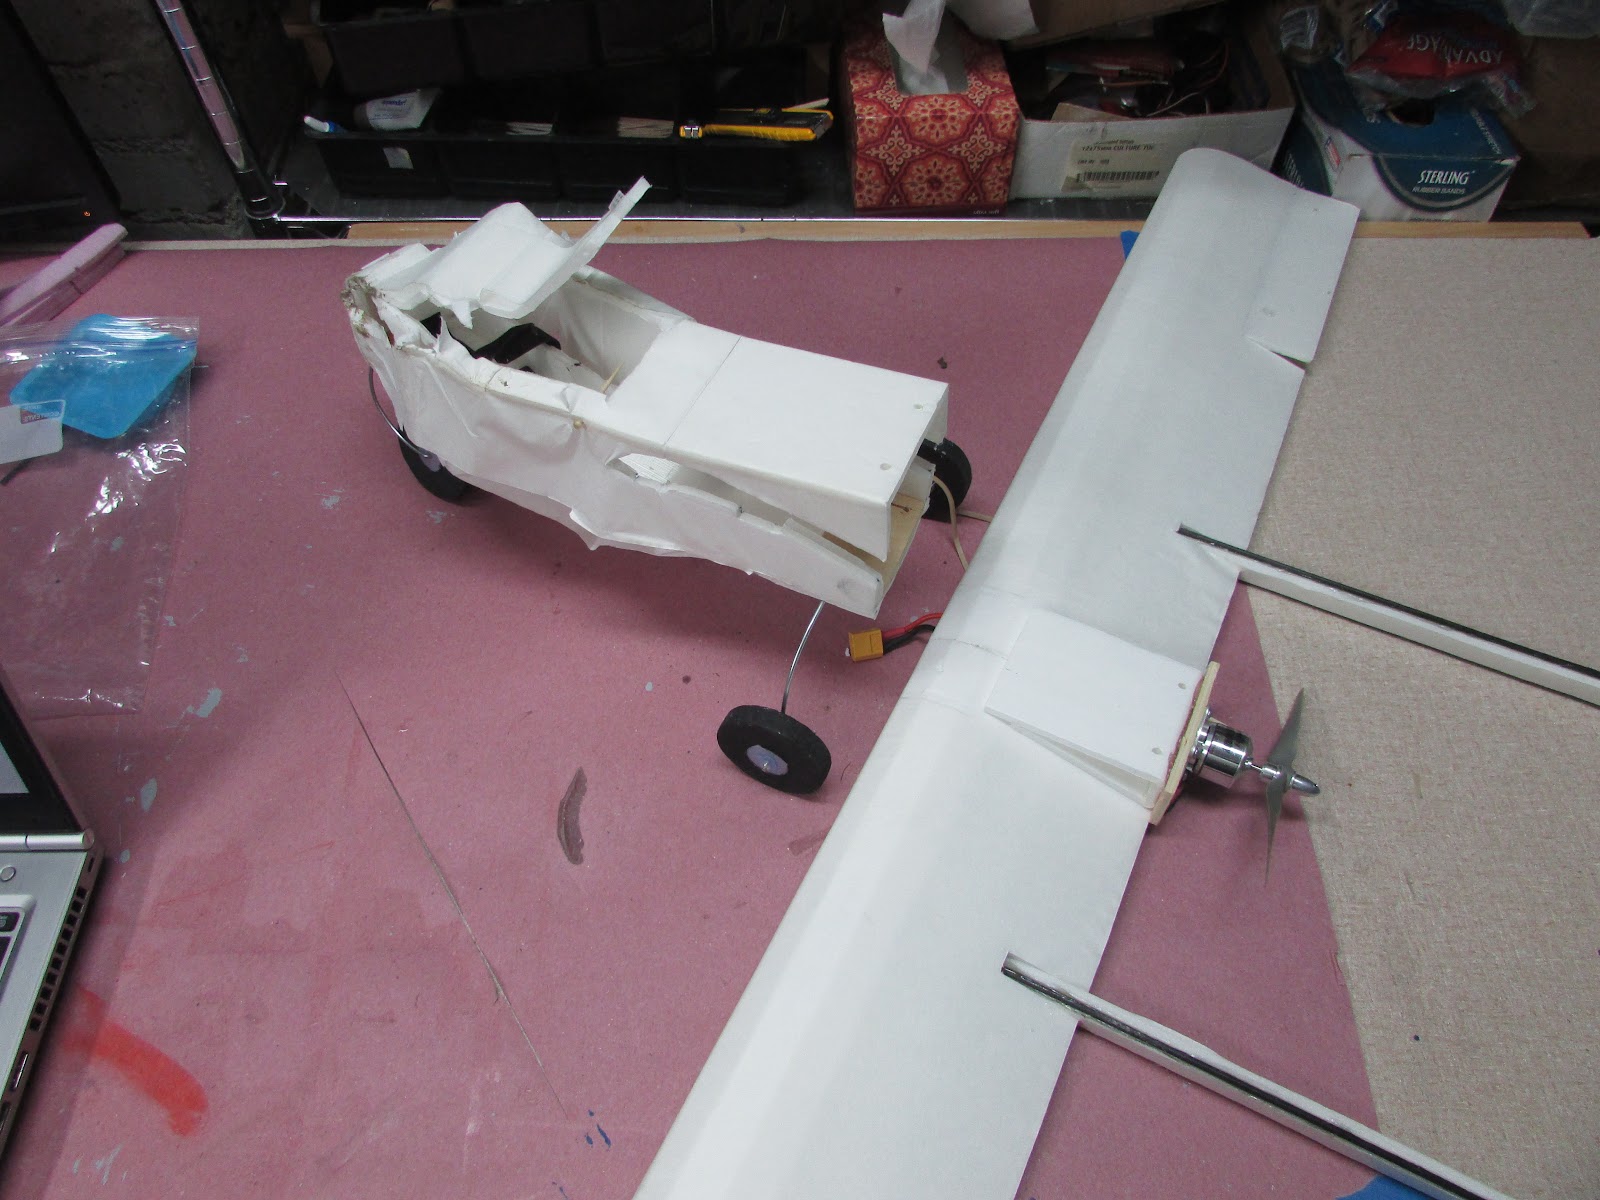
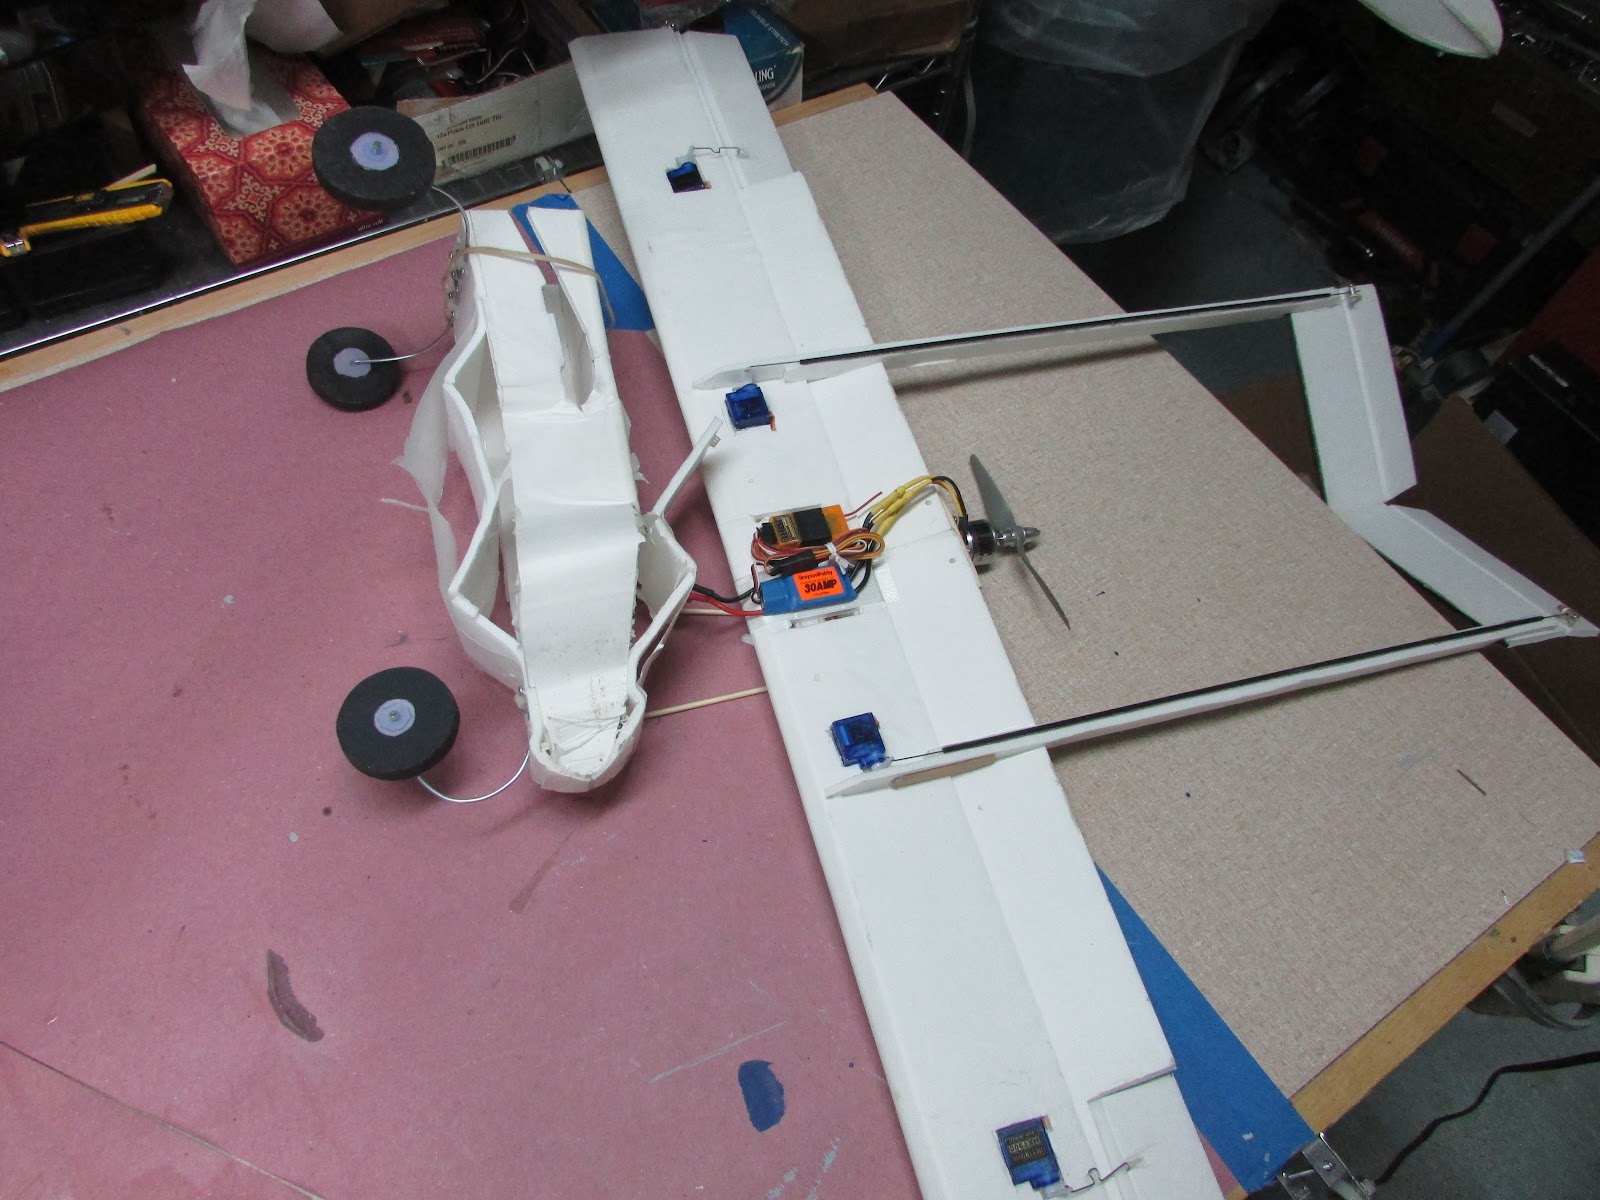
I'll load the video as soon as I have a chance to upload it. Basically the foam tail booms are too weak. The RQ-7 ran off the runway into grass and the sudden stop broke the booms where they join the wing.

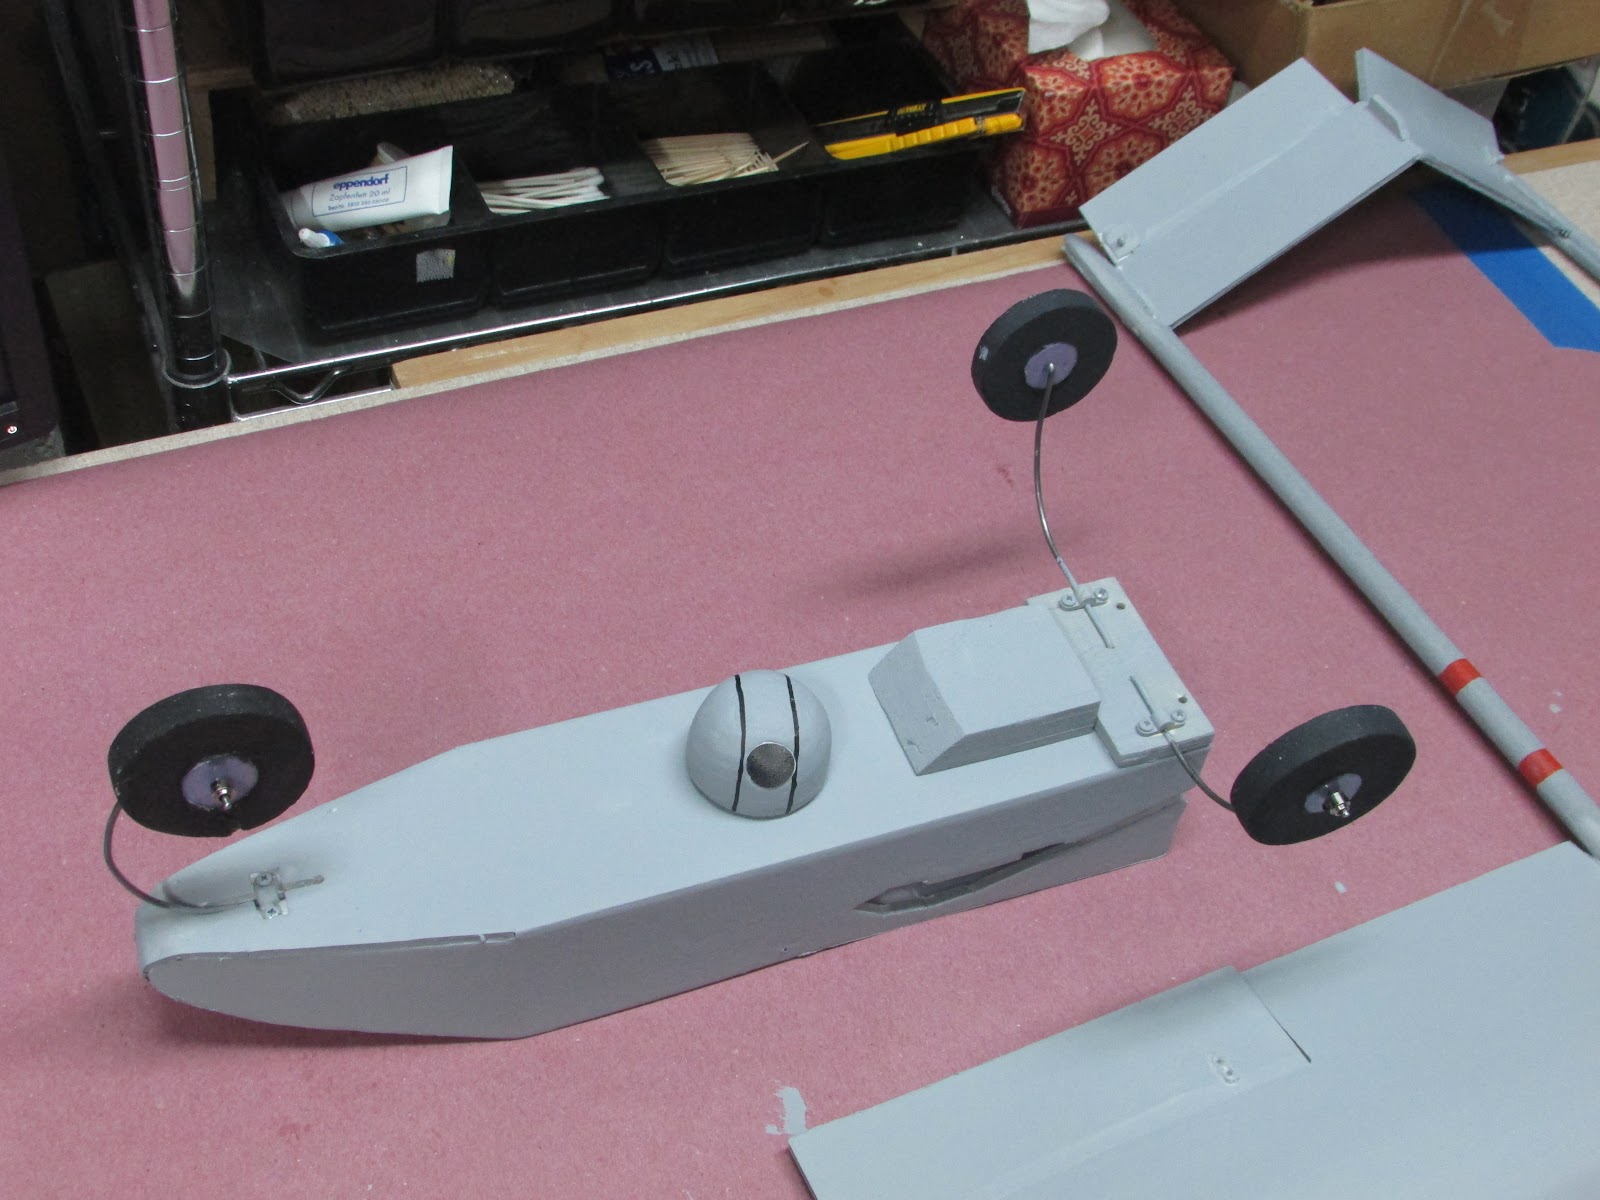
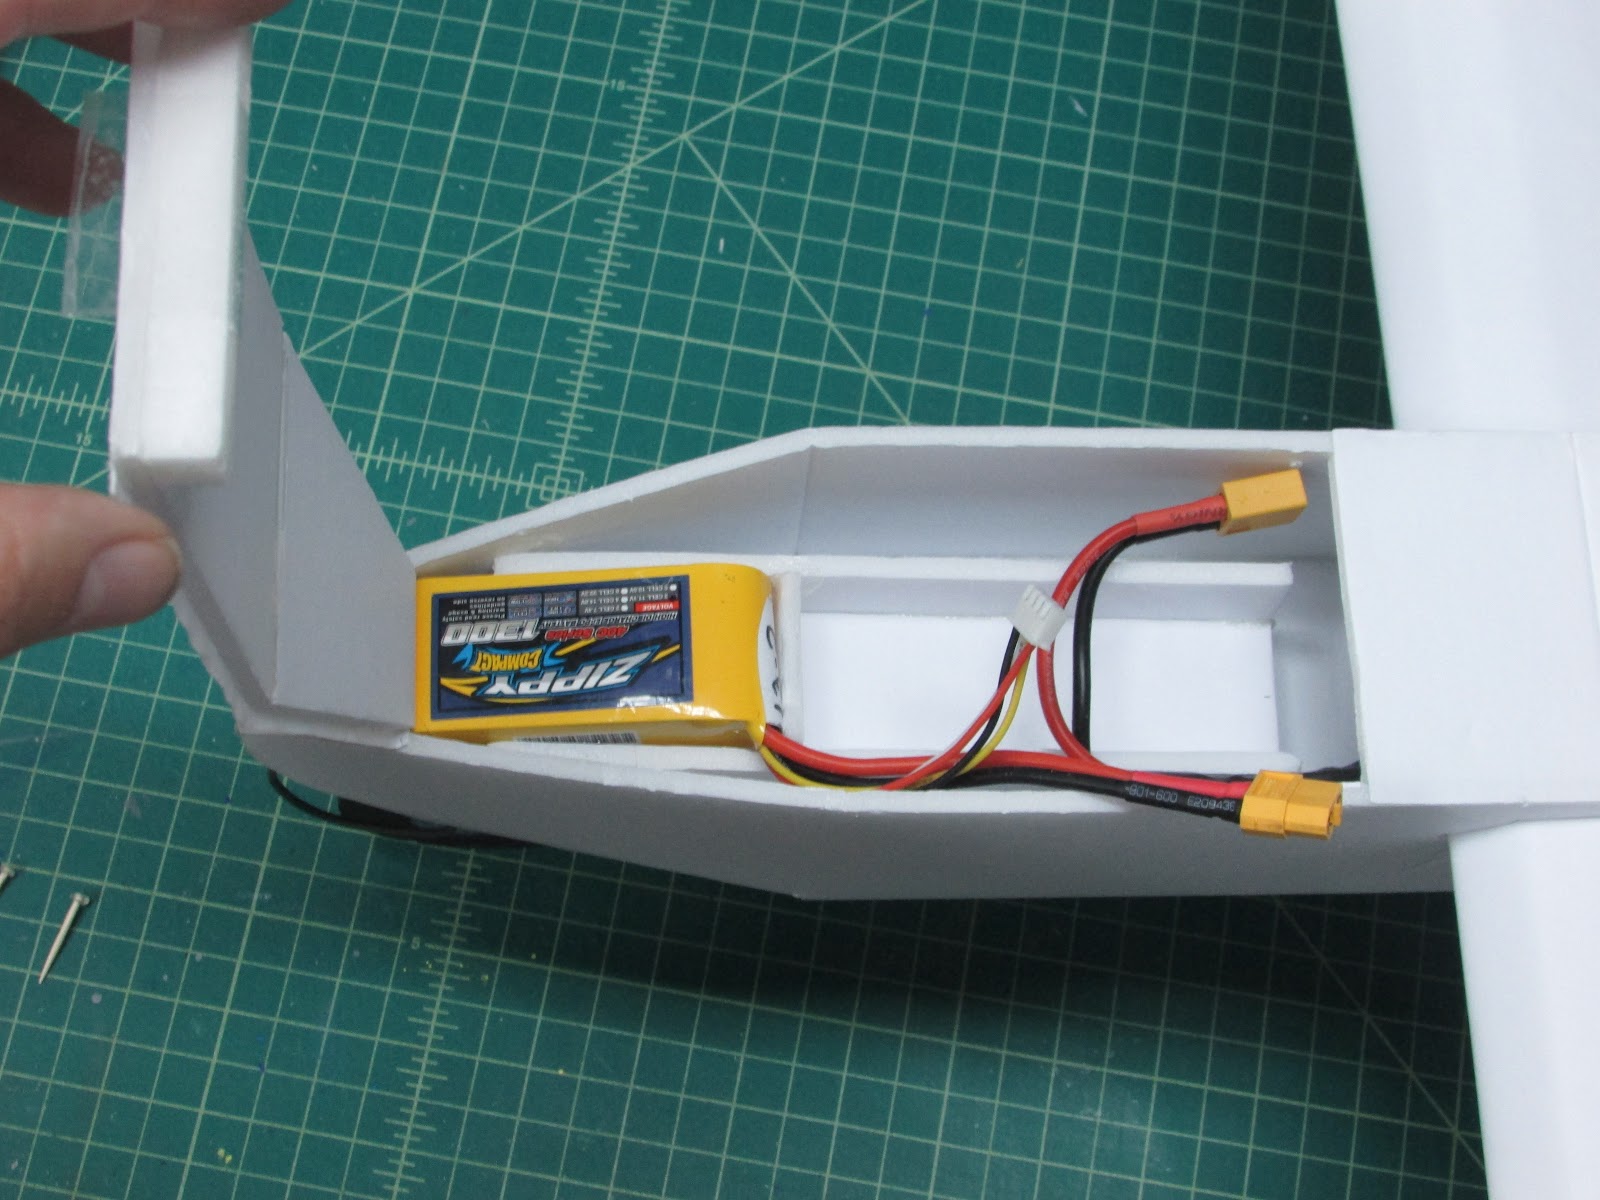
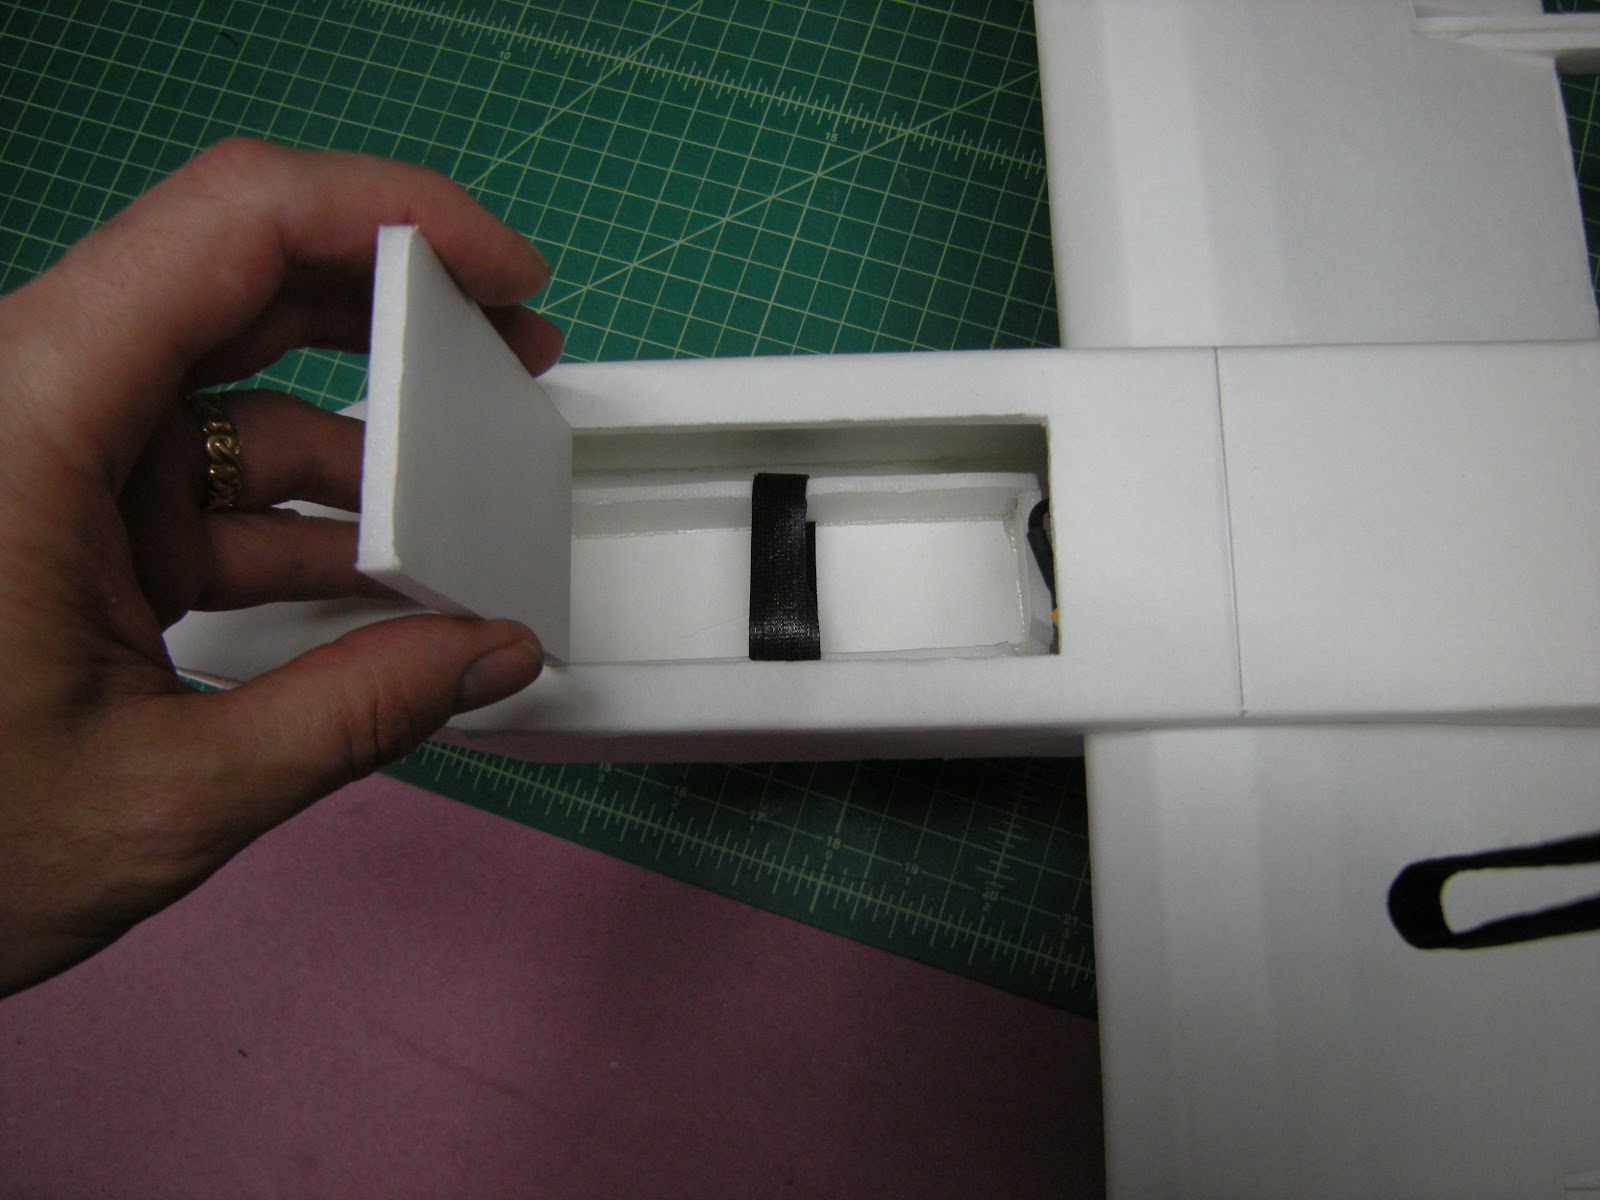
The good news - I have redesigned the booms with additional carbon support. I have redesigned the tail and how it mounts to the booms. I have redesigned how the boom attaches to the wing. I have redesigned the fuselage to allow for easier access to battery and any FPV equipment.


LspvGX9yCwguTyO4fHWbTTrS79piLjrc78ksBdn5z89WCPDaKnDs4zgtaz0i9xobI33eADiW59SunVneT--kJgplJU_IVZ7uQFUY7Riu3WmMPxZ7v1s0CvwjOvm5aHLGpmazajh7
 

HilldaFlyer

Well-known member
Copycats -

RMRC's version - Anaconda. This is a tad bit bigger than mine (and a tad bit more expensive at $299 without electronics $399 with).


Maybe I'm the copycat - I don't know when this was released but it looks like an excellent FPV platform.
 

HilldaFlyer

Well-known member
Version 2 is ready for Maiden.
ItsX4WuE7C_WGyIXZCYOGRzifYCAhyMcpEUVKg33ySNdpgY7p4-_tb5RRQzRQkaRhtQCOD-HhsrsIL4JJVXOrAJ7396FuE4SYk2x_mzZYQLGcu2GBRqiZcKkhnrYfcBUIrIMo9zJ

Looking for a calm clear day.

Version 3 got paint this weekend.
xxsTapbbEVt7e9LHlWtmdyfhwAaZq8_cNGwUKjXRP-yls0bCqpqNky1zkLgMxd-opFpd_xY9WXBUdgYMsbOoxGA4cyTjWxJej9LVlDCkuzoGpR2KaC9A-H2DOzd-rC2X9oueDziv


orQA2CpsHdmST6YrAbtXDajhzyDCz0mpLvXtbRZTCteblhW8HYxOSe8TfFhU-7ZFGJEH84cw_ZA5mte6Ek_6pNhRfMyWPippnAbkBjQJHV6ksPN8xpIL-5Jc2iN8lmfgQdJKziow

Working on the lettering. It should look nice even if it gets turfed.


HilldaFlyer

Well-known member
RQ-7 Shadow v2 Maiden

Here is the second prototype maiden.It flew really well after trimming. I was on the way back to the runway to land when it crashed. "But it wasn't my fault... really!"


I believe it crashed because it lost signal. The receiver in the plan has short antennas and I think when it was flying towards me, the batter is a good signal blocker. Anyway, I have the v3 with all the decals to get into the air.

The good news is that it flew great. I was having fun until is spiraled to the ground.
 
Last edited:

HilldaFlyer

Well-known member
Crash of RQ-7 Shadow v2 can be repaired

Remember in the build I said that I like the wing mounted electronics.... in the event of a crash, the wing and all the electronics are safe and you just have to rebuild a fuselage. I didn't know it would work so well...
zBQvsU_h1uqHy2hBuE7AJejRyqCuDGaH5U7zfiHQ30d2ATecRl1eLOwylyZ4Ny30koxbDsM6vKayrLZpp-3f-_oYFYkDfRRqewkYC7E6wziDWiYsLe5LMvOEr4oRaGIRC21j2LMN

Here is the RQ-7 back on the bench with the crushed nose.

1YPpgoNQAPEibIw2F_CRslfgdBcs0IT-zjKCwnBK5gQV2k5UbU5-Vtd-u34n3kqbgsCio3HxTb7NdvVajM6t8V9JQiB-KVF2l7TlaPpnOoK4gaBYQSE7xDGhbw5iYyQhAh-AZa0k

I removed the fuselage and there is no damage to the wing or tail.

ZTKey5wANnftWQicHz6_IYRU8aVeHMKutSecY7ZlrT2wVJmU5MTceAitvUCW-VRV2MgL7IjQTdL-WjwoIFvGURuwQPHSUK5HBdTM-PEqAMI47FM8Wma-gRrzwcm0N7cY4tcJPK0i

Here is the underside of the wing showing the proximity of the receiver to all the other components, ESC, motor, and the battery in front.

The painted RQ-7 v3 has a FrSky receiver with long antennas.


HilldaFlyer

Well-known member
RQ-7 Shadow Maiden -> PASS

Yesterday I looked at the weather forecast and noticed that this morning (Monday, April 25, 2016) would be the calmest rain-free window between now and when the scale build contest would end. Charged the batteries, got everything packed and "went to work" early. For some reason the detour took me right past the flying field... so I just had to stop.

The Maiden of the RQ-7 Shadow is in the bag!

Hopefully the video camera worked... I'm so happy about the flight that I'm telling before I have proof. If you don't believe me, you can ask the pair of Canada Geese feeding at the end of the runway. They looked a little worried for a moment but didn't run away.

gUwbusTLSTaxbuZ63t2iPmw67snLlzuDgQ4XmtrQLJVfSjPXntxx4Xy_YKLi71qrd6glQ6lNSogmSE9TslWIbSZmS3DexiSXK8-uVaLByRL0meUfte6A3XRsCqA9hY1KRXfmugPN
 

dayve

Member
That looks great! Congrats! I've been thinking about adding something like this or the A-tail Bronco to my build list. Is the battery up in the nose for balance? Is that enough, or did you have to use extra nose weight? I could see that being a challenge on this one. Besides a little bit of foamboard, everything is at or behind the desired CG.
 

HilldaFlyer

Well-known member
That looks great! Congrats! I've been thinking about adding something like this or the A-tail Bronco to my build list. Is the battery up in the nose for balance? Is that enough, or did you have to use extra nose weight? I could see that being a challenge on this one. Besides a little bit of foamboard, everything is at or behind the desired CG.

You're spot on - getting the plane to balance on CG was a worry... especially after adding a carbon fiber tubes to the booms. Both version 2 and 3 flew nicely. Below I have provided photos of battery placement - no added weight.


pQOh9N-WGhHGBwROKYCNKz5Uv4YgauEiuR2stPNb-Z_rBWHonldBeGzDgazXnfT31zmVgb5iIU1ZDxGv6_heyCJsJ3Ap4zqcqqOvR0EEB33ZSDRXZCbT3eqDe5pSC7oF78S80ZIe

RQ-7 v3 used a 1300 mAh battery, it needs to be placed all the way forward. I imagine this configuration will work really well with a camera on the front and the battery back toward the wings.

J_RfEuW6zHvhTQuMm_ZZ_4y9bJM21W3apJfuoyG44bB2lUocovjCPonnY4-3w9rkRPk5dZUYxcN5lA2AwLHzXtrf_SbRvGVgsd0WghYL1IW0AJflhcPeIoCkjjCzl1xrfbAmb70

RQ-7 v2 used a 2200 mAh battery which needs to be somewhere near the wing's leading edge.
 
Last edited:

dayve

Member
Would you mind sharing the specs (or pointing me toward them if I've just totally missed them)? I see that it's a 100cm wingspan. What's the total weight? What motor and prop did you use?
 

HilldaFlyer

Well-known member
RQ-7 Shadow Maiden Flight Video


Bjng8Z14dnsgoFl-7BL12XkEPpdvigZ3K6n-BC92AjaqSu1r4P5LbqeU7nFcMkCA5Wa7ejQErtphhV4E1vQRadFCOrtK2YPswQdUW3j14rfnPNzvUdt8qRCJZMlkrCui7hcKaGRc

Look for my friends at the end of the runway. They watched but didn't run (fly) away. They did look a little concerned at one point.


Yeehaw!It made it. It was really fun to fly. Almost didn't go to work...
 
Last edited:

HilldaFlyer

Well-known member
Would you mind sharing the specs (or pointing me toward them if I've just totally missed them)? I see that it's a 100cm wingspan. What's the total weight? What motor and prop did you use?

Sure can,
RQ-7 Version 1 Materials
Foam Core - 2 sheets of Readi-board (Dollar Tree)
Carbon Fiber Tube - 2 pieces of 3 mm (Radical RC)
Servos, 6x 9g servo (Hobby King)
Servo wire extensions - 2x 15 cm. DIY or Radical RC
Music Wire or steel wire for landing gear (Radical RC, Home Depot).
Plywood - USA Balsa, home building center, etc.
Bamboo skewers (Walmart)
Control horns (Hobby King)
Motor - D2628 2200 Kv or similar (Hobby King)
Propeller - APC 6x4 (Radical RC)
ESC - 30 Amp ESC (Hobby King)
Battery - 2200 mAh 3S 40C LiPo
OrangeRX 615R receiver


Version 1 had flaps that were not duplicated on V2 or V3 because I thought the weight and difficulty penalty was too high. Maybe I’ll add them back if I do a bigger one - I’d like to get the wings to about 60”.


RQ-7 Version 2 Materials
Same as above -

  • Removed flaps so only needed 4 servos.
  • Added another carbon tube to the tail boom so you’ll need 4 pieces of 3 mm carbon fiber tube. The carbon fiber was added to the top of the tail booms because version one was a little flimsy for my liking and broke on maiden crash.
  • Added carbon fiber to leading edge of inverted “V” tail.


RQ-7 Version 3 Materials
Same as version 2 except

  • Used Ross foam core (Walmart)
  • Used 2 mm carbon fiber rods. I liked the stiffness of the 3mm carbon fiber tube in V2 better.
  • Reduced battery size to 1300 mAh 3S 40C LiPo. I changed this before I saw version 2 fly. I was concerned that the wing loading was too high, and after seeing the v1 crash, I wanted it to float. V2 seemed to float just fine, but at that time I had already made space for the smaller battery. Can always go bigger.
  • Receiver was changed to FrSky V8FR-II HV with long antenna fed into the wing’s leading edge. I thought this was the failure of V2 - lost connection due to the placement of receiver and battery, ESC, Motor et.
  • Used heavier duty steel music wire for landing gear rods.
  • Battery hatch was expanded to be top panel of fuselage forward of the wing.
 

JimCR120

Got Lobstah?
Site Moderator
I like your build and the details in the thread. Thank you.

How did you make the decals for the lettering?
 

HawkMan

Senior Member
Nice model, I've wanted one of these for a while, but since I have a Firstar now, I can't justify getting one, but the 2 meter wood kit HK is selling is very tempting as a building project...
 

HilldaFlyer

Well-known member
I like your build and the details in the thread. Thank you.
How did you make the decals for the lettering?

Thanks -
Decals - Great question. Glad you asked but it is
Top Secret!

Just kidding of course. I have written a how to article (about a year ago) on making these type of decals (and have not submitted). I keep thinking that it is too complicated for anyone to bother. For most FT planes the print on paper and stick to the plane will handle the majority of the adornments.

The complete process is pretty involved and more than I can put in this reply... but I will answer briefly.
The decals are made by inkjet printing onto Elmer's Glue. Yes - really!


  • Paint (with a brush) a thin layer of Elmer's glue onto overhead sheet or plastic sheet protector.
  • Let dry - it will turn clear.
  • Print a mirror image onto the Elmer's glue with an Inkjet printer. While the image is emerging from the inkjet printer, dry the ink with a hairdryer on low speed (for the crispest possible image).
  • Mist the image at least twice with clear acrylic (I think I used Krylon clear matte). This keeps the ink from getting wet and smearing in the next steps.
  • Cut out the portion of the image you would like to transfer. Take care, the Elmer's likes to peel away from the plastic so use a pair of scissors.
  • Lay the image glue side up on a sheet of clean paper. Lightly spray with adhesive (I used Scotch Super 77).
  • Let it dry for a couple of minutes - should still be tacky but the solvent should have evaporated.
  • Carefully place it on the model. You only get one chance because as soon as it touches, it is staying there. Rub it with finger, tissue to ensure it is complete stuck down. Usually, but not always, the plastic backing will start to peel off the glue. Just carefully peel the plastic backing off the model and the decal will stick.
  • The water soluble Elmer's glue is now exposed, so to protect it, paint over the decal with clear varnish of some sort (I use DuraClear Acrylic), but you can use Mod Podge, polycrylic, etc.

Note inkjet ink is somewhat translucent so the color of the artwork will be altered by the color of the material they are being applied to. Black works pretty good. Yellow over blue is greenish. You get the idea.

If you want the complete article, let me know and I'll post it.
 

HilldaFlyer

Well-known member
Nice model, I've wanted one of these for a while, but since I have a Firstar now, I can't justify getting one, but the 2 meter wood kit HK is selling is very tempting as a building project...

I've been eyeing that HK one too. I've also been thinking about supersizing this one to about 60" (two lengths of foam). Too much thinking and not enough action.
 

Jaxx

Posted a thousand or more times
I've been eyeing that HK one too. I've also been thinking about supersizing this one to about 60" (two lengths of foam). Too much thinking and not enough action.

You did a great job with this design. A larger version would be great too!
 

HilldaFlyer

Well-known member
Supersizing to 60" and 90"

Just spent a couple of hours to scale the plans to 60" and 90" wingspans. Now the decision is whether the fuselage will be trapezoidal or rectangular. A true to scale would have more of a trapezoid shape... but harder to build. Personally, I don't think it is worth it, but... it would look more true to life.

The 90" design will have to have removable wing panels. It is designed to be 3 foam boards long, so the two wingtip panels can be slipped off. That will add and element of complexity.