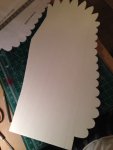
Scratch building a Bald Eagle

Blackbeltrrf

New member
I thought I would share my scratch build Bald Eagle as I am working on it. I have just completed printing and laminating my plans and just started cutting and assembling. Any suggestions along the way are very welcome. So...here we go.

Here are a few views of the fuselage
image.jpg

A front view
image.jpg

Side view
image.jpg

A couple of close up views
image.jpg

Sachet hung in of face for airbrushing later
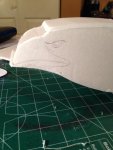
image.jpg

The right wing first level cutout
image.jpg

Added 4deg dihedral to wing tip. I am going to add another 4 deg to the main wing per side as we'll.
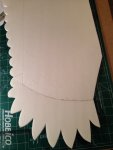
image.jpg
image.jpg
 

Blackbeltrrf

New member
Here is the latest progress tonight on my eagle scratch build

Got the first layer of the wings together. With one side flat on the table I set the angle from center to 10" out towards end of wing at 1 1/2"
image.jpg
image.jpg

Reinforced center by epoxying first a 1/64" birch plywood for strength and flexibility to conform to the dihedral then epoxied a 1/16" Basswood for added rigidity. Did this about 1/2" front and back

image.jpg

A few pictures of the finished bottom layer wing sitting on body. 56" wingspan
image.jpg
image.jpg
image.jpg

Heading to Florida tomorrow for the weekend so not much will get done this weekend but stay tuned for more build
 
This looks great. Here in the UK we have Red Kites and Buzzards everywhere, about 3 fly around our model site. I would love to build this, but it will get confusing when it's in the air for sure!
 

Blackbeltrrf

New member
Update on bald eagle build

Ironing the edges
image.jpg

Using a Vtail design
image.jpg
image.jpg

First layer wing airbrushed
image.jpg

image.jpg
image.jpg

Second layer complete
image.jpg
image.jpg

Wing all complete with all 3 layers airbrushed
image.jpg
image.jpg
image.jpg
image.jpg

Will post more when more work completed. Enjoy
 

eagle4

Member
just truly amazing!!! i am blown away by your airbrushing skills mate. now i'm really excited to see this finished :)
 

Blackbeltrrf

New member
Tonight's update on the eagle


Got the fuselage and tail airbrushed tonight along with mounting of motor
image.jpg

Head close up
image.jpg

image.jpg

image.jpg

image.jpg

image.jpg

image.jpg

image.jpg
 
Last edited:

Blackbeltrrf

New member
I completed the wing mounting on the Eagle. I didn't want the rubber bands for looks so I embedded plastic peices in the wing and will secure wing with skewers. These tabs fit around the fuselage. I reinforced the inside with Carbon Tube for strength and a guide for inserting the skewers. Now all I have to do is airbrush the bottom of wing and it is ready to Fly! Come on good weather.
photo 1.JPG photo 2.JPG photo 3.JPG photo 4.JPG photo 5.JPG photo.JPG
 

Blackbeltrrf

New member
Finally here are the last pictures of the build. The eagle is ready to soar. I will post video of maiden flight when the weather permits

Top view
image.jpg

Front view
image.jpg

Bottom view

image.jpg

image.jpg