Sig Rascal 110 ARF Build

OliverW

Legendary member
Not that I’ve heard. The two big pluses I’ve heard of on using these bottles is that they are clear (easy to see the fuel level) and the cap seals well and doesn’t have a bung to go bad. The original cap is used by some, but it can crack with time so I ordered an aluminum cap that uses a simple o-ring to seal it. Quick, cheap, and easy to replace
We used the original caps on ours, and they broke once the plane broke ha
 

Joker 53150

Mmmmmmm, balsa.
Mentor
A couple parts showed up today, and even though I've got no time to work on the plane I couldn't resist some quality time with my plane! :)

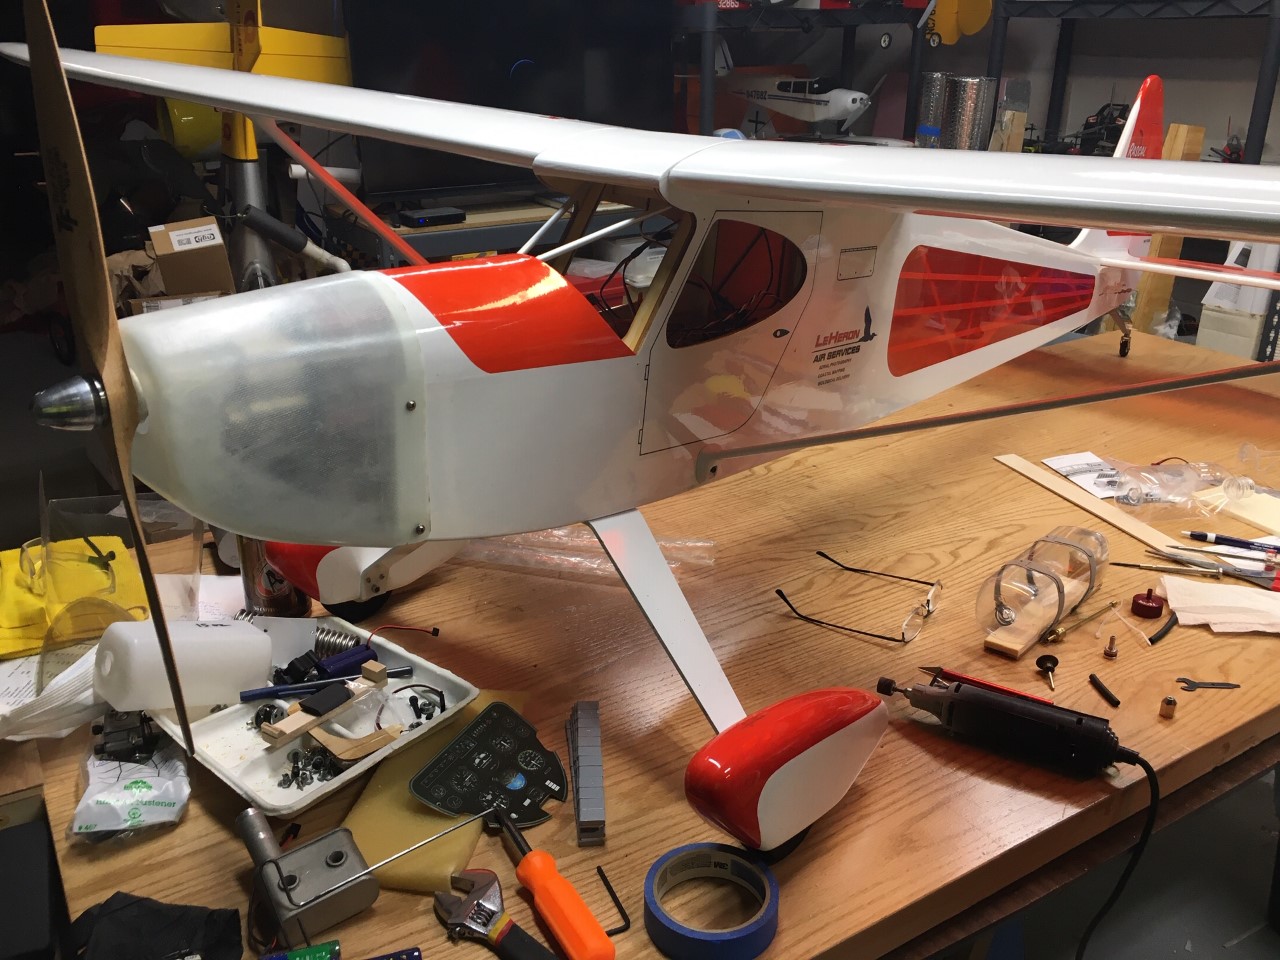
First up is the cowl from Fiberglass Specialties. I've gotten a few cowls from these guys in the past and have been happy with the quality. A few reviews online complain about some imperfections, but they do warn you on the main page that their molds are getting older and some pieces may require a little clean-up. This one will only need some filler primer and MAYBE a tiny touch of filler. The cowl version I ordered is the "longer" model, which is about an inch longer than stock. I wanted to be sure it was long enough, "just in case", and I figured I could always remove excess as needed. For the initial testing I removed the carb, exhaust, and spark plug. The hole for the prop shaft was cut out using a sanding drum on my Dremel tool. The bottom edge of the cowl needs some trimming to let it fit over the nose of the fuselage, but it's getting there. I'll remove it a little at a time to sneak up on a good fit. The prop shaft centers nicely so far exactly where it should be, so I'm fairly relieved that my earlier measurements for the motor location were correct. :cool: After the cowl fits I'll start trimming for the exhaust, carb, and spark plug. I may also need to remove some of the bottom of the cowl for the cylinder head. That'll be a good thing, as the airflow over the head will help cool it.

thumbnail_IMG_1535.jpg


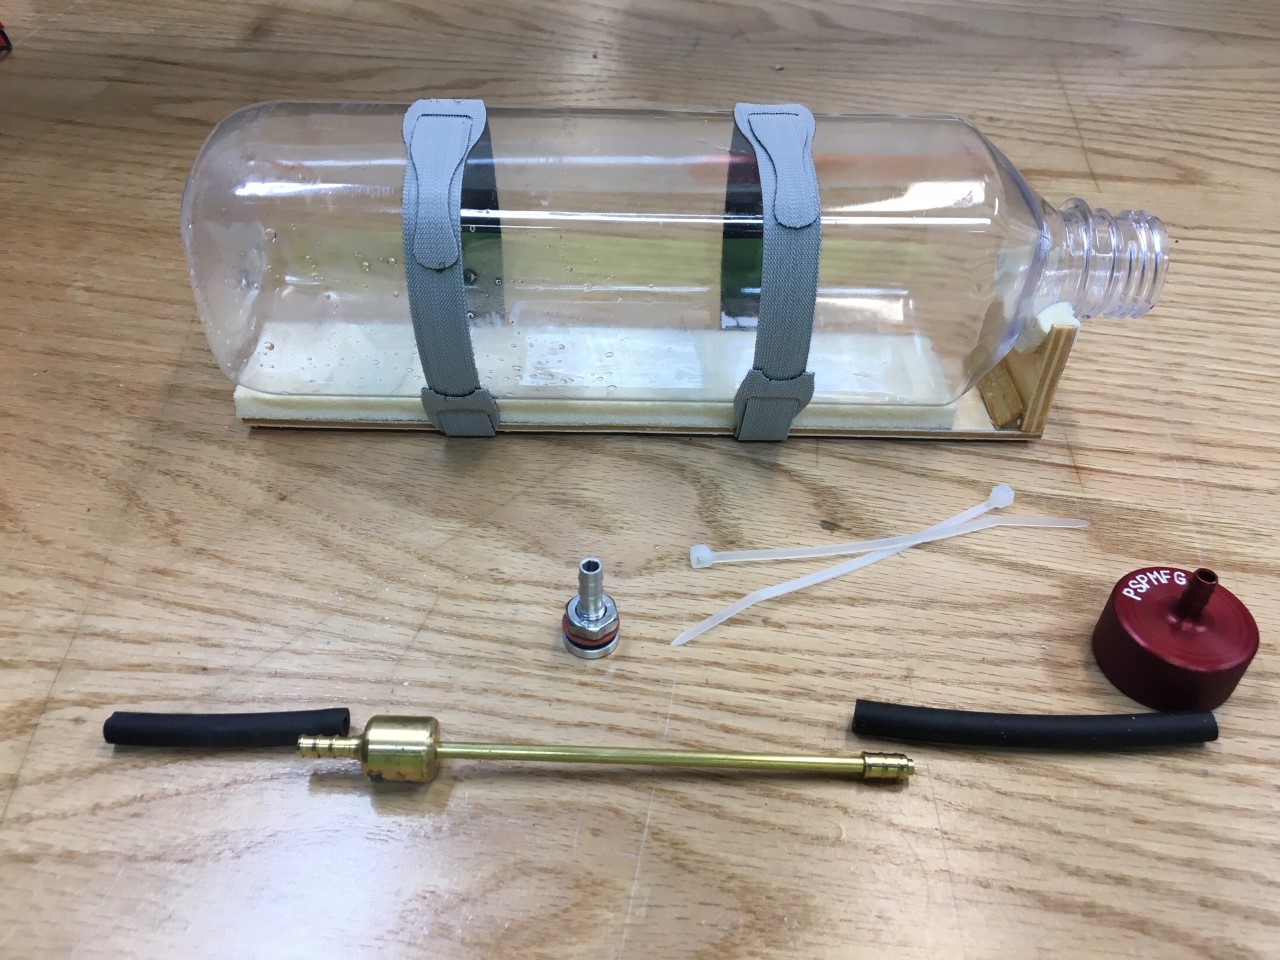
Also in the mail was the gas tank parts from PSP Mfg. I've laid out the main parts more-or-less how they'll go inside the bottle. Instead of simply using a Tygon gas line and clunk the PSP setup uses high quality hose that actually stays flexible, connected to a brass hardline and clunk. The clunk has another short length of hose on the end which is the part that actually hits the sides of the tank. The metal clunk itself is kept off the sides. Also in the picture is a vent that'll be installed in the bottle. For what it is, this stuff is expensive (over $20 USD for the pieces shown). I'm trying hard to like it which will justify the cost. :) The bottle is resting on a mount I'm making, which will fit in the bottom of the fuselage. More to come!

thumbnail_IMG_1536.jpg
 

Joker 53150

Mmmmmmm, balsa.
Mentor
A little quality time with the Dremel and the cowl is installed. I managed to get a nice tight spacing between the prop and cowl thanks to the adjustable engine mounts. With that done it was time to make my shop feel VERY small, so I put the wings and struts on to check balance. I hate to say I'm not thrilled with the results... As it sits right now (no windows, no fuel tank, no exhaust, no muffler, and no batteries) it requires about 15 ounces of weight at the nose to balance! :eek: Most of the stuff I just listed will go forward of the CoG so I may be able to shave 3-4 ounces of dead weight. Looking it over, I don't find anything on the tail that is "excess" by the guy I got the ARF from. Maybe my 26cc gasser is just lighter than it was designed for, so I guess I'll do some research to see if others have had this issue.

thumbnail_IMG_1537.jpg
 

rockyboy

Skill Collector
Mentor
Yeah, that's quite a chuck of lead for the nose. I recognize that gray strip of self-adhesive weights :D

How's the total wing loading though? And comparison to the "stock" weight? You could end up like my All Star that has an extra 1.5 ounces of lead up front but still comes in at 27oz, definitely on the good side of the 26-36oz range.
 

Joker 53150

Mmmmmmm, balsa.
Mentor
FIVE strips, actually! :) Total wing loading per specs should be 17-20 oz/sq ft, and even if I add almost a pound at the nose it won't be bad and may even handle wind a little better. Plans call for the plane to be in the 11-13, and I'm not sure where it's at yet. Maybe it'll still come in at that range if I'm lucky and think light thoughts!
 

rockyboy

Skill Collector
Mentor
FIVE strips, actually! :) Total wing loading per specs should be 17-20 oz/sq ft, and even if I add almost a pound at the nose it won't be bad and may even handle wind a little better. Plans call for the plane to be in the 11-13, and I'm not sure where it's at yet. Maybe it'll still come in at that range if I'm lucky and think light thoughts!

Sounds like she might be the "go-to" plane to take to the field on windy days :D Fingers crossed the landing gear handle the extra pound well!
 

Joker 53150

Mmmmmmm, balsa.
Mentor
From what I’ve read the landing gear should be fine. Some have reinforced it when setting the plane up to piggyback gliders. It is fairly stout metal for a stock plane.
 

Joker 53150

Mmmmmmm, balsa.
Mentor
It's been almost 4 months since I worked on this plane, and it's soooooo close to being done I can't ignore it further. The rebuild on my 1/4 scale Bud Nosen Citabria is put on hold while I try to wrap this project up. The two main tasks are installing/plumbing the gas tank and mounting the batteries. Everything else should be fairly quick by comparison, so let's get rolling. Again.

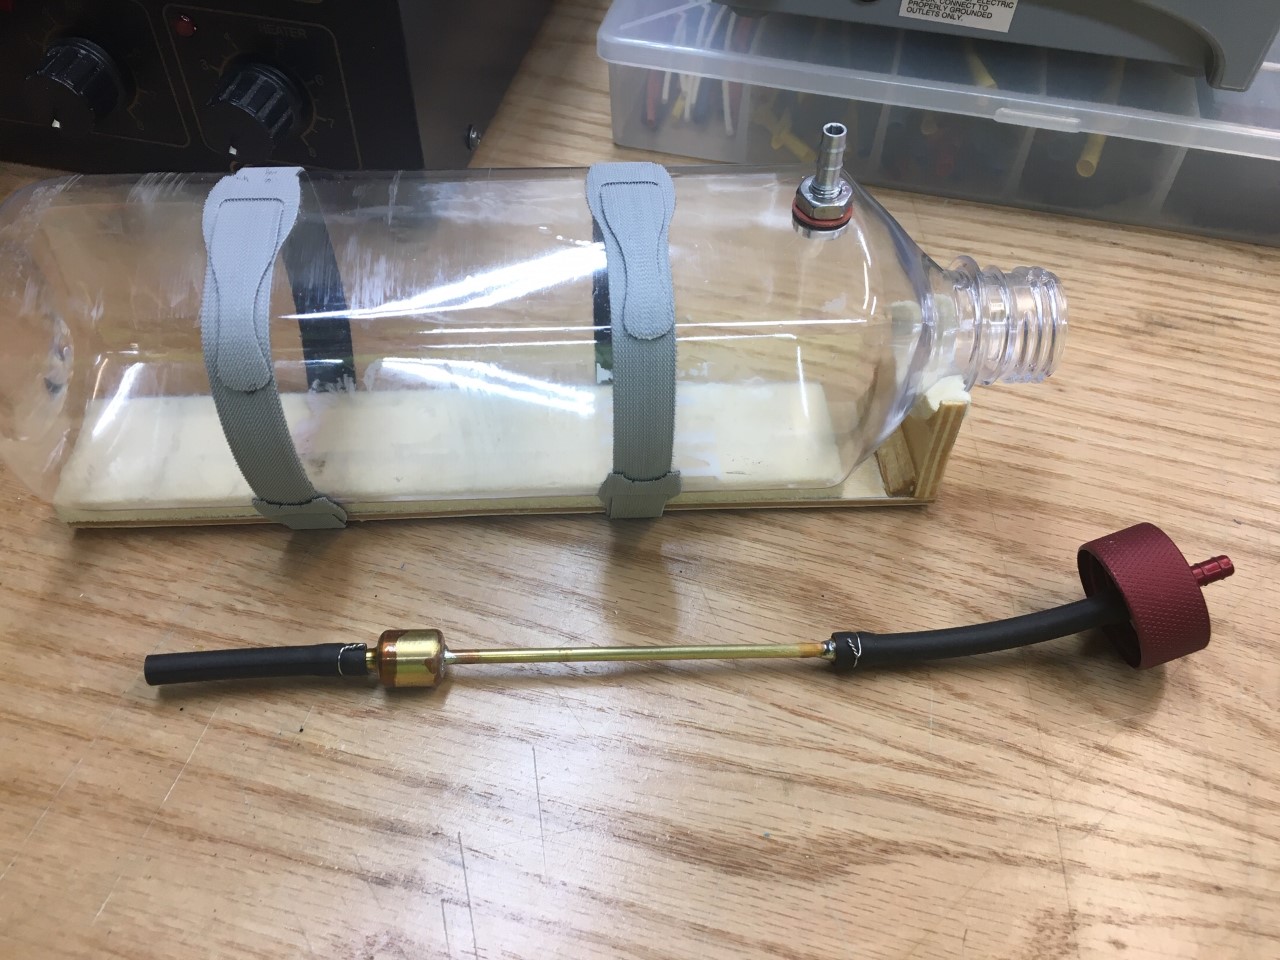
The gas tank goes first so I can make sure it'll fit once the fuel lines are installed. Batteries will then be placed wherever I have the most room. I'd love to have them far forward for the CoG, but they'd be very hard to plug in or charge. Here I've got the "guts" of the tank all built, using a Fiji water bottle and aluminum cap. The black hose is used instead of the usual Tygon fuel line, as it stays much more flexible over time. Tygon gets stiff and swells, but is still good for the regular gas lines to the engine.

thumbnail_IMG_1918.jpg


Some day I'll get a dedicated soldering table set up so I don't have to clear the bench every time I want to solder. Normally to solder I'd just use a regular soldering iron, or maybe a bigger soldering gun. In this case I had the big brass weight to solder which would take forever to heat using a soldering gun, so I broke out my "rework station", which I picked up at an estate sale a few years ago. It's basically an adjustable air-pump that blows out hot air - hot enough to melt solder. I cranked up the temp and adjusted the air flow to "medium-ish" and directed the air flow to the big brass blob. In a short time it was hot enough to melt the solder and draw it in. This was much easier & faster than traditional soldering, although it's not good for typical soldering on PC boards.

thumbnail_IMG_1917.jpg
 

Joker 53150

Mmmmmmm, balsa.
Mentor
The finish line is in sight! The fuel tank is mounted along with the fill port and filter. The battery mount is installed and should (in theory) make it easy for me to remove the batteries for charging. The ignition kill is wired up, programmed, and needs the module mounted. The to-do list is getting short...
  1. Tighten pull-pull cables
  2. Test the battery mount
  3. Trim spinner for prop clearance
  4. Cut spinner mounting bolt to size
  5. Cut holes in cowl for carb, exhaust, and airflow
  6. Install all windows
  7. Clean up wiring
  8. Test run engine
  9. ?? TBD

thumbnail_IMG_1919.jpg
 

Joker 53150

Mmmmmmm, balsa.
Mentor
Moving right along...
  1. Tighten pull-pull cables
  2. Test the battery mount
  3. Trim spinner for prop clearance (Switching to different spinner.)
  4. Cut spinner mounting bolt to size (Don't need to now.)
  5. Cut holes in cowl for carb, exhaust, and airflow
  6. Install all windows
  7. Clean up wiring
  8. Test run engine
  9. Set failsafe
  10. Program rates and expo
  11. Clean up plug wire, engine cables, and fuel line inside cowl.
  12. Add exhaust extension (on order).
The weather this week is going to stop me from firing the Rascal up, but it's ready for it. I ordered some high-temp silicone tube to make an exhaust extension with, in hopes of directing the exhaust away from the air-frame better. The white covering will show all of the mess created by running a slightly higher gas:eek:il ratio for the break-in of the engine. I don't know how much it was run before I got it, or how well it was treated, so I'm playing it safe and treating it like a new engine until I get a feel for it.

In the pic below you can see the green light around the kill flag's plug. I'm not thrilled with the color, but it's visible and serves a purpose. When I plug in the kill flag the light goes out and the system is disarmed. Solid green light means it's all good to go, and flashing means there's a problem or a low battery. The small red light above it is telling me the ignition is powered and live. Since I always start my planes on the right side I placed both lights where I can see them. The gas fill valve may be moved to the left side once the cowl is ready, just to help avoid splashing gas on the electronics.

thumbnail_IMG_1920.jpg


Inside everything is fairly organized and neat. The twin batteries are held in place with a couple rubberbands and Velcro. Since it's not an acrobatic ship this will work fine, and rubberbands will be replaced each day at the field. Heck, I've got 3 POUNDS of rubberbands from Amazon CHEAP, so I may as well cycle through them quickly. :) The wad of foam is simply to help put a little soft pressure down onto the gas tank in hopes of it minimizing vibration of the tank.

thumbnail_IMG_1921.jpg
 

Joker 53150

Mmmmmmm, balsa.
Mentor
A new problem popped up when I installed the wings to test and program the ailerons. One aileron sort-of worked and the other just made a strange high-pitched buzzing sound. Fantastic....

This issue reminded me of the elevator servo problem I had (and fixed), where the servo travel didn't always follow stick movement, and would "bounce" the elevator when you flick the stick a bit. My fix for that was removing the three flat servo extension wires and replacing them with a single extension made from a twisted cable.

Me, being the super genius that I am, figured I might be seeing the same problem with the ailerons. After removing the 4 screws for the aileron servo hatch I worked the old cable(s) out to inspect them. Again, multiple short extensions of flat cable. I replaced the hodge-podge of cables in each wing with a single twisted 36" extension, and also got rid of the "Y" harness. Each servo is run off it's own channel now, and when I applied power everything worked perfectly. Triple rates are now programmed along with some expo, and she's all ready to fire up for ground testing when the winter weather goes away.

So the big take-away on this is be careful with your servo extension choices. Using an extension for your extension's extension isn't a great idea... :)
 

Joker 53150

Mmmmmmm, balsa.
Mentor
There has been no time to play airplanes for the past few weeks due to the new job - I've spent the last two weeks (Sunday thru Friday) traveling and learning the new products I sell. With that out of the way, this weekend had the promise of warm (for Wisconsin in early March) weather, so I wanted to get the Rascal out to maiden.

I brought it outside Saturday morning to fuel up and test the engine. The engine is unchanged from last year when I got it running for the first time, so I figured this would be a fairly easy task. However..... it wouldn't fire, or even pop. I spent a couple hours trying to get it to run. It had plenty of fuel, I could see the spark, so I figured it was the air mixture. Still nothing.

I thought it might be the new ignition kill, which was new from last year, so I bypassed it and still nothing. Then I pulled the plug and grounded it to the engine case and hit it with the starter. Hmmm..... no real spark! It sparked well when hand turning the prop, but with a fast turning starter it didn't spark! Somehow my new ignition module that worked well last year wasn't working. I swapped in another ignition from a different engine and it fired right up. I did some swapping of parts in and out, with and without the ignition kill, with the old and new ignition module, and determined the only problem was the ignition module. So now I've got to swap in the new box, which will be fairly quick and easy.

I also found there was a problem with the throttle servo. It worked well with the plane running, but not with a dead engine. I think it's got a stripped gear, and will replace it to be safe.

I'm also trying a pre-mixed 40:1 non-ethanol fuel and so far really like it. It seems to run much cleaner with no residue compared to mixing my own. However, it's not cheap at around $22/gallon. I may use it for the convenience and clean running when I'm not flying much. We'll see... So now I need to pull the plane back into the hangar, change a few things, and get it ready again for a maiden.
 

Joker 53150

Mmmmmmm, balsa.
Mentor
Well, I think the Rascal is ready for another test-run this weekend. It'll be too cold to fly, but good enough to test. The ignition replacement was easy - unplug and remove the old ignition and replace it with the new one.

The servo, on the other hand, proved to be a bigger challenge. When I remove the original servo I found it was actually working very well and had no signs of stripped gear or other problems. It turns out the pushrod geometry was bad at the carb preventing the pushrod from moving from idle easily. When the engine was running the vibration must have "fixed" the issue temporarily. To get it working well I had to play around with the angle of the pushrod where it connects to the carb, and now it moves from idle without any binding. Again, some testing with the engine running is in order to make sure it's going to continue working.

So now I wait, and work on other planes so they're ready for Spring.
 

Joker 53150

Mmmmmmm, balsa.
Mentor
I rolled some big gassers out for testing this morning - the Rascal 110, the 1/3 scale Cessna, and my 1/4 scale Balsa USA Cub. I ran them all with the pre-mix 40:1 non-ethanol gas from the hardware store, and although it's expensive I'm loving it so far. It is very convenient, it stays stable far better than gas, and has less exhaust residue. A gallon is about $23, but I don't think I've ever gone through more than about 1/3 gallon during a day at the field so when I spread the cost out over a few days of flying it's not bad.

The Cub was fired up first and needed absolutely no tuning or tweaking. It had a slight tuning towards the end of last year and fired right up.

Turning to the Rascal, it fired up and ran ok, but after about an extra 1/4 turn on the low-end needle it really settled down and ran nicely - especially after it warmed up a bit (testing weather was about 36* F). Everything that was done after the last testing appears to be working well, so the next task is getting some more fuel through it before sending it up for a test-flight. I'd like to run another tankful through it before flight since I'm not sure how much run-time the engine has seen so far.


Joker 53150

Mmmmmmm, balsa.
Mentor
Maiden Report!

Winds were up to about 10, temp around 40* F, so the limit of what I'd want to do for a maiden. I got to the sod farm and got ready as my buddy Mike got his plane ready for a maiden as well. The Rascal fired right up, but was having some problems at idle. Turns out it was from some air bubbles in the line, and after the engine warmed up I gave it some throttle to pull the bubbles through, fixing the problem. I could fix the problem by going with a 3-line setup to the gas tank, but like the simplicity (and fewer parts) of a 2-line, so I'll just make this part of my routine. Letting it warm up a bit is good practice, anyway.

As the video shows, it takes off quite easily and cruises around well. It only required a little elevator trim, other surfaces were perfectly fine as-is. I'm still not happy with the throttle and have decided to completely remove the original pushrod so I can re-run it. Using the original pushrod location limits how I run the line, and now that I know it flies well I'm more than willing to spend more time chasing a proper solution. I'm also going to give it all a good nut & bolt check to make sure nothing came loose during the short 5 minute flight. Not shown in the video is the landing. It was fairly uneventful, other than taking FOREVER for the plane to touch down in ground-effect! I've heard this plane doesn't want to come down, and confirmed it. :)


thumbnail_IMG_0106.jpg
 

TooJung2Die

Master member
Congratulation on the successful maiden flight. Looks great. There's a Rascal in our club. I think it's the best looking large airplane I've ever seen. Surprisingly aerobatic too.
 
Last edited:

Joker 53150

Mmmmmmm, balsa.
Mentor
Congratulation on the successful maiden flight. Looks great. There's a Rascal in our club. I think it's a best looking large airplane I've ever seen. Surprisingly aerobatic too.

I’m no 3D pilot by any means, but I did a fairly OK knife edge with it, better than I’ve been able to do with other planes.
 

rockyboy

Skill Collector
Mentor
Got to say I really love the covering effect banking around in the sky - that white border on the translucent red is very sweet!