Swappable Fw 190 - Build thread

Imprez

Member
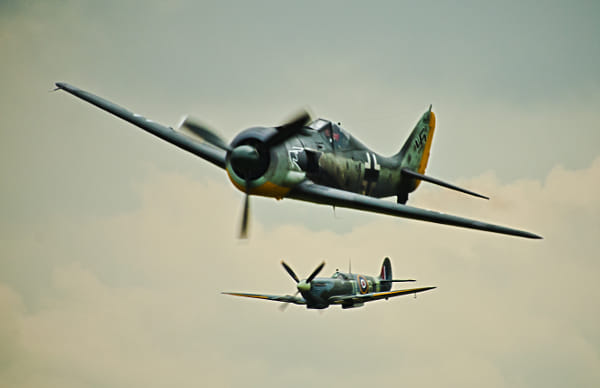
Inspired by 808aerosquadron's P40 and NewZee's Piper Cub I got the idea to try and make my favorite warbird as a swappable too. Ever since I first flew the Focke-Wulf 190 in the online flight sim Warbirds back in the mid 90's it has been my favourite plane. The speed, the fast roll rate, heavy armament and it´s sinister looks made it my ride of choice. I have built it as a plastic model and as a Guillows kit in the past but now it's time to do one out of foam board.

I'm basing my design of the FT Spitfire and will modify it enough to make it look like a Fw 190. The biggest challenge will be the round fuselage compared to the Spits box shape but I've got a few ideas on how to solve that.

Maybe I'm biting off more than I can chew here since the Fw 190 is really not that similar to the Spitfire. Also I have really no other experience scratch building than the Spitfire I've built and the Versa wing that I haven't finished yet. And to make it worse I'm even stupid enough to share the whole build process with you guys so if I fail you will have a front row seat to this disaster :D

So without any further ado lets get on with the planning! I started by downloading Sketchup and the FT Spitfire modeled by roelke2. Then I searched the 3D warehouse for a Fw 190 model and ended up with a model of a Fw 190 kit done by pigl. After that I loaded the Spitfire model into Sketchup and imported the Fw 190 into the same space as the Spitfire model. It took some resizing and moving around but I finally found some common ground between the two models. This is the end result:

sketchup-front.gif

sketchup-top.gif

sketchup-side.gif

As you can see the wings pretty much match up and will not require too much modifications which was my main goal when scaling and aligning. The wings are the most complex part of the Spit model and I don't want to mess too much with them. The Spit has a bit more dihedral but I will not alter that for the sake of stability.

There will however be quite some alteration of the fuselage and the horizontal stabiliser height, size and position. The rudder and elevators are not set together like on the Spit so the rudder will be set further back. These alterations will be a bit tricky but manageable, I hope.

This is how far I've gotten tonight. Next step is to start modifying the Spitfire plans. Stay tuned for more Fw 190 madness later this week!
 
Last edited:

NewZee

Member
Your design looks great to me! I'm sure that you will have good results! once you get the spitfire (or any oter scratchbuilt swappable) under your belt I think modifiying the basic construction principles learned is a fairly straight forward process. I know this might not be for everyone, but I am happy to see everyone's plans and results.

I have to admit that the "cub" I did is my favorite of the three (Spitfire, Fogey, Cub) I have built and flown so far, likely because it is my concept. I'll bet you will feel the same way about your FW190!

Please keep us posted on your progress with lots of pictures and videos!
 

Imprez

Member
Thanks for the positive feedback adge82 and NewZee! I'll try to take as many pictures as possible along the build.

Today's progress is printing out the plans and I have started to sketch my alterations onto them. Nothing is final yet but you get the general idea on the modifications I intend to do to the original Spitfire plans:

DSC_0497.JPG

DSC_0499.JPG

DSC_0500.JPG

There's still some measurements left to check and stuff to alter on the plans but soon I hope it will be time to get the sketches on foam board and start cutting.
 

Imprez

Member
Finished the alterations to the spitfire plans and did some cutting. I've cut out the powerpod, fuselage and a wing half:

fuselage_cut.jpg
Fw190 fuselage sits lower and is longer than the Spits. Servo positions have been moved down to compensate for this.

fuselage_wing_cut.jpg
A lesson learned from the Spitfire build. Don't cut completely through the wing holes in the fuselage and it will hold up better when you fold it to shape. When the fuselage is folded into shape you can cut open the holes completely.

wing_cut.jpg
Fw190 wing profile is more straight and more square at the ends. Profile of the under surface has also been changed to follow the lines of the upper surface.

wing_spitfire_compare.jpg
Comparison of the new shaped wing tips to the Sptitfire.
 
Imprez -

I am really looking forward to seeing the final product, especially how you handled the round nose of the FW 190. Please do post final product pictures.
 

Imprez

Member
Looks great. Fly the thing already!
Haha, thanks, not QUITE finished yet!

I bet it's pretty floaty right now, since there's nothing but FB. :p
I just need to find the proper CG, that's all ;)

Imprez -

I am really looking forward to seeing the final product, especially how you handled the round nose of the FW 190. Please do post final product pictures.
Thanks 808, you can take some credit for this mess since it was your P-40 that got me thinking. Yep, the round nose will be a challenge but I got a plan. I'll keep posting images during the build and all the way to the finished plane!

Some progress today, cut out the second wing half, the rudder and the h-stab. Mounted the wing servos and mounted the wing halfs.

hstab_rudder.jpg
Ruddder and the horizontal stabilizer cut. Elevator is a bit fragile due to the long narrow h-stab.

hstab01.jpg
To help stabilze the elevator I decided to insert a u-shaped piece of piano rod.

hstab02.jpg
"Pre-drill" with a slightly smaller guage piano rod.

hstab03.jpg
Insert the piano rod into the pre-drilled holes.

hstab04.jpg
Push it all the way in and put a bead of hot glue on top to keep it in place.

wing_assembly.jpg
Wing spar glued into place and wing shaped properly before assembly.

wing_assembly2.jpg
Using an iron to form the back wing joint to the correct angle.

wing_assembly3.jpg
Both wing sections glued together. Servo extensions are really long, I know. Noticed I was out of the shorter ones just before I started the wing assembly.
 

NewZee

Member
Imprez....Looks like you are making very nice progress! keep posting your progress, I liked the re-enforcement you did to the H stabilizer! I have used "popsicle sticks" in similar situations .
 
Last edited:

Foam Addict

Squirrel member
"Using an iron to form the back wing joint to the correct angle."
Brilliant! I've been looking for a simpler way to taper my te. Thank you very much!
 

Imprez

Member
Imprez....Looks like you are making very nice progress! keep posting your progress, I loked the re-enforcement you did to the H stabilizer! I have used "popsicle sticks" in similar situations .
Thanks NewZee, popsicle stick would probably work just as well here, you just might have to cut out the hstab a little bit more to allow for travel.

"Using an iron to form the back wing joint to the correct angle."
Brilliant! I've been looking for a simpler way to taper my te. Thank you very much!
You are welcome, the iron is great for flattening or shaping the foam core if used at medium temperature. Not my idea though, I read about it somewhere here at the forum, don't remember where.

Ok, on with the build and more specifically, the nose. My plan to get the rounded nose is to hot glue some foam board discs together and then cut and sand them to a round shape.

nose_1.jpg
Five foam board discs will be about an inch thick when glued together.

nose_2.jpg
Cutting out the discs, really tiresome job since curved lines are hard.

nose_3.jpg
Glueing the discs together using hot glue.

nose_4.jpg
Start to shape the form of the nose using a cutting blade.

nose_5.jpg
Finished cutting, time to sand it smooth.

nose_6.jpg
Sanding done! I used a cordless drill with a round sander that I taped the nose to. Then I just ran the drill and held a sand paper to the nose.

The nose will be fitted to the fuselage using bbq skewers and a couple of small magnets so you still can swap your power pod.
 
Last edited:

Corbarrad

Active member
The FW190 has got to be one of my favourite warbirds, there's just something about it's no nonsese, form follows function desing that strikes a chord with me.
Yours seems to be coming along just fine, though I'm surprised how massive thst forward fuselage looks in comparism with the Spitfire.
 

Imprez

Member
The FW190 has got to be one of my favourite warbirds, there's just something about it's no nonsese, form follows function desing that strikes a chord with me.
Yours seems to be coming along just fine, though I'm surprised how massive thst forward fuselage looks in comparism with the Spitfire.
Agree completely Corbarrad, Kurt Tank's design is very simple yet so elegant.

Your comment about the size of the forward fuselage got me a bit worried so I checked my measurements again and they seem pretty much in the ballpark to my relief. I never meant to create an exact scale model but it can't be too much off either.

I think the main reason that it looks so massive is a couple of reasons:
1. The Fw190 was a smaller plane than the Spitfire and since I'm basing my design on the Spit, the Fw190 will be scaled up to Spit size.
2. I think the fuselage in David's design is more narrow than it should be with proper scale.
3. Radial vs In-line engine. The radials will always have a more massive front area.

3.jpg

Here's a picture by Jan Van de Moortel that illustrates the above to some point.

I'll mount all the parts together tomorrow to see if the proportions look right or if they are off. Measurements is one thing but perception is more important for this build.
 
Last edited:

Imprez

Member
This morning I mounted all the parts including my first prototype fuselage formers. These are not the final shape just yet but it shows you the general idea of how I intend to form the fuselage. I think the main proportions look pretty good but please give me your feedback!

test_assembly1.jpg

test_assembly3.jpg

test_assembly2.jpg

test_assembly4.jpg

Great to see the plane together for the first time, but there is still a lot of work to be done.
 

NewZee

Member
Imprez....Looking good! I think you nailed it! good idea for the nose construction, same concept would work for any radial engine airplane (anyone thinking Corsair?) two questions?

1) with the power pod going in behind the nose how will you push the propeller far enough forward to clear the nose?

2) did you remove the paper from the foam discs (for the nose) before glueing them together? any thought to using a single piece of thicker foam (1" or 25mm?)
 

Imprez

Member
Imprez....Looking good! I think you nailed it! good idea for the nose construction, same concept would work for any radial engine airplane (anyone thinking Corsair?) two questions?

1) with the power pod going in behind the nose how will you push the propeller far enough forward to clear the nose?

2) did you remove the paper from the foam discs (for the nose) before glueing them together? any thought to using a single piece of thicker foam (1" or 25mm?)
Thanks! Yes, the same concept should work fine for all radial engined planes. It would make me happy if this build could inspire even more designs, a Corsair would indeed be awsome!

1. I have made the Spitfire fuselage shorter so the firewall is actually just behind the last "disc" in the nose so the engine will protrude through the hole in the middle and according to my calculations the axle and prop will clear the nose.

2. No, I didn't remove any paper from the discs before glueing, you would probably get smoother transitions if you did. Regarding using another material for the nose, that crossed my mind too. You could build something similar using blue foam for example. But since this is flight test I thought sticking strictly to foam board would be more true to the roots :)

Nice work! Looking forward to seeing more.
Thanks Flynn, I will keep you guys posted!
 
Last edited: