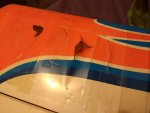
The refurbishment of a Seagull Swift 40

CarolineTyler

Legendary member
Took the first steps in getting this big trainer bird into a decent state.
Here's what it looks like before I start.
IMG_20190215_191545220.jpg IMG_20190215_191620133.jpg IMG_20190215_191559816.jpg IMG_20190215_191638802.jpg IMG_20190215_191647866.jpg IMG_20190215_191643427.jpg IMG_20190215_191655216.jpg

1st stage is to strip off the knackered film covering and assess the woodwork underneath.
Apart from some thin balsa sheeting which has been broken in a minor impact the wings are looking pretty good. The central servo is working cleanly but this form of connection has a lot of slop in it so tempted to change it to separate servos with a direct pushrod. That will also mean breaking the wing down to two parts for transportation will be easier.
IMG_20190219_202139328.jpg IMG-20190219-WA0002.jpeg
 

CarolineTyler

Legendary member
This evening's task was to continue to remove the covering of the body.
With the excess of epoxy resin the previous keeper had used in places made this a difficult job.
At some point the left side of the plane's front must have been damaged and it had been glued back with too much epoxy :)
The vertical stabiliser had also taken some damage. I will add a couple of small gussets when fixing to ensure the strength is maintained.
The bottom was also damaged towards the front so I'll replace it.
IMG_20190220_193127564.jpg IMG_20190220_193120810.jpg IMG_20190220_201754981.jpg IMG-20190220-WA0000.jpeg IMG_20190220_201806022.jpg IMG_20190220_211438387.jpg

All that leaves me with this..m
15506990792412856899687421295117.jpg
 

Bricks

Master member
Very nice job getting the old covering off. It has always amazed me how on one plane it will come off clean and the next struggle like all get out to get it off with all kinds of tiny bits still stuck to the frame.

Only sad thing it is electric, not to say electric is bad but I enjoy my Gassers and Nitro`s.. I like electric for smaller planes less then 48 inch wing span and under.
 
Last edited:

CarolineTyler

Legendary member
Very nice job getting the old covering off. It has always amazed me how on one plane it will come off clean and the next struggle like all get out to get it off with all kinds of tiny bits still stuck to the frame.

Only sad thing it is electric, not to say electric is bad but I enjoy my Gassers and Nitro`s.. I like electric for smaller planes less then 48 inch wing span and under.
The covering used was not solarfilm or it's like but rather akin to thin sticky-backed plastic (for those in the UK who remember Blue-Peter in the 1970's). It came off fairly easily except where it had been smothered with epoxy resin.
Just the elevator and rudder to remove and strip then I can get on with the repairs proper before attempting re-covering.
I'll be replacing the hinges with better quality pinned type so if it needs more work in the future the removal of control surfaces will be a tad easier.
 
Last edited:

CarolineTyler

Legendary member
Off to the Leeds Model Shop tomorrow to get the materials for fixing and covering this bird. Decided to go with each wing having a seperate servo which will allow the wing to be split into two more easily for transport and storage.
Getting excited about making this plane look great again!
 

FDS

Elite member
I have put iron on coverings on my do list, will be interested to see how you get on. There were a lot of different types when I looked, many were expensive too.
 

Bricks

Master member
When you get ready to cover it spray down the balsa frame work with some Lacquer or other clear light paint then do a light sanding. After spraying you will feel all the balsa fuzz sticking up this fuzz inhibits the covering from sticking as well.. It will help your covering stick better and give a smoother surface.

Hair spray is basically Lacquer as a substitute, I am sure you have some of that around.

Nice work.
 

CarolineTyler

Legendary member
When you get ready to cover it spray down the balsa frame work with some Lacquer or other clear light paint then do a light sanding. After spraying you will feel all the balsa fuzz sticking up this fuzz inhibits the covering from sticking as well.. It will help your covering stick better and give a smoother surface.

Nice work.
Thanks! I will (y)