Steamy Piles
New member
So,
I bought my first Flite Test plane probably 3 or 4 months ago now, it was the Masters Series Corsair. For a first build using this assembly style I was actually quite impressed with how everything shaped up and fit together.
I ran into trouble with the tail section, it simply did not fit together as shown in the build video presented by John.
However, being that this was my first build I figured that I had not spent enough time trimming and shaping parts to get the right fit and caulked it to this being my first build.
So I placed an order for a second Corsair and thought it would turn out better, which it mostly did, but I ran into the same issue with the tail section and after some work, I managed to get thing to fit better. I spent some time here trying to sort out what was going wrong as the same issue had occurred in the same spot twice. When I watched and re-watched the video probably a dozen time specific to this area I finally figured out that the set of formers that are used in this area may not be getting cut out right as the video says there are different sized formers, when in fact, there are not. This seems to have happened in the transition from the original brown foam to the new white foam.
Not being discouraged and with lots of glue sticks left over, I ordered more planes, maybe too many, but hey, we are having a pandemic so I needed something to do.
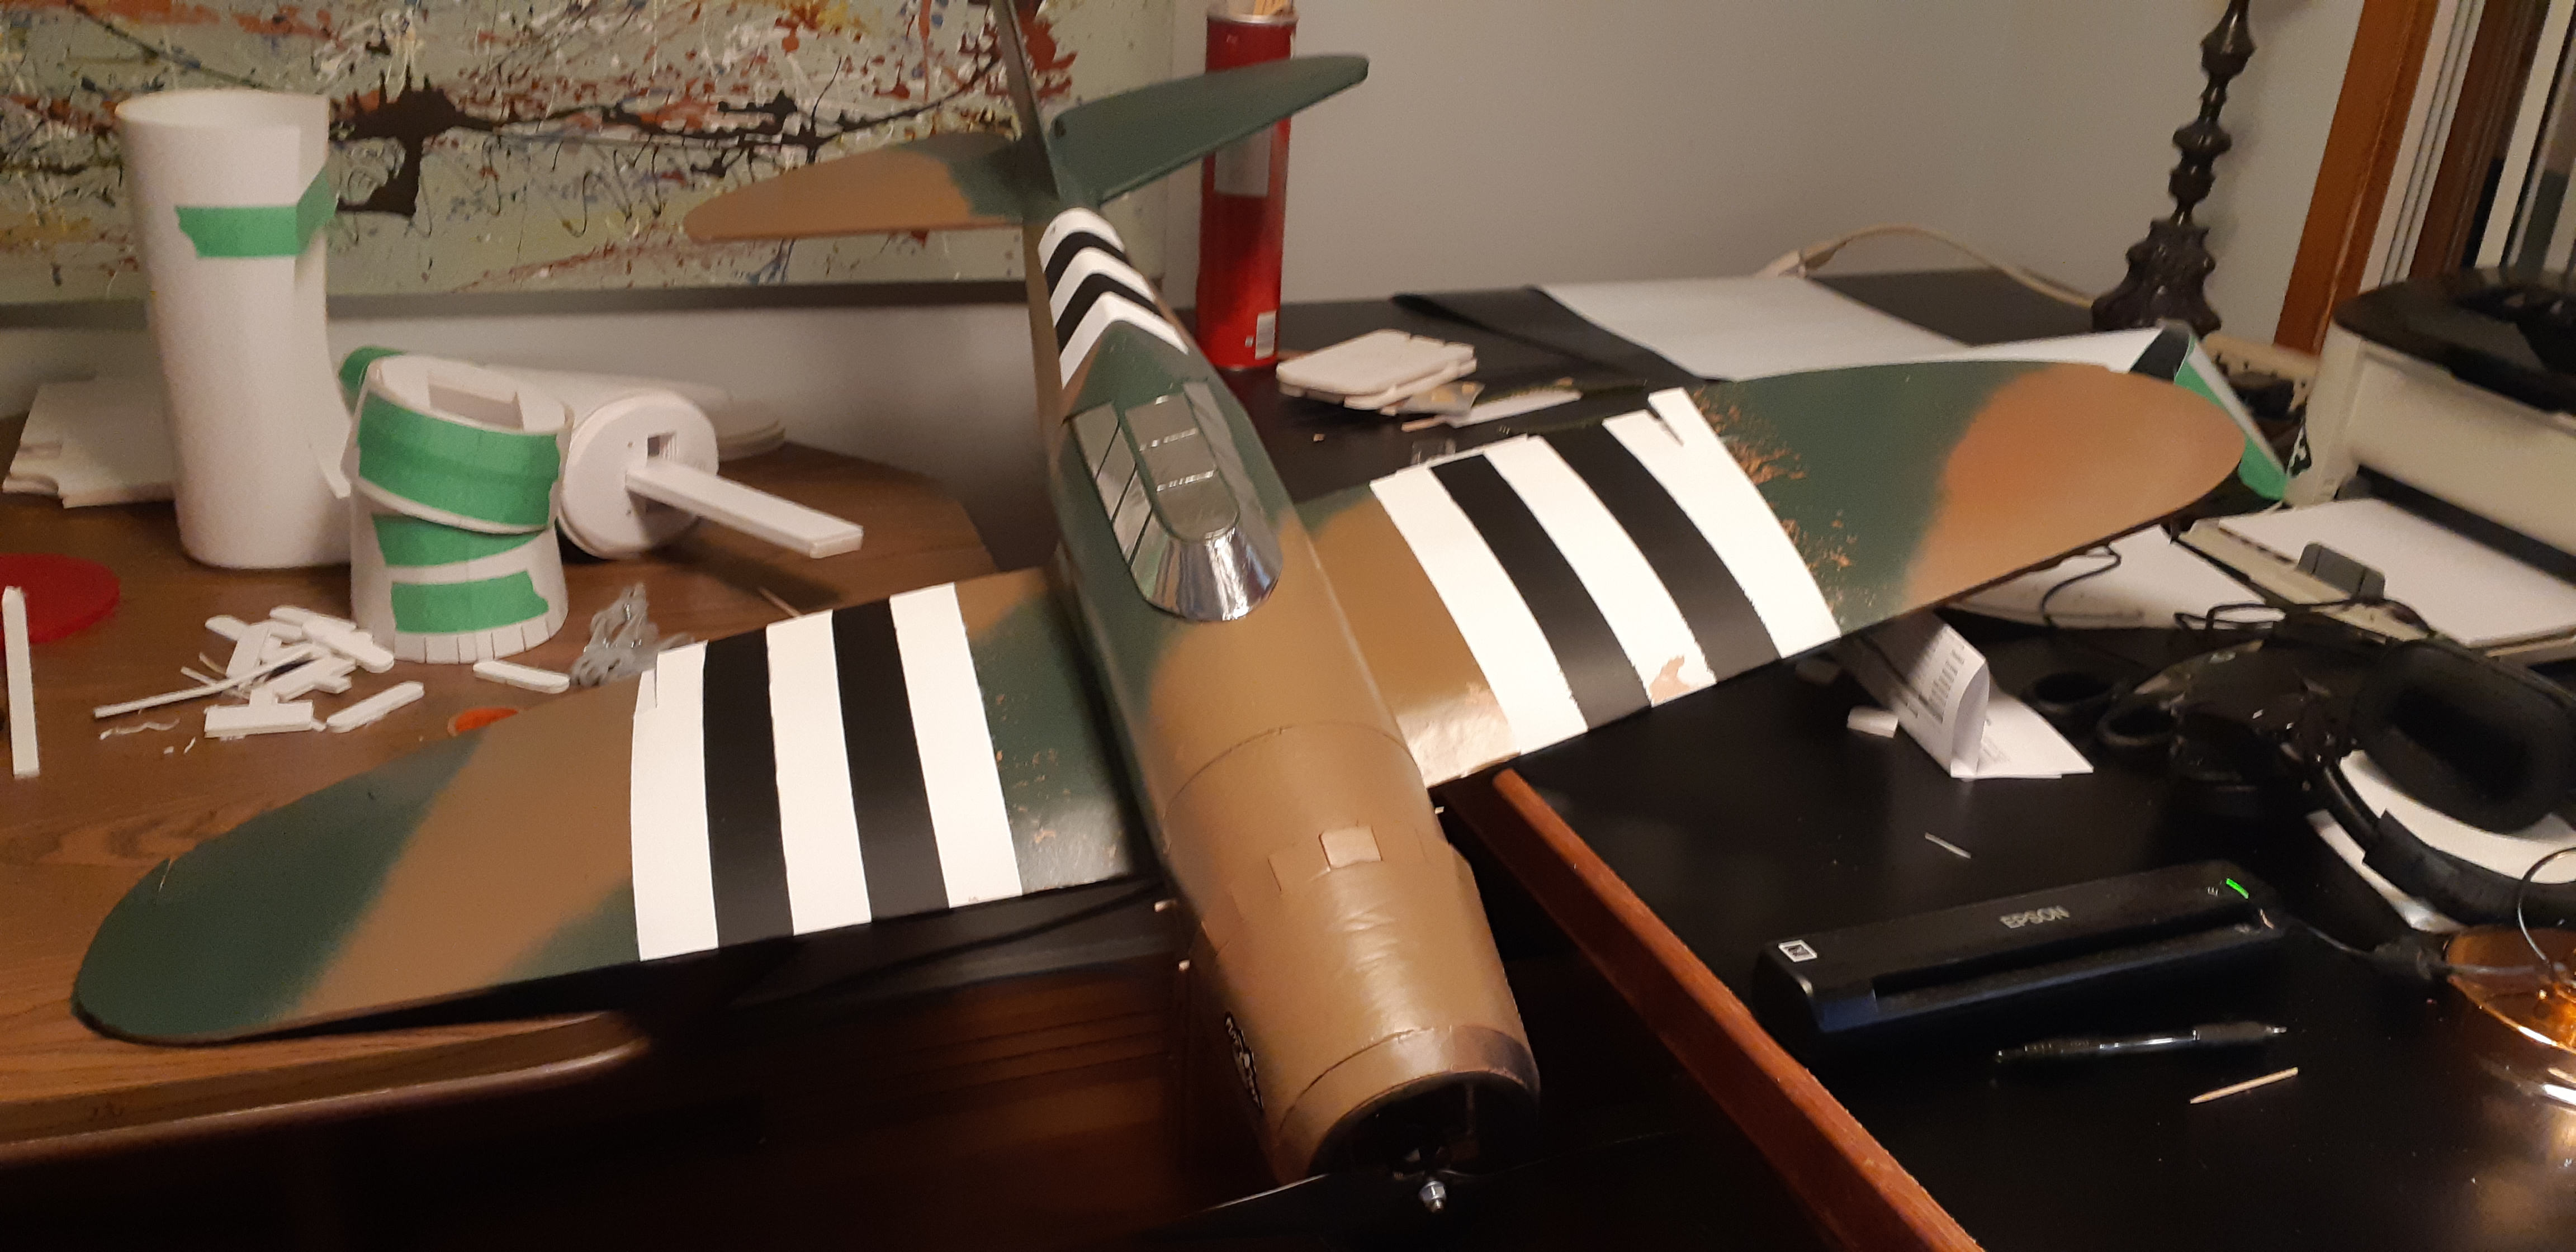
I built the P47 in brown foam and it worked out perfect, I built the Baby Blender without issue, I built the Edge 540 without issue, followed by two Mini Cruisers, a Mini Scout without issue. I was so impressed that I ordered the P51 and another P47.
Here is where things get ugly and I have to wonder if something hasn't happened to the original cut plans or the laser cutter or some other gremlin that has found a place to hide.
First, the P51 is still on back order and I have been waiting for a month or so for that, no issue, it's Christmas and it looks like lots of builders wanted that plane. The P47 arrived five weeks after it was ordered (oh, ps, I am in Canada, all my stuff is coming out of Great Hobby's in Canada, not from Flite Test, this means I have no import issues and can order lipo product without paying $$$$$ for delivery) and the delay in delivery was probably just Christmas volume at Canada Post.
So the P47 in white foam shows up on the 23rd and I have the 23rd, 24th off from work, so I am all about putting the 47 together, except when I peel back the plastic, parts start dropping on the table and floor like it is raining foam parts. This hasn't happened before. As I started to inventory the sheets it became very obvious very quickly that there is an issue over at the laser cutter department.
The battery box and power pod had been 100% cut through, making A, B or C folds impossible, the back third of the rudder was just gone, cut right off like the sheet was either not aligned or it was too small or some other issue with parts layout, half the foam spars, being a front and rear, had been 100% cut, the sheet that holds the rear stabilizer and elevator had been cut 100% down the fold line, see the pic, and there are a few other issues with cuts and scores that just didn't work out. Sadly, I had wanted to do this 47 as the bubble top as the other one is the razor back, but the piece got so pooched that that will not happen.
So, I decided to call tech support and the guy I talked to was really helpful and I sent him a mail with pics that he will forward to FT to get a replacement kit sent out, absolutely awesome customer service from Joe at Great Hobbies in Edmonton") .
.
But the story doesn't end here. I figured that customer feedback is probably the best way to let manufacturers know when there is a problem and what may be a suggested fix. I have noticed over the last several builds that there is an issue between the brown foam and build video's vs the white foam. Stuff just doesn't seem to work out when the builder is building the brown version in the video and you are building a white version. This applies to the Corsair and the P47 and then the P51 is in the white foam in the video. It's almost like the generic size of the foam sheets must have been different and somebody tried to adjust the parts layout on the new sheet size or something like that because former sizes seem to be off.
I was kinda bored so I decided to start assembling some of the parts that did not get 100% cut threw and found some other issues that may need to be looked at. This concerns formers 1, 2, 3 and 4 and the skins. I have taken pictures that show what seems to be sizing issues with either the formers or the skin, some of the cuts on the largest fuselage piece, the one the wing mounts to, seem to have been cut with slight curves on the top and bottom. I have not glued some of the parts together as I was unable to build the battery box. The jar of peanut butter is not only a delicious snack, but it makes a really good weight
Recommendations to the manufacturer.
1. I know this is going to be a pain in the neck, but do a build video using the white foam for the Masters Series planes.
2. Check the build plans and make sure that formers and skins still fit the sheets, I do not know if the part layout works on both the brown and white or if the sheets are the same size. The layout marks for the skewer on the P47 are also absent, so I think that with this amount of errors that somebody may want to review the plans and cut patterns.
3. Pull a kit at random from the production line and build it to check for obvious errors. This would be specific to the Master Series as I have not had a single issue with any other kit, they all go together perfectly.
4. The Masters Warbirds are shown with landing gear but that doesn't appear in the build video's. Could somebody please add that or add a link to it, I have searched for it and it does not seem to exist.
5. Please make sure the accessory bags, the ones with the skewers, rubber bands, plywood cut outs etc are the right one for the plane. The second Corsair I bought came with the wrong wooden spars (obvious), no motor mount, no control horns and generally looked like it was for another kit. I re-ordered missing parts and rec'd and entire new accessory kit, but it was the same as the last kit.....this is a labelling or packaging issue I suspect.
Generally guys, I am not complaining and do not wish to bring any negativity to this forum. I hope that what I have posted is used to fix issues and make things better for all.
Notes.
I think you guys at Flite Test are doing an amazing job. From design, manufacturing, tutorial video's, events, social media and just awesome flight videos. I think you have really done some great things to promote r/c flying. You have some superb products that are fun and easy to build and I will continue to support your business.
Regard's,
Steamy Piles, alias for World of Warplanes, World of Warships, Warthunder and many many more
Fly safe and have fun.
PS, if this is a repeat post, sorry, the other post vanished when I saved it o.0
I bought my first Flite Test plane probably 3 or 4 months ago now, it was the Masters Series Corsair. For a first build using this assembly style I was actually quite impressed with how everything shaped up and fit together.
I ran into trouble with the tail section, it simply did not fit together as shown in the build video presented by John.
However, being that this was my first build I figured that I had not spent enough time trimming and shaping parts to get the right fit and caulked it to this being my first build.
So I placed an order for a second Corsair and thought it would turn out better, which it mostly did, but I ran into the same issue with the tail section and after some work, I managed to get thing to fit better. I spent some time here trying to sort out what was going wrong as the same issue had occurred in the same spot twice. When I watched and re-watched the video probably a dozen time specific to this area I finally figured out that the set of formers that are used in this area may not be getting cut out right as the video says there are different sized formers, when in fact, there are not. This seems to have happened in the transition from the original brown foam to the new white foam.
Not being discouraged and with lots of glue sticks left over, I ordered more planes, maybe too many, but hey, we are having a pandemic so I needed something to do.
I built the P47 in brown foam and it worked out perfect, I built the Baby Blender without issue, I built the Edge 540 without issue, followed by two Mini Cruisers, a Mini Scout without issue. I was so impressed that I ordered the P51 and another P47.
Here is where things get ugly and I have to wonder if something hasn't happened to the original cut plans or the laser cutter or some other gremlin that has found a place to hide.
First, the P51 is still on back order and I have been waiting for a month or so for that, no issue, it's Christmas and it looks like lots of builders wanted that plane. The P47 arrived five weeks after it was ordered (oh, ps, I am in Canada, all my stuff is coming out of Great Hobby's in Canada, not from Flite Test, this means I have no import issues and can order lipo product without paying $$$$$ for delivery) and the delay in delivery was probably just Christmas volume at Canada Post.
So the P47 in white foam shows up on the 23rd and I have the 23rd, 24th off from work, so I am all about putting the 47 together, except when I peel back the plastic, parts start dropping on the table and floor like it is raining foam parts. This hasn't happened before. As I started to inventory the sheets it became very obvious very quickly that there is an issue over at the laser cutter department.
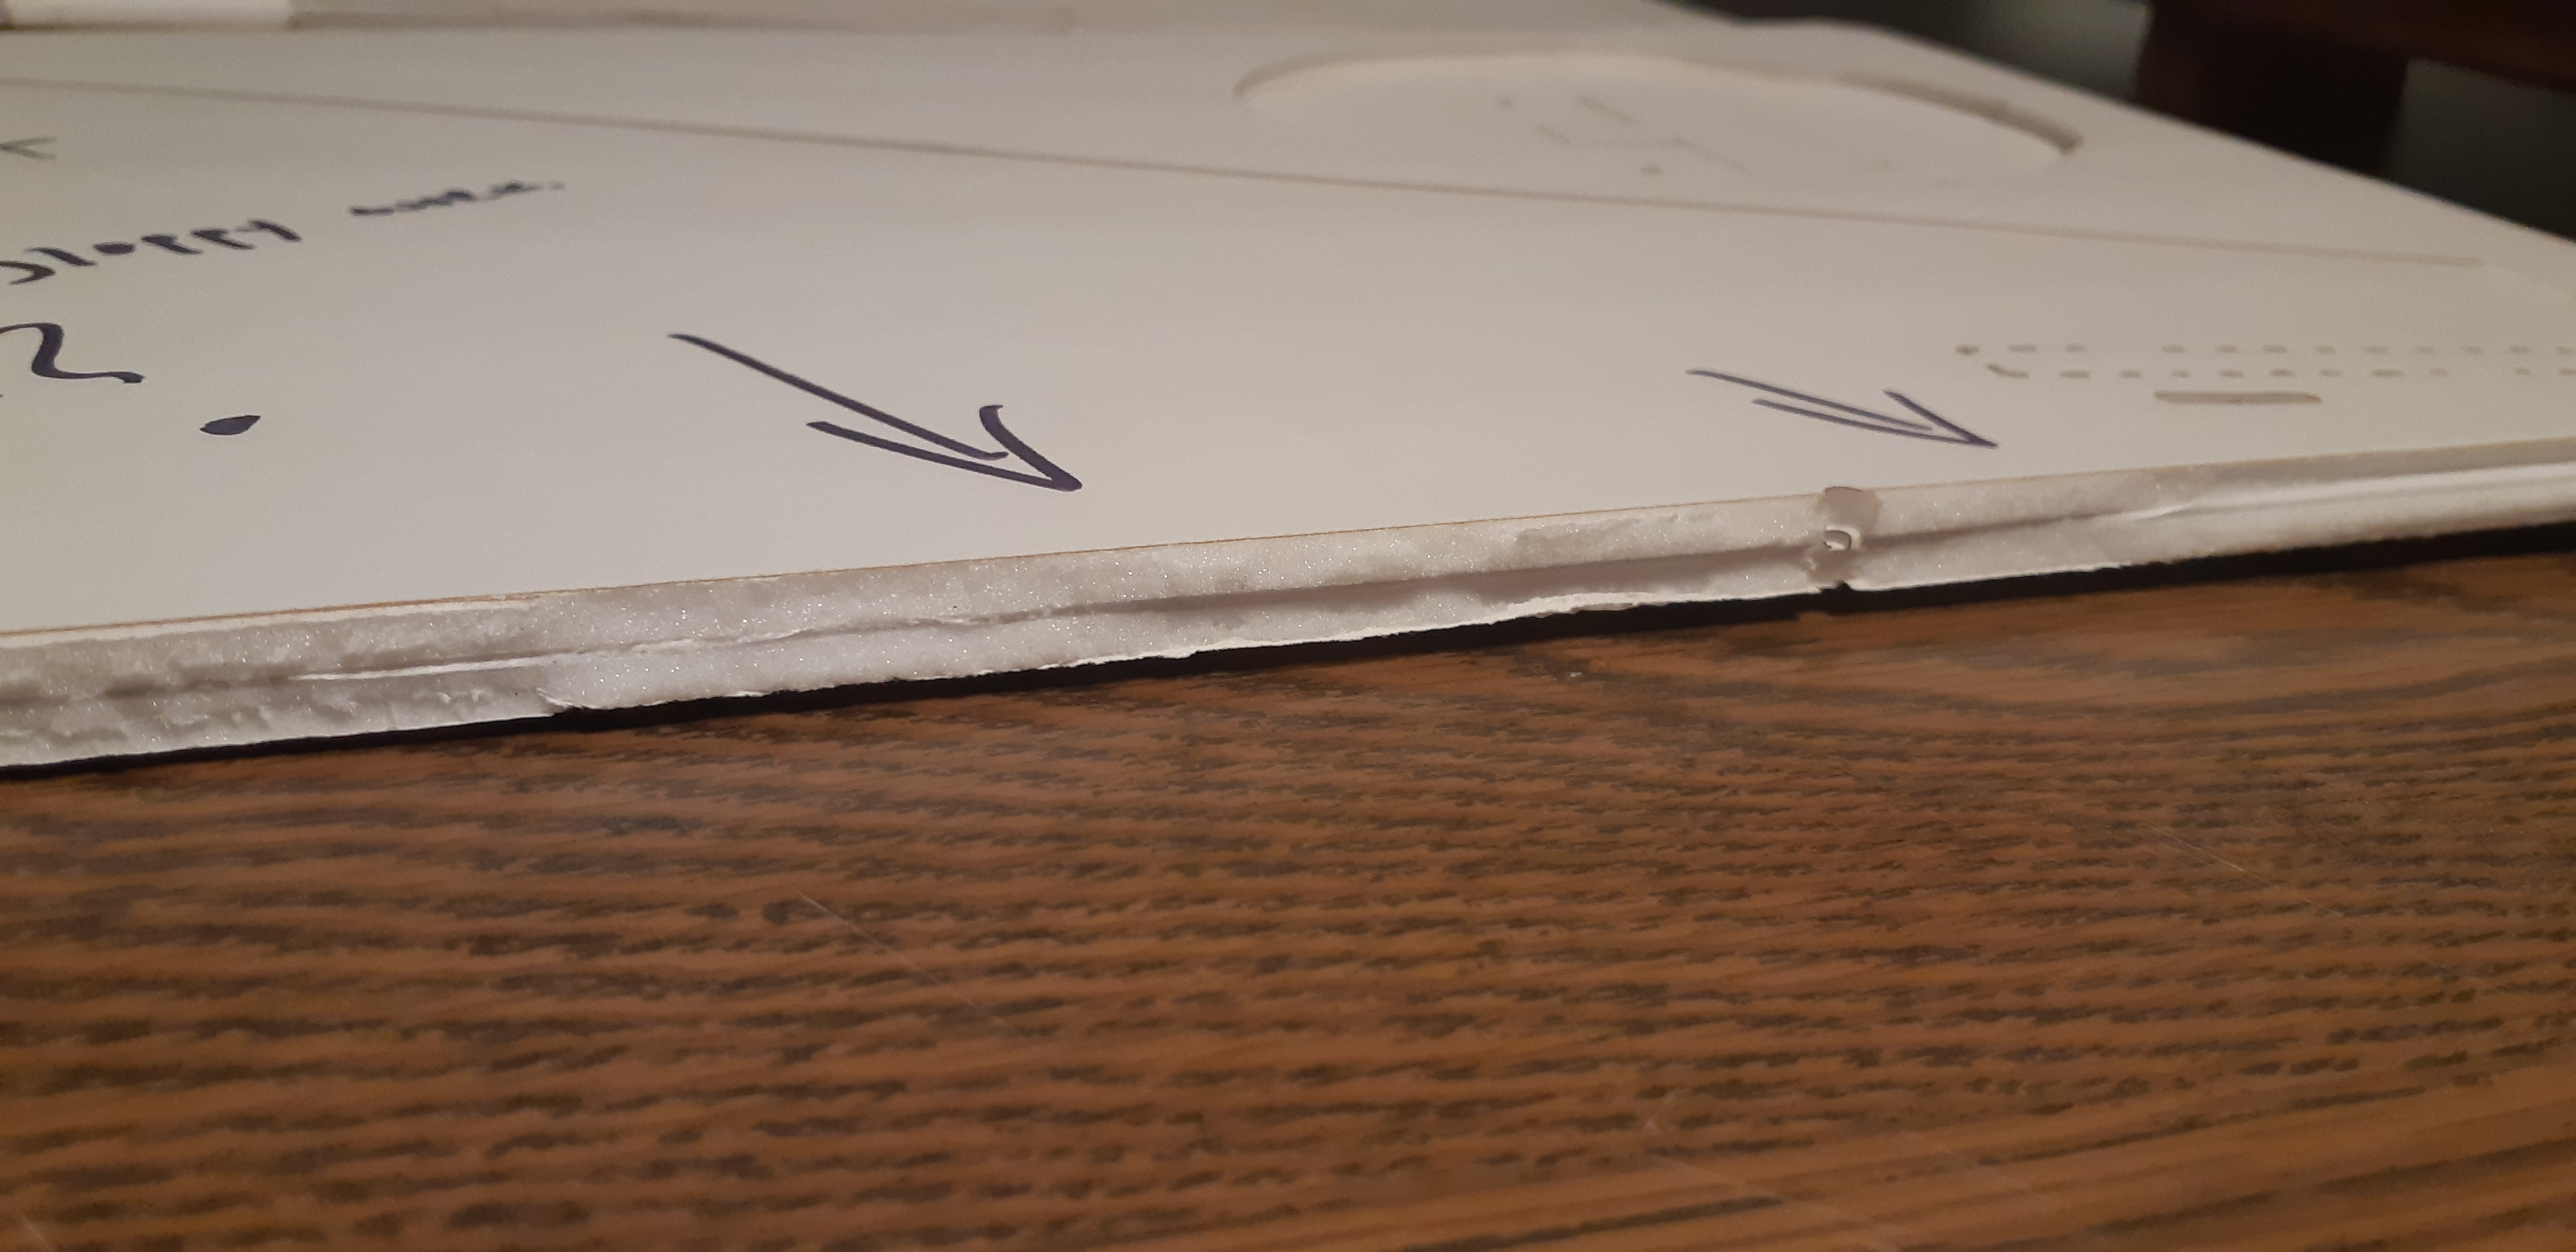
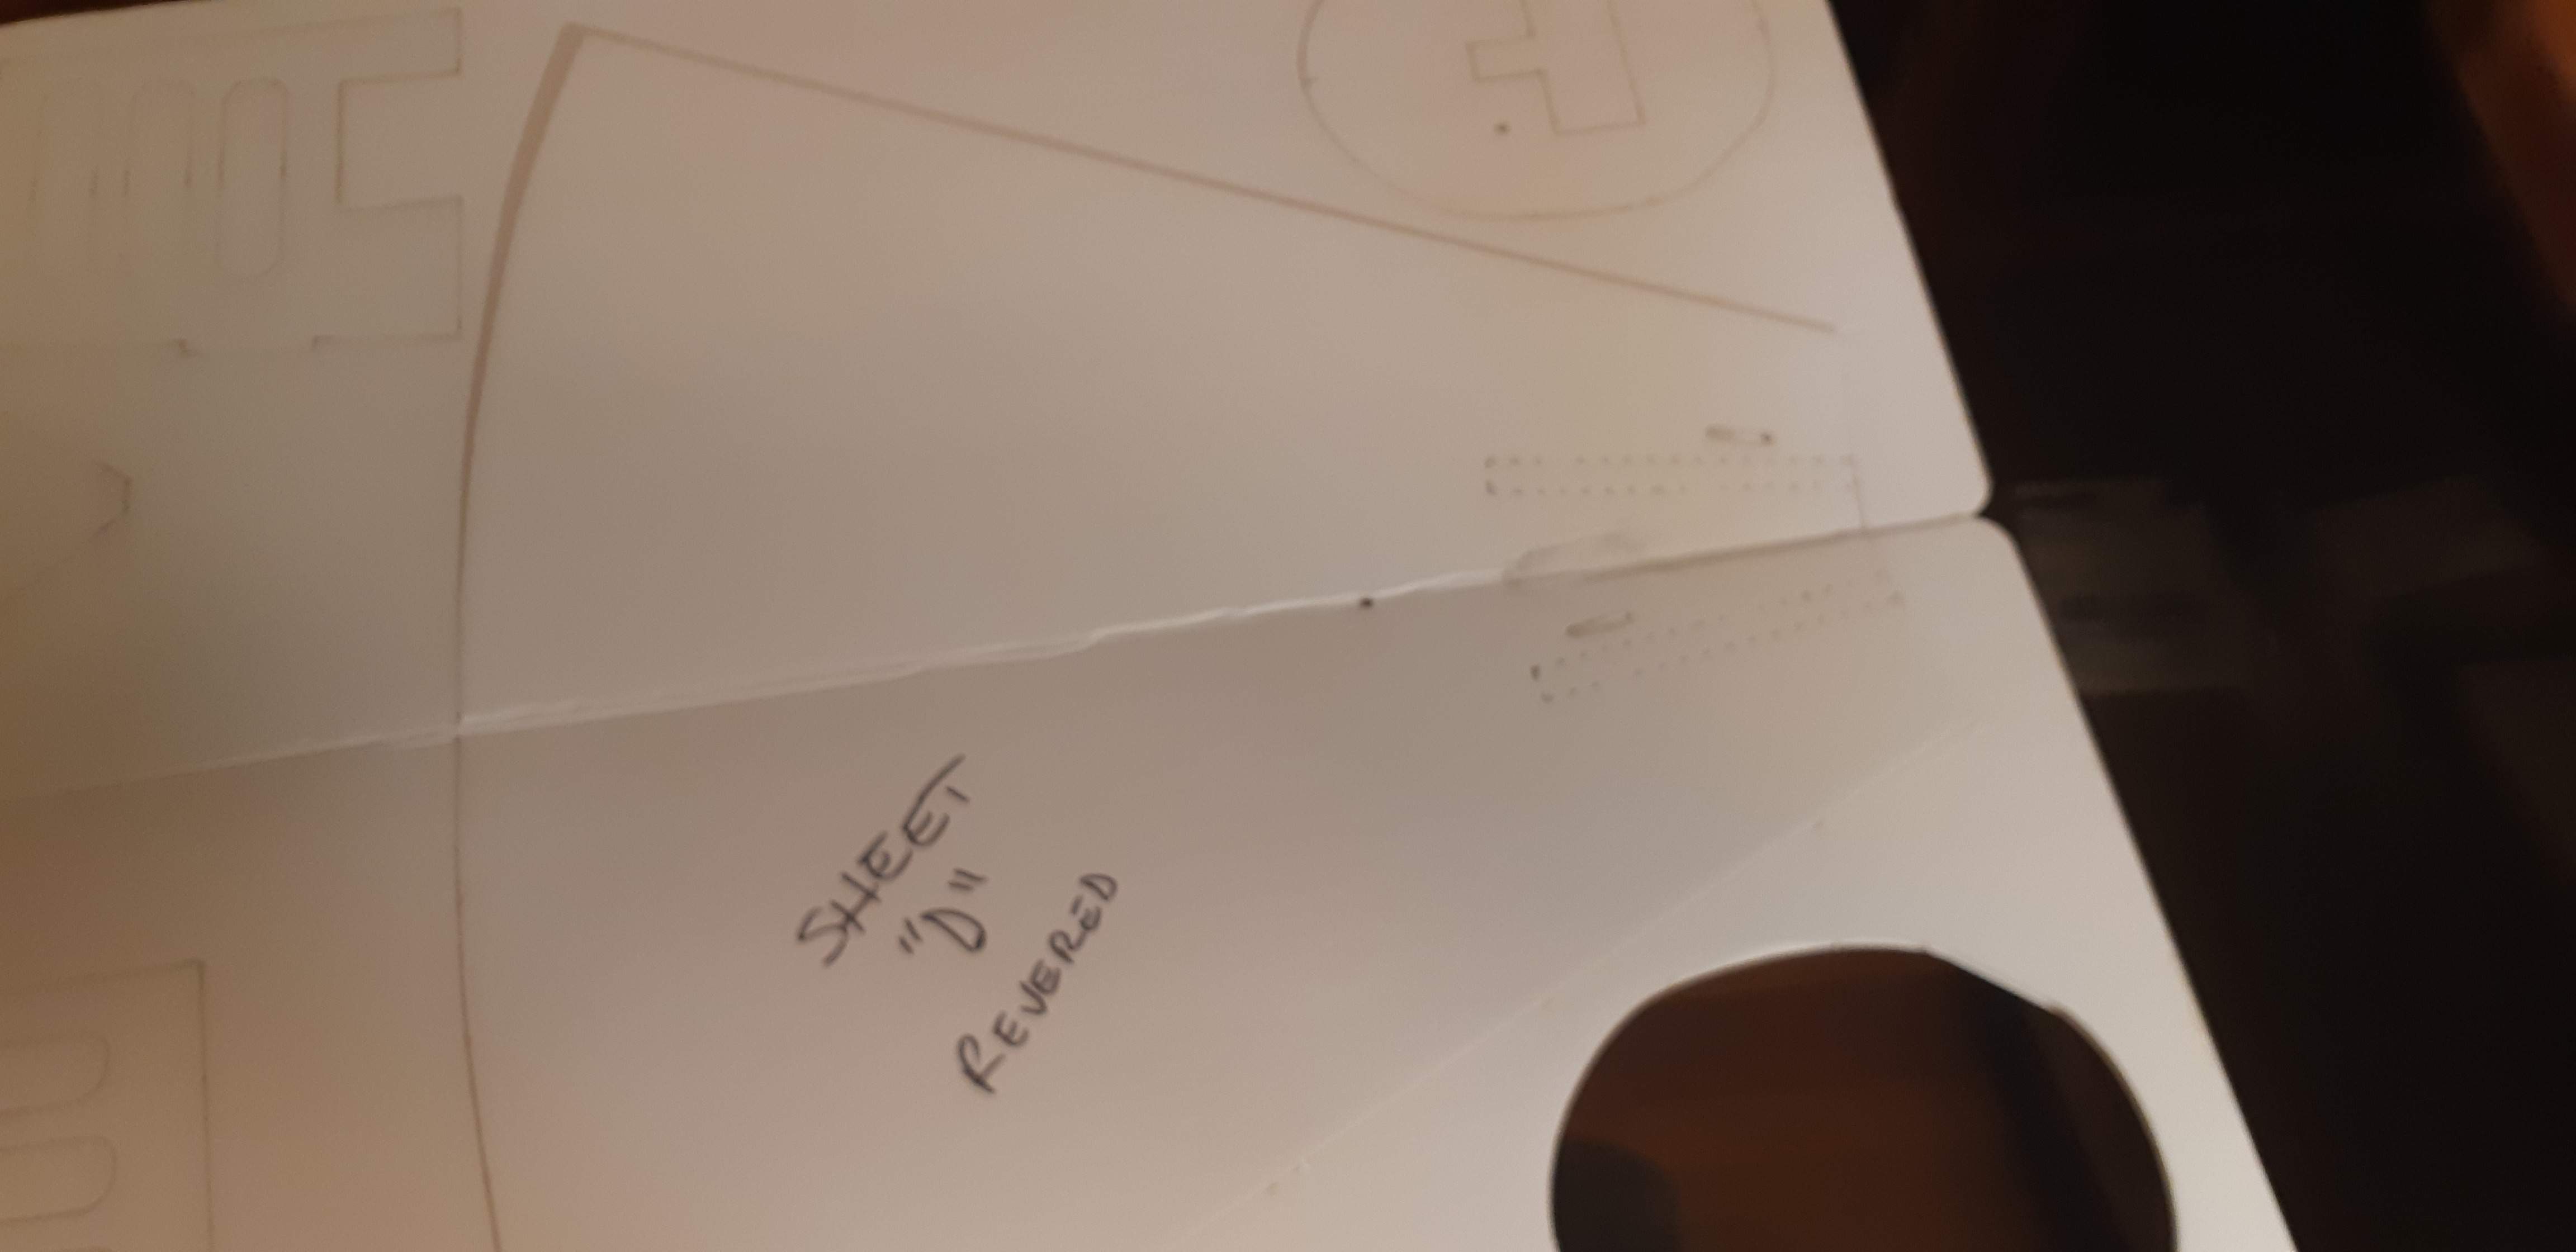
The battery box and power pod had been 100% cut through, making A, B or C folds impossible, the back third of the rudder was just gone, cut right off like the sheet was either not aligned or it was too small or some other issue with parts layout, half the foam spars, being a front and rear, had been 100% cut, the sheet that holds the rear stabilizer and elevator had been cut 100% down the fold line, see the pic, and there are a few other issues with cuts and scores that just didn't work out. Sadly, I had wanted to do this 47 as the bubble top as the other one is the razor back, but the piece got so pooched that that will not happen.
So, I decided to call tech support and the guy I talked to was really helpful and I sent him a mail with pics that he will forward to FT to get a replacement kit sent out, absolutely awesome customer service from Joe at Great Hobbies in Edmonton
.But the story doesn't end here. I figured that customer feedback is probably the best way to let manufacturers know when there is a problem and what may be a suggested fix. I have noticed over the last several builds that there is an issue between the brown foam and build video's vs the white foam. Stuff just doesn't seem to work out when the builder is building the brown version in the video and you are building a white version. This applies to the Corsair and the P47 and then the P51 is in the white foam in the video. It's almost like the generic size of the foam sheets must have been different and somebody tried to adjust the parts layout on the new sheet size or something like that because former sizes seem to be off.
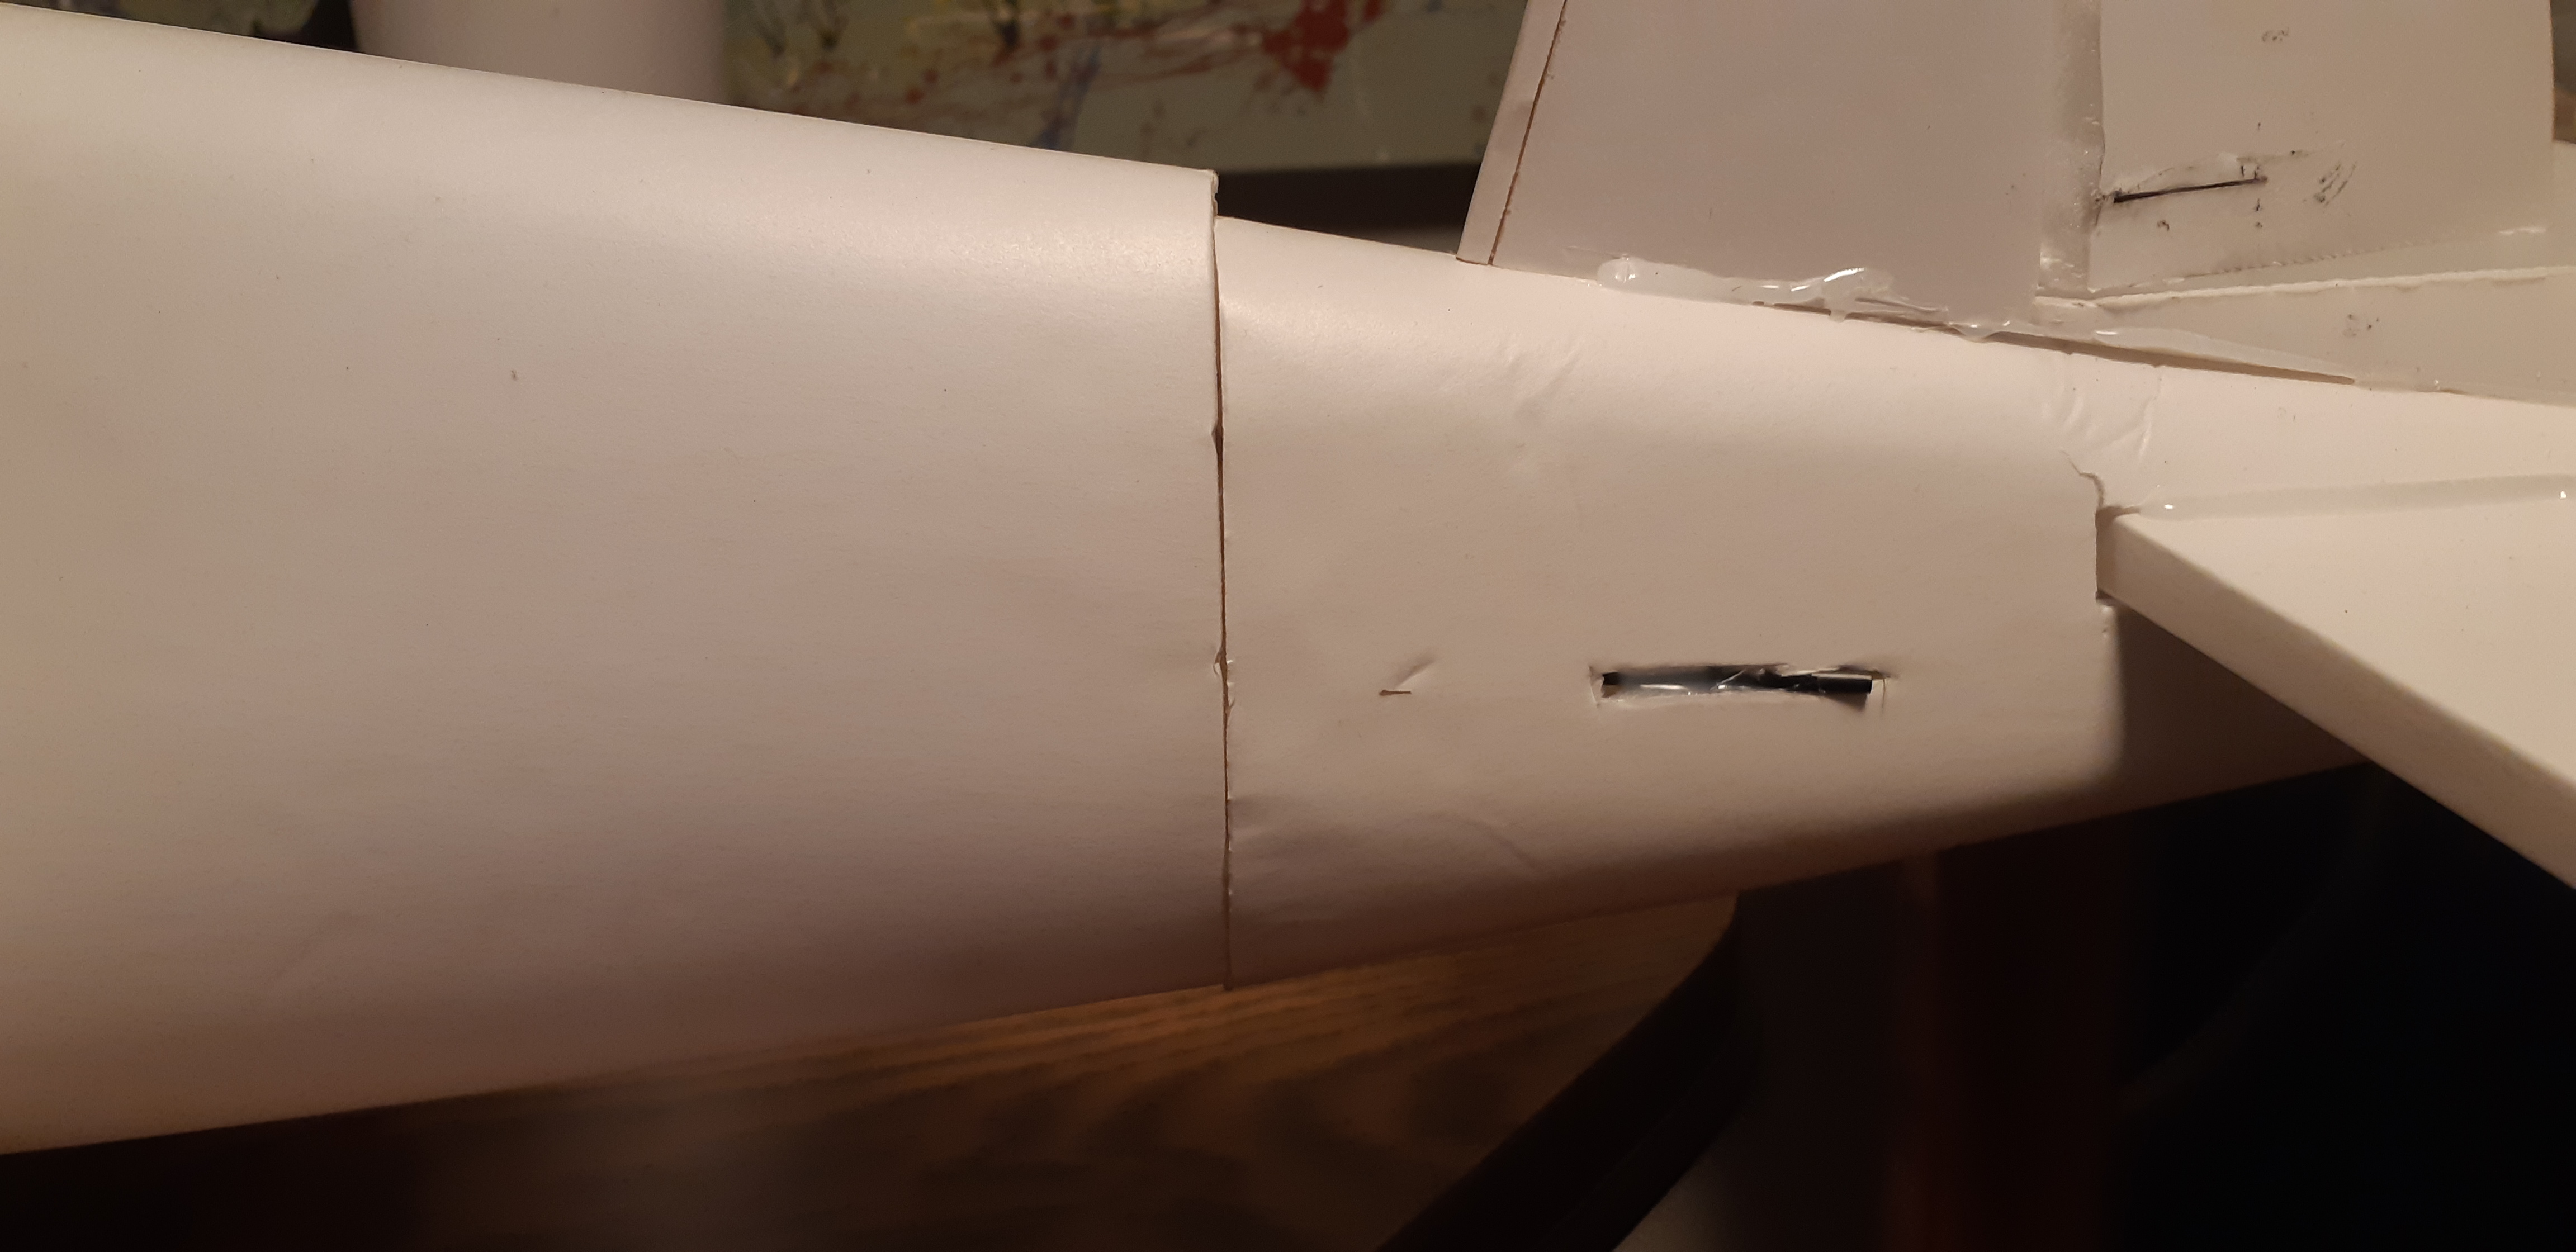
I was kinda bored so I decided to start assembling some of the parts that did not get 100% cut threw and found some other issues that may need to be looked at. This concerns formers 1, 2, 3 and 4 and the skins. I have taken pictures that show what seems to be sizing issues with either the formers or the skin, some of the cuts on the largest fuselage piece, the one the wing mounts to, seem to have been cut with slight curves on the top and bottom. I have not glued some of the parts together as I was unable to build the battery box. The jar of peanut butter is not only a delicious snack, but it makes a really good weight
Recommendations to the manufacturer.
1. I know this is going to be a pain in the neck, but do a build video using the white foam for the Masters Series planes.
2. Check the build plans and make sure that formers and skins still fit the sheets, I do not know if the part layout works on both the brown and white or if the sheets are the same size. The layout marks for the skewer on the P47 are also absent, so I think that with this amount of errors that somebody may want to review the plans and cut patterns.
3. Pull a kit at random from the production line and build it to check for obvious errors. This would be specific to the Master Series as I have not had a single issue with any other kit, they all go together perfectly.
4. The Masters Warbirds are shown with landing gear but that doesn't appear in the build video's. Could somebody please add that or add a link to it, I have searched for it and it does not seem to exist.
5. Please make sure the accessory bags, the ones with the skewers, rubber bands, plywood cut outs etc are the right one for the plane. The second Corsair I bought came with the wrong wooden spars (obvious), no motor mount, no control horns and generally looked like it was for another kit. I re-ordered missing parts and rec'd and entire new accessory kit, but it was the same as the last kit.....this is a labelling or packaging issue I suspect.
Generally guys, I am not complaining and do not wish to bring any negativity to this forum. I hope that what I have posted is used to fix issues and make things better for all.
Notes.
I think you guys at Flite Test are doing an amazing job. From design, manufacturing, tutorial video's, events, social media and just awesome flight videos. I think you have really done some great things to promote r/c flying. You have some superb products that are fun and easy to build and I will continue to support your business.
Regard's,
Steamy Piles, alias for World of Warplanes, World of Warships, Warthunder and many many more
Fly safe and have fun.
PS, if this is a repeat post, sorry, the other post vanished when I saved it o.0
Attachments
-
 20201223_150719.jpg2.3 MB · Views: 0
 -
 20201223_151500.jpg2.7 MB · Views: 0
 -
 20201223_151609.jpg2.5 MB · Views: 0
 -
 20201223_151621.jpg2.4 MB · Views: 0
 -
 20201223_151807.jpg2.3 MB · Views: 0
 -
 20201223_151814.jpg2.4 MB · Views: 0
 -
 20201223_151826.jpg2.4 MB · Views: 0
 -
 20201223_151826.jpg2.4 MB · Views: 0
 -
 20201223_151931.jpg1.9 MB · Views: 0
 -
 20201223_152229.jpg2.3 MB · Views: 0
 -
 20201223_152235.jpg777.5 KB · Views: 0
 -
 20201223_152243.jpg2.4 MB · Views: 0
 -
 20201223_152248.jpg2 MB · Views: 0
 -
 20201223_152253.jpg2.3 MB · Views: 0
 -
 20201227_093643.jpg2 MB · Views: 0
 -
 20201227_094137.jpg2.6 MB · Views: 0
 -
 20201227_100411.jpg817.1 KB · Views: 0
 -
 20201227_100445.jpg859.8 KB · Views: 0
 -
 20201227_103006.jpg2.8 MB · Views: 0