Tinkerbell Biplane Scratch build because I had lots of balsa collecting dust

Duffusmonkey

Junior Member
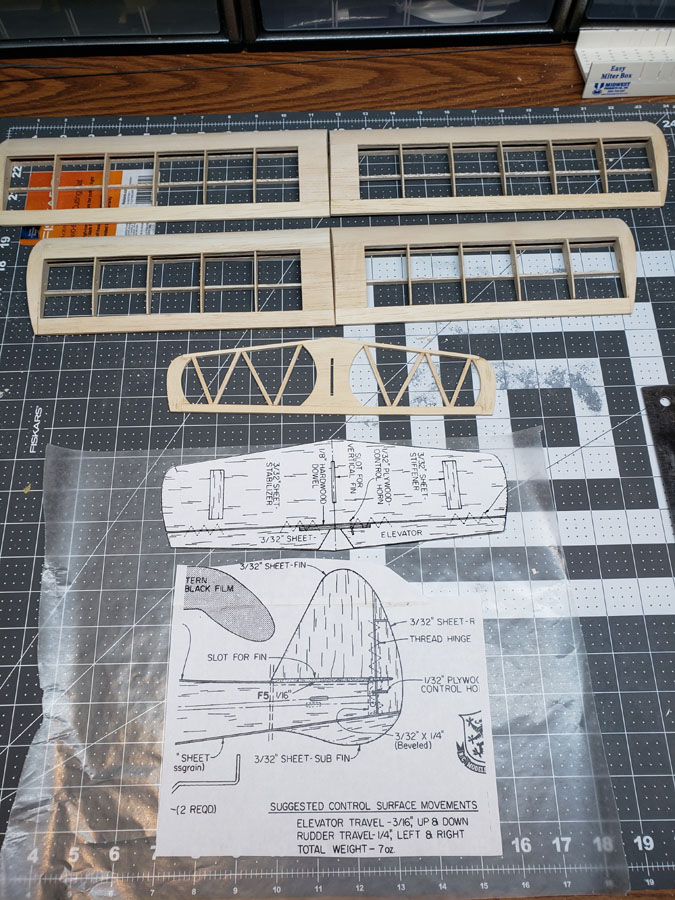
I decided to scratch build a balsa model... because I had a lot of balsa just collecting dust in my basement. There are so many plans for RC planes on the internet that actually spent a few days looking for candidates. I kind of gave up because they were too many options. I decided to build one of the first plans that caught my attention. The Tinkerbell designed by David Boddington , The plans were published in RCModeler magazine in 1993.
https://outerzone.co.uk/plan_details.asp?ID=6306
6306.jpg

6306.jpg


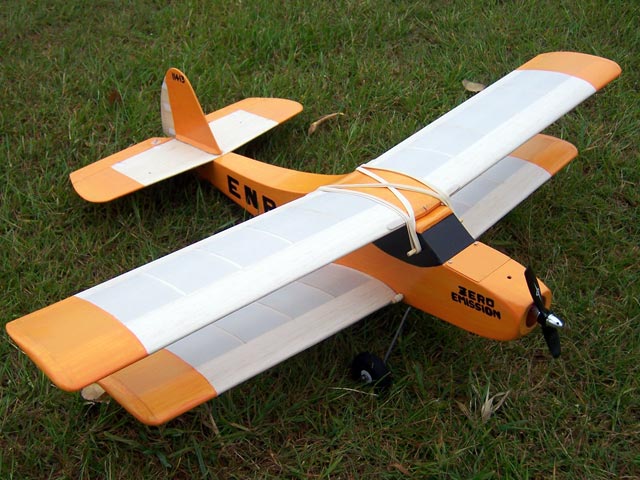
I picked this plan because I wanted a small biplane and I already have a powertrain that I THINK will work in it. To be honest I have never built a model completely from scratch and it has been a LONG time since I built anything balsa. But I am having fun so I decided to document it.

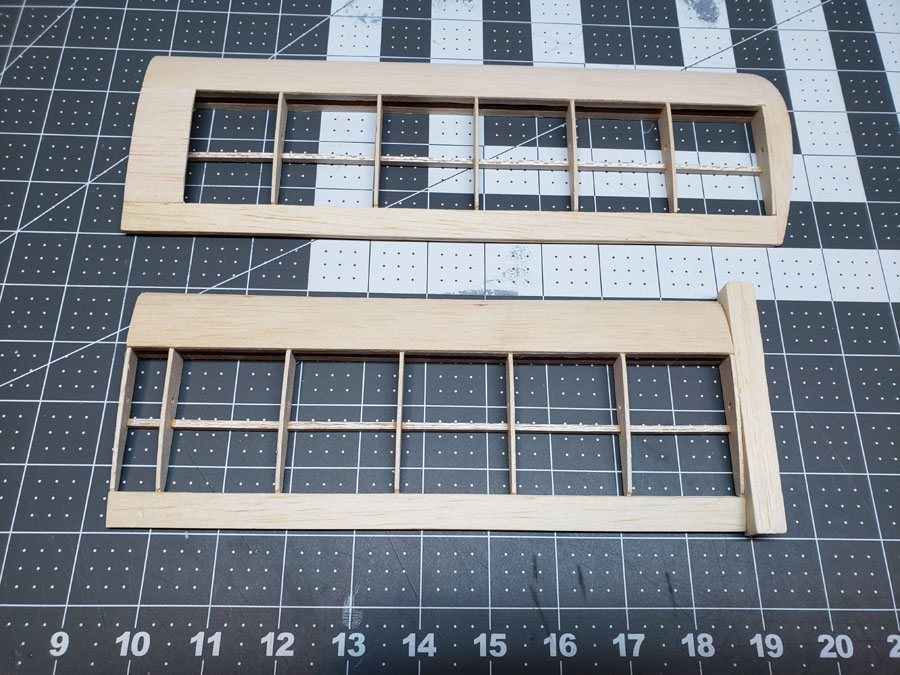
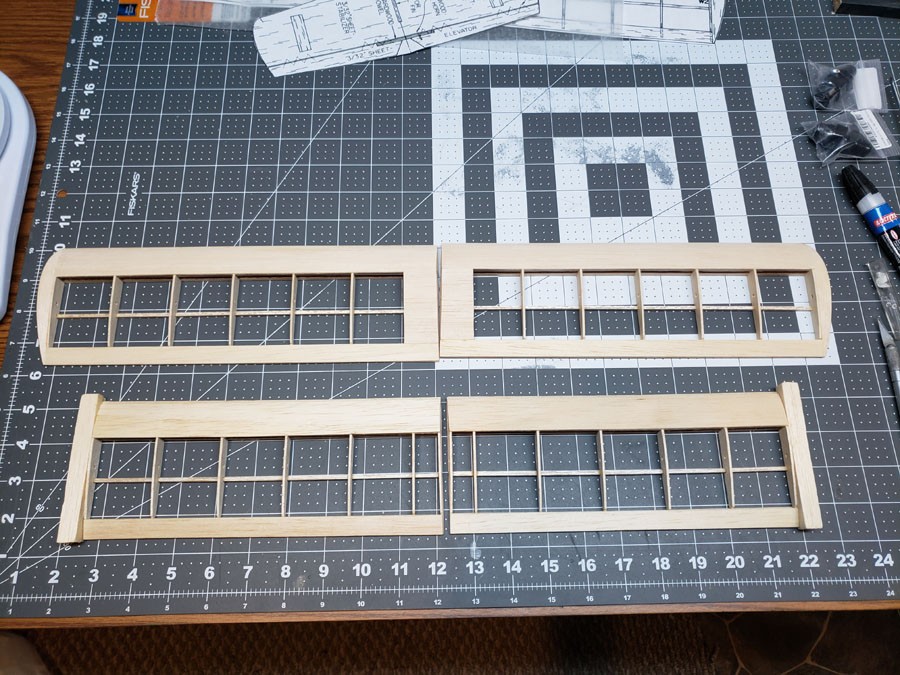
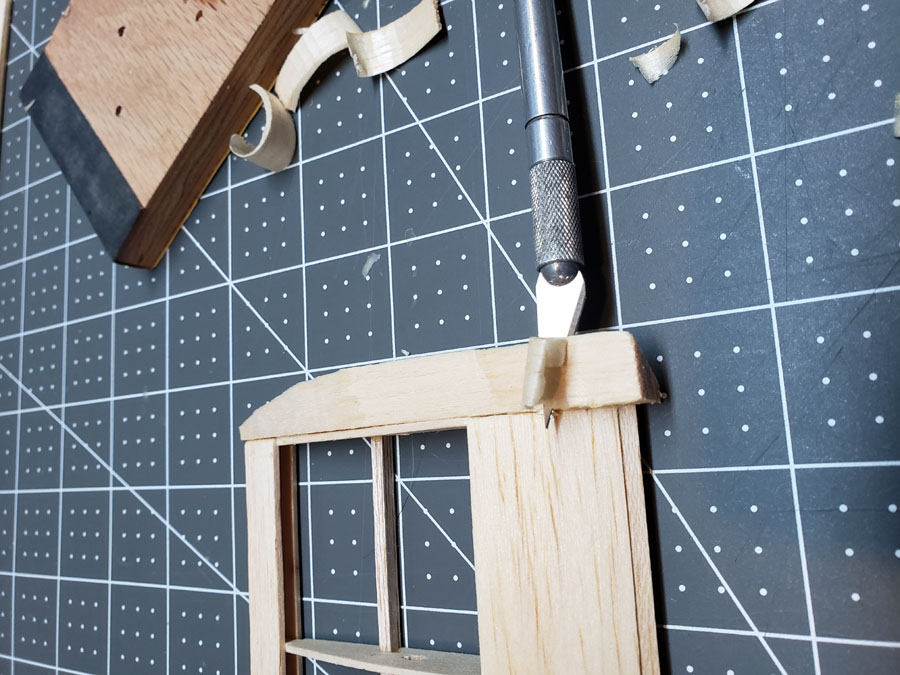
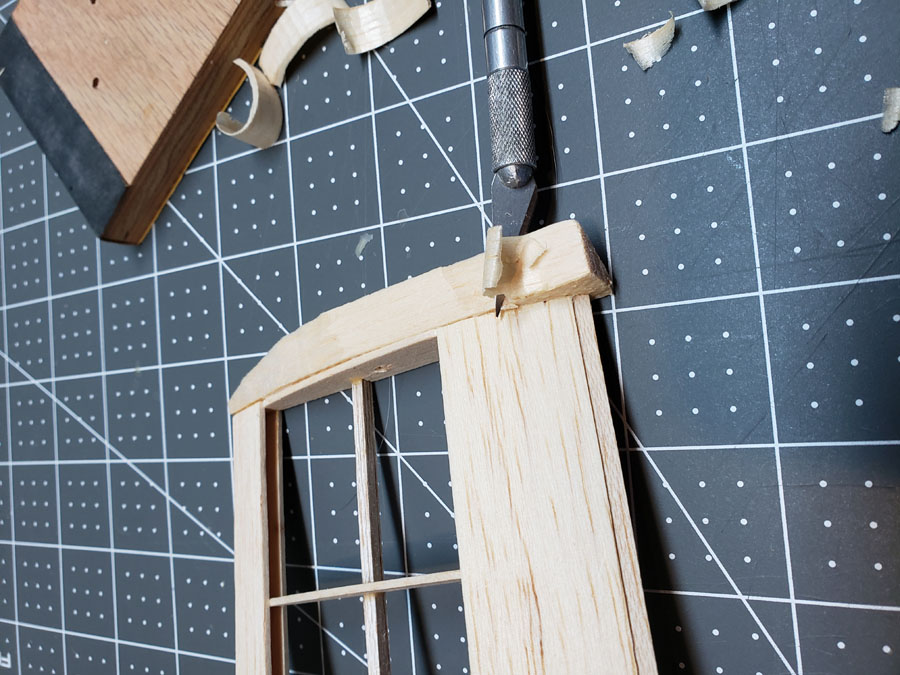
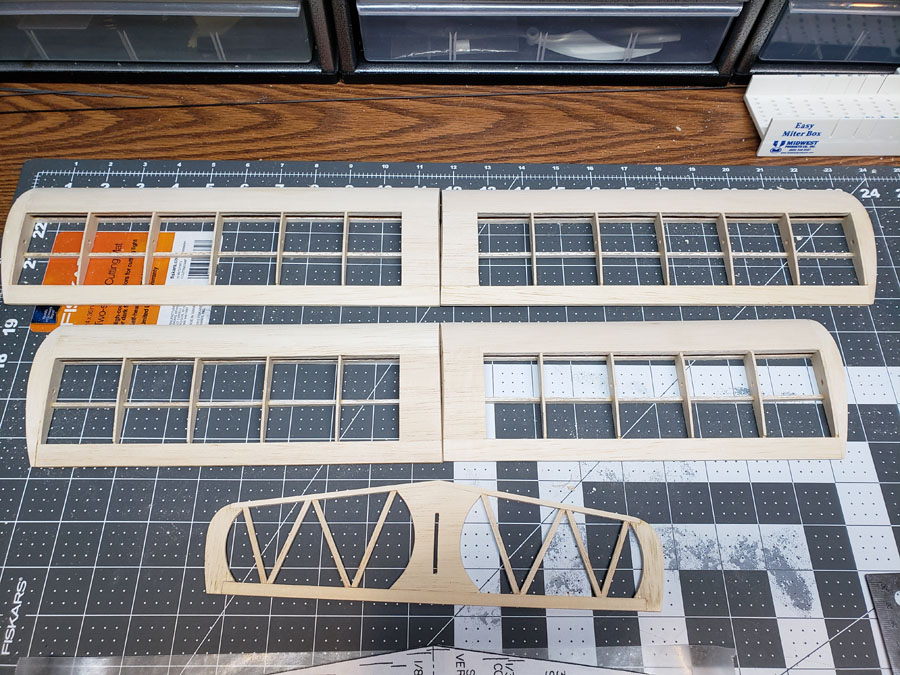
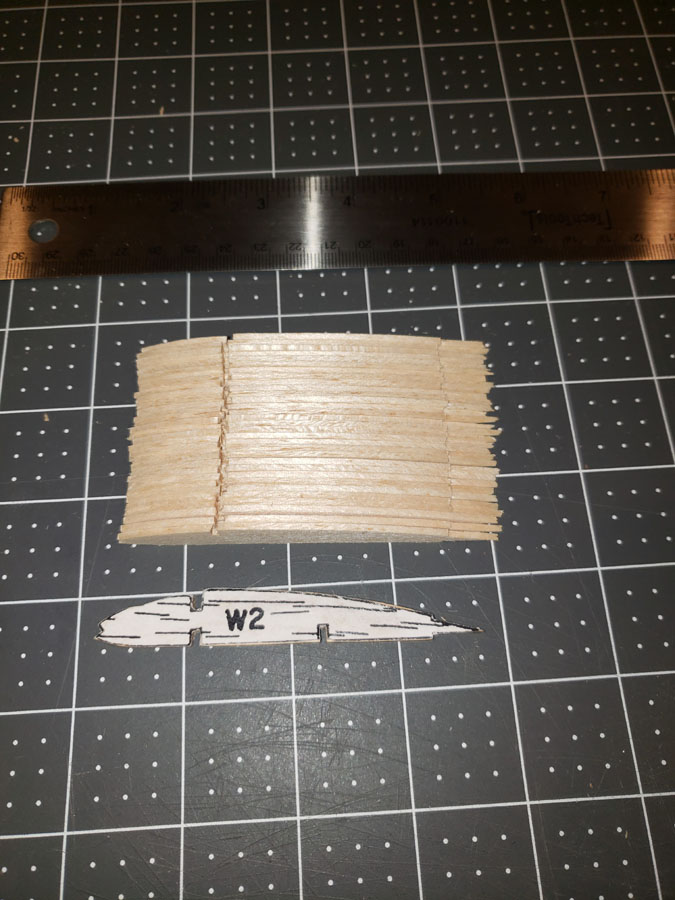
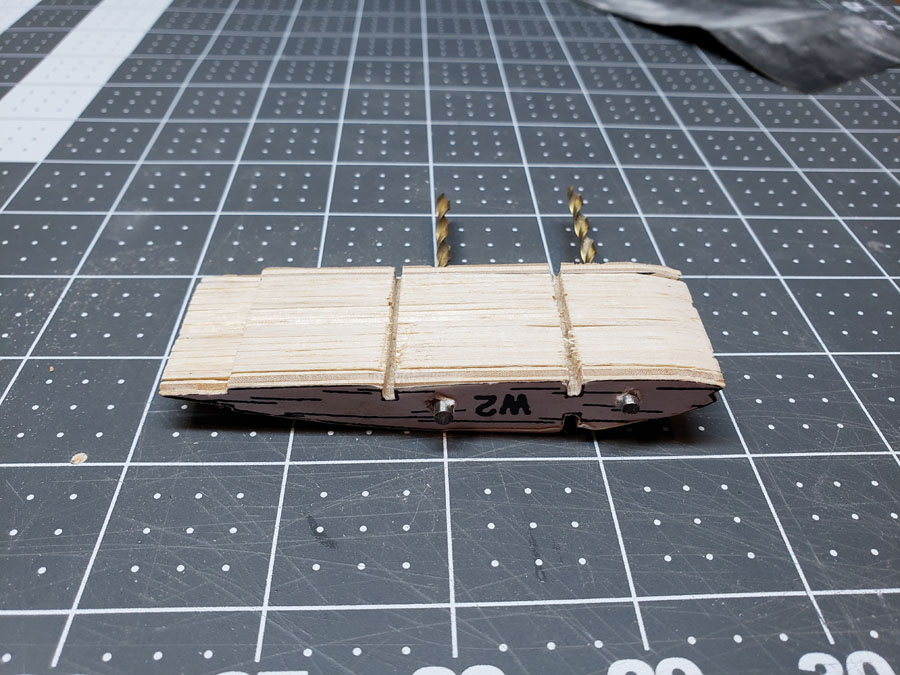
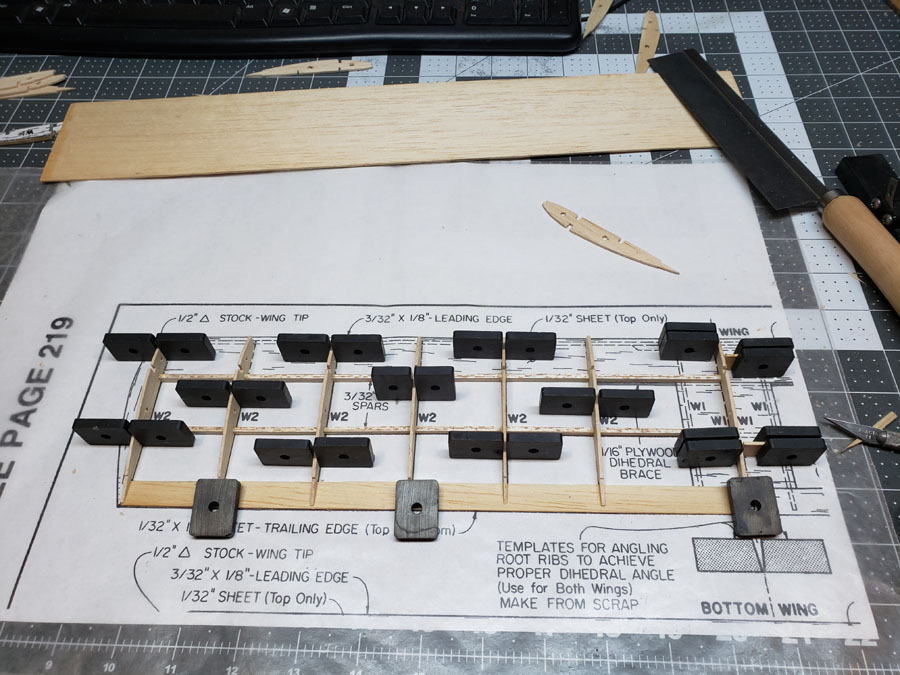
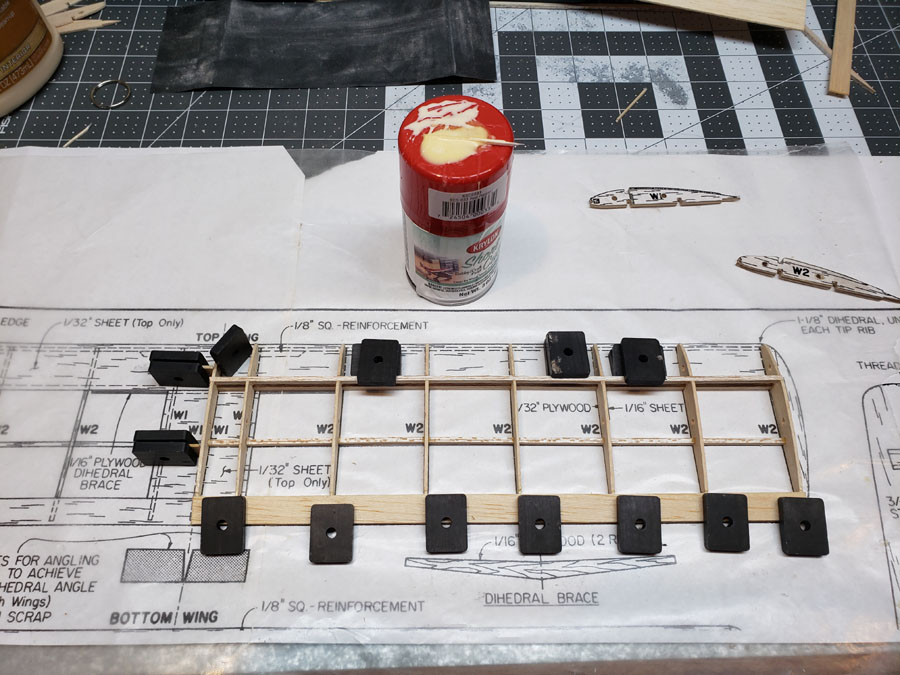
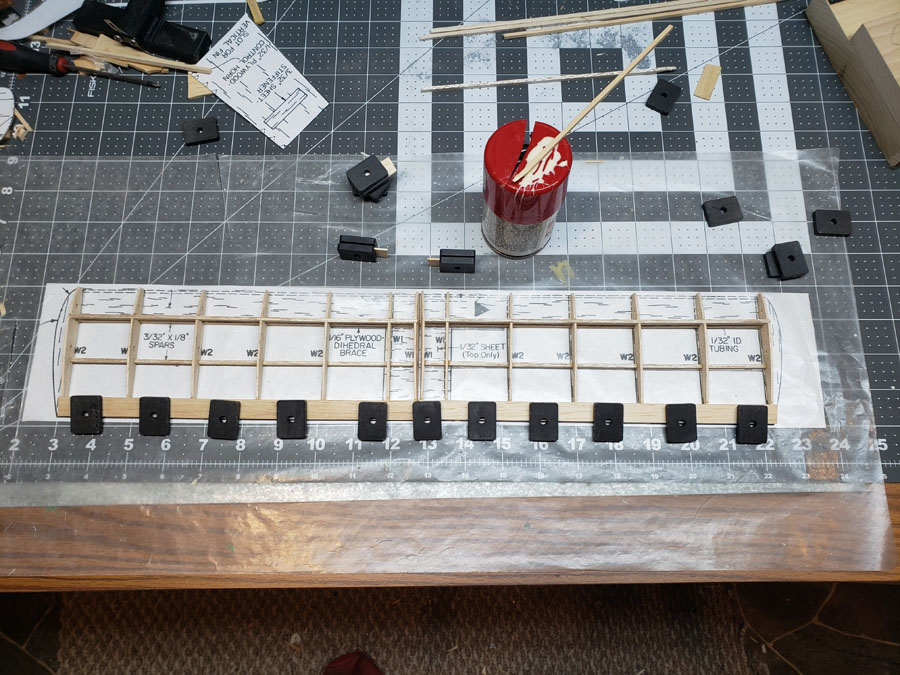
One of the reasons I picked this model to scratch build is because all of the wing ribs were the same size. I just made a template out of plywood then used that to guide my knife while cutting out all of the ribs.


R001CUTRIB20200110.jpg


R002CUTPLYWOOD20200110.jpg


R003SANDPLYWOOD20200110.jpg


R004TEMPLATECUT620200110.jpg
 
Last edited:

Duffusmonkey

Junior Member
Getting late, tomorrow I will figure out how to get my pictures to show up correctly

Once I got all the ribs cut out I lined them up
R005RIBSTOP20200110.jpg


I had actually made 2 templates for the ribs so I drilled holes through everything so that I could sand all the parts down to be identical
R006HOLYRIBS20200111.jpg

For this build I am using magnets to hold everything instead of traditional pins. I think this would work better with a larger plane because if the magnets get too close together things can snap together pretty violently
R007UPPERLHWING20200111.jpg

R008UPPERRHWING20200112.jpg


I like to use the top of a paint can to hold a pile of glue and use a piece of balsa for a brush to apply it. I still like using wood glue because CA gets really hard and make it challenging to sand evenly. Wood glue also lets me make adjustments before it sets

R009UPPERWINGS20200116.jpg
 
Last edited:

OliverW

Legendary member
Getting late, tomorrow I will figure out how to get my pictures to show up correctly

Once I got all the ribs cut out I lined them up
http://monnin.org/Images/Tinkerbell/004TEMPLATECUT620200110.jpg

I had actually made 2 templates for the ribs so I drilled holes through everything so that I could sand all the parts down to be identical
http://monnin.org/Images/Tinkerbell/006HOLYRIBS20200111.jpg

For this build I am using magnets to hold everything instead of traditional pins. I think this would work better with a larger plane because if the magnets get too close together things can snap together pretty violently
http://monnin.org/Images/Tinkerbell/007UPPERLHWING20200111.jpg
http://monnin.org/Images/Tinkerbell/008UPPERRHWING20200112.jpg

I like to use the top of a paint can to hold a pile of glue and use a piece of balsa for a brush to apply it. I still like using wood glue because CA get get really hard and make it challenging to sand evenly. Wood glue also lets me make adjustments before it sets

http://monnin.org/Images/Tinkerbell/009UPPERWINGS20200116.jpg
Looking good!!!
 

Duffusmonkey

Junior Member
The plans call for a sheet of 3/32 balsa for the tail and elevator, but that is too boring for me, I want to see some ribs and crossbracing. This is my first concept
R016ELEVATORIDEA20200116.jpg


I ended up going with something very different. I used basswood for the front and rear edges for extra strength, I used a roll of packing tape as a circle guide and did a little trimming
R017ELEVATOR20200118.jpg
 
Last edited:

Duffusmonkey

Junior Member
I am kind of stuck now. Because I didn't really plan very well I built the wings with the recommended dihedral. The original design was for 3 channel so it had no ailerons. I plan on using Ailerons and using a gyro for stability so I am probably going to modify the wings to take out almost all of the dihedral.

I also think the rudder looks small. I planned making this a slower flyer so I am concerned that there is not enough rudder authority for slow speeds.

I also need to do some math to see if the motor I have will actually work. Its a Power Up 250 Slowfly that makes between 7 and 13 oz of thrust depending on the battery and prop combination used
R018RUDDER20200118.jpg


EDIT: Originally I posted that I didn't think there was enough "RUBBER" Authority, which is wrong in so many ways
 
Last edited:

TooJung2Die

Master member
Remember the joy and satisfaction of spending over an hour cutting out six pieces of balsa?
I do. :) It's all about the journey, not the destination. I'll be following this build.
My favorite balsa builds so far have been printed balsa kits. No die-cut or laser cut parts. Everything is cut out by hand just like you're doing. I have one more printed balsa old timer kit to build then I'm going to build an airplane like you're doing, from a plan. I can't build anything by strictly following the the plan either. You'd probably be happy to find the small rudder and elevator will work just fine for lazy circuits around the field but it sure won't hurt to enlarge them. Love the hand carved wing tips.

It'll fly with the 250 size motor. I'm using a 250 right now on airplanes with 36" and 40" wingspans. They're both under 7 ounces with battery and ready to fly.
 
Last edited:

Duffusmonkey

Junior Member
I tend to exegerate a little. I really enjoyed making the wings, elevator an Rudder. The Wing spars got kind of tedious. The only way I could get good edges on the center openings of the fuselage was to cut about 1/8th inch away from the edge and then whittling and sanding the rest of the way. I might scrap them completely and glue up box sections out of strips. I am always tempted to rush through a project despite knowing that things go much better when I take my time.

One of the reasons I try to use wood glue is because if I use CA I tend to start rushing and that's when things get crooked. But I did use CA on the tail and elevator. Those little sticks are just too easy to bump out of place.

My first ever balsa model was on printed balsa. The curved parts were so close together that cutting one part often damaged the part next to it. It was so frustrating that I am amazed that I finished it. It was in the 80's in the kit below. I have been unable to find a picture of one built. They were just not worth the effort
 

Attachments

  • Screenshot_20200112-211537_Chrome.jpg
    Screenshot_20200112-211537_Chrome.jpg
    607.5 KB · Views: 0
  • Screenshot_20200112-213929_Chrome.jpg
    Screenshot_20200112-213929_Chrome.jpg
    392.1 KB · Views: 0

TooJung2Die

Master member
I see what you mean. The important thing I learned is to cut outside the line and sand the excess to the line. That would be impossible with a kit printed like that. Have you decided on a motor? This is the 250 size motor I have (A1510-2200KV). They're getting hard to find.

1510 2200KV Brushless Outrunner Motor.jpg
 
Last edited:

Duffusmonkey

Junior Member
I have the motor I used to use on my slowbipe. HeadsUpRC is no longer in business so I am not 100% sure on the specs on it. If it's not a good fit I will buy something else. Figuring out correct motor size is not that intuitive. Once I get a finished weight I will probably be taking suggeations
 
Last edited:

Joker 53150

Mmmmmmm, balsa.
Mentor
Remember the joy and satisfaction of spending over an hour cutting out six pieces of balsa? Me neither. I am starting to think that I will buy a 40W C02 laser if I am still building models this spring.

R021FUSELAGE20200120.jpg


It looks like F1, F2 and F6 are called out as plywood parts (based on the way the grain is drawn). If the plans were made for IC engines that may be the reason and balsa *might* work just fine, although the F1 firewall I'd trust most with ply.
 

Duffusmonkey

Junior Member
Good eye! The plans did call for plywood. But they called for 1/16 plywood glued to balsa and I don't have any plywood that thin. F1 is the bulkhead for a Cox glow motor. I am going to put the bulkead for the electric motor forward of it. I will probably use 1/8th ply for that with holes in it to reduce weight and to let air flow over the ESC... which means I need to cut a hole in the middle of F1 to make some room for electronics.

I think F6 was plywood just to be able to cut the opening big enough for pushrods I have some 25 year old Sullivan flexible gold-n-rods (still in the bag) that I might use for push rods. Then I can just drill small holes for them.

I probably should have thought of these things before cutting parts. I guess I enjoy the journey enough that I don't care if there are detours do to poor planning.
 

RCCobwebs

New member
Nice!! I miss the old balsa kits. I was really sad after being away from the hobby for 30yrs to find out that the old balsa kits and plans are nearly impossible to find now.
 

cranialrectosis

Faster than a speeding face plant!
Mentor
I see what you mean. The important thing I learned is to cut outside the line and sand the excess to the line. That would be impossible with a kit printed like that. Have you decided on a motor? This is the 250 size motor I have (A1510-2200KV). They're getting hard to find.

View attachment 155333

I had a hexacopter that flew on these and still have a few motors. LOVE them! :)

I guess I enjoy the journey enough that I don't care if there are detours do to poor planning.

How true is this? :)

Great thread @Duffusmonkey . Loving the great photos.