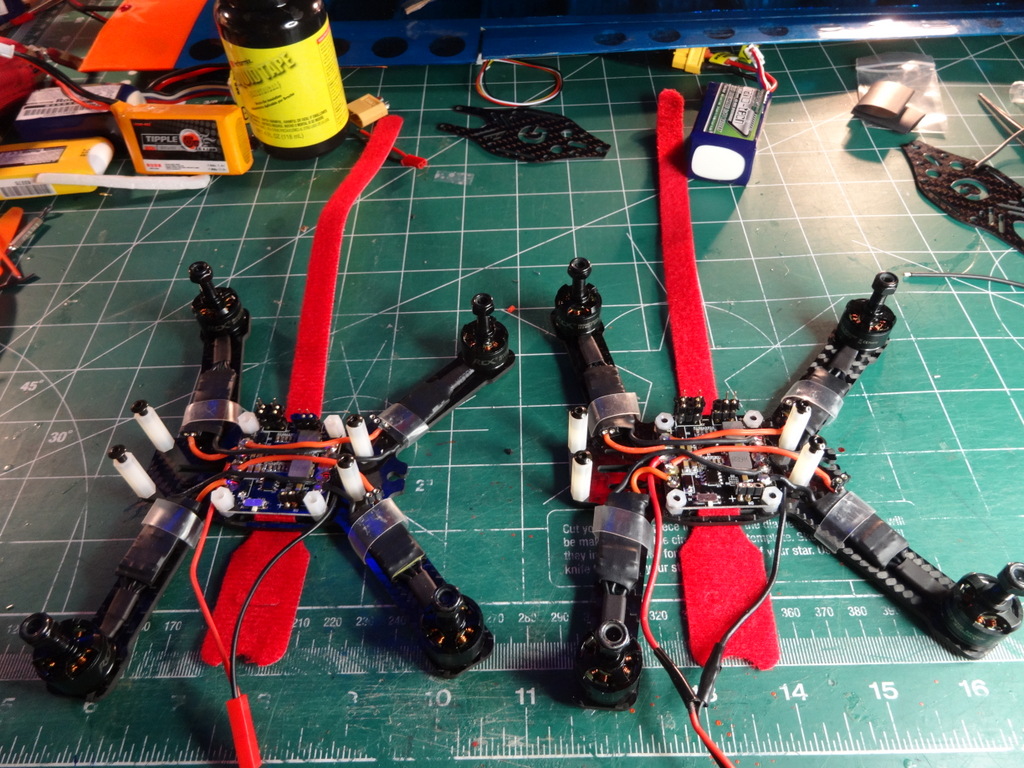
Under 250, Under 250, Under 250!!!

Craftydan

Hostage Taker of Quads
Staff member
Moderator
Mentor
Hey folks!

I've got a project I've been working on, and figured someone might get something out of following the process . . .

Prolog . . .

(yeah, it's going to be that kind of project)

Last year I had a simple project around January/February -- Build three 250 Class FPV quads from parts, tune, then sell two and abuse the third. The build went well, quads tuned out nice, sold at asking price (eventually) and the third quad became my beater for the year. This past Christmas/New Year holiday season was kinda rough for our family, so to de-stress a little, I thought I'd repeat the process . . . with a bit of a personal challenge . . .

The Challenge . . .

Under $250 -- Pick the selling asking price of $250, so make something worth it, but as inexpensively as possible.
Under 250mm -- 250 class is fun, but I want to build a pocket rocket!!!
Under 250g -- This is my chance to give the FAA my single digit opinion not once, not twice, but three times.

Totally doable, but some things to make it interesting:

- Brushless -- brushed is too easy for weight and class, but no way can it justify $250.
- All means All -- AUW limit includes EVERYTHING. I'm not cheating by meeting the limit with dry weight (no battery) or leaving the FPV gear off. RX will have to go on too, so it's going to be BNF.
- Easy to obtain Battery -- won't sell without a good battery source.
- pilot feedback -- somehow, someway, the airframe needs to let the pilot know the state of the batteries.

Aaaand that should make it worthwhile to go through the process.


So let's break this down a bit . . .

For brushless quads, there are quite a few ARF/RTF/BNF 250 kits on the market in this price range, all over 250g AUW. Hard to build a 250 that light, so the class and weight work in the same direction. There are a few sub 250 quads in this neighborhood, but they either weight more, cost more, or lack FPV gear (at the time I started this project, the Hermit 145 was over budget, but HK slashed that . . . doesn't matter, I don't like it's prop mounts :p ) . . . So this is a modestly unchallenged corner in a busy market. This is doable.

So from the spec's above and personal taste, let's expand the spec a bit

- From the weight, a 200-150mm quad frame (smaller threatens the budget), probably carbon.
- Cleanflight based processor (because . . . reasons), SMALL.
- BNF, but I want small, so Spektrum (lemonRX) Sat.
- 3-4" prop with a solid connection -- I *Hate* friction fit props . . . and overpowering it means I want a strong hold on the prop.
- Tiny high kV motors -- sub 1804, above 2200kv. Small is good, but I crave a good Thrust:weight, so I'm not likely to skimp here.
- 2-4S operation -- the gear must handle the high power, fly on low power, but I'm targeting and tuning to 3S.
- Good (but not bleeding edge) ESCs -- BLHeli, preflashed (ok, I can flash, but only if I have to) programmable down the wire.
- 200mW, 32ch VTX
- Tiny but fair camera
- OSD -- Feedback over FPV link. never played with one, but the micro minim's are tiny . . . good an excuse as any :)
- Beeper -- one more feedback
- weight budget -- I can spec the gear easy enough, and add up the published weights, but battery is harder . . . best to carve out a slice for it.
-- < 50g battery
-- < 200g airframe
- PDB if I can get away with one.

So What's Next?

So now that I've laid out an idea of what I'm looking for . . . Next step will be to spec/source the motors, and spec out parts from there . . .

(By the way . . . spoiler alert, this is more of a history than a build log -- first one is built and in tuning, and I'll be posting photos of #2 and #3 being built. From the above, I didn't quite follow the derived spec, but I hit the top 3 solidly and I'm happy with the build. VERY happy. I expect it won't be the best, or the fastest or the cheapest or the prettiest quad, but I'm pleased with her. More to come . . . in the mean time, I need to go clean my workbench for pictures :p)
 

Flat4

Senior Member
Cool, been slowly spec'n out something similar for myself. I'm curious to see the route you go, thinking 3 inch build myself...Subbed

Have you seen the RCX 1407 motors?
 

cranialrectosis

Faster than a speeding face plant!
Mentor
Way to go, Dan!

I think there is lots of interest for this type of craft and the FAA just made it more interesting. Can't wait to see pics. :)
 

Craftydan

Hostage Taker of Quads
Staff member
Moderator
Mentor
Ok, it's later . . . so where were we? right . . .

Motor Spec . . .

So looking at what's available in the sub-200 frame size, typical motors are 110x or 130x in size ("x" depends on the model, most are '04 or '06). Typically, the 110x(being smaller) ends up around 4000kV, the 130x ends up around 3000kV. from my derived requirments, I'd like something that spans 2-4S . . . this is where the little guys get off. 110x's at 4000kV tend to like 2-3S, but 4S is a bit hard on them.

So I'm looking for a good inexpensive 130x motor, so off to my typical haunts . . .

and then I see her . . . across a crowded listing . . . all sleek and just soo cute . . .

Ok, Flat4, you called it: The RCX 1407 :)

I actually did compare them a bit before I gave in, looking at weight, performance and battery range.

The RCX 1306 performance barely cracks 300g running off a power supply(12v), where the 1407 can beat that by 17% with a half full 3S pack . . . for how much more? $2 and 2g? SOLD.

Where's the multipack? Oh? They sell a kit with motors/ESCs/frame/PDB/props and CC3D? . . . meh on the CC3D -- I can remove it from the kit for the extra cost of the motors, but what about the ESCs?

FVT Littlebee 20A? searched some reviews -- preflashed, programs down the wire, reviews well . . . or a house brand I can't see much about :p Littlebee it is!

Since MyRCMart seems to be doing well (except the CC3D . . . I mean really!) let's make the best of their shipping. What do they have in controllers? Oh! An Naze32 Rev 5 clone shrunk to the size of an afro mini? Nice! $15? that'll do!

Micro minim? yup

Cheap camera and VTX? not bad . . .

Buzzer? That too.

That should be all I need except the RX . . . pick up a satellite from lemonRX.

Done . . . cost is good, so let's run through the weight budget an see how we're doing:

Frame:65g
PDB:6g
ESC (x4):24g(6g ea)
Motor (x4):56g(14g ea)
Props(x4):6g(1.5g ea)
Naze:2g
Sat RX:2.5g
Camera:3g
VTX:7g
OSD:1g
Buzzer:10g
TOTAL: 182g

Target was 200g, so plenty of room for velcro, mounting tape, wiring, XT-60, connectors and whatever has to be added.
to go with . . . orders made, well clear of the Chinese New Year, so read up on OSD's and wait . . .

. . . wait, what?!?

Oh, right, I forgot to size the battery . . . no problem!

I've got a few days before the orders arrive . . . let's see, 2S or 3S pack . . . under 50g . . . how much current?

Oh -- 4x9A?!? wow. I'd seen the numbers, but still. let's see . . . um . . . drat. There aren't many packs right at 50g.

Pull up HK (yeah you can get better packs elsewhere, but theirs will give a good cross-section):

2S 950mAh, 25C . . . max current 22A. No good.
3S 460mAh, 25C . . . max current 15A. Worse.
3S 350mAh, 65C . . . max current 22A. Dangit.

Ran the numbers against quite a few more, Maximize the size and the C-rating becomes too low. Boost the C-rating and the largest pack under 50g is just too small for 40A.

Not going to work :( I need to add weight budget more for the battery . . . I need to go to 75g for the battery.

At just under 75g:

2S 1000mAh, 40C . . . max current 40A. Bingo.
3S 850mAh, 45C . . . max current 38A. at'll do.

. . . but now to go on a diet :(

This folks, is what we call iteration . . . and let me remind those new to the process, the sooner you take a spin on a design iteration, the cheaper it is :p

I've already got these parts inbound, so cheap has left the station. Where can I trim . . . and trim inexpensively?

let's look at the top 4 -- Frame, motor, ESC and buzzer (below that the weight drops a bit more).

At 65g, looking around, the frame is a bit of a porker. Shouldn't be hard to trim that in half, but I'll need to be picky, since light frames are $$$$.

ESCs and motors are the expensive bits, and the money has been spent. I could trim on the motors (probably wouldn't have in hindsight), but dropping to the 1306 only gains me 8g total. for a $40 cost, no way. littlebees are just about as light as they can be, so no trimming there.

The buzzer at 10g is not tiny . . . it's just become optional. If I've got weight left it might go in.


So! Lighter frame it is, but which frame?

Back to my usual suspects, searching for sub-200 frame, well below 60g, and sort by price . . . ooh, Chinese new year is upon us, so local shipping . . .

lookie here: Diatone Grasshopper 160

Small frame, good price, specs to 28g, available at the US warehouse (well not any more, but they had several when I ordered) reviews nicely, except it's 32g . . .

I can live with a 32g frame.


So I've just eaten heavily into my margin from not checking my battery budget first, but I'm now at . . . 150g?!? excellent!!! Plenty of margin to build, fair margin on cost, and I dropped 15mm in frame size :)

Looks like we're back on track . . .

Let's see, for what I get, 311g WOT on 3S . . . x4 . . . 250g AUW . . .

5:1 thrust:weight ratio. 50% throttle still gives me 2:1 for 10A total draw, so shes going to sip power in hover.

That makes me happy :)

Next, parts arrive and general layout begins . . .
 

Craftydan

Hostage Taker of Quads
Staff member
Moderator
Mentor
Yeah, I went quad.

I could probably have gotten a tri to work under the same boundaries, but the hit you take trading a motor for servo and tilt can really hurt. On this scale the servo and tilt might very well weight more than the lost motor. Probably better off tilting the rear motors out 20 degrees or so and going V-tail -- that way you only loose 8% thrust on the aft instead of 50%. If you're building a tri for the tri's sake it's worth it . . . but . . .

In the end . . . I'm biased. I don't mind Tri's -- they definitely have a good following -- but they're mechanically more complicated, less powerful, and less efficient than the same sized quad. They do feel nice in flight, but I don't mind the flatter handling and I've already got more yaw than need.
 

Craftydan

Hostage Taker of Quads
Staff member
Moderator
Mentor
The Post Man Cometh . . .

So, fast forward a few days and TADA!!!!! packages start to arrive:

DSC02900.JPG

Ok, so the parts have been here for a while, and I don't care for selfies and food snaps, what makes you think I'd like photo/video unboxing?!?

Get it out of there!!!

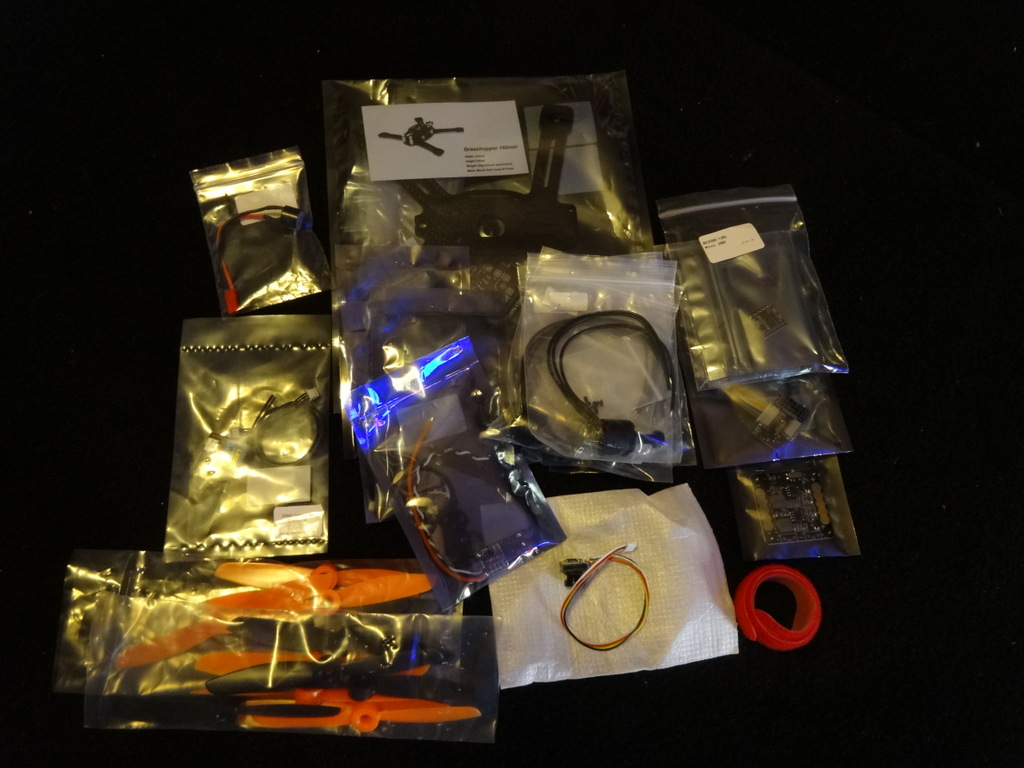
DSC02903.JPG

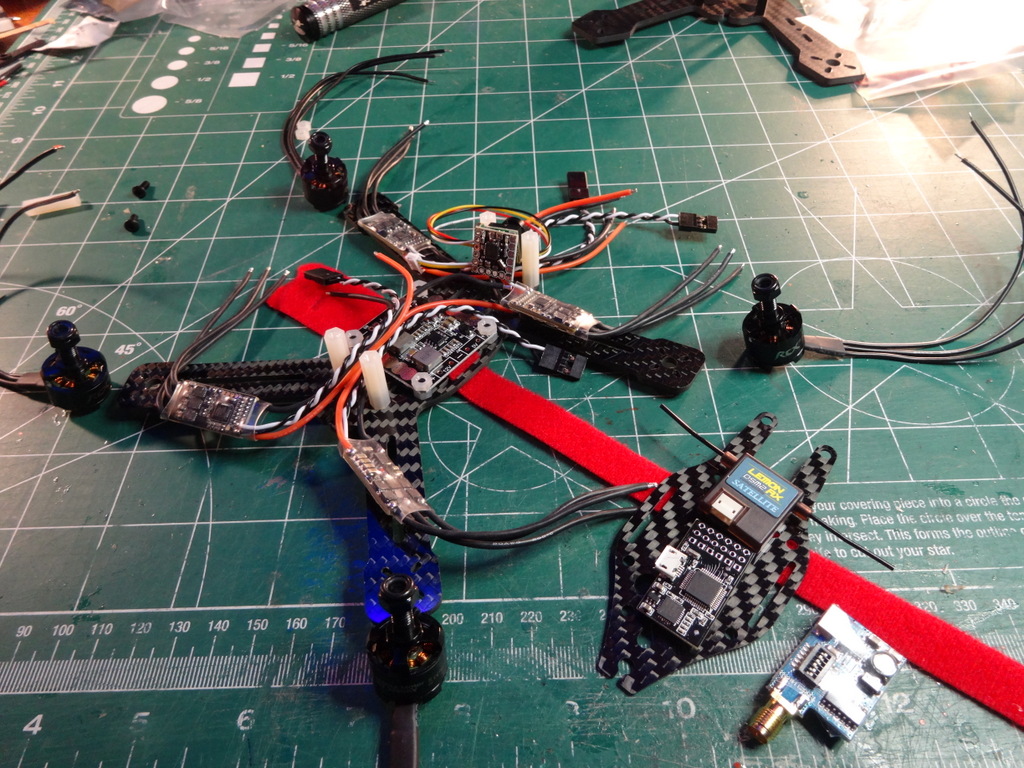
So that's a pile of parts roughly equating to one 160 quad. everything looks in order, time to assemble frames


What Could Have Been . . .

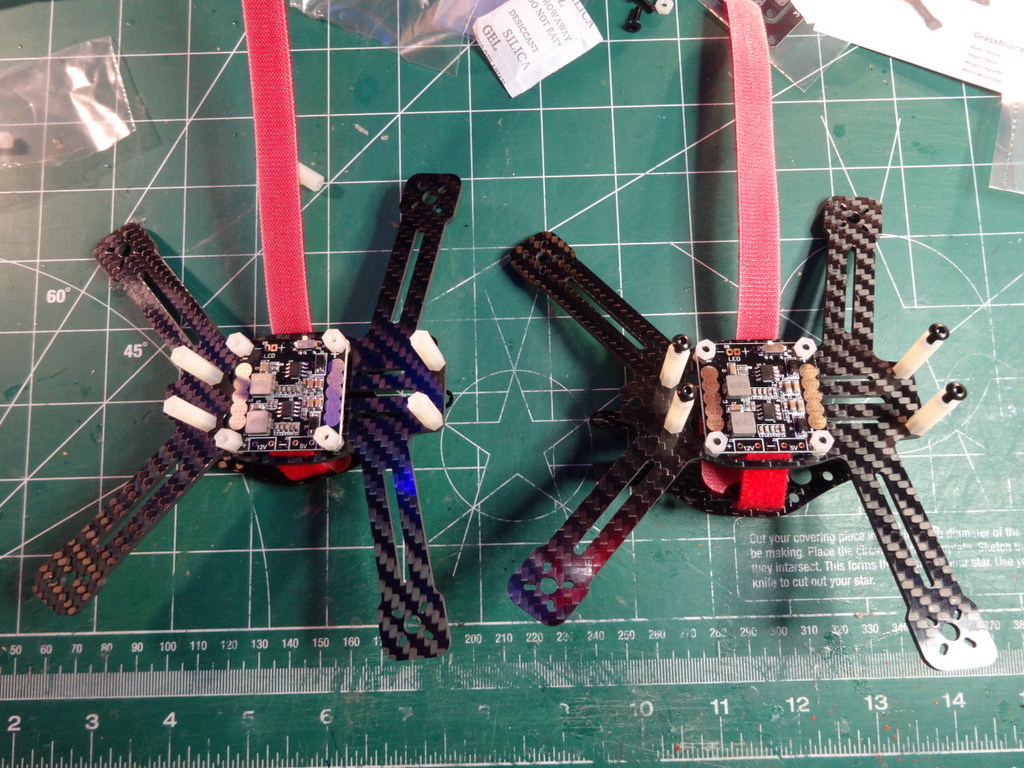
Since the bigger frame is here, might as well assemble one:

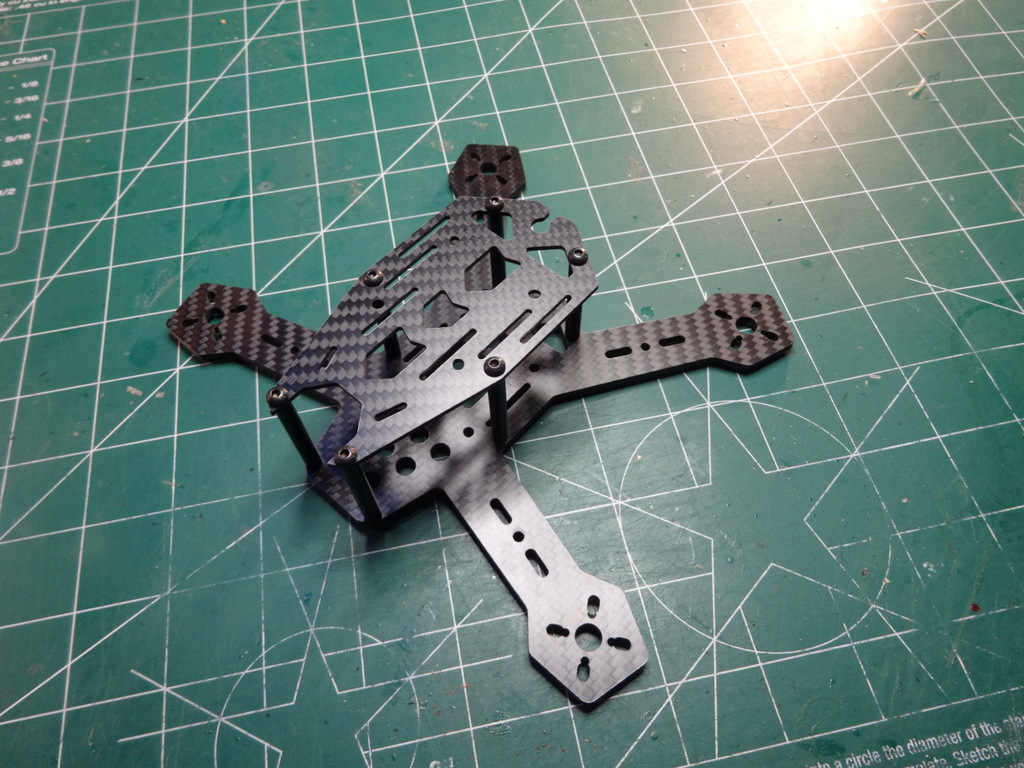
DSC02904.JPG

Not bad, but a bit out of proportion in the Z axis. Suppose it makes sense to fit everything in, but for looks I'll give her a 4/10. Set her on a scale . . . every bit the porker as advertised :p Moving on to . . .

. . . The Latest Hotness

so let's pull out the new guy:

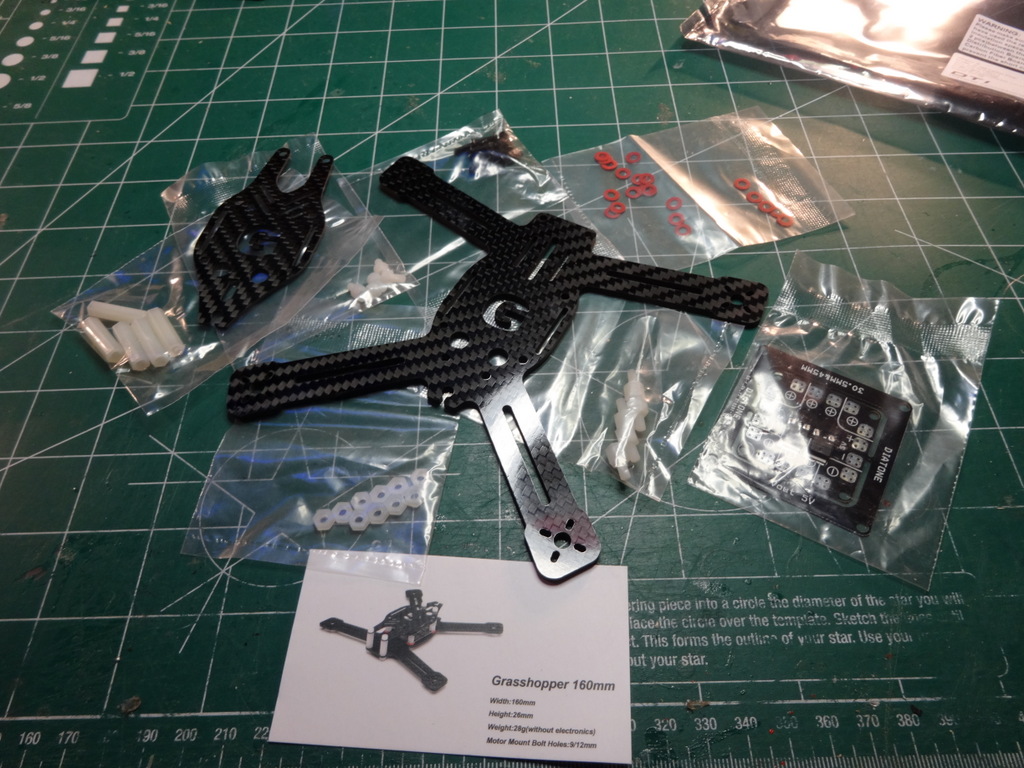
DSC02905.JPG

Lots of nylon and shiny carbon . . .

it's not really that much smaller, Why is the other frame so much heavier?

DSC02906.JPG

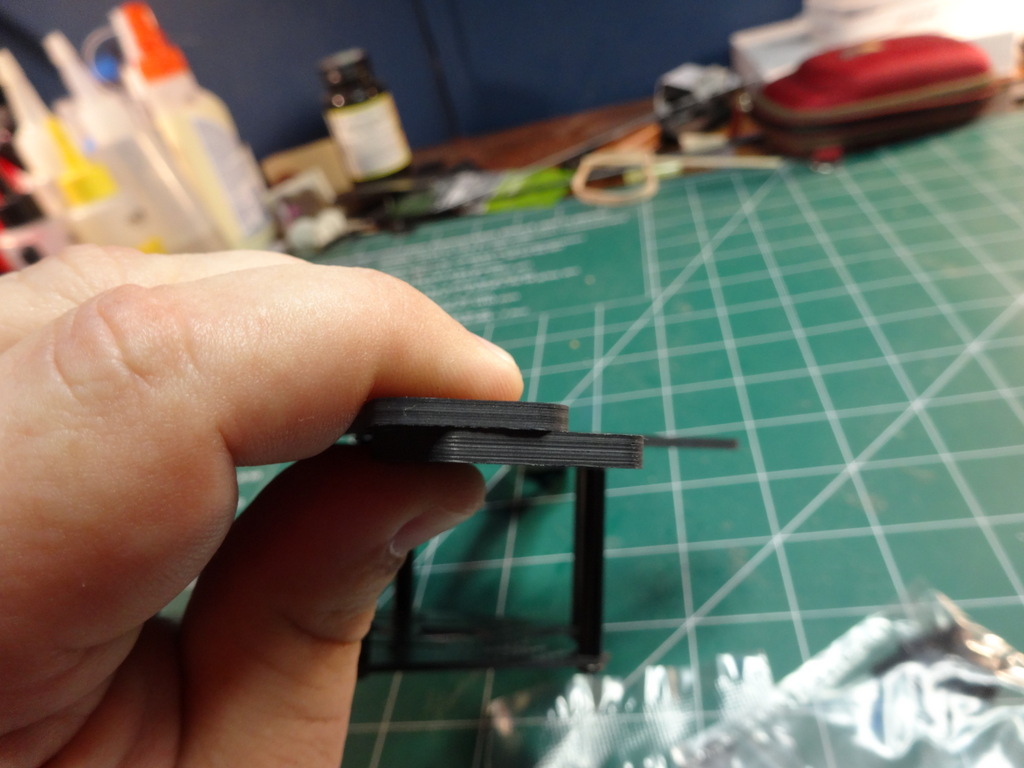
Between the 6 metal standoffs (instead of 4 nylon) , the base plate is much thicker and has less cutouts. We'll see how the grasshopper stands up, but I suspect the heavier frame isn't that much more durable . . . Ok I hope it's as durable, but I'm suspecting too!!!

And Oh lookie, free stuff I don't need with the grasshopper:

DSC02907.JPG

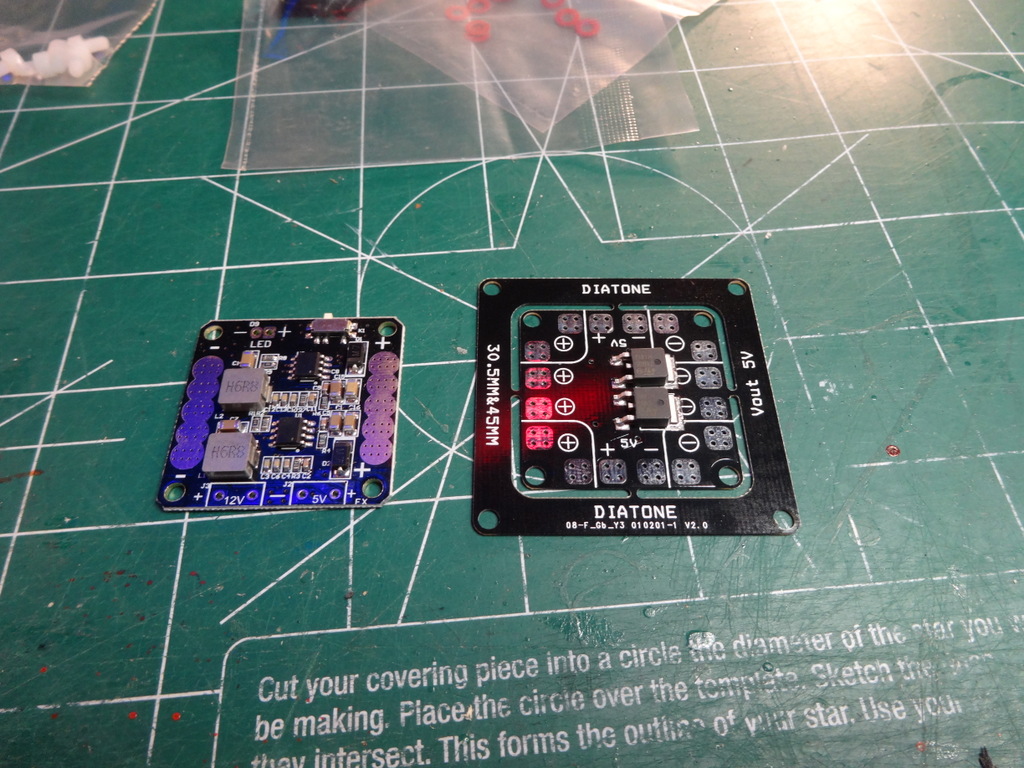
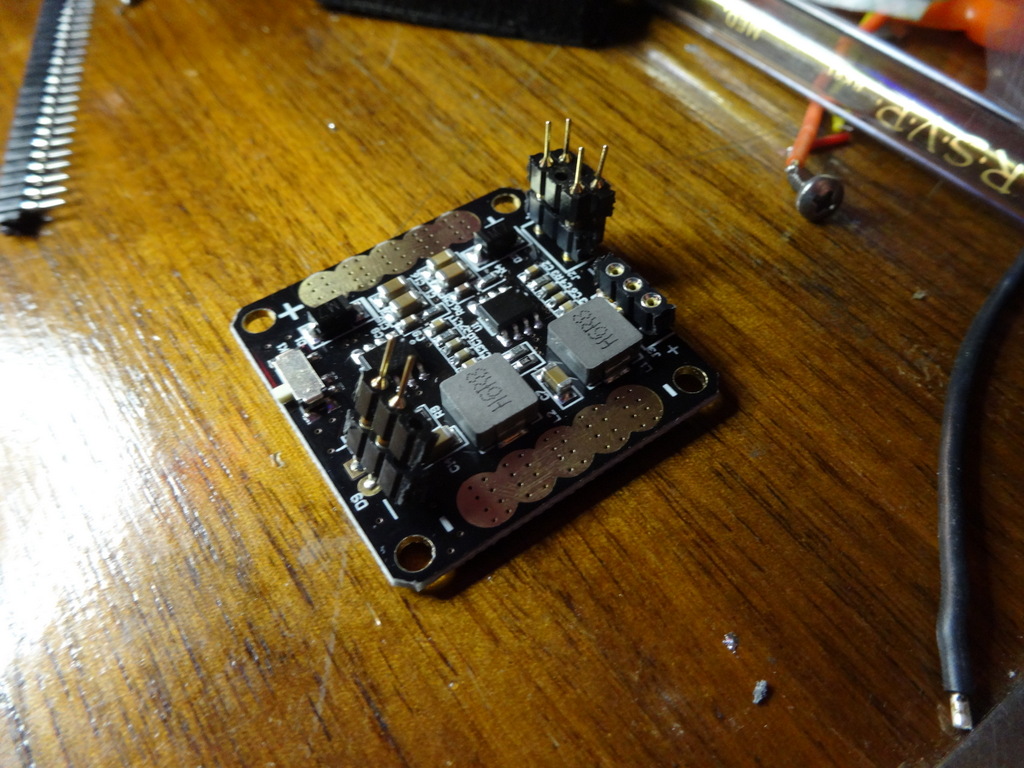
The simpler PDB came with the grasshopper, and is about half the weight of the other, but the integrated 5 and 12v switching regulator and the 12v LED switch seems worth the weight to me.

Well enough ogling, let's start laying everything out!

Layout . . .

First things first, let's mount the PDB, and layout around it:

DSC02908.JPG

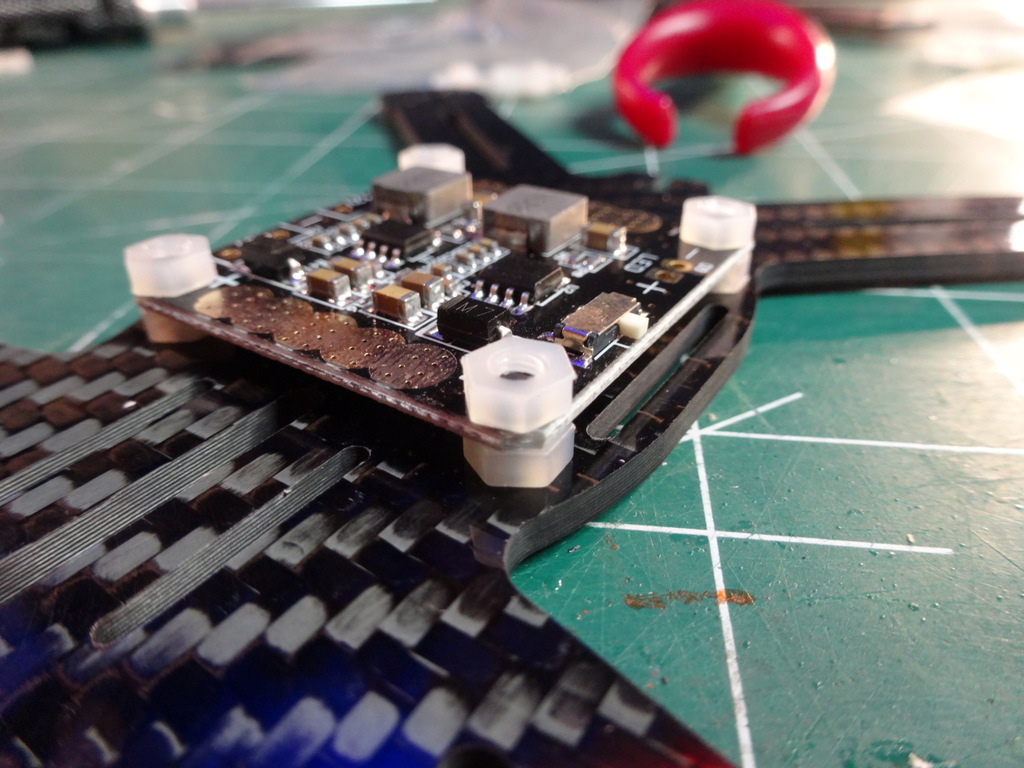
So tried a few combos with the parts given, and this is what I finally settled on. It gives just enouhg clearance below without taking up too much space above it.

The observant among you may have noticed metal screws through the carbon frame into the PDB mounts without insulation -- a potential short through the frame :eek: never fear, I checked -- The PDB mounting holes are isolated from the rest of the board.

Now I *could* have used 2-3 of those little red washers and been even lower, so why this high?

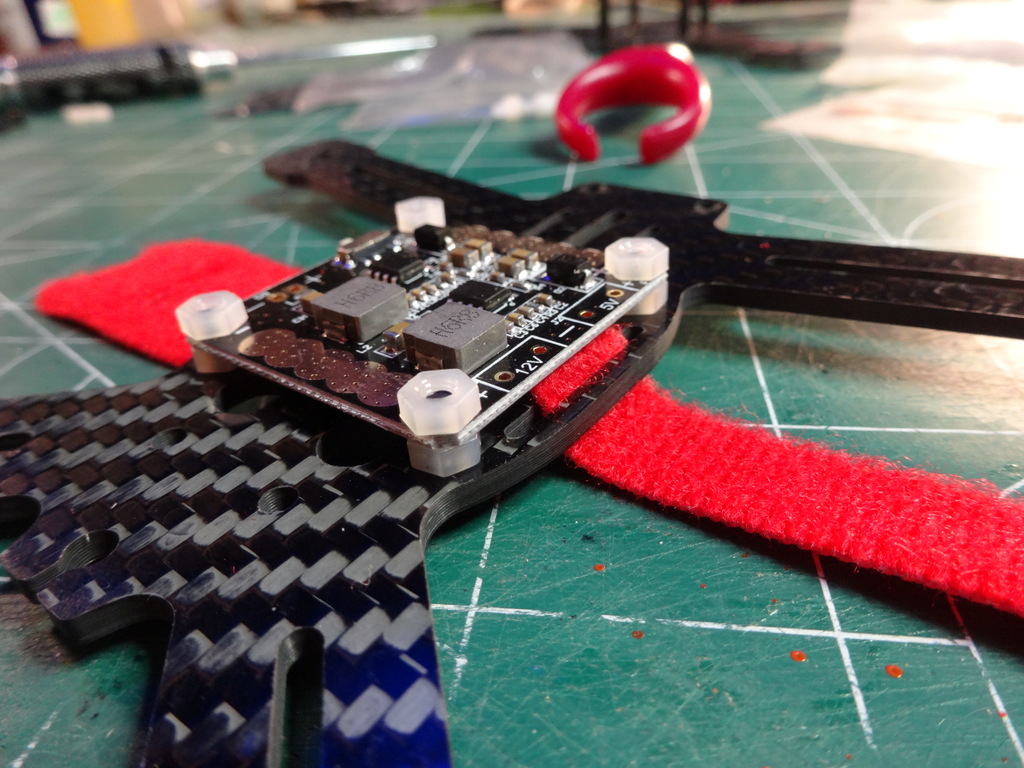
Velcro:

DSC02909.JPG


Ok, so time to start distributing the parts, moving things around, deciding where things go:

DSC02910.JPG

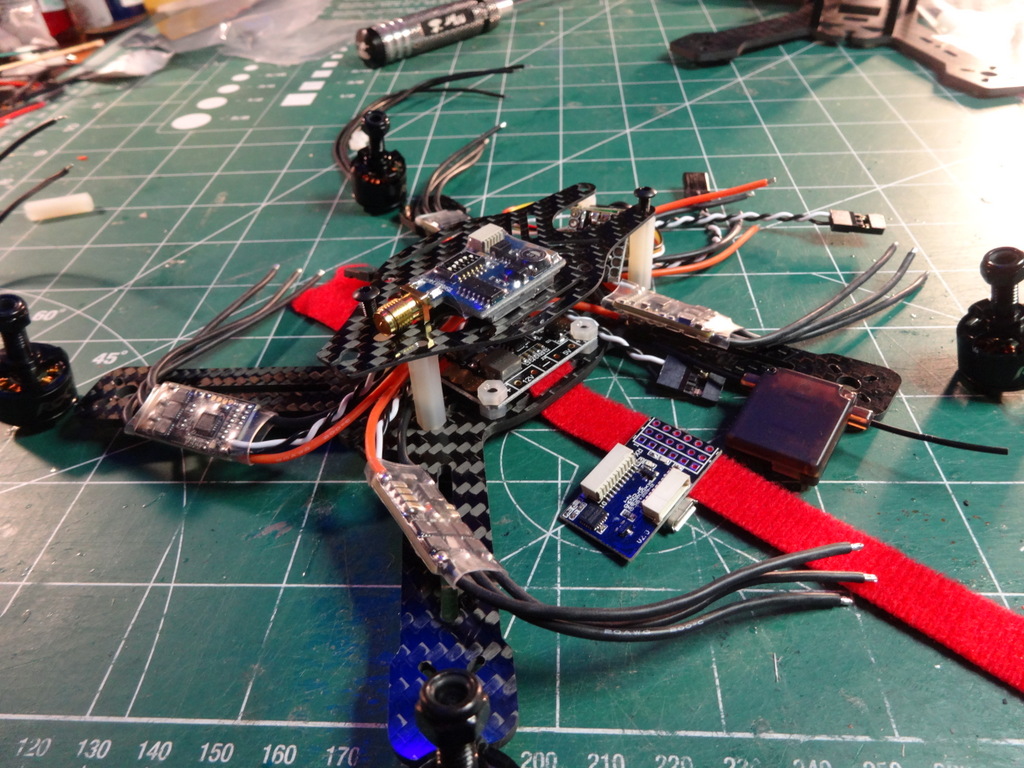
Naturally motors and ESCs go on the booms, camera pops out through the front, with minimOSD mounted behind it . . . and I hit my first mounting challenge . . . I'm practically out of room. Here I decided to split the build into a power-deck and a control-deck. ESCs/Motors/PDB/battery all live on the power deck. everything else attaches to the control deck or posts.

On the control deck, first, I positioned the Naze so it would be right-side-up, but turned 180 in Z, just in front of the rear posts. This put the IMU closest to center, the motor connections toward the front, and gives the level top of both the white quick-connect sockets to mount on the top. quick check of LEDs and they can all show through holes in the deck.

Next, the Sat . . . it should be able to fit right between the Naze and the camera. Finally, what about the VTX? tried a half dozen differnt placements and only found one good one :p on top of the control deck, antenna pointing aft, right over the Naze. In flights the two seem to tollerate each other, so it's ok, but made me nervous :(

Let's set the cover on and see what we've got:

DSC02911.JPG

Tucking parts in for fit checks show it's tight but doable. The Sat will have to come out of it's shell, and I'm not convinced of the minim's mounting . . . but that's much later. I can worry about it then.

Back in real-time . . .

DSC02912.JPG

so I finished up the night by buttoning up #2 and #3. The twins are poised to start installing motor/ESC sets. That's coming up next . . .
 

Craftydan

Hostage Taker of Quads
Staff member
Moderator
Mentor
Bricks,

I'm nowhere near done yet ;)

The VTX I have comes in at 7g, of which, I'm sure a good bit is the carrier board (reg/antenna coupler/switches/filters). Tops, I'd expect shaving off 3g by switching to a stand-alone module with an external regulator -- this kinda holds with your numbers since the Polau and camera weigh about 3g, and yours came out just above 7g including those parts. PDB already has a reg, but I think it's getting close to capacity, so I wouldn't power a 200mw module off that, where as the camera and OSD, I could.

To put in perspective, swapping out the frame dropped nearly 35g for under $20 -- leave off the buzzer and we're 45g lighter. Weight checks were made all along the way (it was done at this stage, but I was tired last night to re-weigh everything for a pic) and the trimming in frame weight upfront more than made up for it. From here on out, weight was watched, but more to make me happy than to worry ;)

If I'd been a bit more observant with options or sized the battery before I ordered it, I'd have bought the motor-pack and PDB from RCX and gotten the grasshopper frame directly. In fairness, getting "everything but the frame" in that kit was only $2 more than than buying the motor pack and the add-on parts separately, so that big bit of carbon didn't cost me *that* much.

Oh! thank's for the lens spec! I'm happy with the 120o lens on mine, but others might not care for the fisheye. That'd be good to pass along.

BTW -- just curious -- how are you switching channels on yours? fixed, or did you put something else in?
 

Bricks

Legendary member
For my Hubsan I did not put in a dip switch to control channels as that would of added weight. For me flying this mostly indoors I went with the wide angle lens coming in at roughly 7-8 grams it did not seem to affect my Hubsan at all. What I liked about using the Palulu was the filtering of power very clean FPV. Adding the Polulu this can be set up as an FPV system to be moved from Quad to Plane or what ever trips your trigger with a simple JST connector.

Edited to add Very nice build by the way working on these small quads can be tricky with limited space. Good Soldering pays off on these little buggers as bad soldering can add a bunch of weight..
 

Flat4

Senior Member
Looking good! I'm really interested to see your thoughts on those motors once you get them in the air.

I have a diatone blade 150 built with 1104 motors, but I've never been very happy with it. At 104 grams auw, it feels like flying a feather. I was hoping to be able to fly it indoors, but it's a bit too fast. It's fine outside, but again with that low auw it has no momentum in the air. Very weird to fly coming from more powerful, heavier builds.

I'm thinking about slapping those 1407's on, bump it up to 4s, and maybe switch out the frame. I'd also love to get a real fpv camera in it as well. For what they are those tiny 3g cameras are quite impressive, but the light handling qualities of them leave a lot to be desired.
 

makattack

Winter is coming
Moderator
Mentor
Very awesomely cool project documentation Dan! I've a few friends around me who are keen on building and flying these micro brushless quads, but the whole squeezing things into tiny packages thing has be twitching and spasming in dread due to my general inelegance with building.

Still, it's great for me to follow along with your journey. One point I can contribute with is the minimOSD you are using. I'm using a similar sized one with the 5V common power setup for both the digital (telemetry input) and analog (video) sides. It's great because it's small, and while it runs cooler than the original minimOSD, it still runs a little warm for my liking. Also, be wary of the RF noise that comes from that tiny bugger. It shouldn't affect the VTX nor RC RX too much, but with such a cramped setup, I'm not sure. I know it can play havoc with GPS receivers.

So, my recommendations: make sure it's not buried / sandwiched with other electronics, and shield or mount it away from RF sensitive stuff if you see weird behavior.
 

Craftydan

Hostage Taker of Quads
Staff member
Moderator
Mentor
So, my recommendations: make sure it's not buried / sandwiched with other electronics, and shield or mount it away from RF sensitive stuff if you see weird behavior.

Yeah, I'm using the micro Minim . . . and it is TINY.

As far as the mount . . . um . . . too late . . . but more on that later . . .
 

Craftydan

Hostage Taker of Quads
Staff member
Moderator
Mentor
. . . and back to your regularly scheduled build, already in progress . . .

Building Power . . .

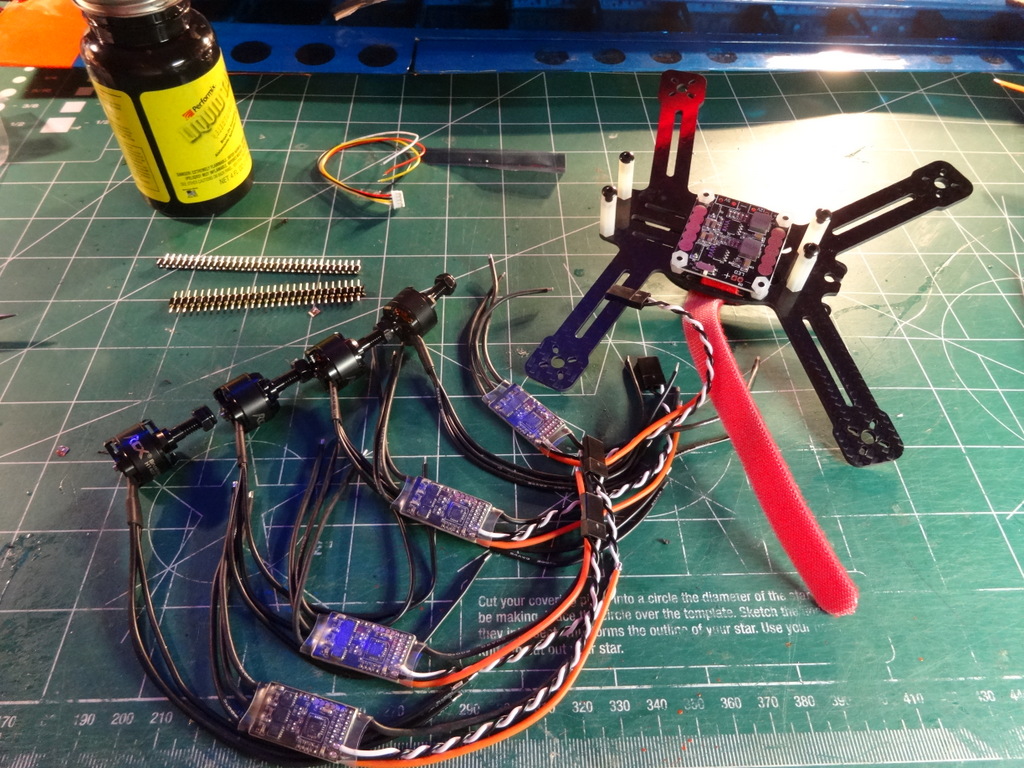
So last we left off, we planned where everything should go, and divided the parts between a power deck and control deck. We're gonna start with the power deck, connecting the motors and ESCs, cleanup the PDB, and solder it all together, testing as we go . . .

DSC02913.JPG

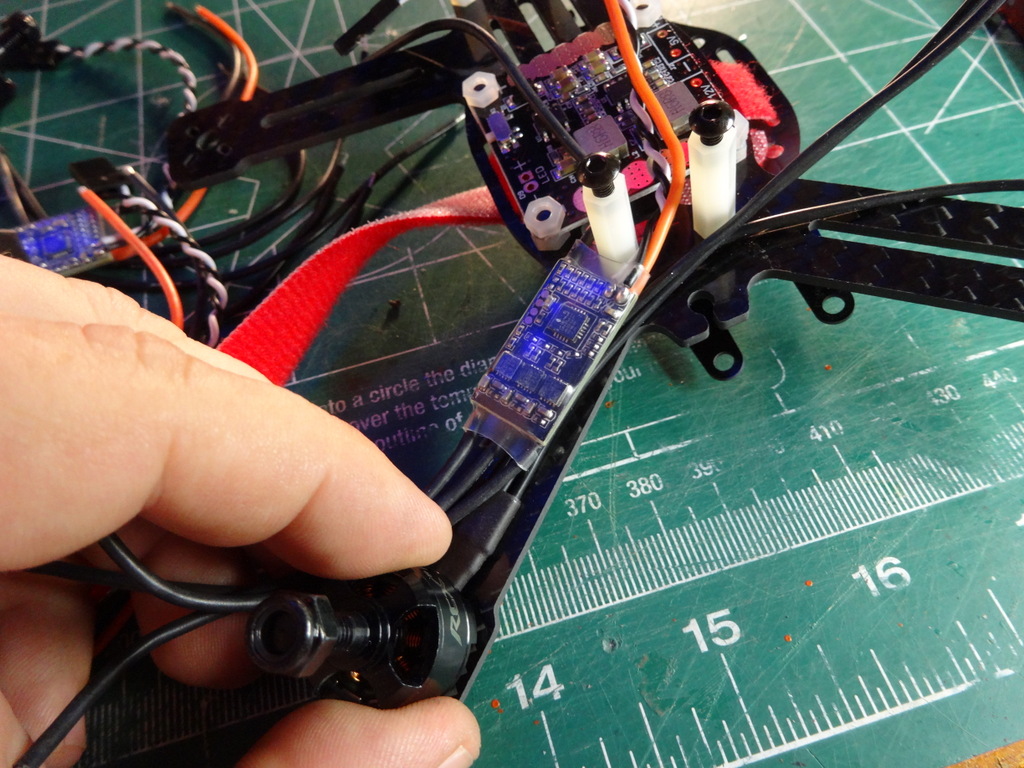
So first we layout the motor and ESC pair and see how much we trim . . .

DSC02915.JPG

Okay, we trim a LOT.

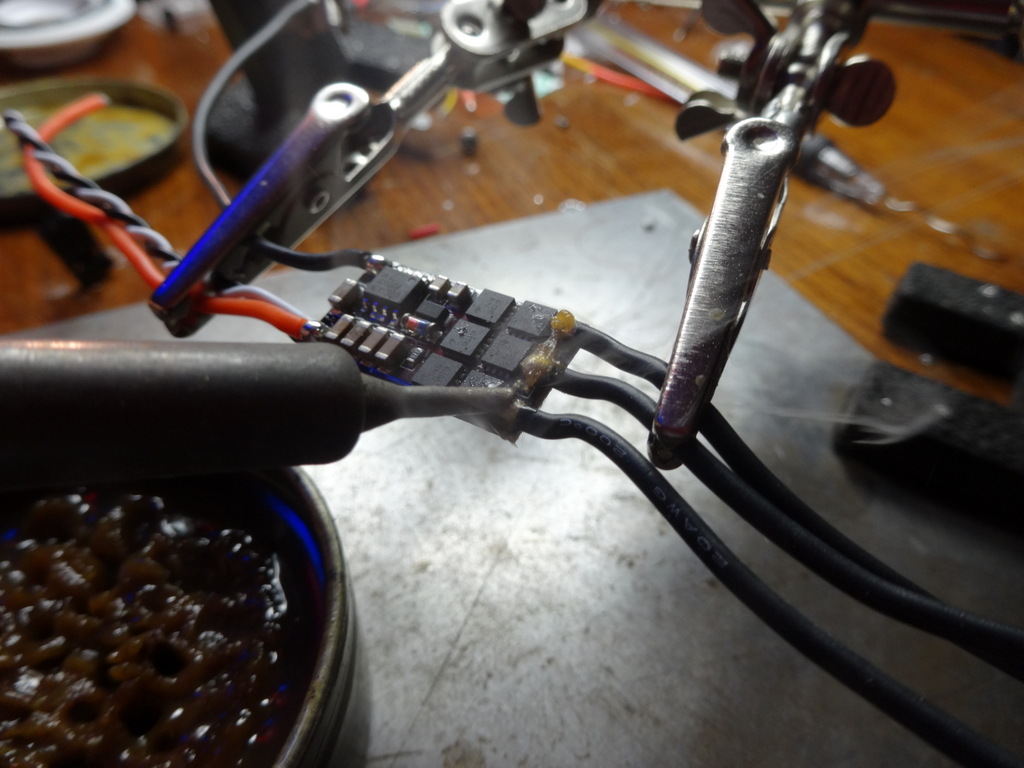
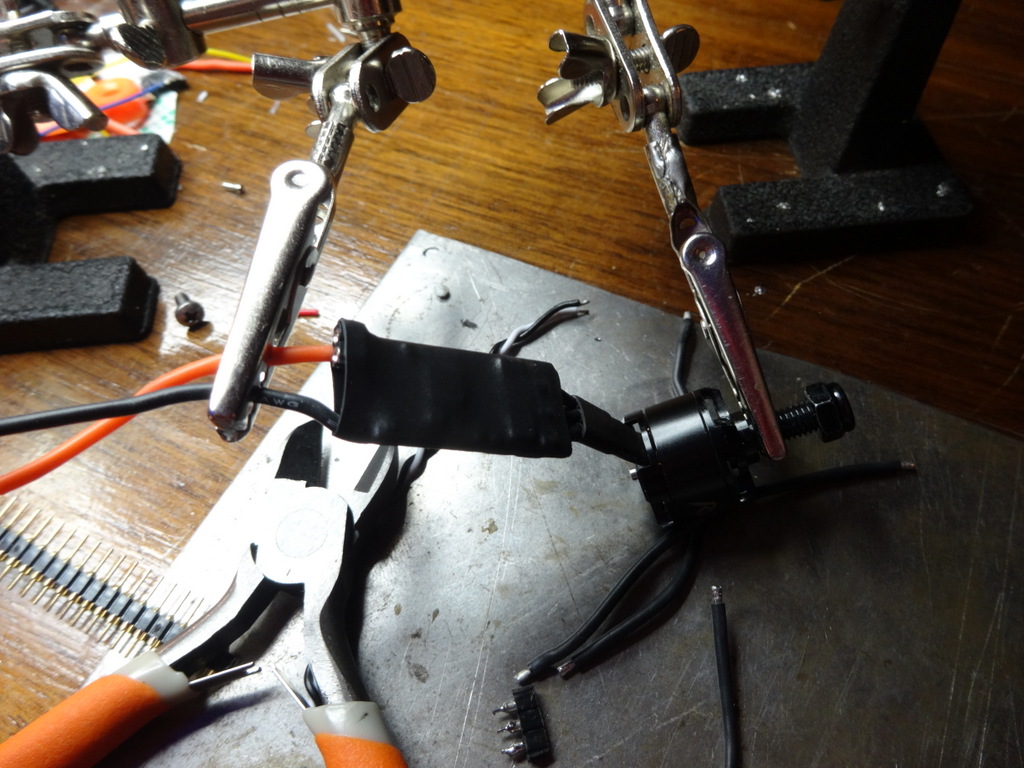
not much room there, so no choice but direct solder -- not a surprise at this scale. Strip her naked and get her in the clamps:

DSC02919.JPG

A touch of solder paste, a dab of heat, and a gentle twist on the wire (don't want to pull up the pad, after all) . . . and the wires are free.

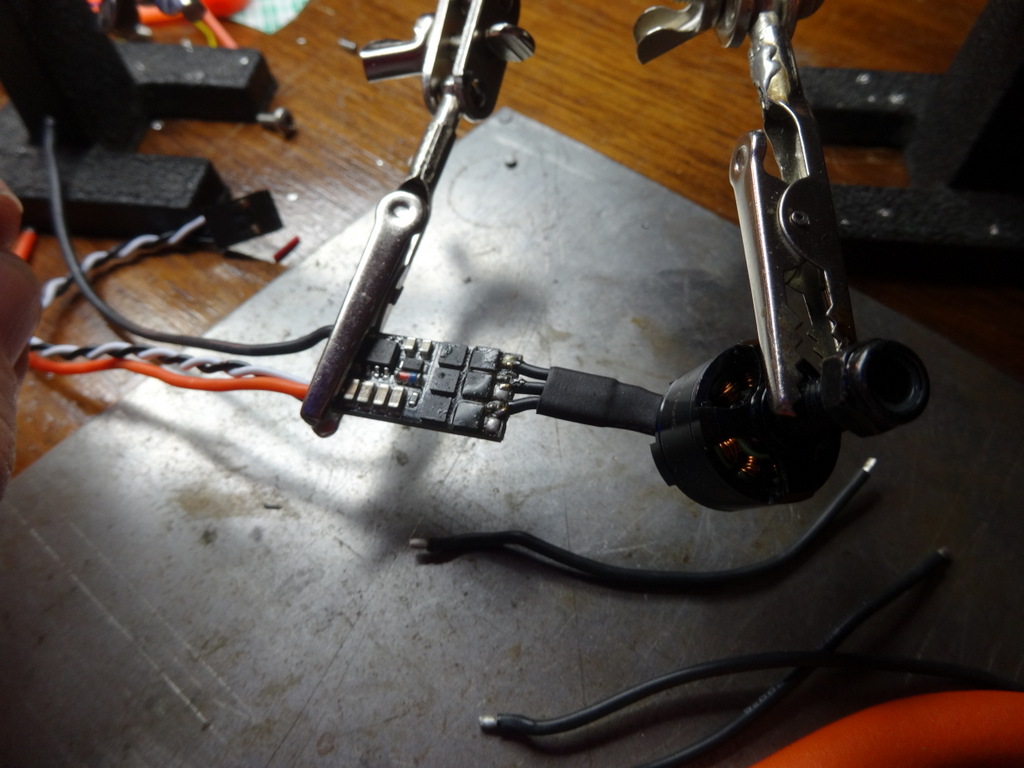
trim the motor leads to almost nothing (spread before you cut -- the middle one needs to be just a touch shorter than the outer two), then tin . . . now let's see what we have:

DSC02922.JPG

Spacing is good.

now which way? we *could* flip every other one to give each motor a natural CW/CCW spin, but I have the benefit of hind-sight on this build, so I'm going to skip it -- you won't believe how easy it is to flash these ESCs . . . more on that later . . .

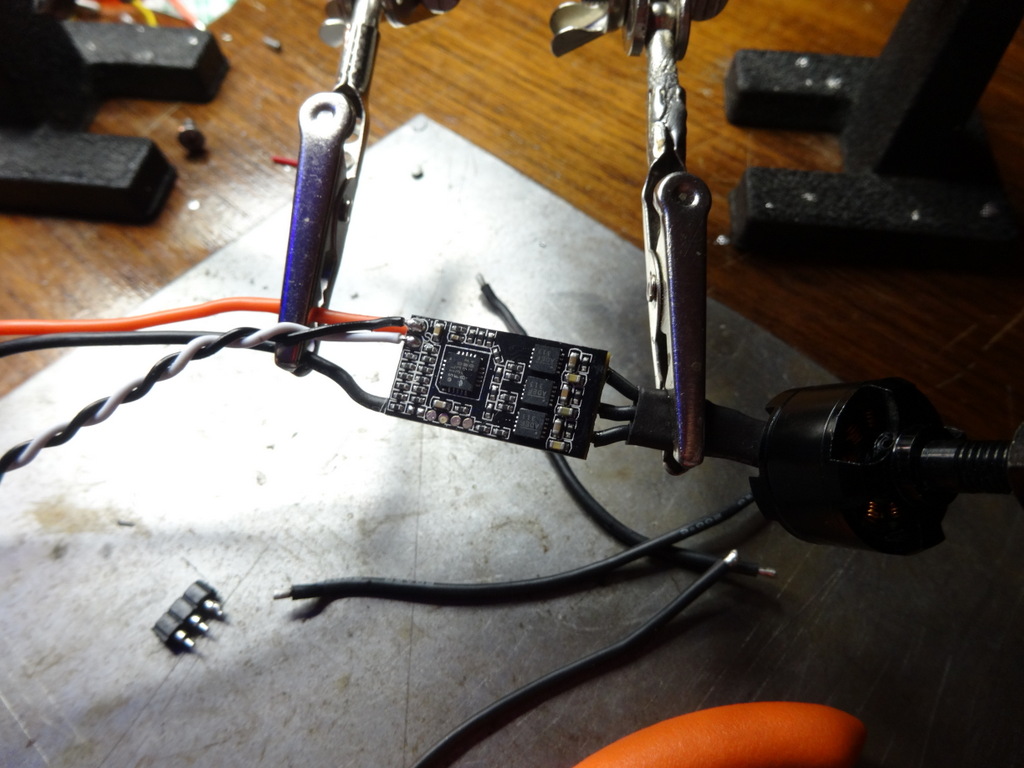
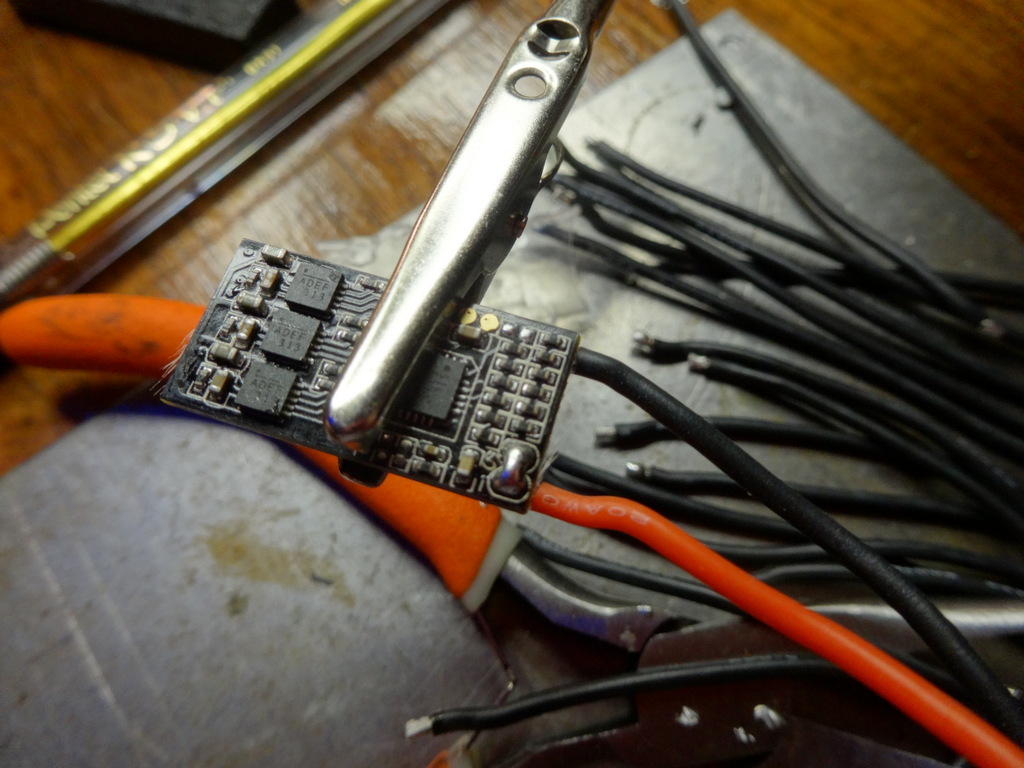
So which way do I prefer it? Processor Up or down?

I'm going Processor Up:

DSC02925.JPG

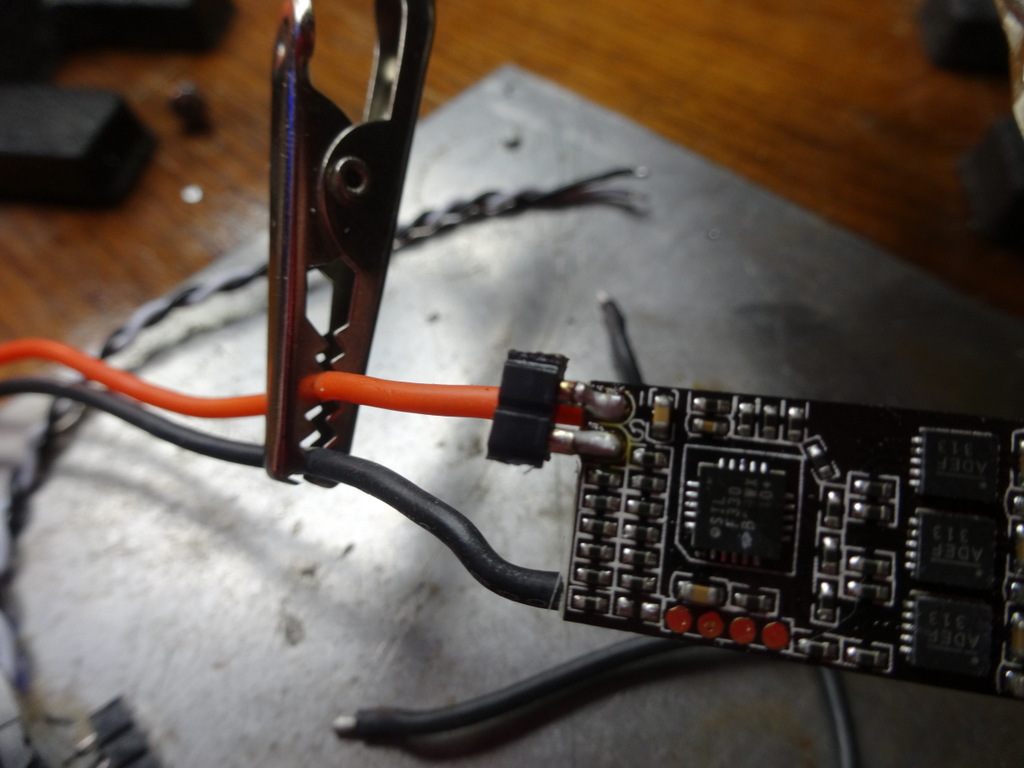
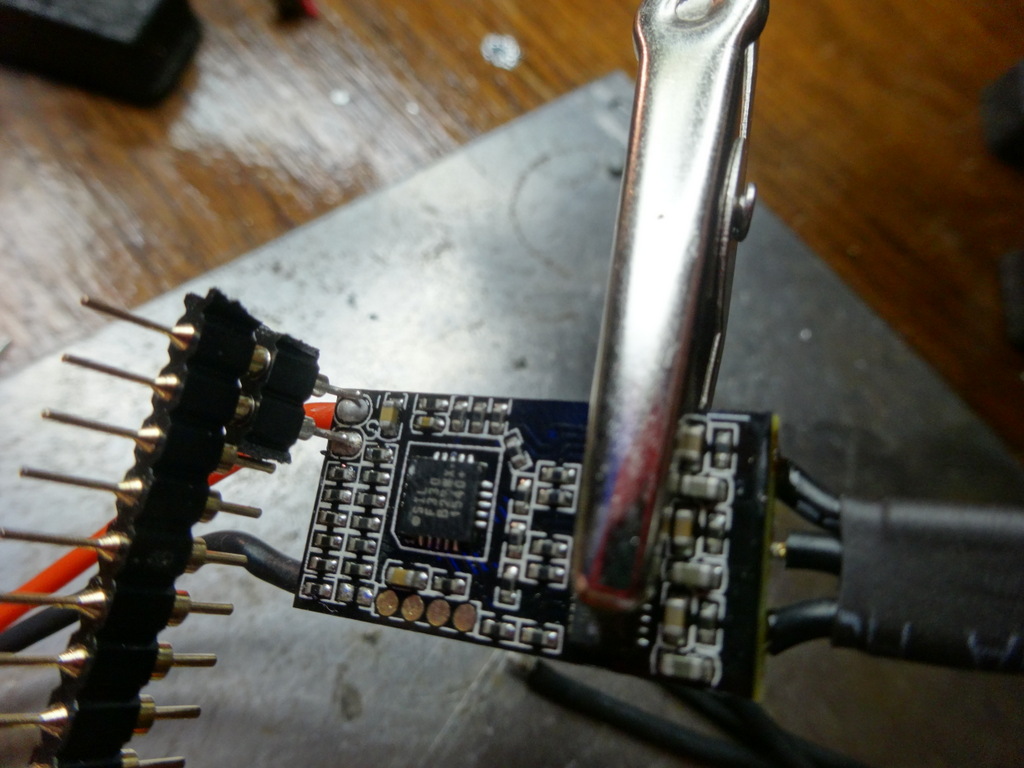
Why?!? At 10A draw, I don't expect the motors to burden the FETs that badly, and more importantly, I want the signal leads out on the top . . . because they gotta go!

DSC02927.JPG

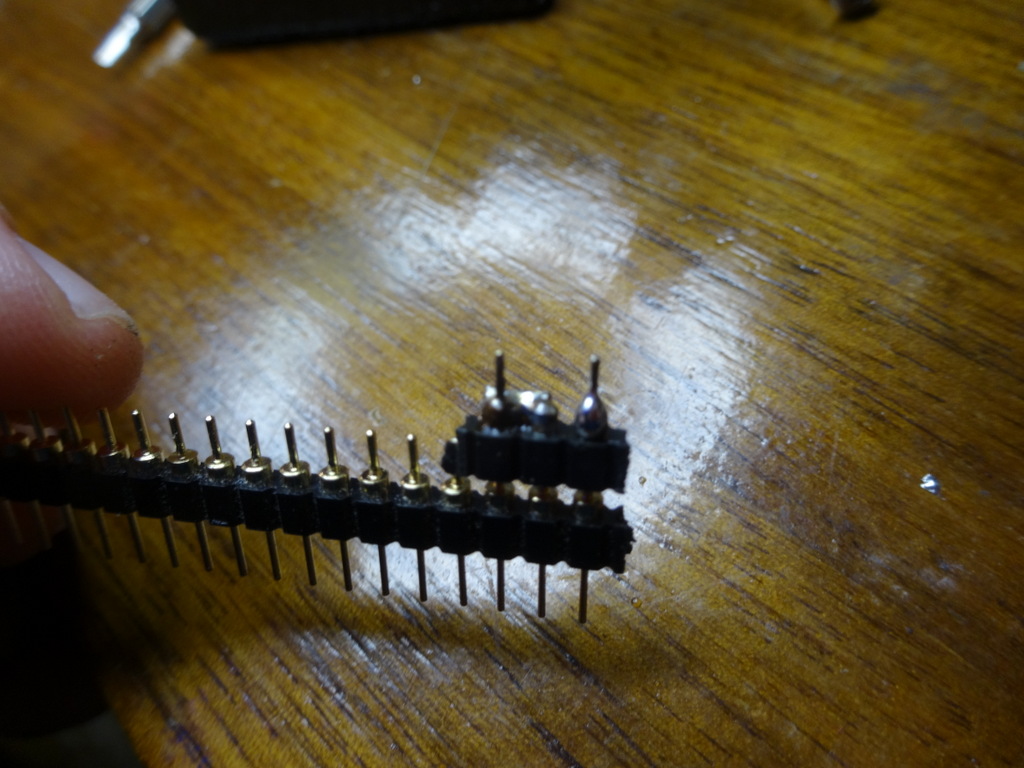
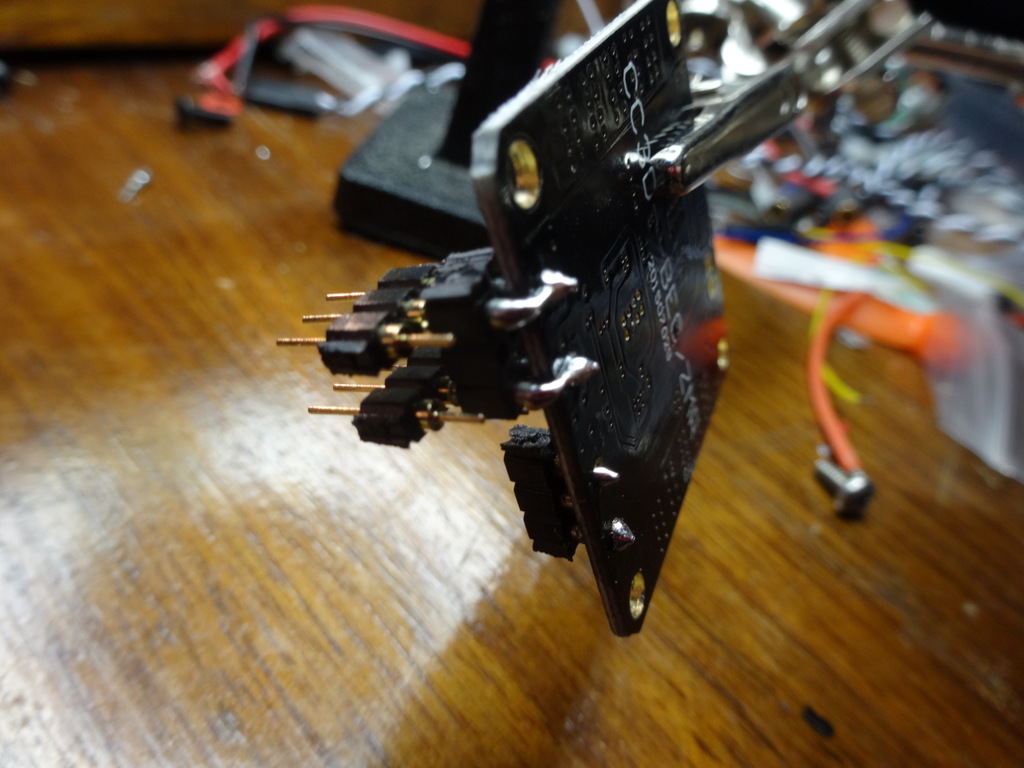
I've replaced it with a low-profile milled connector, and I'll plug the ESC into a harness from there. normally the plug goes on the control board, but I'm going to hard-solder to the board, and trim the harness to fit to the ESC.

Wrapped up in some shrink-wrap and on to the next!!!

DSC02928.JPG

The only minor headache is the rear pair need a bent connector because the rear post sits between the ESC power wires

DSC02929.JPG

This also requires a notch cut in the shrink-wrap for the connector to bend up.

And Disaster strikes!!!!

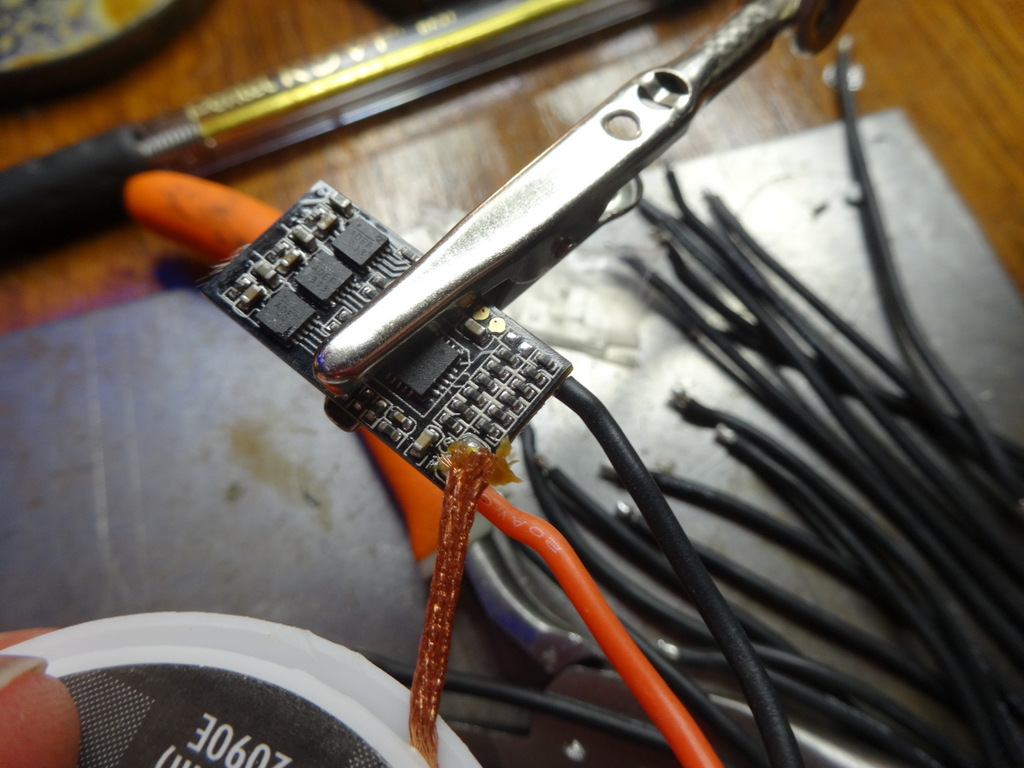
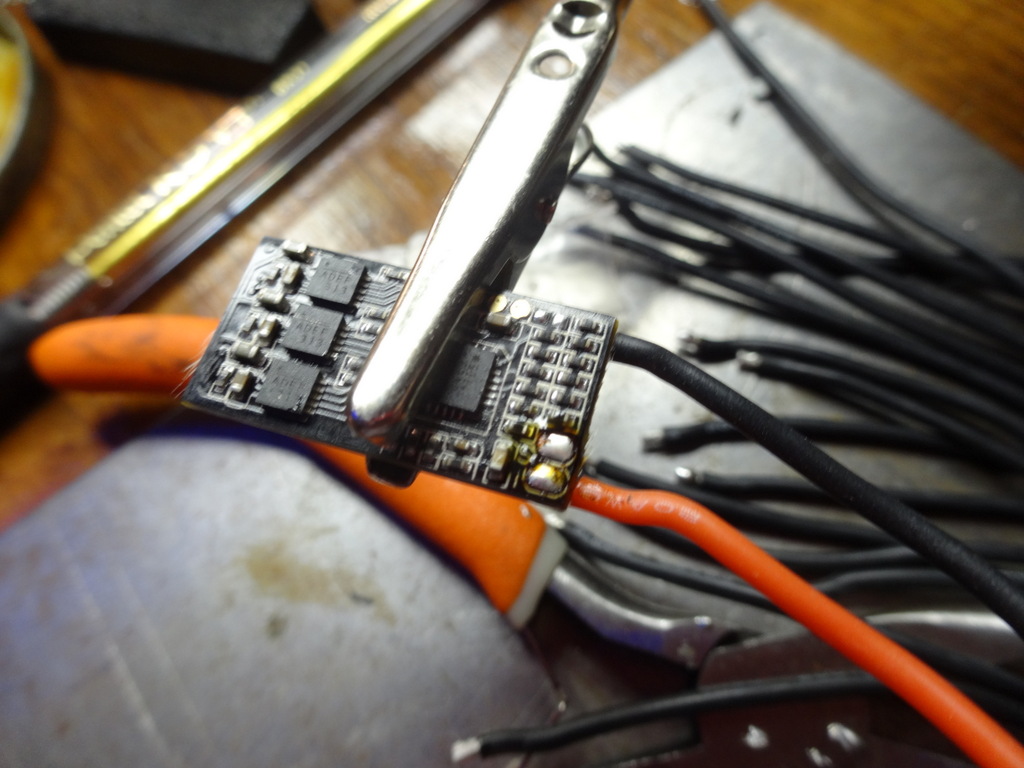
. . . and somewhere around the 6th motor, a little too much solder . . . and the contacts are bridged :eek:

DSC02930.JPG

Not a hard fix, with the right tools. Add a dab of flux, pull out the solder braid . . .

DSC02931.JPG

A touch of heat and Viola! clean and ready for a new connector :)

DSC02933.JPG

Motors and ESCs are together, so moving on to . . .

UBECs and other Polarizing Issues

While building this up, in real-time I've been tuning the first quad, cleaning up harnesses that I didn't like the first cut of, and generally tweaking. one of the harnesses I've rebulit was for the OSD -- it was sharing the bus with the Naze and browning out about the time the battery reached 2/3 full :p While soldering it up I reversed a plug and burnt out m camera! not good. I need to make these connections damage resistant -- if it can be plugged in backwards and cause harm, make it hard to do wrong.

Camera issue was solved (more on that later) but the other place it could bite the future owner would be the power connector for the VTX and the 5v power for the Naze and OSD. For the VTX . . . I have two connections. a filtered/12v regulated plug at 200mil spacing and a switched battery connection at 100-mil spacing. I want to leave both as options for the VTX . . . so . . .

DSC02936.JPG

a 3-pin connector (100-mil spaced) with the center pin on either grounded, and the outer pin on one side connected to power. plug it in backwards, and the VTX's connections are all grounded without power -- no harm done:

On the 5v side, since I have two connectors, back to back (and again, 200mil spacing on the PDB :p ) I stacked them side-by side, and I'll connect the plugs together by liquid electricians tape.

DSC02937.JPG

It'll be a pretty stout harness, so it'll be difficult to plug in backwards, since it won't have much give.

All power connections done. Tin the ESC pads and time to power the ESCs . . .

DSC02938.JPG


The leg bones connected to the hip bone . . .


Cut, strip, tin, join.

Add on an umbilical cord (a cute little JST that will stand in until I wire in the honkin' XT-60)

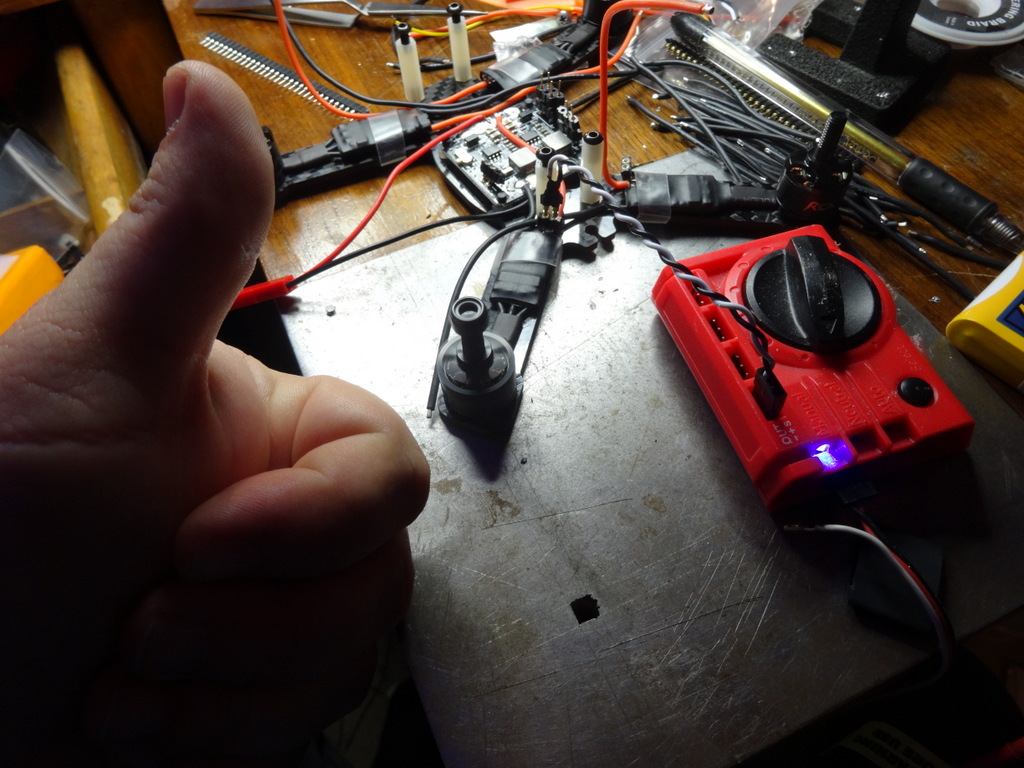
TEST.

DSC02940.JPG

SUCCESS!!! I now have a monocopter :)


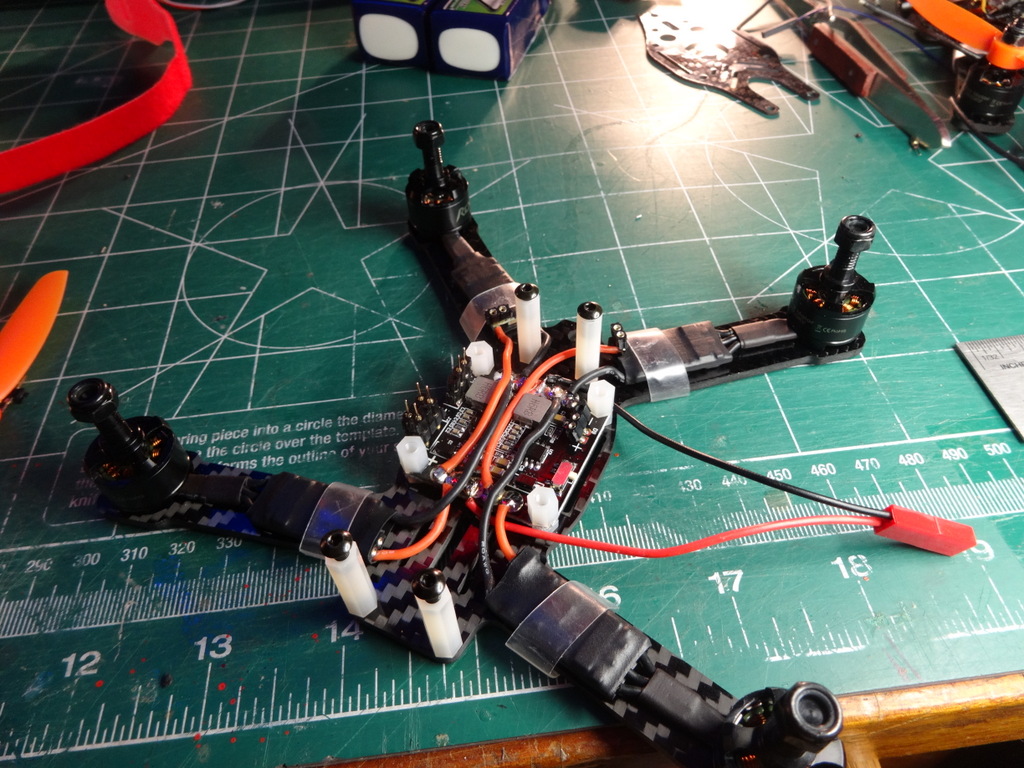
Repeat, repeat, repeat . . . and it may be a bit of a worm-pile, but it's all laid out:

DSC02941.JPG

DISASTER STRIKES AGAIN!!!

. . . so I'm repeating (on the second quad), and wouldn't you know it, the last ESC . . .

NO response. It beeps on power-up, but won't spin-up with the servo tester. it's powered, but no signal is getting in.

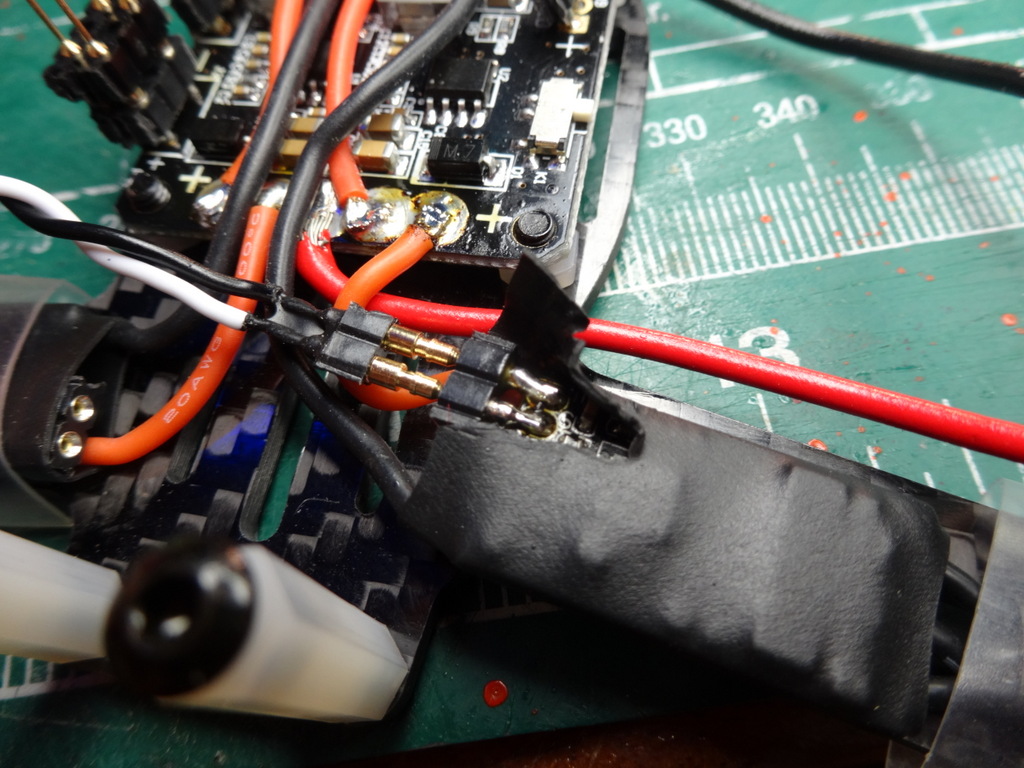
*sigh* This is why we test at every opportunity. Time to strip her. Open the shrink wrap a bit, and sure enough, the signal contact wasn't actually soldered.

DSC02942.JPG

D'Oh!!!!

Re-solder, connect test . . . SUCCESS!!!!

. . . .and desloder the power leads so I can re-shrink-wrap her :p

and short of the XT-60, the power deck is done!!!

Once again in Real time . . .

. . . and that's two power decks complete :)

DSC02943.JPG

Now that the power decks are done, time to get into the more delicate electronics. Next comes the Naze board and the Sat RX . . .
 
Last edited:

AdamV

New member
Thanks for posting your build, Dan! I've decided to build along with you on this, so i've ordered everything the same, except for the flight controller. MyRCmart was out of the mini naze, so i went the impulseRC tornado because i'm curious to try something new and the price (if not weight) was comparable by the time i would have got a FDTI adapter to program it. - Otherwise my build will be identical. That frame is back in stock on banggood in the US too.

I still need to order props and appropriate batteries - i was thinking 4045 or 4030 props? Seems like the BN props get too hot

But i'm not sure what the best battery choice would be.

Thrust Tests seem to imply the motor/esc chosen could even support 4s?
 
Last edited:

Craftydan

Hostage Taker of Quads
Staff member
Moderator
Mentor
Thurmond,

That's mostly there, but add on their FPV kit and you're over $250. Without the FPV it's not worth it -- these tiny overpowered beasts make for piss-poor LOS machines, bouncing very quickly through their "visual range" bubble. You could trim a bit and self-source the gear (assuming you could get it and keep the shipped cost under the wire) but the $250 isn't a goal, it's a limit. Any extra cost pushes you away from ideal (cheap) and has to have a corresponding benefit. 1104's on a 122mm frame? Cute? Sure. Worth the premium? I dunno about that.


Adam,

Brave man!!! We'll see the wisdom of following me on this crack-pot venture, but welcome along ;)

Looks like a nice little F3 board -- might be a touch heavier than mine, but should be well within bounds. You will need longer or other screws to mount it -- you could either mount it above the PDB (longer screws), but you'll have to push your PDB connectors out the sides, or just mount it to the top plate (extra screws). FYI, the hardware in the grasshopper kit is all M3 -- you'll need a 2mm hex key for it. the motors need a 1.5mm hex key for their screws, and they fit the grasshopper frame perfectly.

For you, the next section will only loosely follow, since the flight board is different, and the ESC flashing in the section after will not work at all on a Tornado board -- the output stage on the ESC lines prevent it. You can pick up a USB linker module and flash the ESCs one at a time. Not really that hard, but not as simple as you'll see me do it :(


Not sure when I'll get the next section done . . . hopefully tomorrow. I got through 80% of the work last night on the next part and I pulled up a trace . . . grrr . . . Then while inspecting it, had the frame on my desk lamp break. I can take a hint when it's time to call it a night.

Took the night off to ponder the best way to recover. I've got a shindig tonight, so not sure I can affect the repair afterwards. Get'er done and I'll post up the Naze and Sat install and setup.