*Unofficial* Mini SE5 Biplane

Bobthestickman

New member
Thanks! The plans say to put the CG on the crease of the top wing but when I try to measure it from there the plane seems to hang completely flat even when I slide the battery all the forwards or backwards.
 

TooJung2Die

Master member
During the SE5 maiden flight I commented, "This is NOT a beginner airplane!" With it's short distance from tail to wing and large control surfaces control inputs are exaggerated. It's "short coupled". The rudder has a lot of authority and banks the airplane hard when turning. You can roll it over very easily with just the rudder. I suggest you reduce your rates by half of what you have it set for now for first flights. Increase your expo to 50%. Set the CG so the airplane hangs slightly nose down not level. Don't be afraid to add weight, there's plenty of wing area to carry it.

Great looking build by the way!
 

jaredstrees

Well-known member
Totally agree with TooJung, make it slightly nose heavy. Mine would pitch up as well until I added a little weight in the nose. Mine's overweight quite a bit from the plans, but even in a slight wind I can almost park it in the sky. You may need to trim your elevator a little as well to compensate. Good luck, this plane is really fun when you learn it!
 

rockyboy

Skill Collector
Mentor
Welcome to the forums Bob! :applause:

Love the look of that SE5a - nicely done sir!

While I haven't built that model specifically yet, when having CG troubles there is a way to work it out without going back to the plans. Glide testing.

The idea is put the battery and everything else into the airframe and go over to that lovely soft tall grass. Then give a medium-strong ish level toss from about shoulder height. If it stalls (i.e. nose up) at any point on the way to the ground, she's tail heavy. If it points down to the ground that's the opposite of course. The goal is for it to basically stay with wings and fuselage level on the way to the ground. Lather, rinse, and repeat moving things around (or if necessary adding weight) until it acts more like an airplane and less like a tossed set of car keys. :)
 

TooJung2Die

Master member
While I haven't built that model specifically yet, when having CG troubles there is a way to work it out without going back to the plans. Glide testing.

Great advice! Glide testing will reveal a lot of problems before flying under power.

I admit often overlook this step when building proven FT designs but when something goes wonky on the maiden then glide testing is the way to go to work things out before the next flight. I always glide test my original airplane designs.

Jon
 

Bobthestickman

New member
Wow thanks for all the replies everybody!

I remade the powerpod and mounted it with the firewall in line with the front of the plane, then I taped a coin to the end of the battery for a little nose weight. It flew much nicer this time, stable in pitch and none of the wing wobble that seems to have spoiled other peoples experiences.

Unfortunately it required a lot of right rudder to fly straight, I think this was because my foam board was badly warped giving me giving warped wings, after a nice little flight this got the better of me and as I came back towards myself I ran out of talent and stuffed it into the ground breaking those ohh so fragile wing struts.

I cut the top wing off and I'm going to remake it with the warp going the other way and see if this cancels out the warp in the lower wing. But until then thanks for all the kind responses.

IMG_3587.JPG
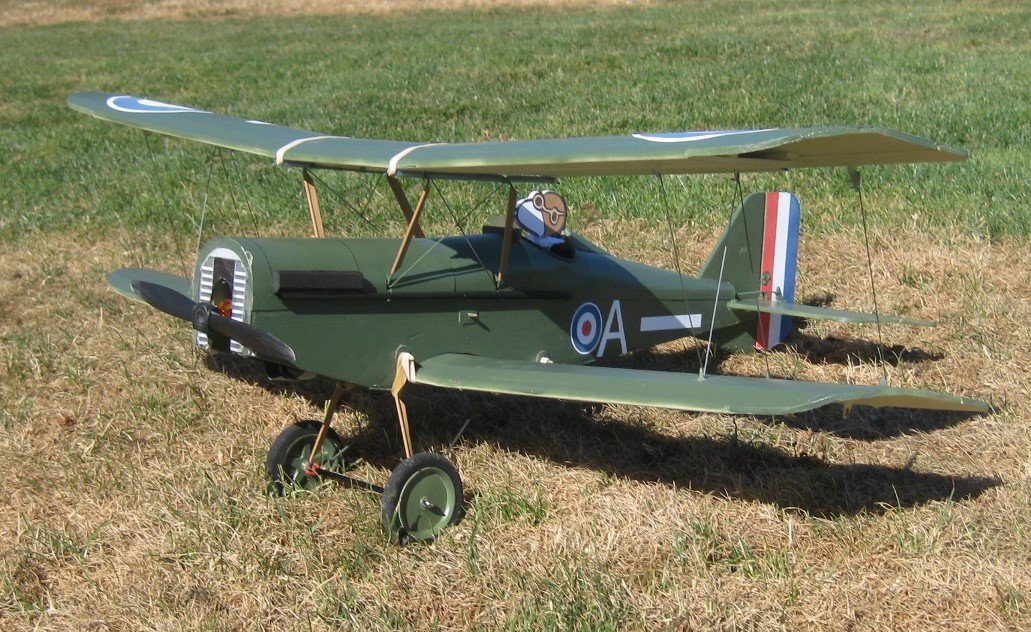
My even sadder looking SE5

IMG_3588[1].JPG
One badly warped wing
 

rockyboy

Skill Collector
Mentor
Yeah, that's a bit out of whack!

I've heard of people having luck with heat to rewarp it in a positive way :) If you use the wife's iron, make sure to use a thin towel or wax paper to prevent getting paint on the iron. Ask me how I know. :black_eyed:
 

NorfolknGood

New member
Superb little things, what Lipo's are everyone using and their physical size please? Also what size piano wire for undercart and for pushrods. I'm a newbie to foamies my last build was a 1/3rd Sopwtih Pup!
 

docque

Active member
Superb little things, what Lipo's are everyone using and their physical size please? Also what size piano wire for undercart and for pushrods. I'm a newbie to foamies my last build was a 1/3rd Sopwtih Pup!
I would like to know that too. I got a battery that was only 50 mah more and it was too big for the plane. My little guy has been sitting on the shelf for months.
 

Jhdgkss

New member
Hi there. I have just purchased this kit, and i am really looking forward building it.
I am looking to build the attached livery snoopy included.
Does and one have any tips.
And are there any decal sheet for this livery plus recommended paint colours?
Also i want to add ailerons using standard micro servos, is there an official mod out there for this?
 

Attachments

  • flitetest_se5_ft4123_3.jpg
    flitetest_se5_ft4123_3.jpg
    54.5 KB · Views: 0
  • se5asmallje-jpg_1472679350.jpg
    se5asmallje-jpg_1472679350.jpg
    229.8 KB · Views: 0

TooJung2Die

Master member
Rasterize made a full set of "skins" for the SE5 like post #173 above. SE5 SKIN Use them as is or scavenge the parts of the image you want to use.
SE5 is usually painted a dark olive green with a light color underneath. I copied livery images I found on the web and printed them on label stock. Just peel'em and stick'em.