what is the slowest plane on FT

Rasterize

Maker of skins and decals for foam board RC planes
Moderator
Mentor
Progress! ....and a really long post.
The only part I think there may be questions on is the following: This is what I call the Power Pod Cradle or the PPC.
There are two sides and a bridge. This is how it looks in the plans:
PP Cradel.jpg


Each side of the PPC is made up of three pieces for 6 total. Here is what the pieces should look like cut out. Note the red outline on the far right piece. This area has the foam removed per the plans. It has also been pre folded with the two pieces to it's left. The red arrow at the bottom points to the crease line. This paper will wrap each side so when you insert the power pod there is nothing for it to get hung up on.

PP1.jpg


The third and final piece of the PPC is the PPC Bridge seen below with a standard C Pack Powerpod. The PPC Bridge will span the two fuse halfs providing dimension and strength (tabs sticking out the edges key into the fuse). The sides above will be glued onto it's edges (they key into notches on the sides). There are slots for the power pod to plug into (outlined in red).

PP2.jpg


Here is the Power Pod sitting in position on the bridge with the C fold completed. Below it, one side (3 pieces) has been glued together. The edge wrap has yet to be glued in position.

PP3.jpg


One side has been glued in position. The other side has been assembled and the flap is glued down. Make sure you don't accidently glue the power pod in the cradle!

PP5.jpg

Second side ready to be glued in position. Note how the open sides go to the outside, away from the power pod.

PP6.jpg


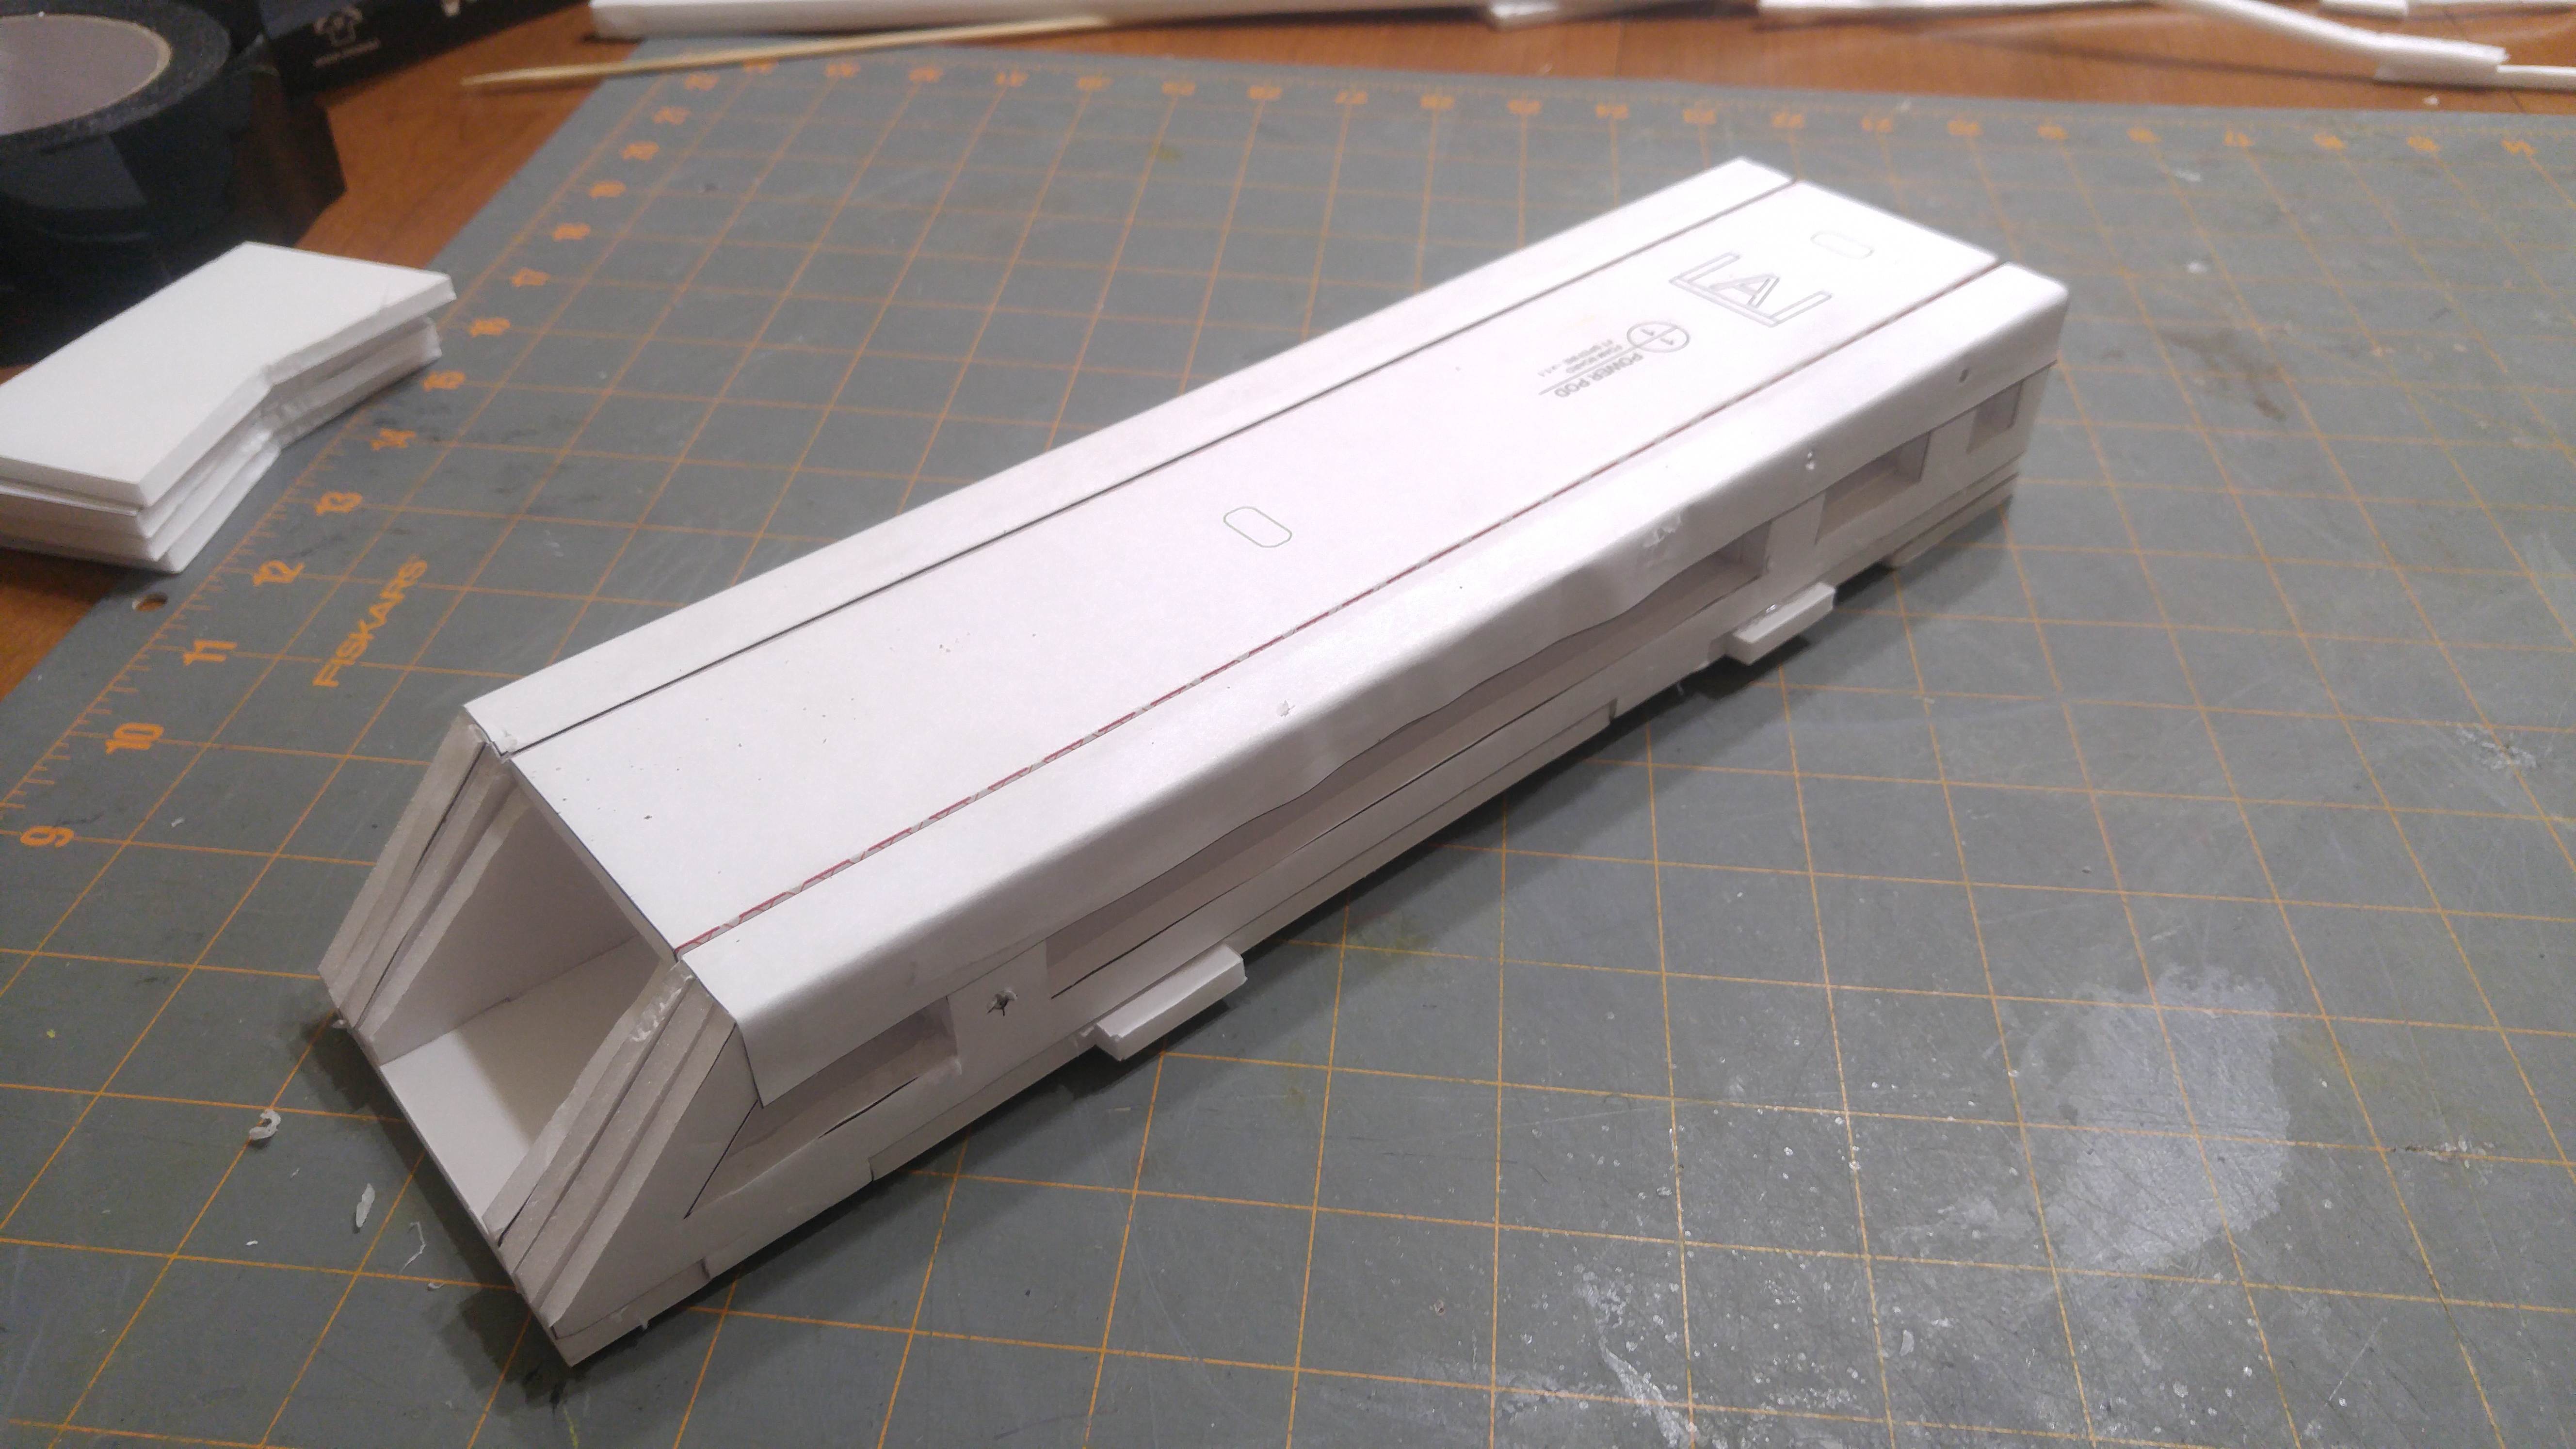
Cradle with power pod assembled.

20191026_150234.jpg


Power pod should easily slide from the cradle.

PP7.jpg


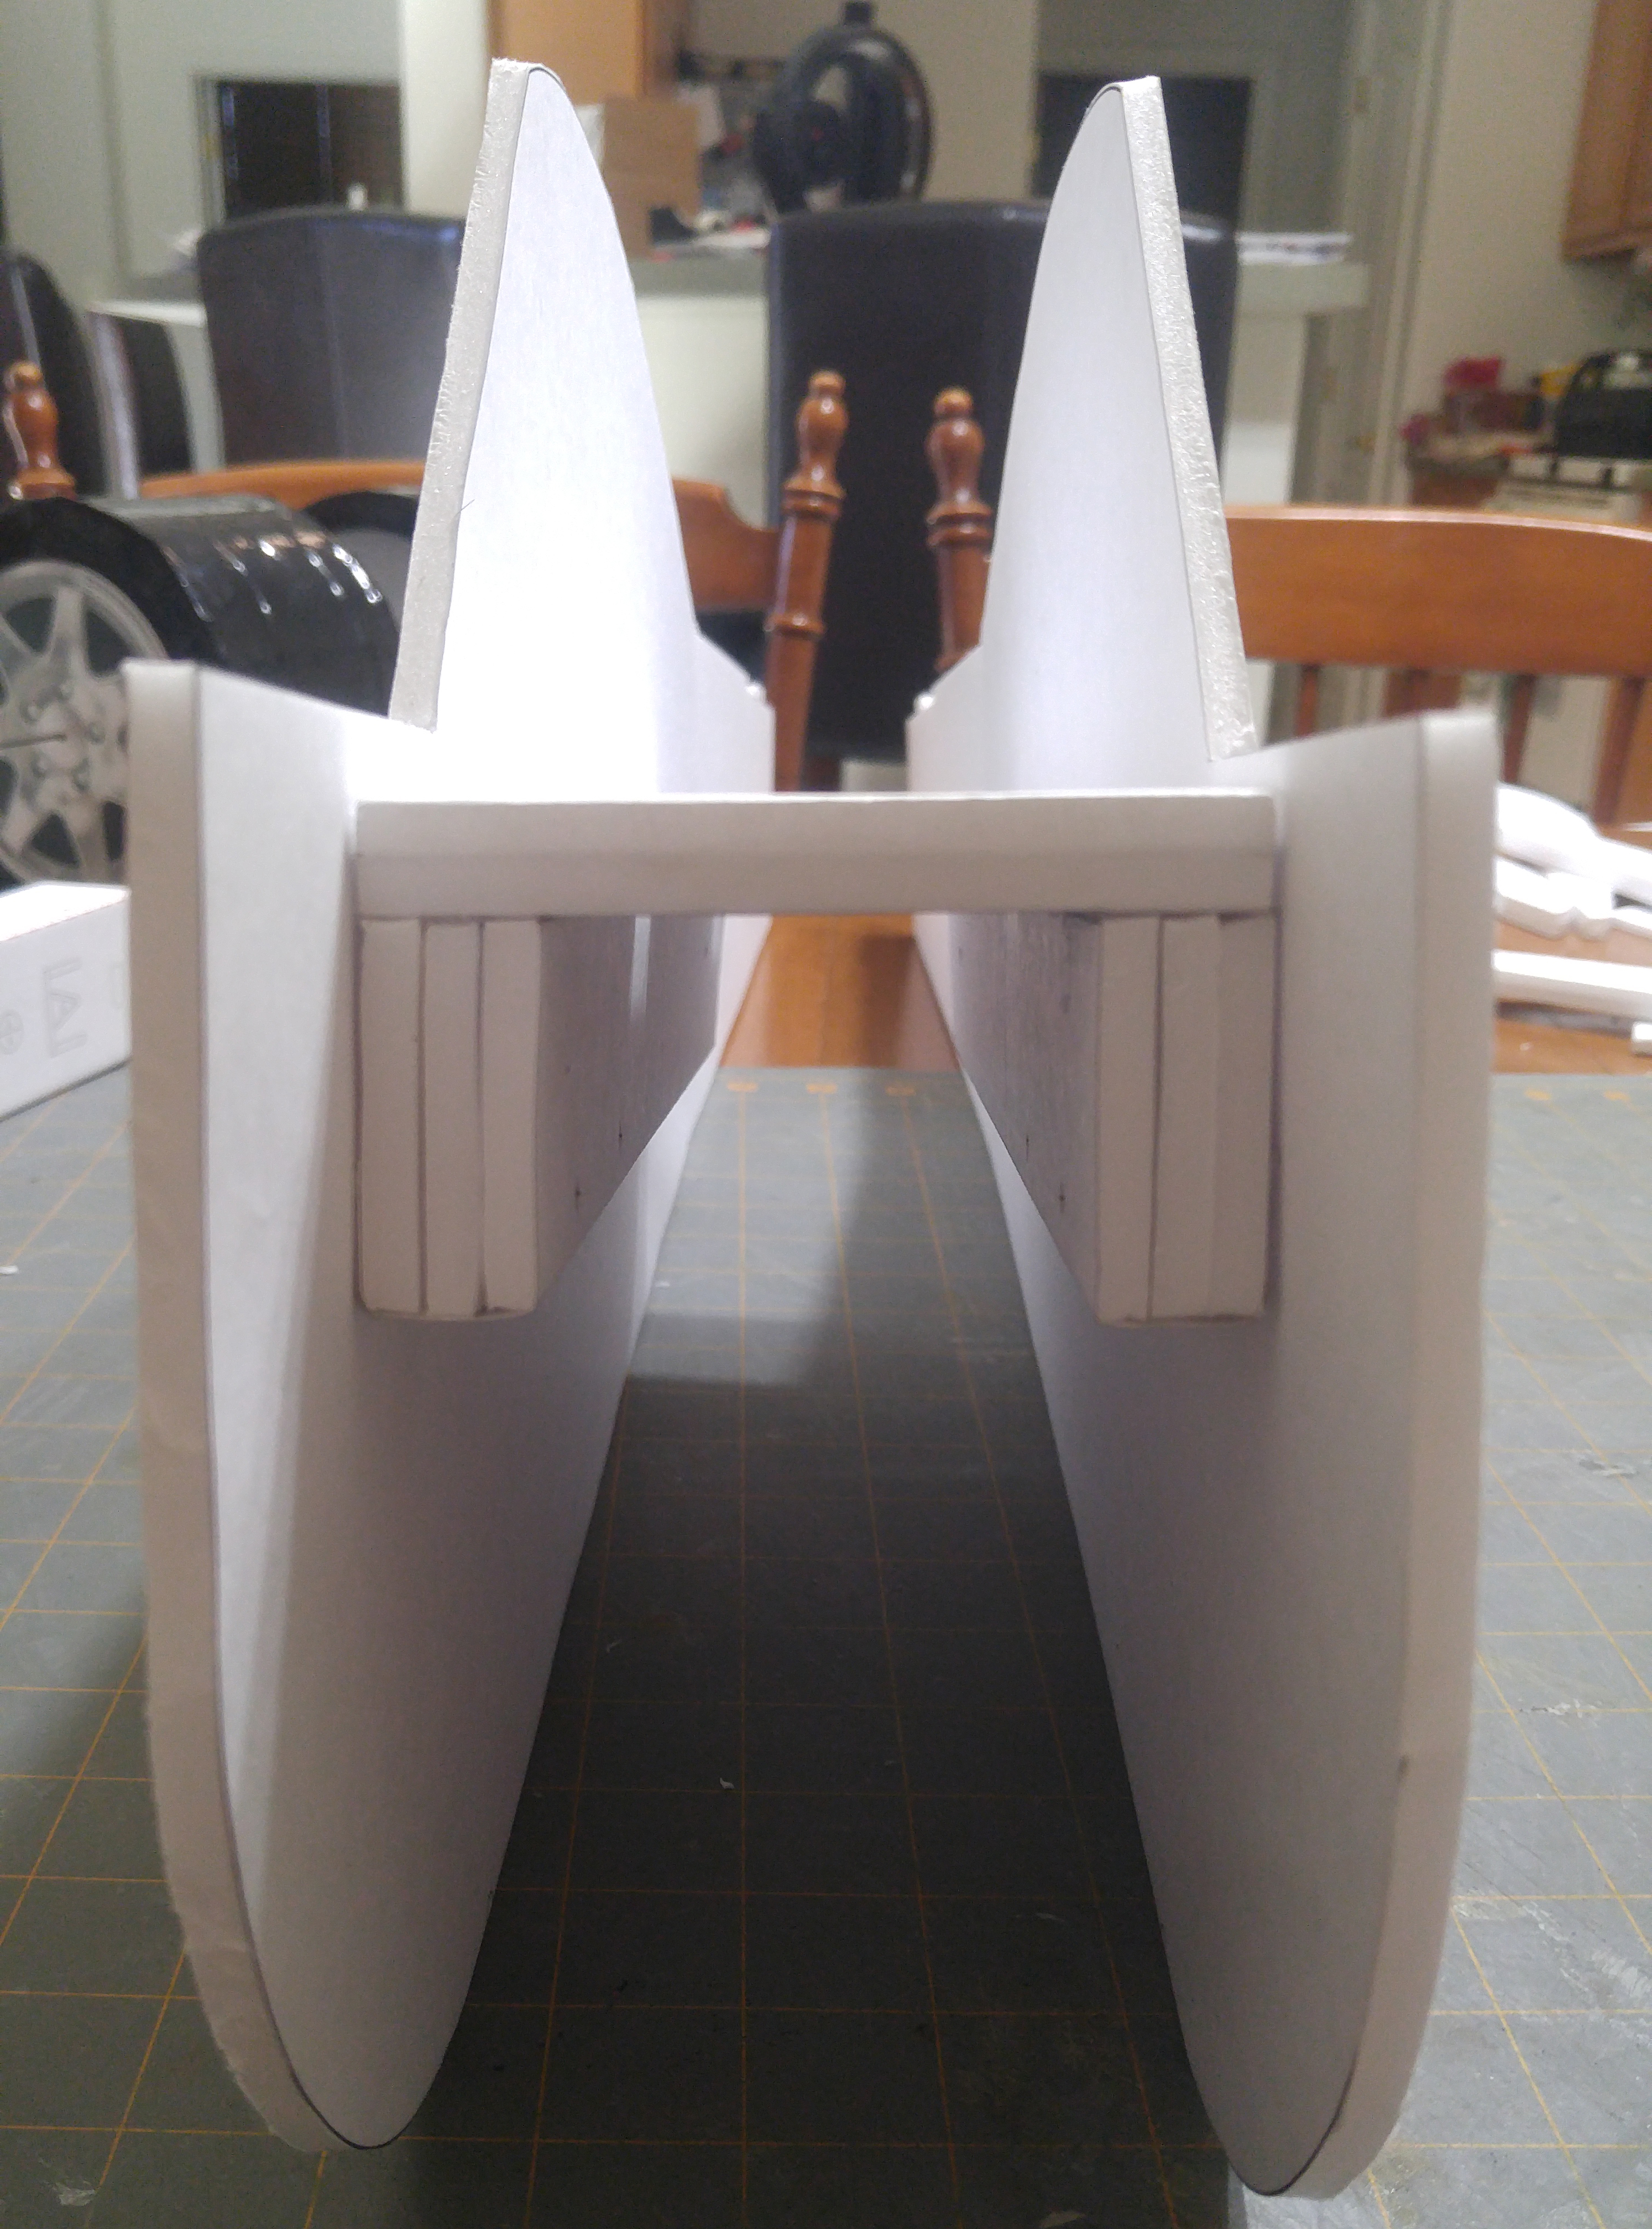
Tabs on the side of the cradle will then key into slots on the fuse. Slots (in red) have yet to be cut.

PP8.jpg


Once the cradle is glued to the first fuse side, it would be a good time to make your skewer holes for that side.

PP9.jpg


Cradle installed (sans powerpod). The rest is just fuse panels and wings!
PP10.jpg


Clear as mud? Goooood.... :)
 
Last edited:

buzzbomb

I know nothing!
Progress! ....and a really long post.
The only part I think there may be questions on is the following: This is what call the Power Pod Cradle or the PPC.
There are two sides and a bridge. This is how it looks in the plans:
View attachment 146671


Each side of the PPC is made up of three pieces for 6 total. Here is what the pieces should look like cut out. Note the red outline on the far right piece. This area has the foam removed per the plans. It has also been pre folded with the two pieces to it's left. The red arrow at the bottom points to the crease line. This paper will wrap each side so when you insert the power pod there is nothing for it to get hung up on.
View attachment 146660

The third and final piece of the PPC is the PPC Bridge seen below with a standard C Pack Powerpod. The PPC Bridge will span the two fuse halfs providing dimension and strength (tabs sticking out the edges key into the fuse). The sides above will be glued onto it's edges (they key into notches on the sides). There are slots for the power pod to plug into (outlined in red).

View attachment 146661

Here is the Power Pod sitting in position on the bridge with the C fold completed. . Below it, on side (3 pieces) haves been glued together. The wrap has yet to be glued in position.

View attachment 146672

Ones side has been glued in position. The other side has been assembled and the flap is glued down. Make sure you don't accidently glue the power pod in the cradle!

View attachment 146673
Second side ready to be glued in position. Note how the open sides go to the outside, away from the power pod.

View attachment 146674

Cradle with power pod assembled.

View attachment 146675

Power pod should easily slide from the cradle.

View attachment 146676

Tabs on the side of the cradle will then key into slots on the fuse. Slots (in red) have yet to be cut.

View attachment 146677

Once the cradle is glued to the first fuse side, it would be a good time to make your skewer holes for that side.

View attachment 146678

Cradle installed (sans powerpod). The rest is just fuse panels and wings!

View attachment 146679

Clear as mud? Goooood.... :)
Verrrrryyy slick!
 

sundown57

Legendary member
Progress! ....and a really long post.
The only part I think there may be questions on is the following: This is what I call the Power Pod Cradle or the PPC.
There are two sides and a bridge. This is how it looks in the plans:
View attachment 146671


Each side of the PPC is made up of three pieces for 6 total. Here is what the pieces should look like cut out. Note the red outline on the far right piece. This area has the foam removed per the plans. It has also been pre folded with the two pieces to it's left. The red arrow at the bottom points to the crease line. This paper will wrap each side so when you insert the power pod there is nothing for it to get hung up on.

View attachment 146690

The third and final piece of the PPC is the PPC Bridge seen below with a standard C Pack Powerpod. The PPC Bridge will span the two fuse halfs providing dimension and strength (tabs sticking out the edges key into the fuse). The sides above will be glued onto it's edges (they key into notches on the sides). There are slots for the power pod to plug into (outlined in red).

View attachment 146691

Here is the Power Pod sitting in position on the bridge with the C fold completed. Below it, one side (3 pieces) has been glued together. The edge wrap has yet to be glued in position.

View attachment 146672

One side has been glued in position. The other side has been assembled and the flap is glued down. Make sure you don't accidently glue the power pod in the cradle!

View attachment 146673
Second side ready to be glued in position. Note how the open sides go to the outside, away from the power pod.

View attachment 146674

Cradle with power pod assembled.

View attachment 146675

Power pod should easily slide from the cradle.

View attachment 146676

Tabs on the side of the cradle will then key into slots on the fuse. Slots (in red) have yet to be cut.

View attachment 146677

Once the cradle is glued to the first fuse side, it would be a good time to make your skewer holes for that side.

View attachment 146678

Cradle installed (sans powerpod). The rest is just fuse panels and wings!

View attachment 146679

Clear as mud? Goooood.... :)
ill try printing them tonight when I get home.
I wanted to mention an easy and great way to support the wings on larger builds like this is to cut the leading and trailing edge about 1 1/2 inches longer than the plans call for. then score cut them back to where they belong. that way you can run a skewer the full length of the wing both front and back. then you can just roll the paper over the skewer and hide in underneath the wing so it doesn't show. that keeps the leading and trailing edge very straight and strong.
 
Last edited:

sundown57

Legendary member
ok, so this is how I have been cutting the wings and adding the skewer. I do the skewer before I peel the paper or start to roll it. that way I don't get any wrinkles in the edges. and you can see how I leave just a small amount over the edge to tie the string to.
 

Attachments

  • IMG_4296.JPG
    IMG_4296.JPG
    613.6 KB · Views: 0
  • IMG_4298.JPG
    IMG_4298.JPG
    511.6 KB · Views: 0
  • IMG_4299.JPG
    IMG_4299.JPG
    497.4 KB · Views: 0

sundown57

Legendary member
@sundown57 - I was tidying up a flight log thread, and the very first video from a year ago is the fish flying slow - brings back memories of you starting out too! :D
Yeah, that fish and that time frame was the real turning out for me. that's when I knew I could learn to fly. I hadn't had much luck until then. I had built mostly all mini's not knowing that larger planes were easier to fly.
 

Rasterize

Maker of skins and decals for foam board RC planes
Moderator
Mentor
Replacement page for Page 4 of the "Slowfly Ltr Body.pdf" on post #300. Slots are missing and off center on page 4. Also the vertical lines on the back of the fuse side should be a score line NOT a cut line. I will put up replacements later. Thanks to sundown57 for the catches!
 

Attachments

  • Slowfly Ltr4.pdf
    763.7 KB · Views: 0
Last edited:

Rasterize

Maker of skins and decals for foam board RC planes
Moderator
Mentor
Replacement pages for Page 18 and 22 of the "Slowfly Ltr Body.pdf" on post #300. The vertical lines on the back of the fuse side have been changed to a crease line NOT a cut line. Thanks again to sundown57 for the catches!
I will update the "Slowfly Ltr Body.pdf" on post #300 as soon as I can.
 

Attachments

  • Slowfly Ltr18.pdf
    735.9 KB · Views: 0
  • Slowfly Ltr22.pdf
    736 KB · Views: 0

sundown57

Legendary member
I'm not too far behind. I have the fuse, power pod, tail and wings about done. hopefully tonight I can finish mine up. I love the eyes on yours, amazing how that little bit can give it so much character.
 

Attachments

  • IMG_4302.JPG
    IMG_4302.JPG
    837.3 KB · Views: 0
  • IMG_4303.JPG
    IMG_4303.JPG
    840.8 KB · Views: 0
  • IMG_4304.JPG
    IMG_4304.JPG
    793.7 KB · Views: 0

Rasterize

Maker of skins and decals for foam board RC planes
Moderator
Mentor
That's just awesome! Absolutely love it! The little mouth sticker just makes it work! :love:

Thx buzzbomb! My wife and daughter said the face really boosts the "cute factor". lol

Sweet! Love the over sized wheels. Waiting for a video :)!

Thx Mayan! They are "Bushwacker style" wheels. 20" in circumference! Covered in black packing tape with some cool steel wheel graphics on the side.

I'm not too far behind. I have the fuse, power pod, tail and wings about done. hopefully tonight I can finish mine up. I love the eyes on yours, amazing how that little bit can give it so much character.

Looking good boss! I'm a way slower builder. A few minutes here, a few there kind of thing. I'm hoping to maiden tomorrow morning.
The googly eyes are right out of my local Walmart craft center. I like to peruse it for odds and ends, popsicle sticks of various sizes, wooden dowels, googly eyes etc.
:)