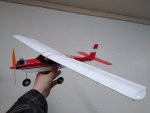
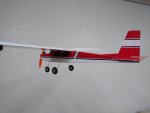
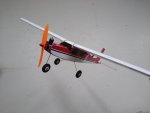
Willy Nillies Eaglet 250 build. It's here!

Turbojoe

Elite member
It's going to take a solid day to clean up and re-organize the build area and make the needed adjustments to the Eaglet 250. Then I think I'll open up the Skylark 250 kit and see what unnecessary mods I can make to that bird as well. I was thinking Skylark twin and Eaglet twin but after the maiden on the Eaglet with the small 5x3 prop and the totally junk batteries two motors is just plain stupid power even for a modification maniac like me. The Skylark 250 will definitely get steerable nose gear though. But only ONE motor....

Joe
 
Hey Joe,

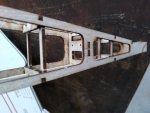
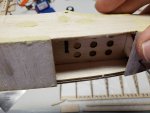
All those pieces are for fuselage. Attached are a couple pics. The ply rectangles were intended for hatch tangs, the balsa rectangles are stringer supports, and the other ones are upright braces for the aft fuselage - if you don't put these in the covering will pull and deform the structure in between the large aft fuselage lightening holes.

Great work Joe!

Sincerely,
Doug and Becky
WillyNillies.com

I see that there are four balsa pieces that are stringer supports, but only see three of them in the picture. One on the bottom behind former 3, and two behind former 4. Is the fourth extra or am I missing its use?
 

Willy Nillies

Elite member
I see that there are four balsa pieces that are stringer supports, but only see three of them in the picture. One on the bottom behind former 3, and two behind former 4. Is the fourth extra or am I missing its use?

Hopefully this picture will show better. The 4 balsa rectangular pieces are vertical uprights.

Sincerely,
Doug and Becky
WillyNillies.com
 

Attachments

  • IMG_20200124_224744895.jpg
    IMG_20200124_224744895.jpg
    2.9 MB · Views: 0
Hopefully this picture will show better. The 4 balsa rectangular pieces are vertical uprights.

Sincerely,
Doug and Becky
WillyNillies.com
I understand that, but I was referring to the horizontal rectangular balsa pieces that stringers rest against. I can see two on the bottom and one on top, behind the wing.
 

Willy Nillies

Elite member
Ohhhhhhh.... Okay! There are only 2 in the kit. One goes right behind the landing gear on bottom and the other right behind the wing trailing edge on top.

The third one you saw was an oooops. It is not needed there.

Sincerely
Doug and Becky
WillyNillies.com
 
Ohhhhhhh.... Okay! There are only 2 in the kit. One goes right behind the landing gear on bottom and the other right behind the wing trailing edge on top.

The third one you saw was an oooops. It is not needed there.

Sincerely
Doug and Becky
WillyNillies.com
Got it, thanks! I'll be able to wrap up my fuselage tonight then.
 
Yay! Glad we could help!

Sincerely
Doug and Becky
WillyNillies.com

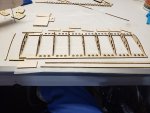
Looking over the wing, there's one part I haven't figured out where it goes. It's the curved stringer on the far left. Looks like it could be used to double up the fuselage wall or used on the wing.
 

Attachments

  • 20200125_123611.jpg
    20200125_123611.jpg
    3 MB · Views: 0

Willy Nillies

Elite member
Looking over the wing, there's one part I haven't figured out where it goes. It's the curved stringer on the far left. Looks like it could be used to double up the fuselage wall or used on the wing.

Hi There,

There should be 2 of those. They go on the inside of the lower fuselage. Just aft of the firewall. Re-enforcement for the battery bay.

Sincerely,
Doug and Becky
WillyNillies.com
 

Willy Nillies

Elite member
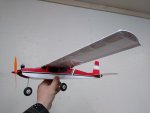
Finished up the company display/demo Eaglet 250 tonight. Ready to fly! Stop by and we'll take her for a spin! :)

Sincerely,
Doug and Becky
WillyNillies.com
 

Attachments

  • 8LhMFUQJafNdS_a-_c8aPkVfeRcHyilrp3On7maIzr4pX92IB.jpg
    8LhMFUQJafNdS_a-_c8aPkVfeRcHyilrp3On7maIzr4pX92IB.jpg
    70.5 KB · Views: 0
  • aXSOstCpmkTUi6xLJQaALOhS7F18so9kiaHVMDyhmHspX92IB.jpg
    aXSOstCpmkTUi6xLJQaALOhS7F18so9kiaHVMDyhmHspX92IB.jpg
    75.6 KB · Views: 0
  • F6kN4Uq47qVawY74rVInrx5zuZkKhw0vTK_YebDBuyEpX92IB.jpg
    F6kN4Uq47qVawY74rVInrx5zuZkKhw0vTK_YebDBuyEpX92IB.jpg
    64.6 KB · Views: 0
  • LeqLLFNjh2NxYviU2eoY97Stkx4TvUxpcYJQm9g2uRMpX92IB.jpg
    LeqLLFNjh2NxYviU2eoY97Stkx4TvUxpcYJQm9g2uRMpX92IB.jpg
    67.5 KB · Views: 0

Turbojoe

Elite member
I originally wanted to do the Goldberg scheme on mine but it never would have looked as good as yours. Nice work!

Were you flying one handed? I could never fly and film like that. I have enough trouble with the camera clipped to my glasses.

What's that white stuff all over the place? :)

Joe
 

Turbojoe

Elite member
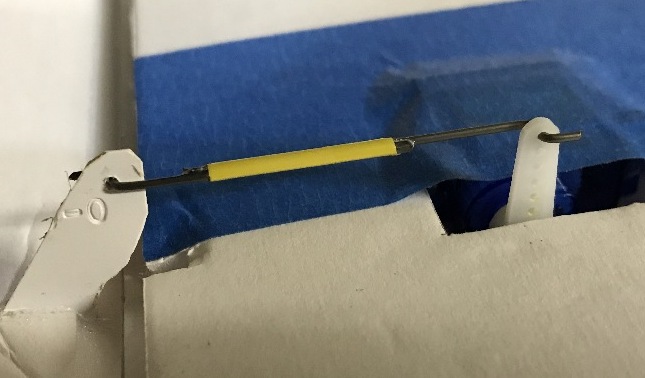
We use the short servo arms. Z bend is fairly easy to slip in. The short arms help alot with resolution/returning to center.

Sincerely,
Doug and Becky
WillyNillies.com

Good idea. I'll have to implement on the Jr.Skylark. Breezy over at the flying site so no Eaglet flight this morning. Possible rain tomorrow. Thursday should be good. I've got 6 batteries to go through now!

Joe