Winter Build 2018/19: Hangar 9 P-47D Razorback

willsonman

Builder Extraordinare
Mentor
After the TF Corsair stopped by the Horizon Hobby tent at Flite Fest, the guys there offered to sponsor a project. They asked me to go through their website and find something of interest and there was a LOT to choose from. Horizon is fully sponsoring this build so I want to be completely transparent that this is NOT a review of a product, but a building of one. I decided on the Jug for a number of reasons.

1: I really want to dress this girl up and show what you can really do with an ARF... What I am now calling a BARF (Builder's ARF).
2: Carl (wilmracer) picked one of these up and she is a sweet flying ship that really has no bad habits.
3: Aluminum finish. I want this to be a full-scale polished warbird that will sparkle and gleam at events to really stir up some conversation about learning to use this material.
4: Other goodies along the way as they come but I will be drawing on my gimmick experience from the Corsair build.

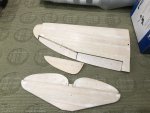
To start off, I took the rudder out of the box and only using a hair dryer I was able to peel away the vinyl covering with ease. While the covering is nice, the metallic finish will require a surface that is glassed for the best adhesion. Flite Metal has been a go-to covering for many Top Gun competition winners for many years now. As far as my research can tell, this is simply aluminum tape from the hardware store that is 6" or 12" wide. The kit appropriate for this aircraft was priced at $62 +shipping and I was able to source mine off Amazon for $23 +shipping. It is also thinner, therefore more lightweight, but I am hoping due to the thinness that application onto compound curves may be more forgiving.

Rivet application will be a nice reprieve from my usual technique. Heat will not be required to apply them and I have been able to source a steel tube of a smaller diameter that leaves an excellent impression in the aluminum. The rivets will be a more appropriate scale size.

In a sense, this will be an ARF-bash. I will be extensively going over this model to detail it out which is why I'm calling it a BARF. An otherwise 2-weekend leisurely assembly will quickly become many months of fun building. I hope that others will join in the build to ask questions and genuinely participate.
 

wilmracer

I build things that fly (sometimes)
Mentor
Looking forward to watching this one! Eagerly awaiting progress pictures...
 

Mid7night

Jetman
Mentor
Alright man, I’m ready! I know the scale details will be astonishing and awesome, but I can’t wait to see what other little “gimmicks” you throw in on this one. 👍😎👍
 

willsonman

Builder Extraordinare
Mentor
No real progress yet, fellas. I spent the weekend with the new Horus. I'm getting acquainted and adjusting. With the sticks 20mm further apart it is a different feel for sure but the functionality and usefulness is staggering. I hope to get started stripping her down soon.
 

F106DeltaDart

Elite member
Looking forward to the build! And thanks for the link to the Aluminum tape as well. Covering up a foam LX B-25, for a metal finish at the moment, and this should do the trick!
 

willsonman

Builder Extraordinare
Mentor
Absolutely! I am finding that there are a LOT of tricks you need to learn to apply this stuff in a way that looks perfect. Simply applying it is, in fact, NOT the hard part. The basic run down is that to create a mirror finish you have to have everything perfectly smooth. One of the things I had not even considered was that the glue on the back even distorts this stuff. This is what causes the "orange peel" look. I've seen tutorials on removing this but, oddly, a lot of folks instruct you to sand the aluminum BEFORE you apply it. Say what? If you do that and then burnish it to the surface you will still get the glue warping and distorting the aluminum.

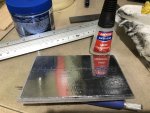
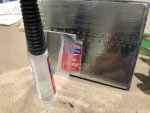
The surface prep seems to be a bit redemptive. From instructions I've found, I've not once seen this applied to any other surface than something that has been glassed with epoxy. The images below are of a test surface. I try to avoid epoxy wherever I can to save weight but I was concerned about the softness of applying glass with WBPU/BP filler and application of this material. The sample here is a ply plate with a sheet of balsa applied with CA. Glass cloth was applied with WBPU and dried with two coats of WBPU/BP to fill the weave. This was sanded with 220 grit paper and two coats of primer applied. The primer was wet sanded with 220 and then 400 grit papers. The first image is the aluminum applied in it's raw form. The second has been polished with a basic rubbing compound and a paper towel. The third was polished with the same compound with a microfiber cloth. You can see that the finish gets progressively better but the orange peel is still there.
IMG_6853.JPG IMG_6854.JPG IMG_6855.JPG

To mitigate this you then have to go to the sanding. This makes the surface ugly before it gets better. This image shows the aluminum raw compared to the basic polish and then a sanded surface. The sanded surface needs a series of progressive polishes BUT you can already see how the orange peel is completely gone. First with a cutting compound and then with one, maybe two additional polishing compounds. I still have to figure that part out. Basically this will have to be done using power tools. There are different buffing wheels that I can use on my drill but I have to be careful with what to use since this is on soft balsa. These wheels are generally made for polishing hard surface metals like wheels, fuel tanks, and other car parts, as well as jewelry. I will walk through my methodology as I get it ironed out.
IMG_6877.JPG
 

willsonman

Builder Extraordinare
Mentor
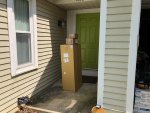
A little over a week ago, I came home from flying on a Saturday morning to find this on my front porch.
IMG_6849.JPG

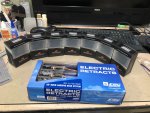
Obviously the big box contains the airplane. The little boxes contained an army of servos and the electric retracts. More parts are en route.
IMG_6852.JPG

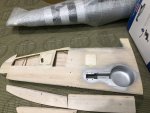
To firm up my plans to apply the foil, I had to first remove the covering that was already on there. That little red wad is the vinyl covering that is easily removed with a hair dryer. No heat gun needed to remove this. You can see how the construction is keyed for assembly and there is wood filler applied for a smooth finish already. While there were occasional small fibers of wood pulled up as the covering was removed, the surface is easily restored to smooth with a touch of 400-grit sandpaper. Application of glass and filler should mitigate any other minor surface imperfections.
IMG_6875.JPG

Finally, we have the livery. This one is tough because there were not too many examples to be found without paint. There were a few and "Silver Lady" seems to check the boxes for me. Some paint, but a LOT of exposed aluminum for me to show off. The image of her below features a "Malcom hood" canopy however, there are other references to this subject without it. The other GREAT thing is that Callie Graphics already has this one in her store. I'm sure that Callie could easily cut paint masks for me rather than apply vinyl. I can't really apply vinyl here because you have to seal it with a clear coat... I do not want to do that on aluminum. Not to mention that the vinyl, over time, will heat and shrink a bit in the sun and will more easily slide around on polished aluminum. Paint it is.
IMG_6878.JPG
 

willsonman

Builder Extraordinare
Mentor
I started to remove the covering and it was surprisingly easy with just a bit of heat. What's interesting is that some areas were more difficult than others. The black and white stripes on the wings, for example, were more difficult to remove even though they are just printed onto the vinyl. I am going to save all of the vinyl and get a weight of it for those who may be curious about it. What is also noteworthy is that on joints where the control surfaces meet structure, there is traditional covering that leaves a bit of the color as it is removed. As you can see from the pictures, there is more of the keyed parts exposed and filler has been used to smooth out the surface. There is also some additional paint work done around the wheel well.

Of note here is that the wheel wells will be removed. I plan to fabricate inner gear doors for a complete look. With the squared off doors the round liners will not be a good fit for the look and I will detail out the well interior. I will also fill in the 3 open panels on the bottom with a bit of balsa. Obviously this is required to apply the aluminum covering. Some fitting of various things will be needed prior to that, like proper lights for the wing tips.

I hope to get the other wing and fuselage stripped this evening. I want to note that the QUALITY of wood is overall very good. There were a couple of places where the grain was pulled up. This is consistent with other balsa kits I've constructed over the years. Sometimes the softness and grain consistency is not the same on sheeting but its OK! A little sanding a filler is all that is needed for glass preparation.
IMG_6901.JPG IMG_6902.JPG
 

willsonman

Builder Extraordinare
Mentor
I did not get a chance to pull off any more covering and I'll explain why. I unwrapped the fusealge and prior to removing the covering I wanted to mark the locations of the parts for the exhaust scoop on the belly and the oil cooler flaps/ waste gate (OCWG) valve just aft of the cowling. I inspected the location of the OCWG and I wanted to design and 3D print something with more detail. The structure behind the balsa was problematic and so I needed to sit and think for awhile. After look at a lot of references, I noted that the location and angle indicated by the print on the covering is, in fact, slightly off. I believe I can properly locate the OCWG a bit better and make it a bit functional as well. On the attached image you can see how the OCWG is level with the datum and positioned right up against the cowl edge. The location on the covering angles it down and more aft of the cowl edge. This is further confirmed by the P-47 on display at the Udvar Hazy museum.
Ref1.jpg 40371494_295410234592568_2469323637891530752_n.jpg

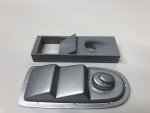
With that sorted, I've roughed out a printable for the OCWG. Still needs some work but it is a good start.
oil cooler.JPG

I also inspected the pylons for the wings to drop bombs. I may be able to fit my printable release mechanism in there but it will be tricky to use it. Need to think on this a bit more.
 

willsonman

Builder Extraordinare
Mentor
So I snapped a quick picture of the stock location of the OCWG on the H9 airplane. I clearly shows the angle issue I mentioned previously.
IMG_6908.JPG

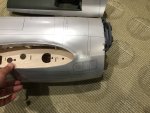
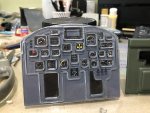
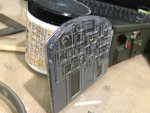
Moving on, I stripped down the fuselage including the hatch. With the vinyl off I also pulled out the cockpit panels. As you can see, they are decent for an ARF but IMO, they are a bit lacking in details. Look for some 3D printed panels coming to this space.
IMG_6915.JPG IMG_6916.JPG IMG_6917.JPG

Lastly, I was able to refine my OCWG design and do a test print in PLA. Final prints will be in ABS for better heat resilience. The moving flap will be made from an aluminum soda can for a bit better realism. I'm pretty happy with it but given that it is fairly complex with the deflector and hollowed out underside, it requires some support. THe print here was done with 0.05mm layer height and the support layers were done at 0.2mm. With ABS I'll do the same but I'll be able to smooth it out with acetone.
IMG_6918.JPG
 

willsonman

Builder Extraordinare
Mentor
Long weekend over with just a touch of progress.

I did a couple of test prints in ABS for the OCWG part. ABS is more finicky than PLA since it does not bridge well. I need to get some proper supports incorporated but it is still progress. I spent far too much time trying to dial in a new roll of PLA for another print and did not have time to get the last wing stripped. I hope to get on that this evening and I'll have some time-lapse footage to share in a video update later.

I got my polishing compounds in and they really do make quite the difference. The brown tripoli takes out the sanding marks quite well and the rouge makes a very high shine that is near mirror-like. The issue I noticed is that after the buffing I'm still seeing the background substrate on my test piece and specifically I'm seeing where the burnishing tool left streaks in the softer substrate. I think I will need to go to a harder finish using epoxy with the glass rather than water-based ployurethane and baby powder mixed. With the epoxy, I can use my power sander to minimize the elbow grease required to sand to a perfect finish.
 

wilmracer

I build things that fly (sometimes)
Mentor
Yeah... I was wondering if the WBPU would give a hard enough surface. One other benefit you may get from that route would be resistance to hangar rash. If the aluminum over the WBPU shows tiny marks left over from burnishing I'd be a bit worried about marring the surface more during transport and setup.

Keep it up!
 

willsonman

Builder Extraordinare
Mentor
Yes, that is a concern. I was amazed at how well-polished the outcome was and then, just brushing my finger over the surface... left micro scratches. It will not last forever but will still be impressive.

I also neglected to mention that I received 4" Robart scale wheels in the mail. The tires are MUCH softer than the stock ones and they look much better too. Should I encounter too much sink in the tire I have a trick to stiffen the tires up just a bit. That will depend on weight of the airplane. The robart tires can come off the plastic hubs with the hub screws removed. You can them make "O"-shaped discs of various foam densities (carped padding and even neoprene) to insert inside the tire to stiffen them up a bit. It does not add much weight but can reduce the flat spots as well as rolling resistance if the tire has the proper support.
 

willsonman

Builder Extraordinare
Mentor
I finally got the remaining covering off this weekend. In terms of weight, it totaled up to 10.25oz.
IMG_6962.JPG

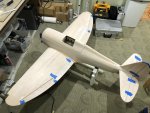
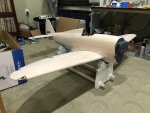
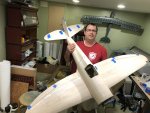
With the covering off I did a mockup of all the parts just to finally have a look at her.
IMG_6964.JPG IMG_6965.JPG IMG_6966.JPG IMG_6967.JPG

There are a couple of spots that need some repair as I got a bit hasty removing the covering. No big deal. I also need to go over some reference pictures and see if there is any structure that needs modification to be more scale. One area I'm pretty sure needs some work is the turtle deck aft of the cockpit. The shape there does not seem right to provide rear visibility for the pilot.

I've also made progress on the instrument panel design. it is sized according to the width of the cockpit and I'm working from several reference pictures to get it right. More work to be done here but it should be a good print with some finer details.
IMG_6970.JPG
 

wilmracer

I build things that fly (sometimes)
Mentor
Looking good! Love the progress on the panel.

The jug had full metal flying surfaces, not fabric covered, right? I'm pretty sure about that but not 100%. Hopefully you won't have to redo those.
 

willsonman

Builder Extraordinare
Mentor
Yes, the -D model did have full metal control surfaces. I've not read too much into earlier models but I believe that the initial prototypes had fabric covering. At any rate, all of the reference drawings I've found have rivets on the control surfaces and pictures do not indicate that any of the surfaces had fabric covering.
 

willsonman

Builder Extraordinare
Mentor
Just a little more progress on the instrument panel has been completed. With the inclusion of some finer details, it is requisite that I try printing with a smaller diameter nozzle. My overall impression is that print speeds will need to be lower but it will be a fine balance as ABS layer adhesion can peel up if you go too slow. I'm not one of the 3D printer guys that tries to get the fastest prints. I value quality of quantity.

I made a few surface repairs to the wood last night. I use 3M lightweight spackle and I just used it in places where some of the softer grain was pulled up during the removal of the covering.

I've also had some additional thinking time on how I want to glass. While I do need a hard surface to apply the aluminum, I prefer to use WBPU as it dries faster, is less messy, however the surface is much softer. I'm going to try a hybrid approach. To help save weight, I'll apply WBPU to the bare wood and let it cure out and do my final glass prep on that surface. As 70-80% of the WBPU weight is lost during evaporation this will create a barrier where any additional WBPU will not soak into the wood and create excess weight. Once the glass is applied, I will rough sand it to prep for a fill coat or two of resin. The resin will harden the surface a lot and give the substrate I need to apply the aluminum. I'll cover that in detail when I get there.

At this stage I also need to start working out some details. To do that I'll take some 3-views and scale them up to print out for my reference. There are a couple of "scale deviations" that I am sure I will do along the way. As this model is NOT intended to be representing war-time activity, it seems reasonable that systems would be updated for civilian, private, use. Therefore, the navigation lights will also incorporate some strobes. I do plan to do a retractable landing light in the wing as well. These sort of details are needed from the scaled-up reference drawings.