Winter Build 2018/19: Hangar 9 P-47D Razorback

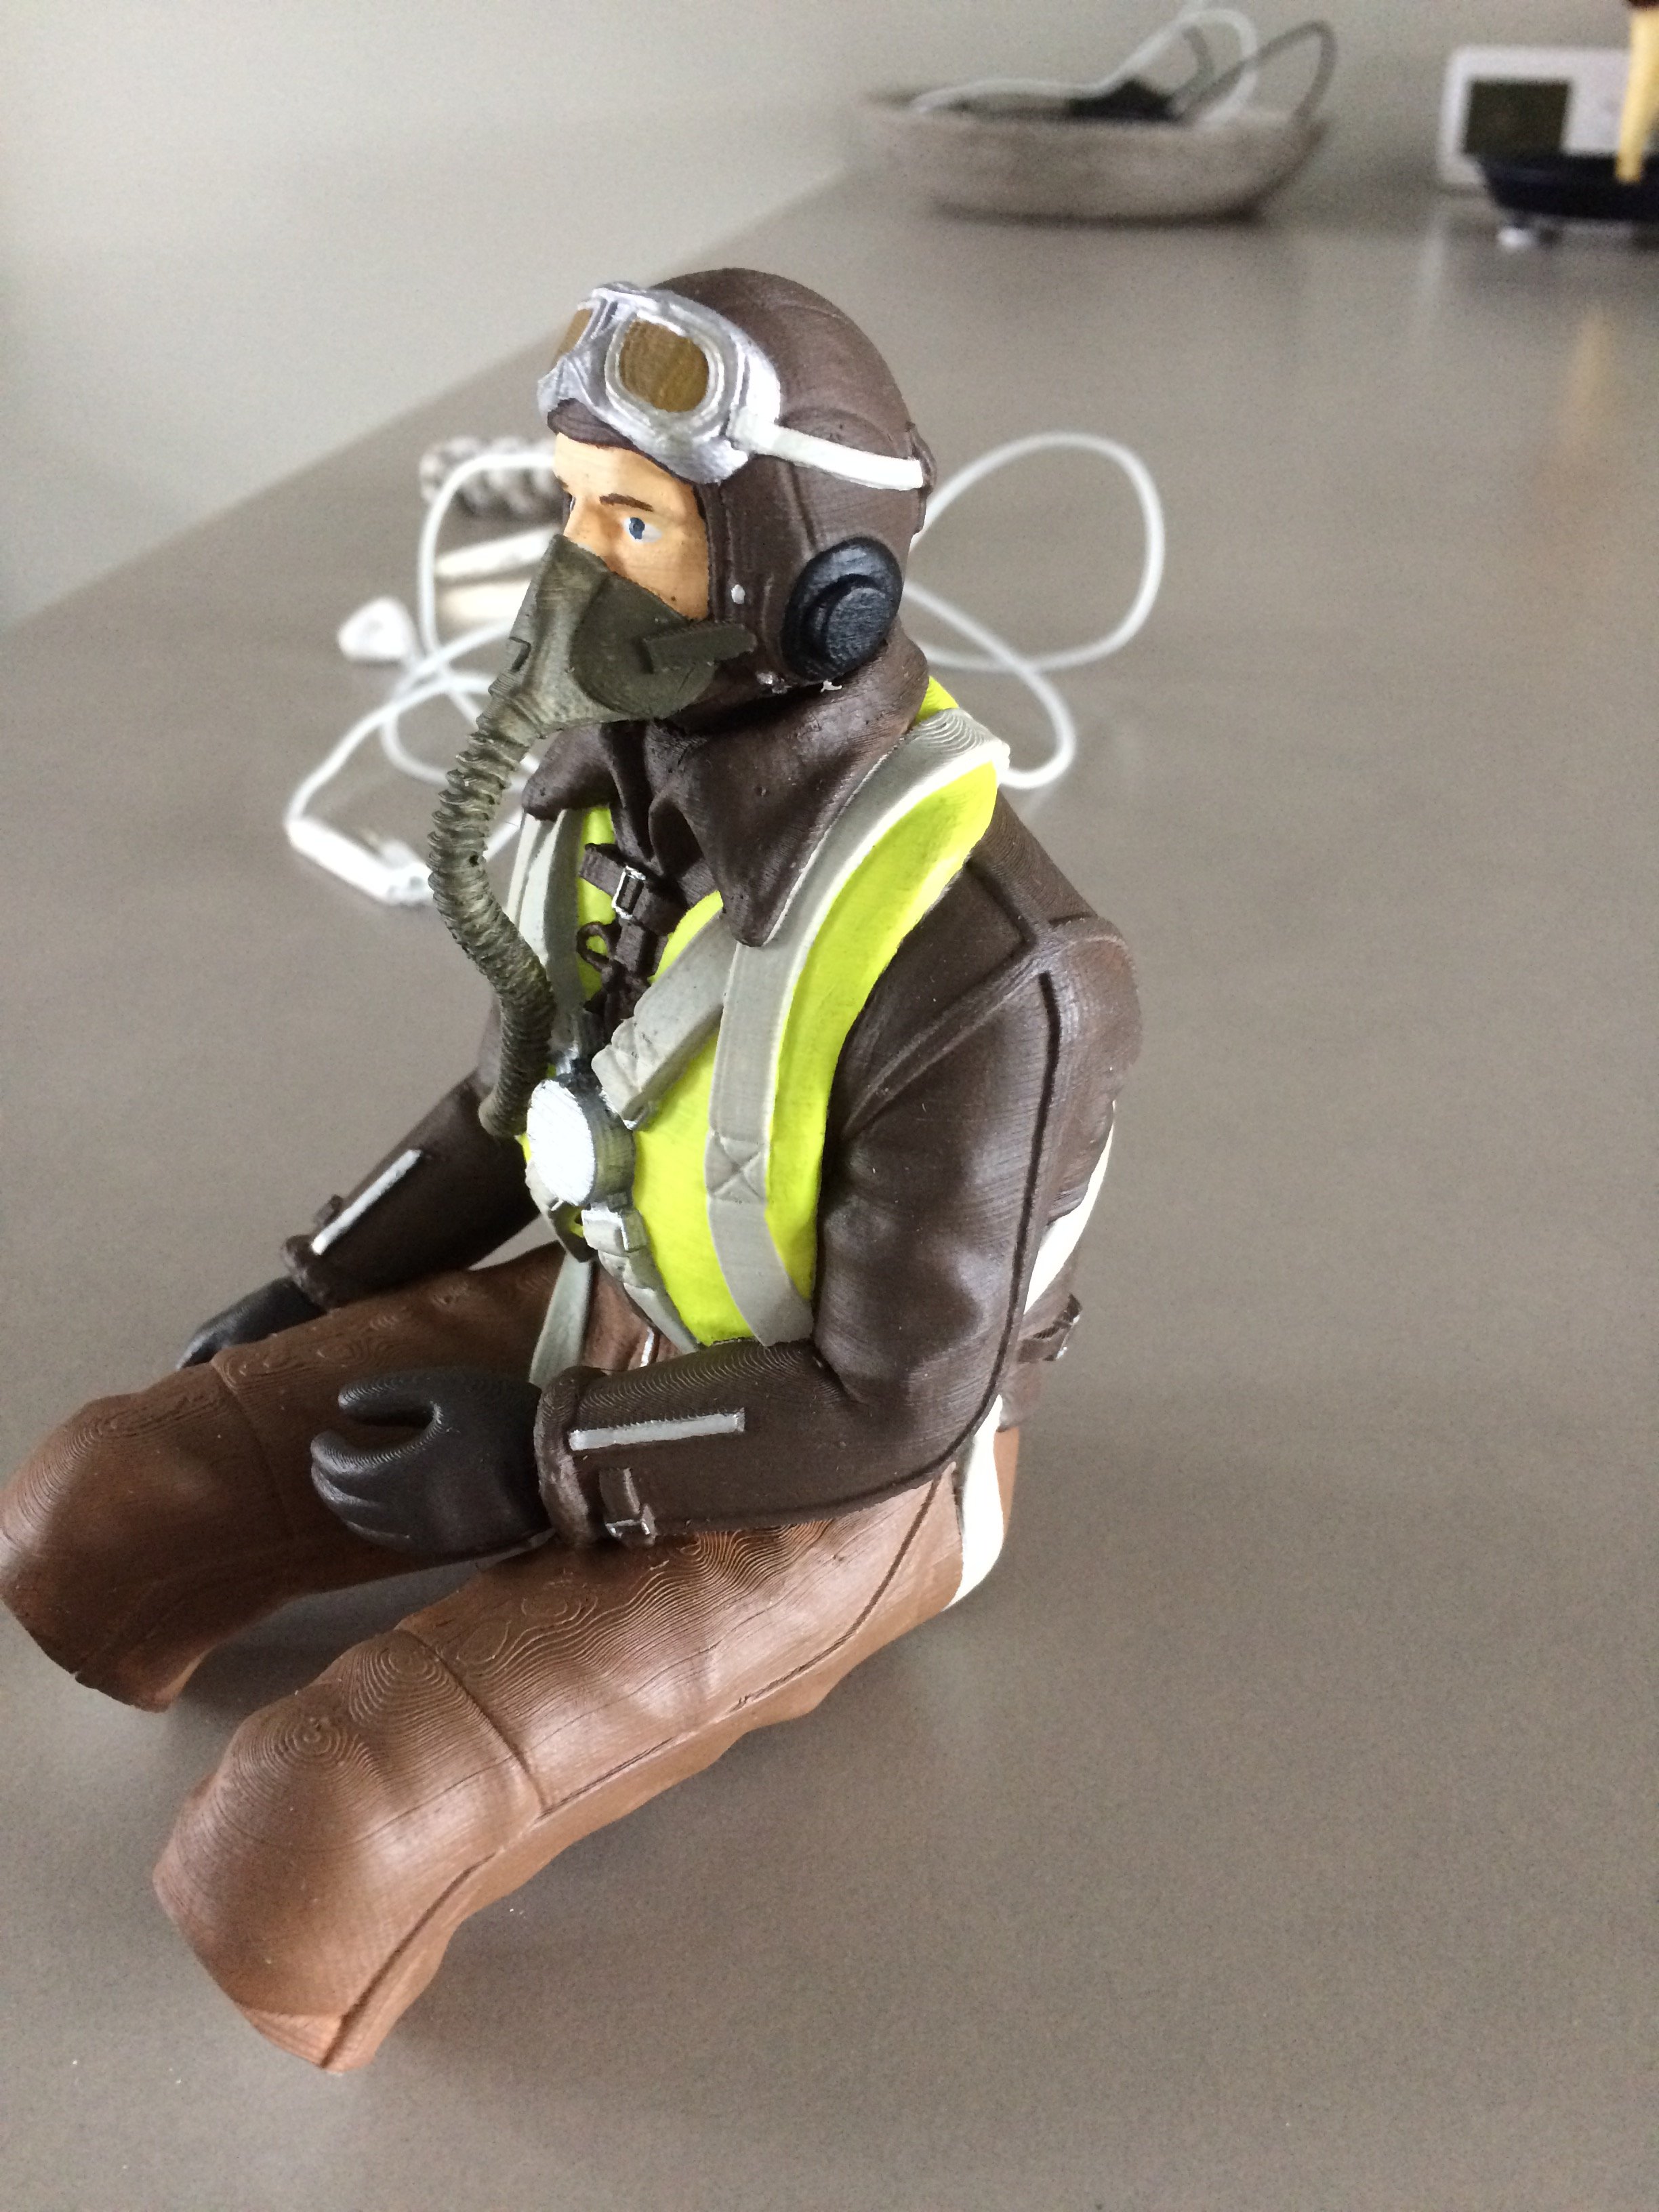
The pilot looks great. The paintwork is awesome. Funny you should mention 'to small'; I just re-printed my pilot on a bigger scale, because I found him to be too small. Took the printer more than 20 hours pfff.
 

willsonman

Builder Extraordinare
Mentor
Both wings were sanded last night. They are basically ready for some covering. The first thing you really need to do is make guide lines. The way this works is that you install one panel of aluminum at a time. This is not monokote so don't go try and cover the entire thing with one sheet. It just will not work. In order to accomplish this we go back to the reference print out.
IMG_7839.JPG
Remember that large printing I made way back in the first video? Yeah, that one.

Using that as a guide, I'm measuring distances of the panel lines and drawing them onto the wing. I'm using a seamstress' tape measure and a pencil. The tape allows me to measure as well as have a straight edge. I can tape one end and pull tight and make a nice line with the pencil. Below is a picture of my initial progress. These lines only took about 5 minutes to do.
IMG_7838.JPG
 

wilmracer

I build things that fly (sometimes)
Mentor
Lines are looking good!

I got my servo wire guide tubes printed last night. Just need to pull the Jug out and install them. They will make a HUGE improvement to setting her up at the field.
 

Attachments

  • 20190312_073426.jpg
    20190312_073426.jpg
    2.1 MB · Views: 0
  • 20190312_073436.jpg
    20190312_073436.jpg
    1.8 MB · Views: 0
I painted my new pilot. Same as the other, although the bigger scale makes details more visible and certainly set the bar higher for the painting. But hey, he's here again and looks a million.
 

Attachments

  • 20190312_125435612_iOS.jpg
    20190312_125435612_iOS.jpg
    937.7 KB · Views: 0
  • 20190312_125444589_iOS.jpg
    20190312_125444589_iOS.jpg
    938.2 KB · Views: 0
  • 20190312_125457668_iOS.jpg
    20190312_125457668_iOS.jpg
    849 KB · Views: 0
  • 20190312_125516393_iOS.jpg
    20190312_125516393_iOS.jpg
    1.6 MB · Views: 0

rockyboy

Skill Collector
Mentor
While the pilot is a little small, the next size up would have been way too big. These odd scales are problematic that way... which is why we need more PILOTS that can be PRINTED.

Just think of Joel or Laine being in the pilot seat. :p
 
.... There are lots of pilots available for printing, for instance on CGtrader. Although (strangely) in contrast with other printable 'thingies' they tend to cost a little money. Mine cost 30 dollar, which I hate, but I would have paid the same amount for a servo, so it's a emotional barrier only.
 

willsonman

Builder Extraordinare
Mentor
Made some progress on covering last night. The flaps are done and look perfect. You can see that the reflection as-applied is ok but once polished they will be smooth and have a near-mirror finish.
IMG_7842.JPG
 
Just for info: would the metal finish also allow for (spray)painting? Or won't it stick?
I like the panels, I like the rivets, mostly because they're 3d instead of drawn, but otherwise I'd prefer (olive drab) coloring.
 

willsonman

Builder Extraordinare
Mentor
There needs to be some surface prep. Either a fine sanding or chemical etching. My plan for paint is to apply my vinyl masks and give a rub with 800 git and apply some primer. This should stick well and then I can spray on the color I need. I will not be applying any sort of sealant as over time, the paint will chip and fade a little and give those touches a little more realism. I could probably leave on the base mask and apply a matte clear coat but I'm liking the option to have a bit of chipping. I may change my mind.
 

wilmracer

I build things that fly (sometimes)
Mentor
There needs to be some surface prep. Either a fine sanding or chemical etching. My plan for paint is to apply my vinyl masks and give a rub with 800 git and apply some primer. This should stick well and then I can spray on the color I need. I will not be applying any sort of sealant as over time, the paint will chip and fade a little and give those touches a little more realism. I could probably leave on the base mask and apply a matte clear coat but I'm liking the option to have a bit of chipping. I may change my mind.

I think you have a great opportunity for "natural" weathering there. I'll be really interested to see how she looks after a season or two.
 

willsonman

Builder Extraordinare
Mentor
Not much to report on but LOTS done last night. All of the control surfaces, H-stab, and fuselage have been given 3 coats of sanding sealer. This takes a bit of time as one coat goes on the part and then flash-dried with a hair dryer. Rinse and repeat two more times and then go to the other side. Two control surfaces had some epoxy on one side that was left over from making the inner gear doors so I did sand the epoxy back.

Up next is to sand it all back. As I've posted parts that I've covered with foil, I've been working out my technique for instructional videos. I want to make sure my personal approach is solid before I give out all the information.
 

cranialrectosis

Faster than a speeding face plant!
Mentor
Made some progress on covering last night. The flaps are done and look perfect. You can see that the reflection as-applied is ok but once polished they will be smooth and have a near-mirror finish.
View attachment 126296

Kinda reminds me of the photo of that shiny Willson you posted a while back.

I am amazed at your level of skill and dedication here. Thank you for this thread.
 

willsonman

Builder Extraordinare
Mentor
Quite a bit done yesterday... feeling it today too. All but the fuselage was sanded smooth. Some parts where the glass overlapped were a bit wavy so I hit those spots with 120 grit, then 220, then 400. Everything rubbed down with 400 in the end.

The weather was cooperating so I quick shot some silver paint on the drop tanks. If you read up on the history of external fuel tanks, they were typically constructed using impregnated paper. These tanks were wood with a papier-mâché skin. Wood served as the structure, including anti-slosh baffles while the paper served as the sealant and aerodynamic portion. The fuel would quickly dissolve the glues involved but it was cheap to construct as metal was not available for such an expendable item. The caveat here is that all metal tanks were, in fact, used prominently among the American forces in Europe. The tanks I've modeled for this project are of the all-metal style. While I could have sheeted these in the aluminum, given the likelihood of losing or damaging them, I opted to paint them.
IMG_7846.JPG
 

wilmracer

I build things that fly (sometimes)
Mentor
I support your choice to paint the tanks ... not the least reason being I've made attempts at covering compound-curved surfaces with aluminum tape and I wouldn't wish that task on ANYONE. ;)

The tanks do look miserable for that task. He will have enough curves to cover with the fuselage, although I don't think any quite as bad as the tanks. I agree too though... especially since I know he will be showing off and dropping them every chance he gets :) (I would too). If people give him a hard time about it I suppose he could do a set for display on the ground and then fly with and drop the painted ones, but IMO that is just crazy talk
 

willsonman

Builder Extraordinare
Mentor
The other option is to print the bottom half as a mold to then make a static set out of lithoplate... but that is crazy talk. :p
 
I did my guns today. Made from aluminium with carbon innerpart. Don't know if that is visible on the pics (night here, so difficult light for the cam)
 

Attachments

  • 20190315_201856418_iOS.jpg
    20190315_201856418_iOS.jpg
    735.5 KB · Views: 0
  • 20190315_202134703_iOS.jpg
    20190315_202134703_iOS.jpg
    635.2 KB · Views: 0
  • 20190315_202206851_iOS.jpg
    20190315_202206851_iOS.jpg
    631.6 KB · Views: 0

SlingShot

Maneuvering With Purpose
A hard time....who would do such a thing? At the Evergreen Museum in Oregon they have some static display models. One in particular that I remember was a warbird with an exposed wing magazine.

Now that thing was really cool and detailed. But I do believe you could see wood grain on the ammunition. I couldn't imagine anyone complaining about that.

It will be beautiful.
 

willsonman

Builder Extraordinare
Mentor
I had a productive weekend. Not as far as I would have liked but it is still good progress.

I got the ailerons covered with little issue but they were much less complicated. The elevators have multiple panels to them so I drew my reference lines with a pencil based on my 3-view print outs. From there I'm using masking tape for each panel and removing excess material per the reference lines with my 2mm overlap.
IMG_7857.JPG

As I wanted a little motivation after such a large amount of time covering this item, I decided to break out a fresh buffing wheel and my polishing compound. You can clearly see the difference between the unpolished and polished portions of the part.
IMG_7859.JPG IMG_7858.JPG

I got all excited and just had to put some rivets on. This wow factor is really motivating. Keep in mind that this particular image has the part a bit dirty. I had to rub don the part with some acetone to clean off the adhesive on the aluminum. This left a lot of streaks. I opted not to snap a picture of the cleaned up part so that when the completed portions come together it will be very shocking.
IMG_7860.JPG