Bloody Baron - Build

LooseBruce

Senior Member
Baron Coming along Nicely

Hi Guys, Here is my Baron before electronics are installed. I think this one will look real nice in the air.
I intend to swap it with my power pod for my Bloody Wonder MKIII. It would be nice to use the same receiver but if it does not work out I have a Lemon that I can use :)
BlBaron Build0002.jpg

BlBaron Build0001.jpg
 

LooseBruce

Senior Member
Bloody Baron is Fini

Hi flyers,
My Bloody Baron is finished. I have to stop building and start flying because I am getting too many planes. I am sure some of you have been there. It has been so cold and windy but I will brave the weather before I build another plane. A couple of things that went right. I made a little cut out for the elevator servo thru the 1st fuselage doubler wall to help secure it. I do wish I had mounted as far forward as possible though as I am tail heavy still.

I used to use the same receiver in swappables but with the DX6i "model select" it is a pain. Now I install a Lemon Rx on the swappable (as opposed to in the power pod). Then I put a 4" servo extension cable in the throttle channel. This makes it easy and quick to get to the Rx. There is only 1 (countem 1) connection to make between the power pod and the swappable model. BaronFini001.JPG BaronFini0002.jpg

The nose art is just printed on copy paper and covered with clear tape just like Sponz's graphics.I spray it first with adhesive so it sticks to the tape. I like this technique.
I see the BB wing is larger than the Bloody Wonder MKIII. I have the 24 gram motor. I hope this is a floater.
LooseBruce
 

SP0NZ

FT CAD Gremlin
Staff member
Admin
Moderator
Mentor
That is AWESOME! Love the Snoopy on the nose. Try the CG at 2.75". I think I need to change the CG location on the plans for the Baron and the Ugly Wonder as they both have a constant chord, whereas the Bloody Wonder does not.
 

SP0NZ

FT CAD Gremlin
Staff member
Admin
Moderator
Mentor
I have flown The Bloody Wonder with the 24 gram motor, so I know it will work for you.
 

narcolepticltd

I unbuild stuff regularly
went for supplies today, and my dollar tree finally has white adams foam board back in stock. I also found similar foam board at hobby lobby (3/16") but they had a lot of colors to choose from... just not as cheap as dollar tree (it was $2.50 a sheet). I may go back later this week and pick up some red for the baron =)

But first, I finally finished getting electronics setup and rates dialed in on my FT Flyer... plan to maiden that tomorrow. My very first attempt at scratch building (even made my own control horns). We'll see if it crashes straight!
 

narcolepticltd

I unbuild stuff regularly
I almost forgot, Sponz... for the poster board backed patterns... the wing specifically. It's a bit larger than the standard poster board size. do you just tape 2 pieces of poster board together and then glue the pattern on to that?
 

SP0NZ

FT CAD Gremlin
Staff member
Admin
Moderator
Mentor
went for supplies today, and my dollar tree finally has white adams foam board back in stock. I also found similar foam board at hobby lobby (3/16") but they had a lot of colors to choose from... just not as cheap as dollar tree (it was $2.50 a sheet). I may go back later this week and pick up some red for the baron =)

Be warned, Adams Foam Board (a.k.a. Dollar Tree Foam Board) is lighter than any other paper backed foam board out there. I've seen the Hobby Lobby stuff you are talking about. It is similar to Elmer's Board, which is a LOT heavier. The plane will not fly the same if built from the heavier board and you may need a bigger motor. I doubt a Bloody baron made from Elmer's Board would fly off the 24 gram motor.

But first, I finally finished getting electronics setup and rates dialed in on my FT Flyer... plan to maiden that tomorrow. My very first attempt at scratch building (even made my own control horns). We'll see if it crashes straight!

LOL, good luck with the maiden. The FT Flyer is a good learning plane. Both for building and flying. Have fun with it.
 

SP0NZ

FT CAD Gremlin
Staff member
Admin
Moderator
Mentor
I almost forgot, Sponz... for the poster board backed patterns... the wing specifically. It's a bit larger than the standard poster board size. do you just tape 2 pieces of poster board together and then glue the pattern on to that?

That is exactly what I do. It works great.
 

SP0NZ

FT CAD Gremlin
Staff member
Admin
Moderator
Mentor
I used to use the same receiver in swappables but with the DX6i "model select" it is a pain. Now I install a Lemon Rx on the swappable (as opposed to in the power pod). Then I put a 4" servo extension cable in the throttle channel. This makes it easy and quick to get to the Rx. There is only 1 (countem 1) connection to make between the power pod and the swappable model.

Very kewl tip. I just got my first 5 pack of Lemon Rx's in the mail last week. I think I will give your setup a try.
 

brian79cj

Member
After making a couple of mistakes I have finally have the Baron ready for electronics.

1st- I used packing tape on the wings parallel to the length of the wing so I could use it for reinforcing the hinge. It looks good and worked great but it made applying the decals difficult. I had to ask Sponz to take out the cut lines on the decals so I could print them onto sticker stock. This all worked out awesome. I will be using lots more of the sticker stock for other decals.
2nd- I applied all the tape before bending plane up. It worked great until I needed to glue wing and tail to fuselage. both surfaces were covered with tape and I was told that it would not work. I very carefully peeled tape off of mating surfaces. Surprisingly it only removed some fuzz from the paper. Most of it was still intact. I was careful in not cutting into the paper.
3rd- not really a mistake but I hot glued all the edges to help with delaminating. Hope it works
I have not flown it yet but I have torqued on the frame and it is very stiff with no signs of weakness because of it. White packing tape on bottom to help with orientation and help protect for belly landings. Any ideas for making the bottom stand out more? Do I need it to or is the red on top enough? Pictures attached:
 

Attachments

  • IMG_0176.JPG
    IMG_0176.JPG
    1.3 MB · Views: 30
  • IMG_0175.JPG
    IMG_0175.JPG
    1.5 MB · Views: 13
  • IMG_0177.JPG
    IMG_0177.JPG
    1.4 MB · Views: 30
Last edited:

narcolepticltd

I unbuild stuff regularly
Be warned, Adams Foam Board (a.k.a. Dollar Tree Foam Board) is lighter than any other paper backed foam board out there. I've seen the Hobby Lobby stuff you are talking about. It is similar to Elmer's Board, which is a LOT heavier. The plane will not fly the same if built from the heavier board and you may need a bigger motor. I doubt a Bloody baron made from Elmer's Board would fly off the 24 gram motor.

Now I'm curious... that elmer's stuff is serious business, but this was backed with similar paper to the black adam's board. I may pick up a sheet or 2 just to weigh it =P.

but hey... an excuse to buy a larger motor right? Ok off to bed, I found a huge park a few miles from home where I can crash the flyer and want to get out there early!
 

LooseBruce

Senior Member
That is AWESOME! Love the Snoopy on the nose. Try the CG at 2.75". I think I need to change the CG location on the plans for the Baron and the Ugly Wonder as they both have a constant chord, whereas the Bloody Wonder does not.

That is great news. I will certainly try it at 2.75 first. I hate adding weight for the COG.
Thanks, LooseBruce
 

LooseBruce

Senior Member
After making a couple of mistakes I have finally have the Baron ready for electronics.

1st- I used packing tape on the wings parallel to the length of the wing so I could use it for reinforcing the hinge. It looks good and worked great but it made applying the decals difficult. I had to ask Sponz to take out the cut lines on the decals so I could print them onto sticker stock. This all worked out awesome. I will be using lots more of the sticker stock for other decals.
2nd- I applied all the tape before bending plane up. It worked great until I needed to glue wing and tail to fuselage. both surfaces were covered with tape and I was told that it would not work. I very carefully peeled tape off of mating surfaces. Surprisingly it only removed some fuzz from the paper. Most of it was still intact. I was careful in not cutting into the paper.
3rd- not really a mistake but I hot glued all the edges to help with delaminating. Hope it works
I have not flown it yet but I have torqued on the frame and it is very stiff with no signs of weakness because of it. White packing tape on bottom to help with orientation and help protect for belly landings. Any ideas for making the bottom stand out more? Do I need it to or is the red on top enough? Pictures attached:

Very nice bird, I thought it was my own at first. Thanks for prompting Sponz to teach us about the layers in the PDF. I used that technique also.I am using the tape for my hinge also but oriented it with the fuselage. It works just as well and I like the way it looks where it overlaps. I am not putting any glue on this hinge yet because it is so cold here I think it interferes with the motion.

I had been down the same path before about putting tape where you don't want it. What I do now is use blue masking tape over the paper where I don't want the tape to stick. WARNING!!! Before you stick the blue tape to the foamboard first stick it on a rug or something similar to help it loose its stickiness. It adheres to the foam board too strongly if you skip this step.

I left the undercambered part of the wing and the ailerons white but made the flat underportion of the wing red. I like the looks of that better than all white. I think some contrast helps in seeing the plane in the air. It is a funny thing that when we are building or showing the plane we concentrate on making it look good on top BUT when we are flying we are usually looking at the bottom of it :)

Good luck with the maiden flight,
LooseBruce
 

LooseBruce

Senior Member
Maidened Bloody Baron This Morning

That is great news. I will certainly try it at 2.75 first. I hate adding weight for the COG.
Thanks, LooseBruce

Well it was easy to hit the 2.75 mark for COG. The wind died down significantly this morning so it was time

I headed out to the snow covered hay field across the road from my house.
Hand launched and I immediately did several aerobatic maneuvers. Snap rolls and loops so fast you could not believe it. Followed by a HSVL (high speed vertical landing). No damage though, also NO control. I thought it was a COG problem so I moved the battery forward and then I did it again. #$%^&*((*

When I was checking out for the next aerobatic run I noticed the ailerons and the rudder were acting in reverse mode. WHAT A ROOKIE MISTAKE!!. I had not checked them after I changed my receiver to the new Lemon Rx. I checked the throws and adjusted them but did not notice they were reversed. Lesson learned once again.

After that it flew just beautifully. I slowed it down and did some very nice turns , climb and finally a golden landing.
WHoo Hoo, happy flyer here. Unfortunately Deb gave up filming while I was setting my reverse controls. She later noticed I was flying and caught just the landing. Film at eleven. So I have unplanned aerobatics (proving the plane can do them) and a landing (proving the plane can do them). One little crinkle that is insignificant.

Gotta Love It,
LooseBruce BaronafterMaiden0001.jpg
 

SP0NZ

FT CAD Gremlin
Staff member
Admin
Moderator
Mentor
When I was checking out for the next aerobatic run I noticed the ailerons and the rudder were acting in reverse mode. WHAT A ROOKIE MISTAKE!!. I had not checked them after I changed my receiver to the new Lemon Rx. I checked the throws and adjusted them but did not notice they were reversed. Lesson learned once again.

I know that feeling all to well. I did that with my first FT Spitfire build in front of some of my friends too. Totaled the Spitfite. :black_eyed: I always check them now. :)
 
Last edited:

Jrl

Junior Member
Bloody Baron as first scratch build?

Guys - I'm thinking about choosing the bb as my first scratch build. I'm learning to Fly on an apprentice 15e but would like something smaller. Thoughts? I'm willing to struggle. The drawings are so good that I'm not too worried about the build process. I thought I would start with the slower setup or would the heavier/faster setup be better for a touch of wind?

One more question: would the bb handle the weight of an internal led strip? I would forgo the colored packing tape. I'm hoping this could be an early morning flyer (before the winds start up).

Either way, nice job on the design.
 
Last edited:

SP0NZ

FT CAD Gremlin
Staff member
Admin
Moderator
Mentor
Guys - I'm thinking about choosing the bb as my first scratch build. I'm learning to Fly on an apprentice 15e but would like something smaller. Thoughts? I'm willing to struggle. The drawings are so good that I'm not too worried about the build process. I thought I would start with the slower setup or would the heavier/faster setup be better for a touch of wind?

One more question: would the bb handle the weight of an internal led strip? I would forgo the colored packing tape. I'm hoping this could be an early morning flyer (before the winds start up).

Either way, nice job on the design.

I think if you can fly the apprentice you should be able to handle the Bloody Baron. I might be a bit biased, but I think it's a very easy plane to build. And if you need any help with anything during the build the forums is a great place to get it. I say go for it! The rudder allows it to do some extra crazy stunts, but it flies just fine without it too.

The beef setup will definitely handle wind better than the light setup, but I love flying it either way. The LED lights don't weigh very much so I think that you should be fine adding them. The wing loading on this plane is very light to begin with.

Good luck, and post a picture or two if you do build one.
 

mad_milchmann

New member
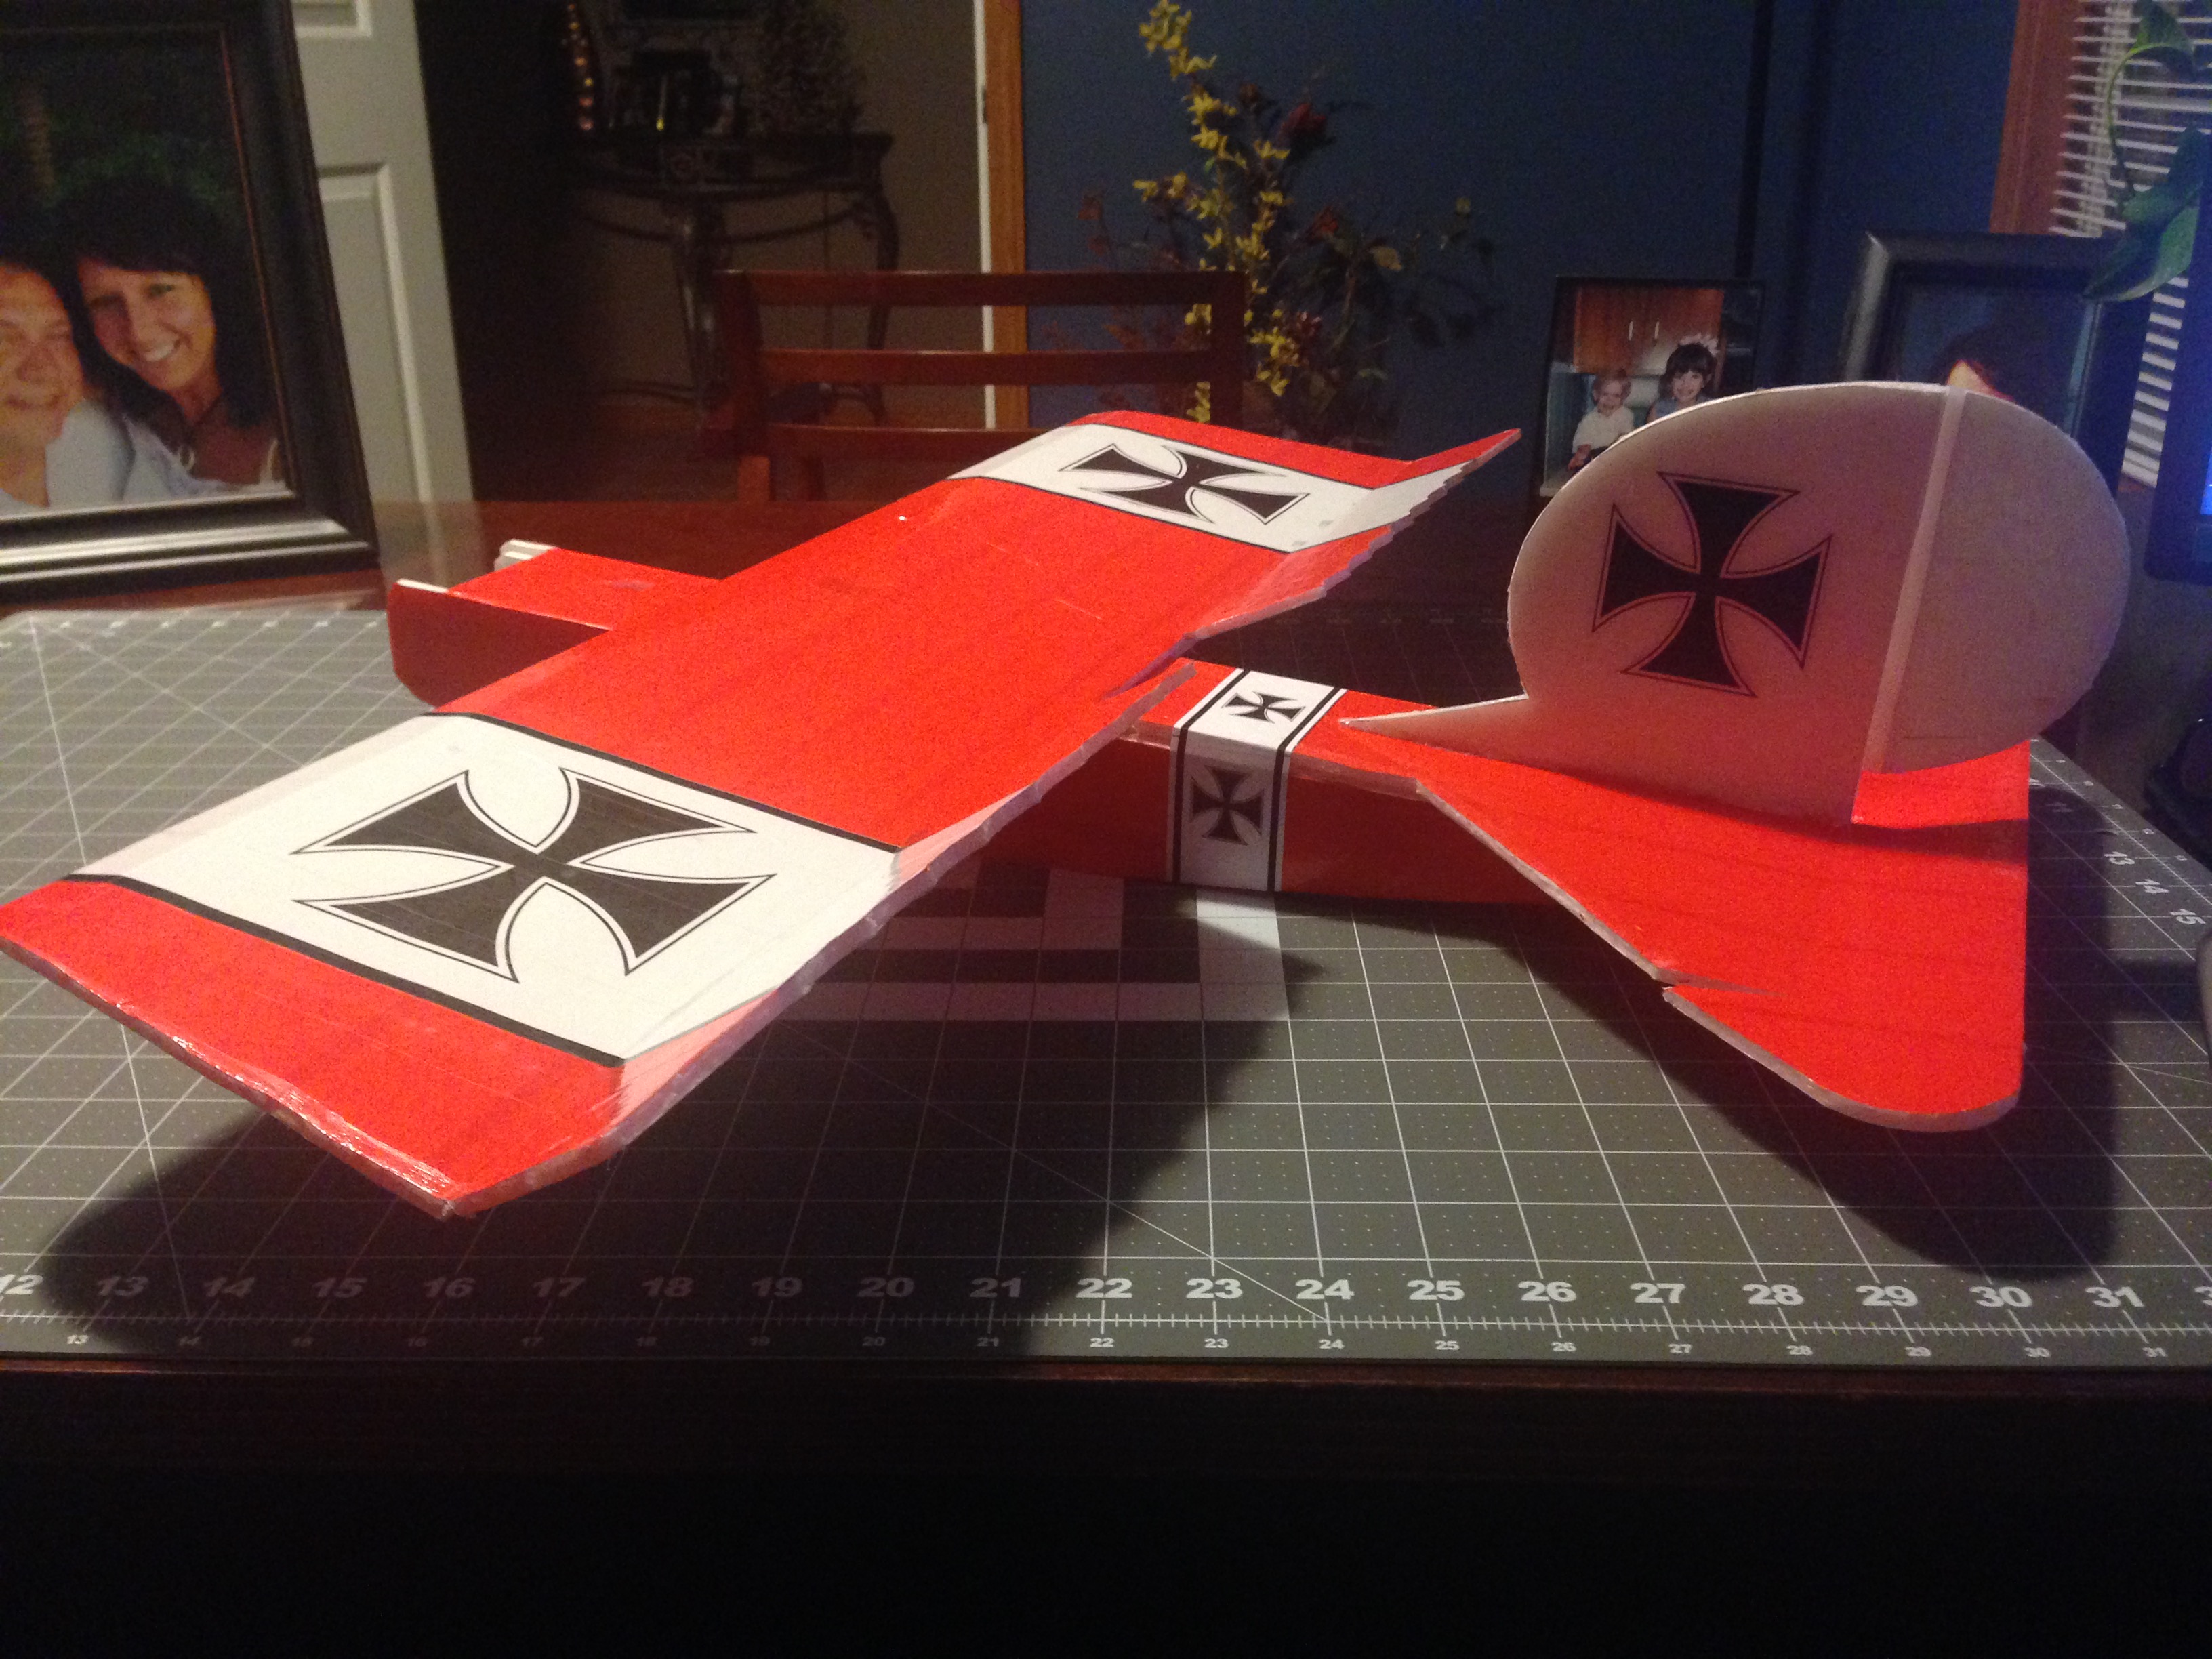
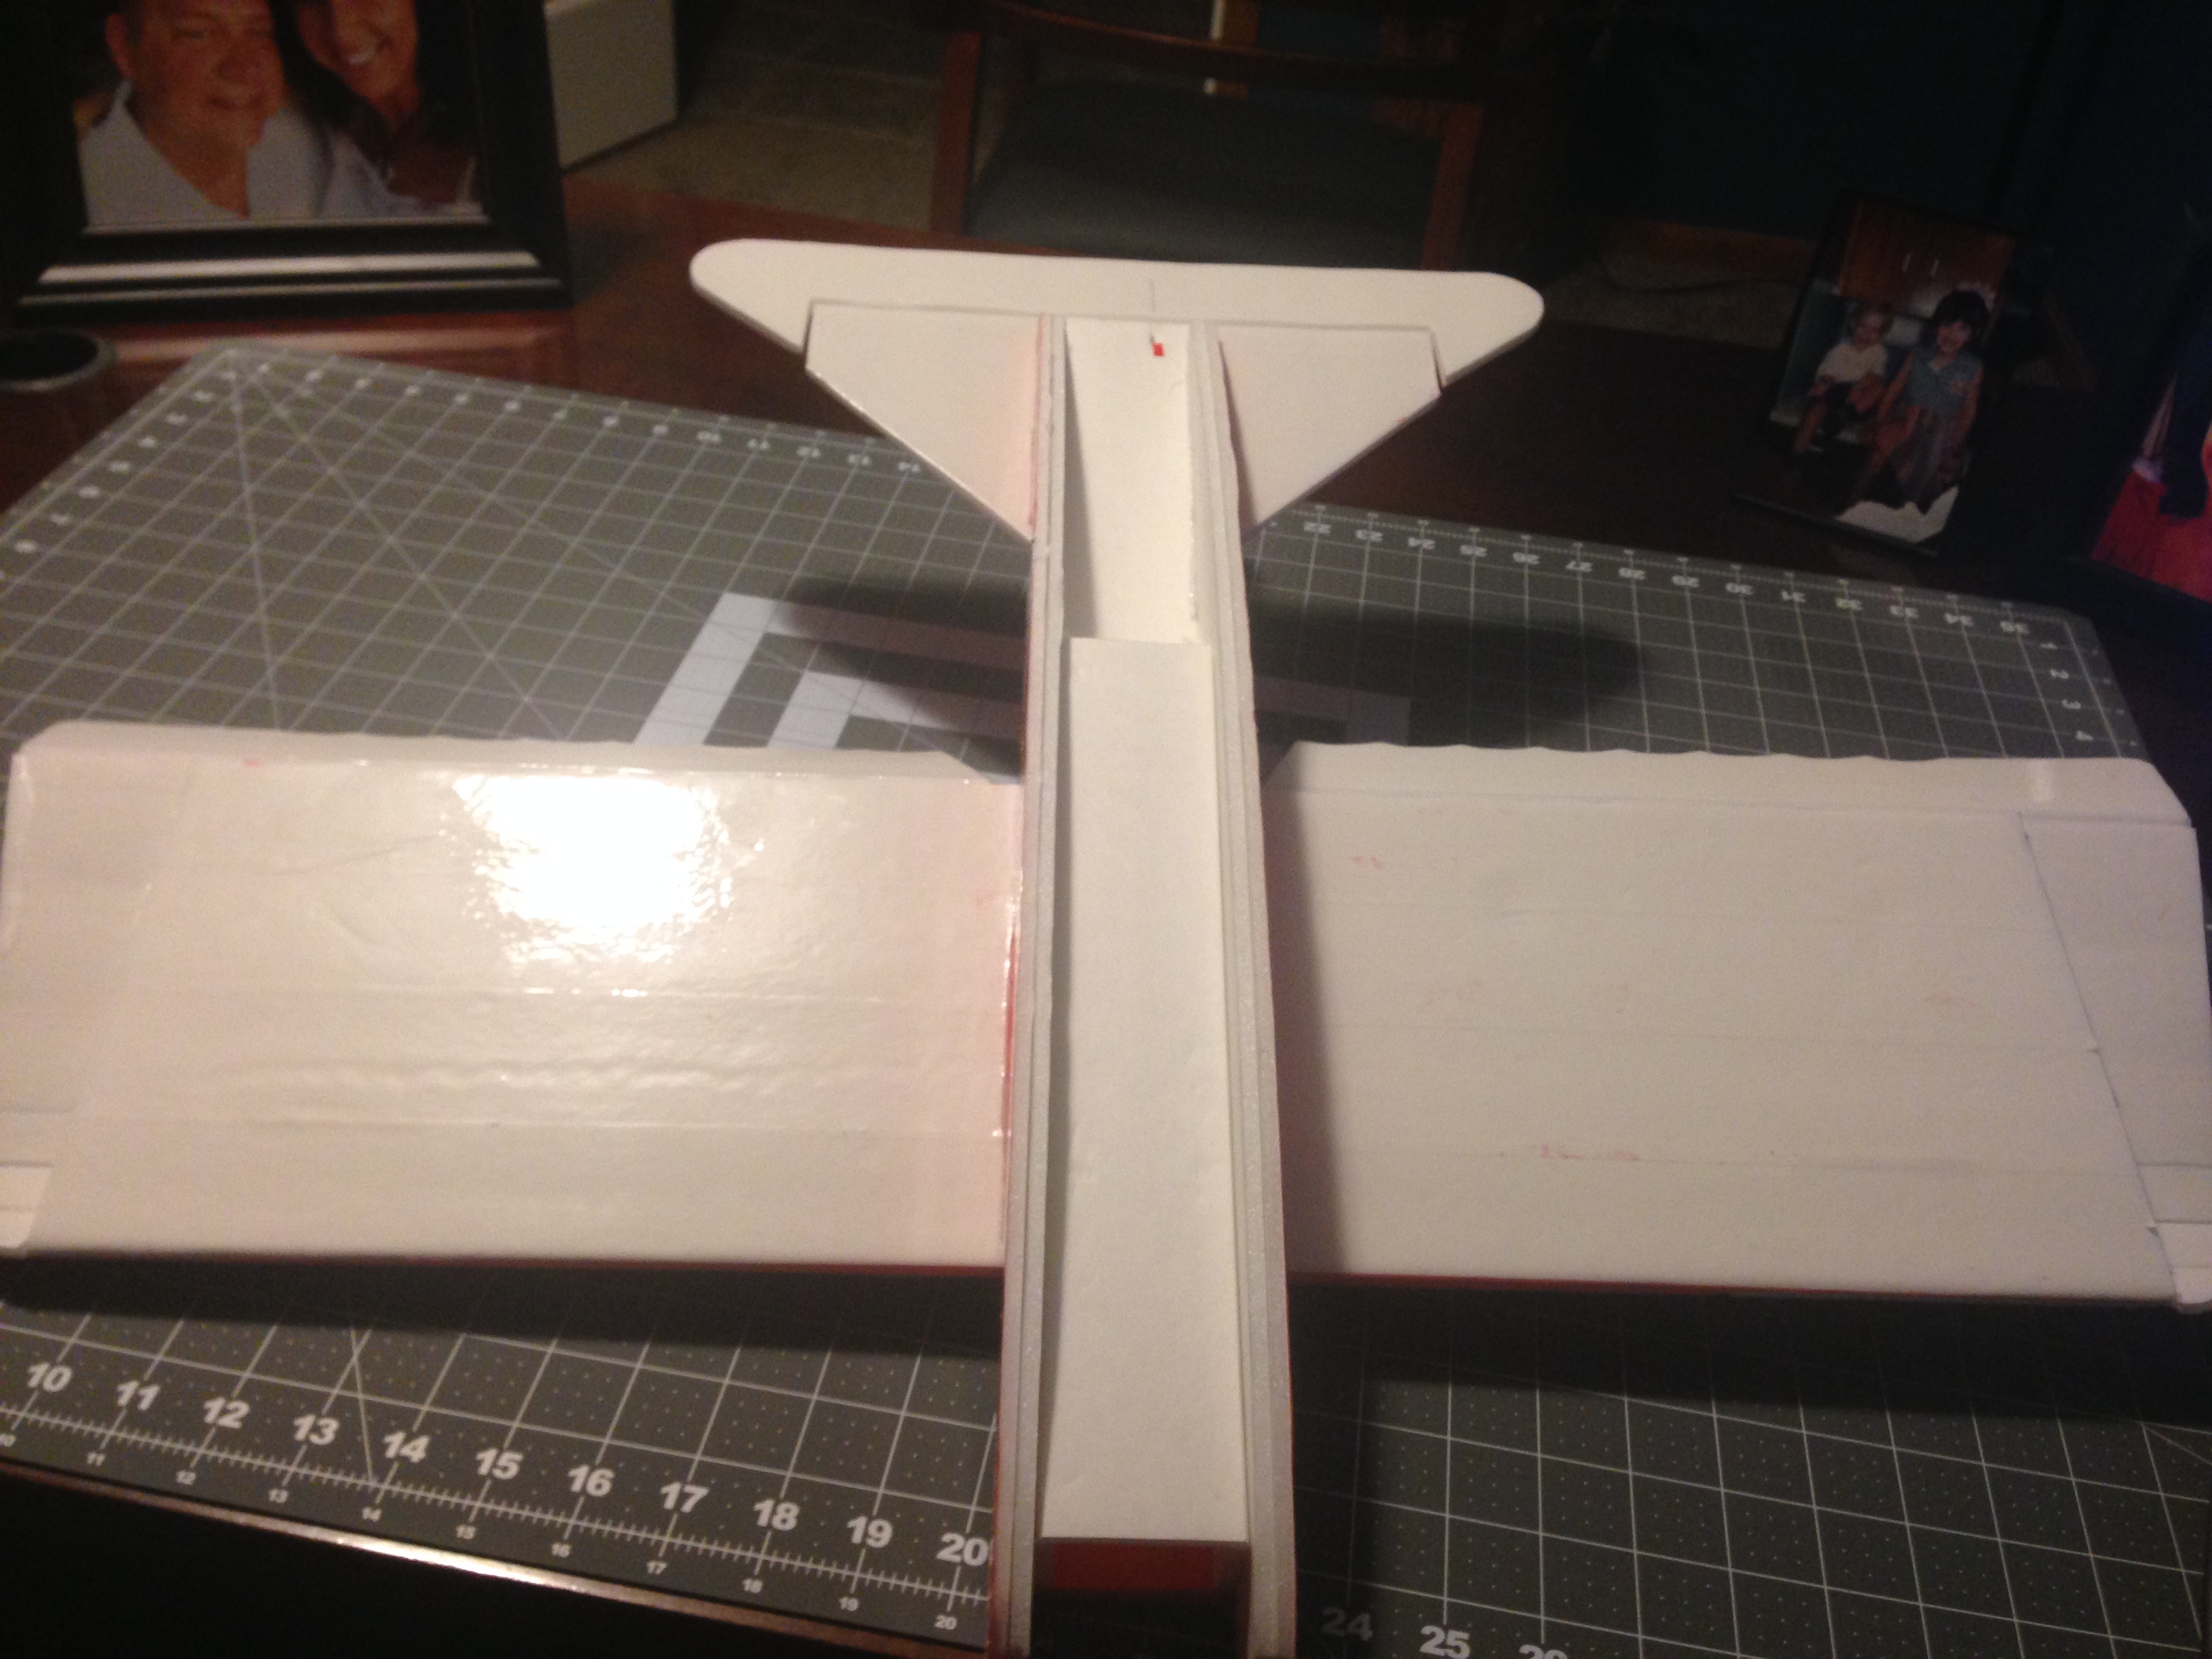
I finally have my BB nearly finished, only the electronics have to be glued in and I still have to make a Firewall and attach it.
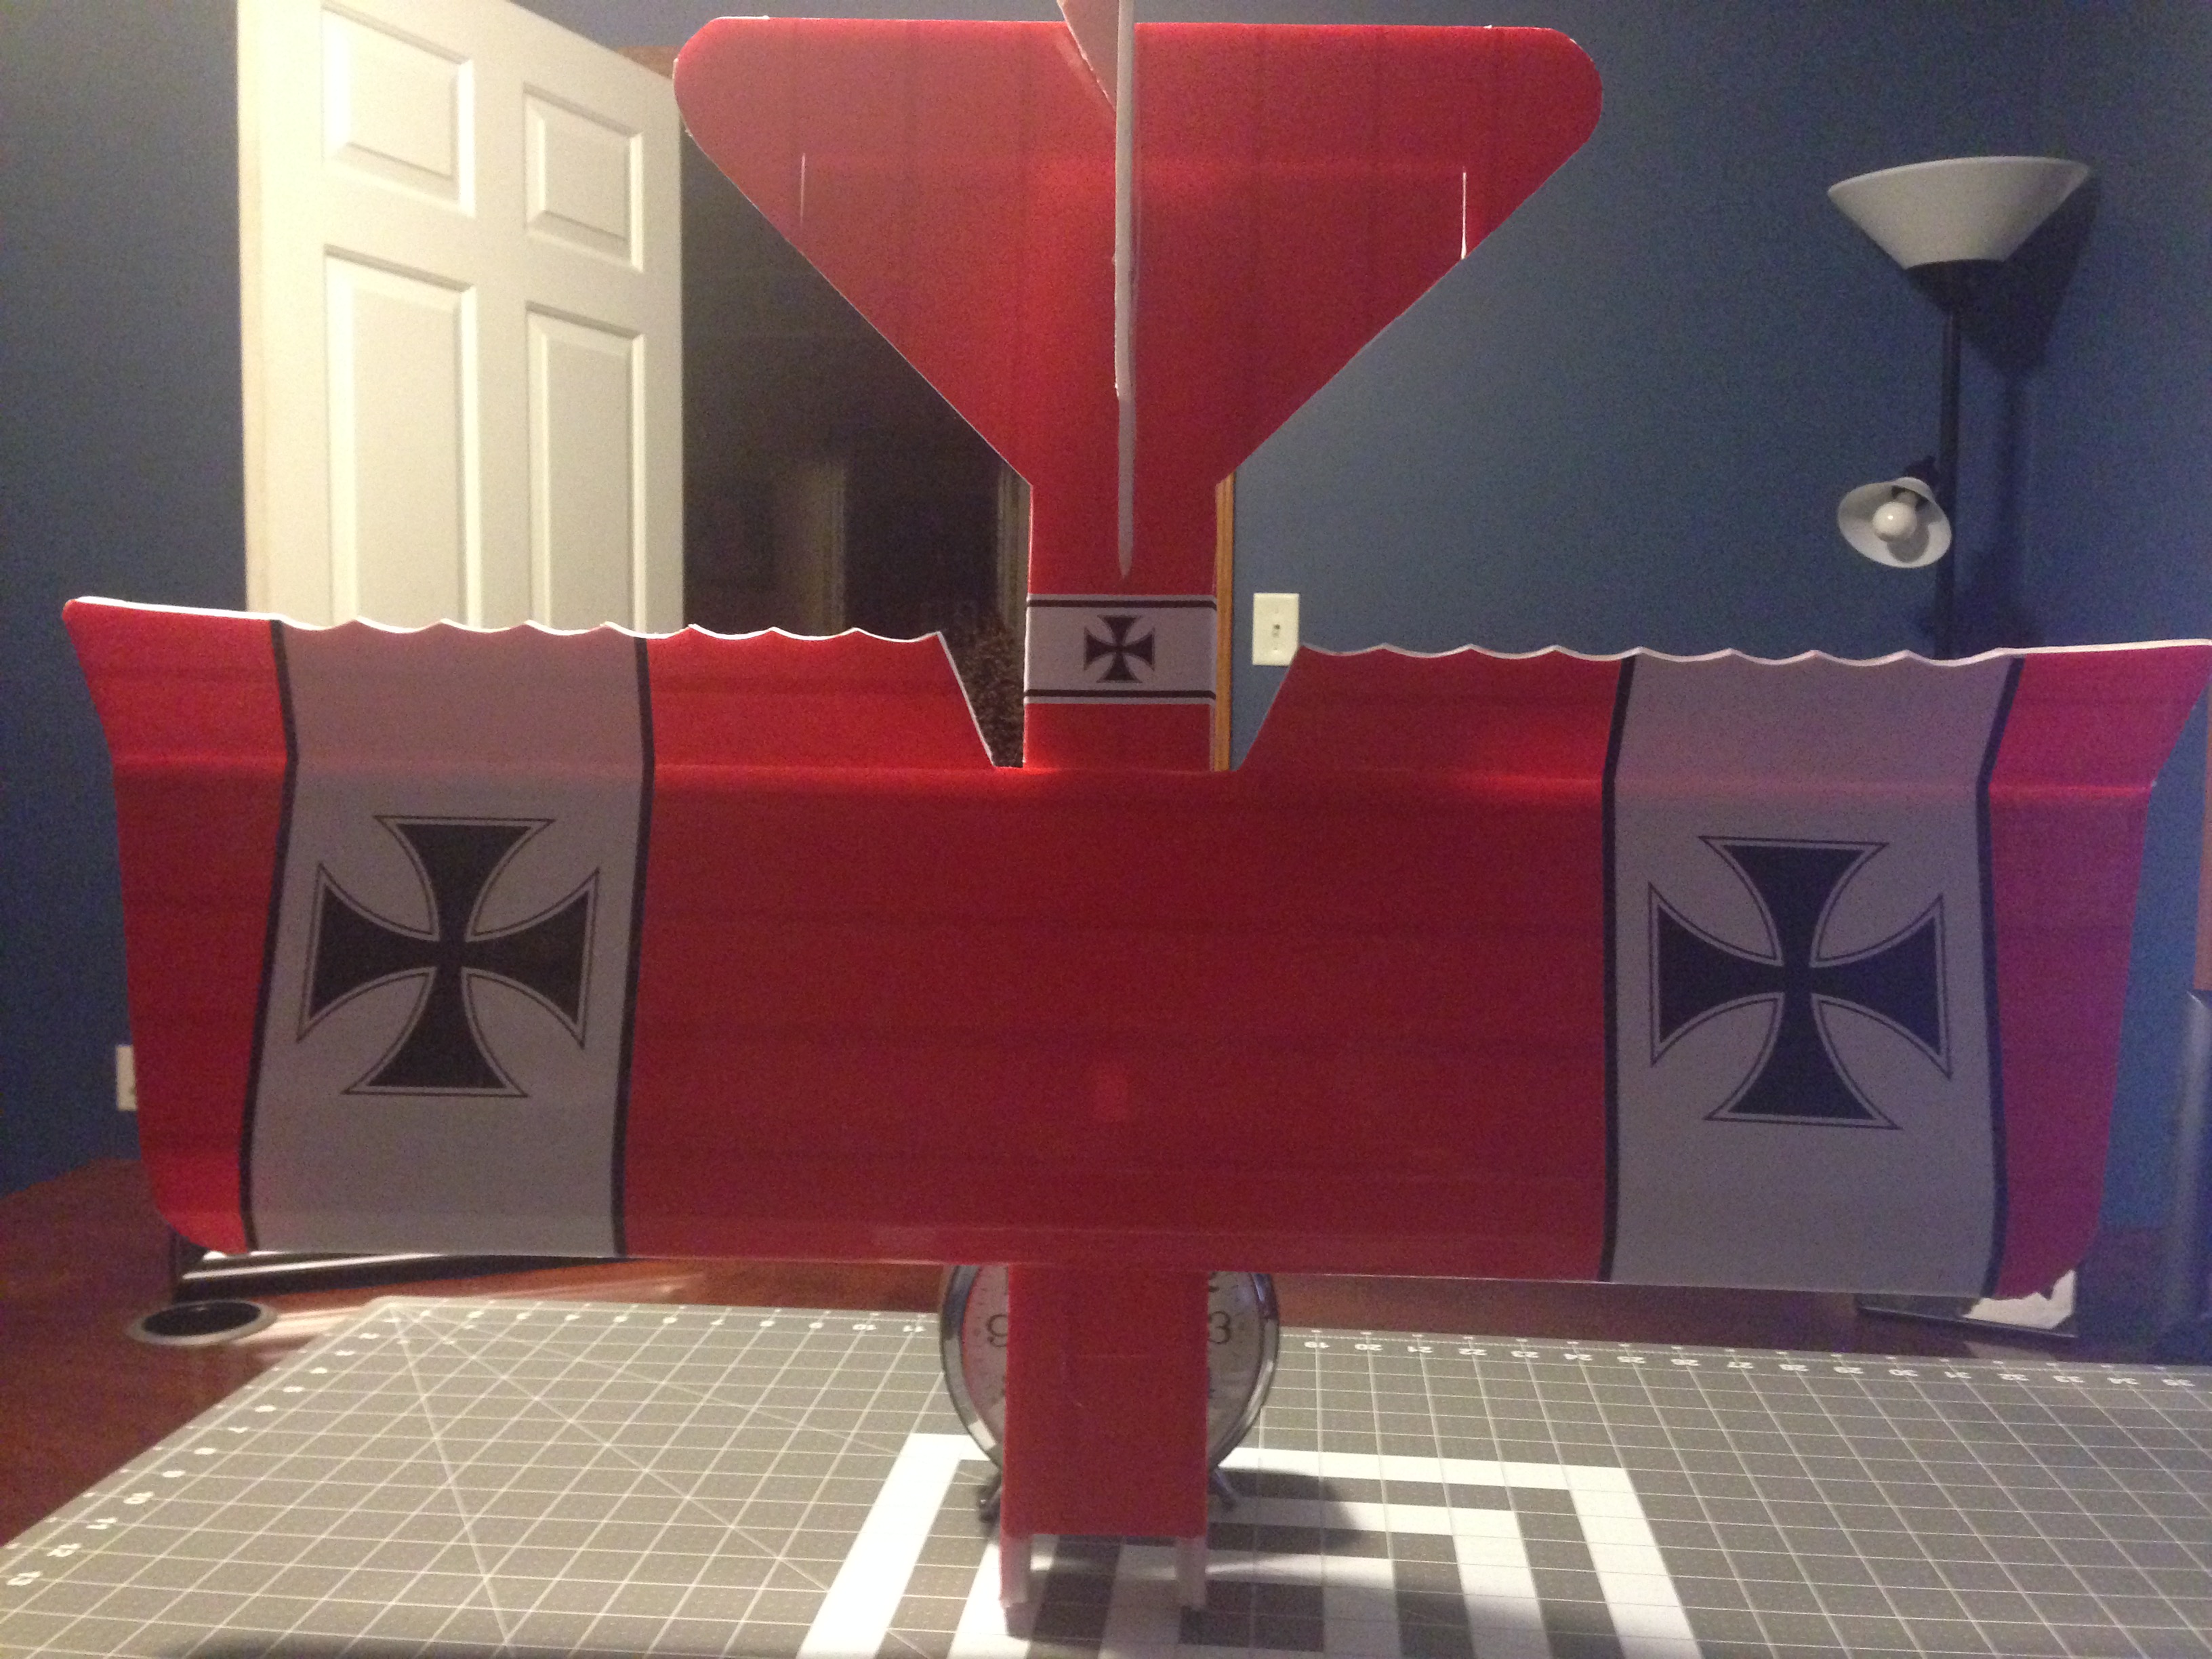
I really liked building it and your plans were awesome to use. I just couldn't get the colored tape aligned really parallel, so now it has a rather irregular look to it and some paches were gaps occured... altogether it looks like a WWI where either the mechanic was drunk or which has taken a lot of beating during combat. Both of which ideas I somehow like. :D

it took me quite some time to finish it, since I was watching movies/series while building and took breaks when there was an interesting scene. ;)
But I estimate about 6 hours real building time, which is partly due to the fact that I never tried to cover large areas in packing tape before. with a little more experience here it would have been much faster. The taping alone took me about 1-2 hours. :eek:

since our foamboard here in Germany seems to be a bit more heavy than the DT Foamboard the plane seems a lot heavier, but i didn't weigh it yet. I'm going to weigh it and post pictures of my build as soon as I find some time.

Thanks for the awesome Plans SPONZ, I cant wit for the snow to melt so that I can fly. :)

Guys - I'm thinking about choosing the bb as my first scratch build. I'm learning to Fly on an apprentice 15e but would like something smaller. Thoughts? I'm willing to struggle. The drawings are so good that I'm not too worried about the build process. I thought I would start with the slower setup or would the heavier/faster setup be better for a touch of wind?

The Bloody Baron was my secound build (first one was the Baby Blender, which was much harder to build), and i found it quite easy to do although it has a lot of curved lines. you might want to practice cutting the curves on the wings on a scrap piece of foamboard first, so you won't ruin a big piece if you get it completely wrong. but thats the only part on this build that was a bit tricky - i think.
 

mad_milchmann

New member
Finally I had time to glue in the servos and install the pushrods :)
I put the pushrods in shrink tube to reduce flex. The long one to the elevator i additionally fixed with some zip ties to prevent flex cause the shrink tube wasn't enough. the wire slips really nicely through the tubing :)
maybe I add some zip ties to the ohter pushrods when they flex too much but I think it should work now.

2015-03-20 10.52.31.jpg 2015-03-20 10.53.06.jpg 2015-03-20 10.53.22.jpg